Versa SSE Quick Start Guide
This guide describes the minimum configuration requirements to set up an SSE Client through Concerto. You can find more advanced SSE configurations on the Versa Documentation Portal.
The following links provide more basic Concerto information:
For more information on the required configuration steps outlined in this guide, see the following articles on the Versa Documentation Portal:
- Configure Site-to-Site Tunnels
- Configure User and Device Authentication
- Versa SASE Client Install
- Configure TLS Decryption
- Configure SASE Secure Client-Based Access Profiles
- Configure SASE Secure Client-Based Access Rules
- Configure SASE Clientless Access Rules
- Configure SASE Internet Protection Rules
- Configure SASE Private Application Protection Rules
- Publish SASE Gateways
Configuration Overview
This Quick Start Guide covers the following steps to set up an SSE client through Concerto:
Step 1: Log in to Concerto
Step 2: Configure Site-to-Site Tunnel or SD-WAN
Step 3: Configure User Authentication
Step 4: Set the Versa Directory User Password and Install SASE Client
Step 5: Configure Decryption Profiles
Step 6: Configure a TLS Decryption Policy Rule
Step 7: Configure a Secure Client-Based Access Profile
Step 8: Configure a Secure Client-Based Access Policy Rule
Step 9: Configure a Real-Time Protection Profile
Step 10: Create an Internet Protection Policy
Step 11: Create a Private Protection Policy (Optional)
Step 12: Publish Policies to Gateways
Step 13: Connect to the Gateways Using the Configured Client Policy
The steps that you need to perform to set up an SSE client might be different for your service type. The table below lists the steps to set up an SSE client for the following services:
- Versa Secure Internet Access (VSIA)
- Versa Secure Private Access (VSPA)
- VSIA and VSPA
| Configuration Steps | VSPA | VSIA | VSPA and VSIA |
|---|---|---|---|
| Configure site-to-site tunnels |
|
|
|
| Configure user authentication |
|
|
|
| Add user-defined objects/EIP profiles |
|
|
|
| Configure secure access profile with DNS servers and routes |
|
|
|
| Configure secure access rule |
|
|
|
| Configure TLS decryption |
|
|
|
| Configure real-time protection profiles |
|
|
|
| Configure internet protection rule | NA |
|
|
| Configure private protection rule |
|
NA |
|
Step 1: Log in to Concerto
Log in to Concerto Orchestrator using the credentials and URL provided to you. You may be asked to change your password if you are logging into the portal for the first time.

Step 2: Configure Site-to-Site Tunnel or SD-WAN
For more information, see Configure Site-to-Site Tunnels.
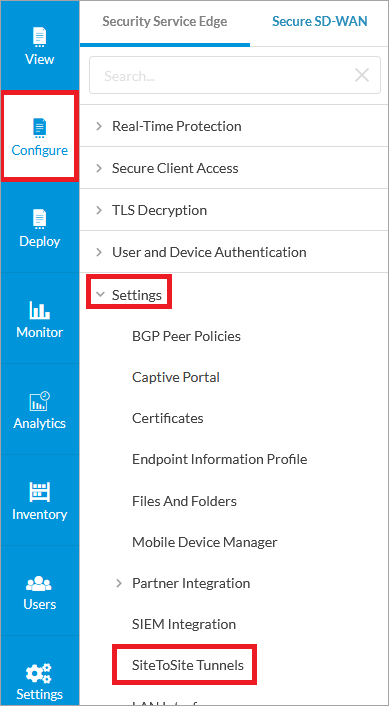
Select Configure > Settings > Site-To-Site Tunnels. (If you do not have an IPsec tunnel endpoint to use [existing branch router or datacenter edge router], you can skip Step 2).
Note that this step is needed if you are interconnecting your private enterprise network into the Versa SSE infrastructure – whether for connectivity to your IDP or your internal private networks. If you have purchased Versa SD-WAN, you can use SD-WAN instead of IPsec/GRE for connectivity into the gateways from your enterprise network. (You must confirm your purchase with Versa account team).
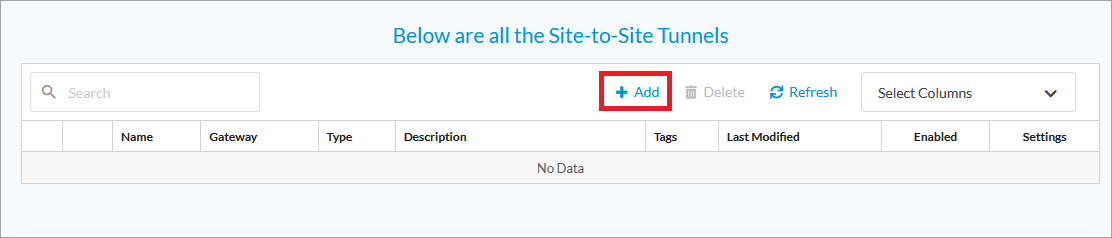
Click + Add.
You need to configure the following parameters according to your tunnel requirements:
- Type
- IPsec Information
- Address and Routing/Policy Configurations
- Name, Description, and Tags.

Step 3: Configure User Authentication
For more information, see User and Device Authentication and Configure Certificate-Based Device Authentication for Secure Access.
For authorized access, you must be authenticated by Versa Secure Client.
Select Configure > User and Device Authentication > Profiles.
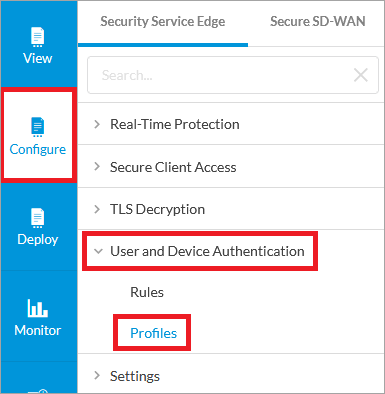
In the User and Device Authentication Profile page, click + Add.

There are many ways you can integrate an IDP to utilize authentication methods such as SAML, RADIUS, or LDAP. The simplest way is to use a Versa Directory, which is an IDP hosted by Versa Networks for customers who do not have an IDP. The following output focuses on using Versa Directory. Refer to the documentation if selecting SAML, LDAP, or RADIUS for descriptions of the fields required for input and relevant instructions.

You can use the default settings or add more concurrent logins for testing. For more information, see Configure Versa Directory Authentication Using an IAM Server.

Click + Add to create users.

Add the user email which will be the user's login name, First Name, and Last Name, and then click + Add New to create a group for the user.
Note: A valid email address capable of receiving messages is required.

Enter the name for the user group.

Click Add.

Click Next to continue.

Enter a name for the new directory authentication profile and select Save.

The new profile is saved to Concerto. You can click Refresh Now to check that the status is successful. Close the window when it is finished.

Step 4: Set the Versa Directory User Password and Install SASE Client
Log in to the email account that was referenced in the Versa Directory. Your email should have a message from Versa Networks letting you know a new account was created. Click SET PASSWORD to create a new password.

Note that if you are an enterprise user that will be leveraging Versa Directory, all users (email addresses) will receive the welcome message to set their password. If you are an administrator and your enterprise is using a different IDP, such as Okta, Azure AD, or Entrata, you will have to generate an email to your organization with the download link and instructions (or automate this process using your IT automation tools).
To access this information, navigate to Configure > Secure Client-based Access > Policy Rules. In the upper right corner, next to Publish, click the Client Download link.


From the device on which you want to install the Versa Client, open the email from Versa, and then select to install the correct software for your device.
Windows is used as an example in this guide.

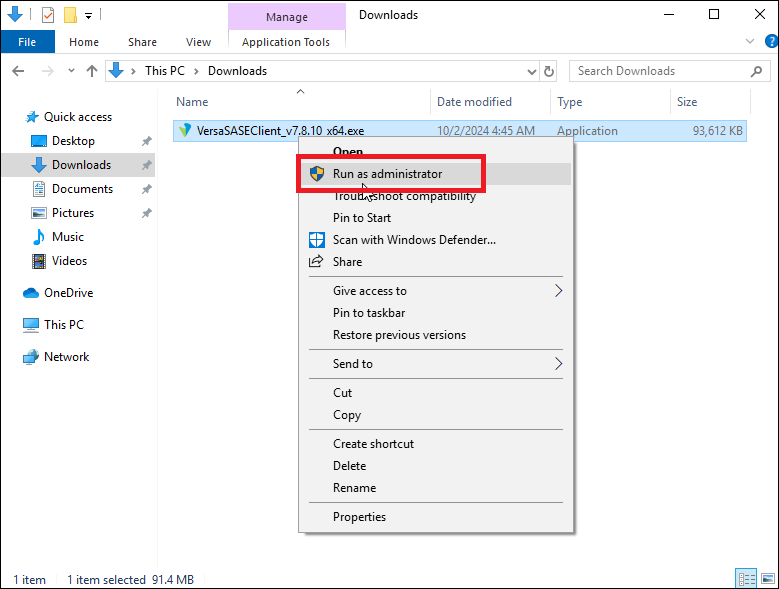
Follow the steps to download the Versa SASE Client. You can also deploy SASE client to devices managed by Microsoft Intune or Ivanti Neurons for Unified Endpoint Management (UEM). For more information, see Mass Deploy Versa SASE Client using UEM.

Install the Versa SASE Client executable.
Click Next to continue.

Create a desktop shortcut, if you prefer, and then click Next.

Select Install to install Versa SASE Client with the set configuration.

Select Finish when completed. The Versa SASE Client screen displays after finalizing configurations in Concerto.

Step 5: Configure Decryption Profiles
For more information, see Configure TLS Decryption.
The TLS decryption configuration is optional, however it provides additional capabilities and is required when using advanced security protection functions such as CASB and DLP. You can upload your own certificate chain or leverage the auto-generated certificate provided and signed by Versa Networks, which is installed on your client machines when the Versa SASE client application is installed.
In the Concerto Orchestrator, click Configure > TLS Decryption > Profiles.

Concerto provides implicit or predefined TLS decryption profiles. To create a custom profile, click +Add.

Depending on your requirements, you can decrypt traffic or inspect traffic. Select Decryption Profile, and then click Next.

Versa Networks automatically creates a CA Certificate for you. You can upload your own certificate, but for this example, the Versa-generated certificate is used.

Under Inspection Options, configure how to handle unsupported or expired certificates.

Select the decryption options you would like to support. This example uses the following settings.

Enter the decryption profile name and select Save.

Step 6: Configure a TLS Decryption Policy Rule
For more information, see Configure TLS Decryption.
Select Configure > TLS Decryption > Policy Rules.

In the TLS Decryption Rules List window, scroll down and click Let's Go.

Select a decrypt and inspect profile to use in the Decrypt and Inspect the Traffic pane. Note that you can also create Do Not Decrypt rules for traffic that you do not want to decrypt. For example, you can choose not to decrypt personal user information such as financial information.

For Users & Groups, you can retain the default option All Users, or you can select specific users or groups.

Endpoint Information Profiles (EIP) allow you to validate additional details about the posture of a user’s device before taking actions. We do not use EIP profiles in this example. For more information about about EIP, see Configure Endpoint Information Profiles.

The Network step provides additional ways to identify and control policies. In this example, we use the default settings. Click Next.

Enter a Name, and then click Save to finalize and save the decryption rule. Note that to avoid overload, ensure you select only HTTP/HTTPs in services.

Step 7: Configure a Secure Client-Based Access Profile
For more information, see Configure SASE Secure Client-Based Access Profiles.
Select Configure > Secure Access > Client-based Access > Profiles.

Click the ![]() Add icon.
Add icon.
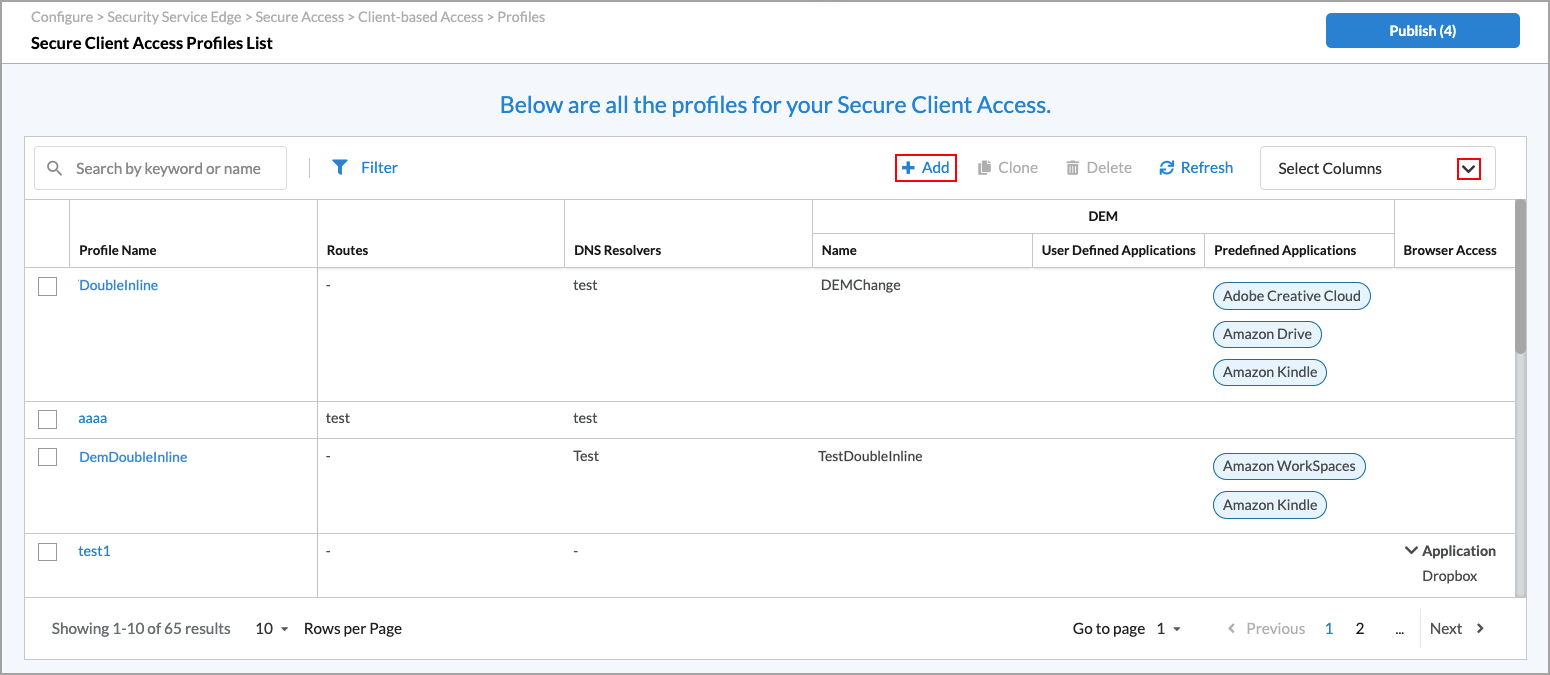
Add some routes to reach your private network from the Versa gateway. If you did not configure a site-to-site tunnel in Step 2, and you are using only the Versa Secure Internet Access (VSIA) solution, you can skip adding the routes, but you must configure a DNS resolver. For Versa Secure Private Access (VSPA), DNS domain is mandatory. Note that the Digital Experience Monitoring (DEM) tab appears only if you have enabled DEM for the tenant. For more information about enabling DEM for a tenant, see Configure SASE Tenants.

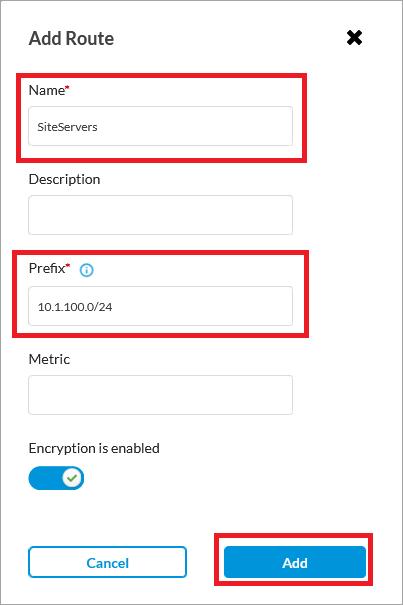
Click Add Routes to add routes.

In the Add Route window, enter a name and prefix, and then click Add.
To configure a DNS Resolver, click Back after adding routes, and click Add DNS Resolvers in the DNS Resolvers pane.
In the DNS Resolvers window, click the ![]() Add icon.
Add icon.

In the Add DNS Resolver window, enter a Name and a DNS Server IP Address, and then click Add.

After configuring a DNS Resolver, click Next to go to Step 2, Digital Experience Monitoring. Note: The Digital Experience Monitoring step only displays if DEM has been enabled for the tenant. For more information about enabling DEM for a tenant, see Configure SASE Tenants.
Note: In Release 12.1.1, you configured DEM when configuring an application monitor.

Click Customize in the Digital Experience Monitoring pane to select a DEM profile.

Click the ![]() Add icon to configure a new client-based DEM profile, or select a DEM profile from the list.
Add icon to configure a new client-based DEM profile, or select a DEM profile from the list.

Select one or more custom or predefined applications.
Note: If DEM is enabled for this tenant, you can configure up to 50 predefined applications.
Click Next to go to the Name, Description, and Tags section.
Enter a name for the new DEM profile, then click Save to save the new client-based DEM profile.
Step 8: Configure a Secure Client-Based Access Policy Rule
For more information, see Configure SASE Secure Client-Based Access Rules.
Select Configure > Secure Services Edge > Secure Access > Client-based Access > Policy Rules. Note: In Releases 12.1.1 and earlier, the Secure Access folder was called Secure Client Access and Policy Rules was located directly under Secure Client Access (Configure > Security Service Edge > Secure Client Access > Policy Rules). In addition, you configured both client-based and clientless access from Secure Client Access > Policy Rules screens.

In the Secure Client Access Policy Rule List window, scroll down and click Let's Go.

Select the operating system to use. For this example policy, we use Windows. For more information, see Enforce OS-Based Secure Access Policy Rules for Remote SASE Clients.

This policy uses the option for Known Users, but you can select a specific user or group of users that match or utilize this profile rule.

Endpoint Information Profile (EIP) and compliance check with MDM can identify additional potential risks on a device. To keep this policy simple, click Next without configuration changes. For more information on MDM, see Configure SASE Unified Endpoint Management for Microsoft Intune and Configure SASE Unified Endpoint Management for Ivanti Neurons.

You can manage user access based on Source geographic location and source IP address. In this simple policy example, we use the default.

Based on previously configured constraints, you can now define how you want to control applications. In this policy, we allow traffic that matches the rule to pass.
In the next step, Traffic Action screen, if you select Breakout to Internet in the Traffic Action screen, no default route is added on the client toward the gateway. The traffic for the applications you specify is sent directly to the gateway (applicable to VSPA). If you select Send Apps to the Versa Cloud, a default route is added on the client toward the SASE gateway, and the applications you specify bypass the local breakout.
Here, we select the Breakout to Internet option and you can specify which applications are sent through the gateway. In the following example, we select YouTube and Facebook. For more information, see Configure Application and Domain-Based Traffic Steering for the SASE Client.
Note that the field "Select Subscription type for users matching this rule" aligns to the license type you purchase. The options are:
- VSPA (Versa Secure Private Access)—focused on ZTNA for private network control and access.
- VSIA (Versa Secure Internet Access)—focused on ZTNA for public application control (Internet).
- VSPA + VSIA—focused on both.

The following screen varies based on the Concerto headend and Versa Cloud Gateways that are provisioned for you. If your deployment does not match, select the gateways in your environment you want to use to quickly validate this policy. Gateway selection allows you to control which gateways users connect to based on the secure access rule, and whether their traffic breaks out to the internet or goes through private access. This ensures you control which gateway serves these users. For more information, see Configure SASE Client to Select the Best Gateway Using Concerto.
In this example, there is one gateway group for the two Versa Cloud Gateways in this SASE headend. This allows for configurations such as Best Gateway Selection, which is auto-configured and provided based on the group name and grouping of the attached gateways.

In the Client Configuration screen below, select the Secure Client Access Profile that you created in Step 7: Configure a Secure Client-Based Access Profile above.
You can customize the client controls. For more information, see Create a SASE Client Configuration for Secure Client-Based Access. Versa SASE Client controls include detection of trusted networks, and advanced settings such as always on, pre-logon, tamper protection, and DLP data exfiltration. For more information, see Configure Detection of Trusted Networks for SASE Gateways, Configure Always On, Configure Pre-Logon for the Versa SASE Client, Configure Tamper Protection, Configure DLP Data Exfiltration.
You can also select the VPN type. For more information on selecting the VPN type, see Configure SSL VPN Profiles. To select advanced encryption algorithms when the VPN type is IPsec, see Configure SASE Client Encryption Algorithms.

Enter a name for your policy in the Name field, and then click Save.

Step 9: Configure a Real-Time Protection Profile
You use Versa SASE security enforcement rules to define the actions to take on traffic that meets previously defined match conditions and to define the security enforcement actions that you can apply to matching traffic. You can select profiles under Filtering Profiles, Malware Protection & IPS, Cloud Access Security Broker (CASB), Data Loss Prevention (DLP) profiles, Advanced Threat Protection (ATP), and Remote Browser Isolation (RBI). For more information on the specific profiles, see the following articles:
- URL filtering—Configure Custom URL-Filtering Profiles
- IP filtering—Configure Custom IP-Filtering Profiles
- File filtering—Configure Custom File-Filtering Profiles
- Domain Name System (DNS) filtering—Configure Custom DNS-Filtering Profiles
- Malware protection—Configure Custom Malware Protection Profiles
- Intrusion protection system (IPS)—Configure Custom IPS-Filtering Profiles
- Cloud Access Security Broker (CASB)—Configure CASB Profiles
- Data Loss Prevention (DLP)—Configure Data Loss Prevention in Concerto
- Advanced Threat Protection (ATP)—Configure Advanced Threat Protection
- Remote Browser Isolation (RBI)—Configure Remote Browser Isolation
For more information on real-time protection, see Configure Network Obfuscation.

You can apply either one security enforcement action or one security enforcement profile to matching traffic.
You can specify the following security enforcement actions:
- Allow—Allow all traffic that matches the rule to pass unfiltered.
- Deny—Drop all traffic that matches the rule.
- Reject—Drop the session and send a TCP reset (RST) message or a UDP ICMP port unreachable message.
- Profiles—Handle traffic based on the match and action configured in the profile.
Step 10: Create an Internet Protection Policy
For more information on internet protection policy rules, see Configure SASE Internet Protection Rules.
For other internet protection features, see Configure DLP Data Exfiltration and Configure Safe Search.
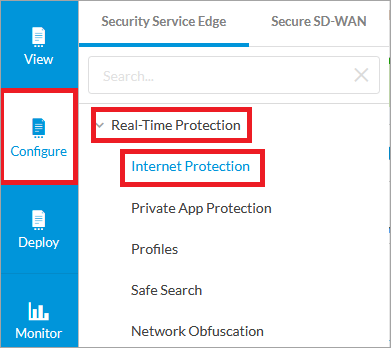
Select Configure > Real-Time Protection > Internet Protection.
Scroll down and click Let's Go.

In the Applications and URLs screen, select the Applications tab, then select Facebook and YouTube as the applications for this policy.

Click Next to use the default settings for Users & Groups, Endpoint Posture, GEO Locations, and Network Layer 3-4, until you reach Security Enforcement. The Security Enforcement screen displays options to control the selected applications as you want. You can allow, deny or reject applications, as well as use security profiles to utilize security enforcements for better data security. Note that the enforcement options vary based on your license.

In the Review & Deploy screen, enter a name for new policy in the Name field and click Save.

Step 11: Create a Private Protection Policy (Optional)
For more information, see Configure SASE Private Application Protection Rules.
In this step, we configure rules to protect private applications. (You can skip Step 10 if you did not create a site-to-site tunnel in Step 2).
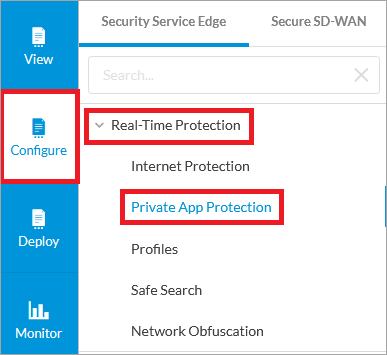
Select Configure > Real-Time Protection > Private App Protection.
In the Private App Protection Rules List window, scroll down and click Let's Go.

For this policy, we protect all applications that users are allowed to access. Leaving the list blank uses Any as the selector. Click Next.

Click Next to progress through the screens for Users & Groups, Endpoint Posture, GEO Locations, and Network Layer 3-4, until you reach the Security Enforcement screen. Note that the enforcement options that are available depend on your license.
In the Security Enforcement screen, under Profiles, select the required protection policies, and then click Next.

Enter a name for the policy in the Name field, and then click Save.

Step 12: Publish Policies to Gateways
For more information, see Publish SASE Gateways.
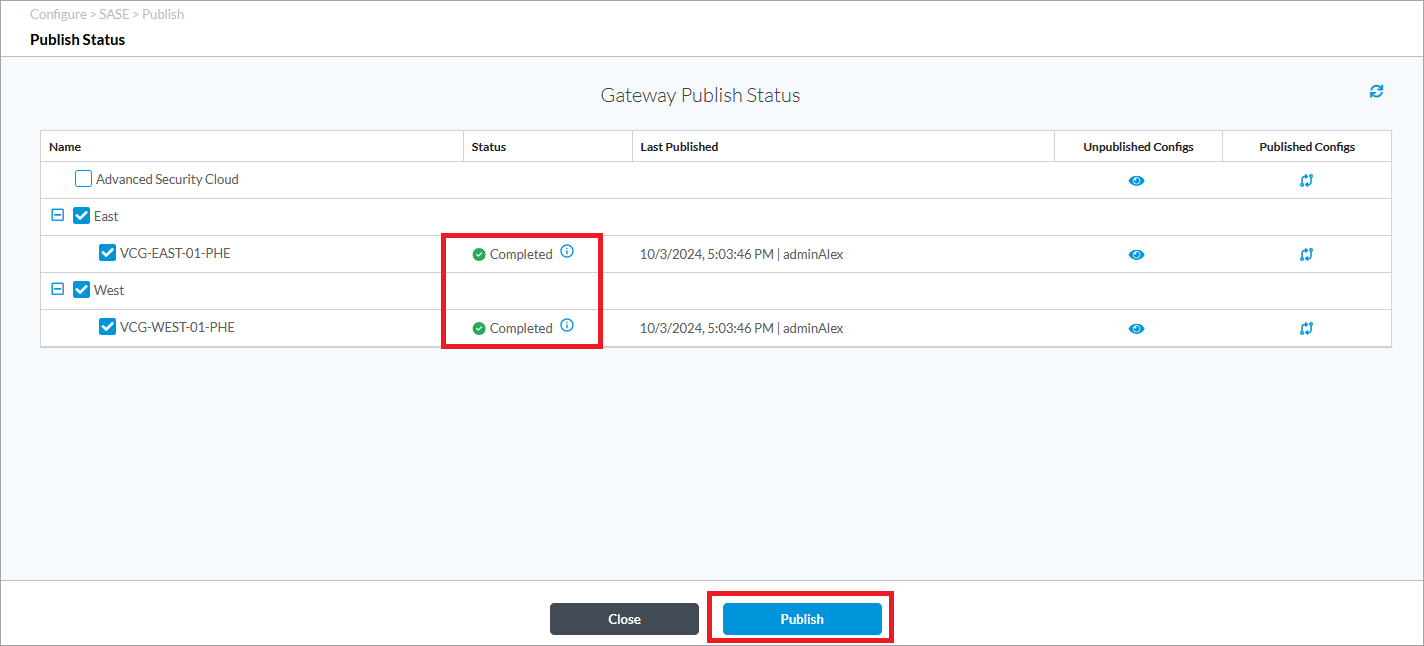
After you configure the required policies, you can push them to the Gateways. To do this, click Publish on the top right side of the page.

Verify that the required gateways are selected, and then click Publish.

Wait for the status indicators to change to Completed, and then click Close.
Step 13: Connect to Gateways Using the Configured Client Policy
After you configure the required policies, connect to the gateways from a Windows device using the following procedure.
Open the Versa SASE client, and then click Register.
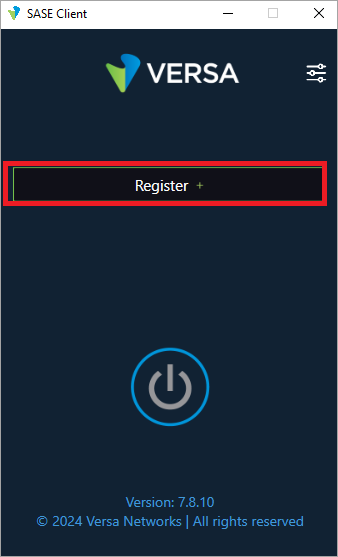
The email that you receive in the email account configured in Step 3 contains details about how to register the account. Copy the details for Portal FQDN or IP, Enterprise Name, and User ID from the email.

When prompted, enter the configured password, and then click Submit.

After a few moments the SASE client connects to a gateway.

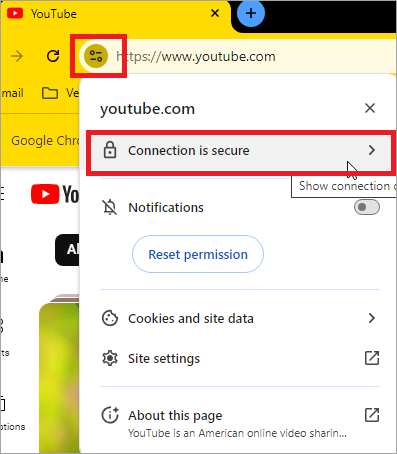
Next, you can validate the traffic sent through the gateway. For example, open YouTube to verify if the decryption policy is active. To do this, click the ![]() Site Information icon next to the YouTube URL, and then click Connection is secure.
Site Information icon next to the YouTube URL, and then click Connection is secure.
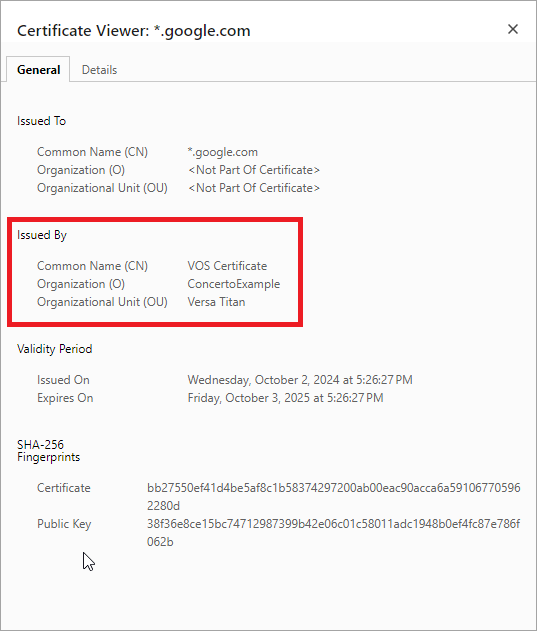
Click the![]() icon next to Certificate is valid.
icon next to Certificate is valid.

You can view the VOS certificate in use.
Next, go to Analytics > Logs > Firewall.

After a few minutes, you can view logs for the applications that are sent through the gateways.

You can also test connectivity through your site-to-site tunnel using Ping.