Configure SASE Secure Client-Based Access Profiles
![]() For supported software information, click here.
For supported software information, click here.
Secure client-based access profiles define the application monitors, browser access, DNS resolvers, and routes that are used to bind public keys to the client. A DNS resolver is a server that determines which DNS name server the client uses to perform DNS lookups for all traffic. You can configure DNS resolvers that are then shared with the clients when they register.
To periodically monitor end-to-end network and application performance for a user device, you can enable Digital Experience Monitoring (DEM) on SASE clients. To do this, you configure DEM when configuring a secure client-based access profile. (You can also configure DEM directly by going to Configure > Security Service Edge > Digital Experience Monitoring. For more information, see Configure Digital Experience Monitoring.)
The SASE client receives the DEM settings when it registers with the SASE portal. The SASE client collects DEM statistics based on these settings and periodically forwards them to its currently connected SASE gateway. For information about viewing DEM statistics, see View Digital Experience Monitoring Dashboards.
Configure Secure Client-Based Access Profiles
To configure SASE secure client-based access profiles:
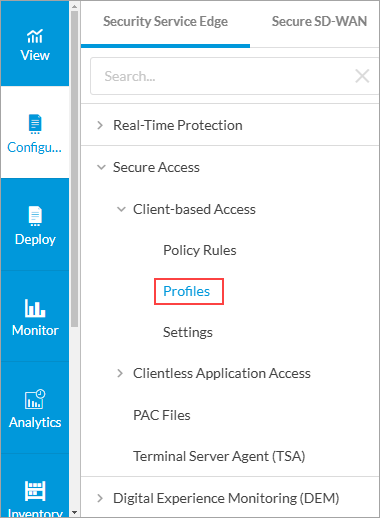
- Go to Configure > Security Service Edge > Secure Access > Client-based Access > Profiles.
Note: In Releases 12.1.1 and earlier, the Secure Access folder was called Secure Client Access and Profiles was located directly under Secure Client Access (Configure > Security Service Edge > Client-based Access > Profiles).
The following screen displays.

- To customize which columns display, click Select Columns and then click the columns to select or deselect the ones you want to display. Click Reset to return to the default columns settings. The available columns are:
- Routes
- DNS Resolvers
- Name
- User Defined Applications
- Predefined Applications
- Browser Access
- Click the
 Add icon to create a new client-based profile. The following screen displays. Note that the Digital Experience Monitoring (DEM) tab appears only if you have enabled DEM for the tenant. For more information about enabling DEM for a tenant, see Configure SASE Tenants.

- Click Add Routes to add a route that needs to be advertised to the secure client access users. The following screen displays.

- Click the Add icon. In the Add Route pop-up window, enter information for the following fields, and then click Add.

Field Description Name (Required) Enter a name for the route. Description Enter a text description for new route. Prefix (Required) Enter a prefix for the route.
If you are using Versa Secure Internet Access (VSIA), the 0.0.0.0/0 subnet is advertised to the client by default.
If you are using Versa Secure Private Access (VSPA):
- For Releases 12.1.1 and earlier, the prefix must be in the private access subnet range as defined in RFC 1918 (10.0.0.0/8, 172.16.0.0/12, or 192.168.0.0/16).
- For Releases 12.2.1 and later, the prefix for the route can be in the private access subnet range and public access subnet range for VSPA clients.
Metric Enter a value for the route metric.
Range: 0 through 4294967295
Default: None
Encryption Select to encrypt the route and to route the traffic for applications and domains to an encrypted tunnel. By default, encryption is enabled.

To disable encryption, click the slider.

If you disable encryption, traffic is routed on an encrypted or non-encrypted (clear-text) route, depending on the configuration, for applications and domains. If the route is not encrypted, the Versa secure client access creates two tunnels, encrypted and clear text, and then routes traffic. In this case, you might consider securing the application using a different method, such as SSL/TLS.
- Click the
 Back arrow to return to the Create Secure Access Client screen.
 - Click Add DNS Resolvers to add DNS resolvers. The following screen displays.

- Click the Add icon. In the Add DNS Resolvers popup window, enter information for the following fields.

Field Description Name (Required) Enter a name for the DNS resolver. Description Enter a text description for the DNS resolver. Domain Enter a valid domain name for the DNS resolver to send to the client. The client uses the DNS resolver to perform DNS lookups for all traffic. DNS Server IP Address Enter a valid IP address for the DNS server. To enter additional addresses, click the
 Plus icon.
 - Click Add.
- Click Next to go to Step 2, Digital Experience Monitoring.
Note: In Release 12.1.1, you configured DEM when configuring an application monitor.

- Click Customize in the Digital Experience Monitoring pane to select a DEM profile.
Note: The Digital Experience Monitoring step only displays if DEM has been enabled for the tenant. For more information about enabling DEM for a tenant, see Configure SASE Tenants.

- Click the Add icon to configure a new client-based DEM profile, or select a DEM profile from the list. If you select a previously configured DEM profile, go to Step 17, Review and Deploy.

- Select one or more custom or predefined applications.
Note: If DEM is enabled for this tenant, you can configure up to 50 predefined applications. If DEM is not enabled, you can configure three predefined applications.
- Click Next to go to the Name, Description, and Tags section.

- Enter a name for the new DEM profile.
- Click Save to save the new client-based DEM profile.
- Click the Back arrow icon to return to the Secure Client Access configuration screen, or click Next to go to Step 3, Review and Deploy.
- In the Review and Deploy screen, enter a name for the new secure client access profile.

- Review the configuration. Click the
Edit icon to revise the sections as needed.
- Click Save to create the client-based secure access profile.
Software Support Information
Releases 11.1.1 and later support all content described in this article, except:
- Release 12.1.1 allows you to clone Private Application Protection Profiles; supports Digital Experience Monitoring (DEM).
- Release 12.2.1 renames the Application Monitor screen to the Digital Experience Monitoring screen when configuring a secure client-based access profile and supports public access subnet range prefixes for VSPA clients.
Additional Information
Configure SASE Secure Client-Based Access Rules
Configure SASE Secure Clientless Access Rules