Configure SASE Unified Endpoint Management for Microsoft Intune
![]() For supported software information, click here.
For supported software information, click here.
You use Unified Endpoint Management (UEM), formerly known as the SASE Mobile Device Manager (MDM), to administer mobile devices, such as smartphones, tablet computers, and laptops. To use UEM, you create a UEM profile to retrieve device information from a Microsoft Intune server using the device ID and other information.
You can associate UEM profiles with a secure access portal or a secure access gateway to verify device information during Versa Secure Access (VSA) client registration (portal) and after registration (gateway).
After you link a UEM profile to a Microsoft Intune server, when a user tries to connect to a Versa gateway using a VPN client, a check verifies whether the device is enrolled with the Intune server and if the device is compliant with the policies you have configured. If the device is managed and compliant, the VPN session is established, and the user is allowed to access internal resources.
Note: You must configure the following SASE rules, profiles, and settings in a specific order:
- Configure users and groups, and then publish them to the gateway. For more information, see Configure Users and Device Authentication.
- (Optional) Configure site-to-site tunnels. For more information, see Configure SASE Site-to-Site Tunnels.
- Configure secure client access profiles and rules. For more information, see Configure SASE Secure Client-Based Access Rules and Configure SASE Secure Clientless Access Rules.
Versa Networks supports strict policy management as part of zero-trust network access (ZTNA) to ensure that only approved devices can access the corporate network by integrating with Microsoft Intune to distinguish between compliant and non-compliant devices. Once integrated, Versa gateways can retrieve the compliance status of connecting devices in real-time and enforce appropriate access controls to the network, gateway, and corporate resources.
To integrate UEM for Microsoft Intune, you do the following:
- Configure the Azure portal
- Configure UEM on the Intune portal
- Configure UEM in Versa Concerto
Configure the Azure Portal
- Ensure that you have the Enterprise Mobility + Security E3 license to assign to users or groups for UEM. Go to Licenses > All Products and check the Available column. The example below shows that there are 3 Enterprise Mobility + Security E3 licenses available.

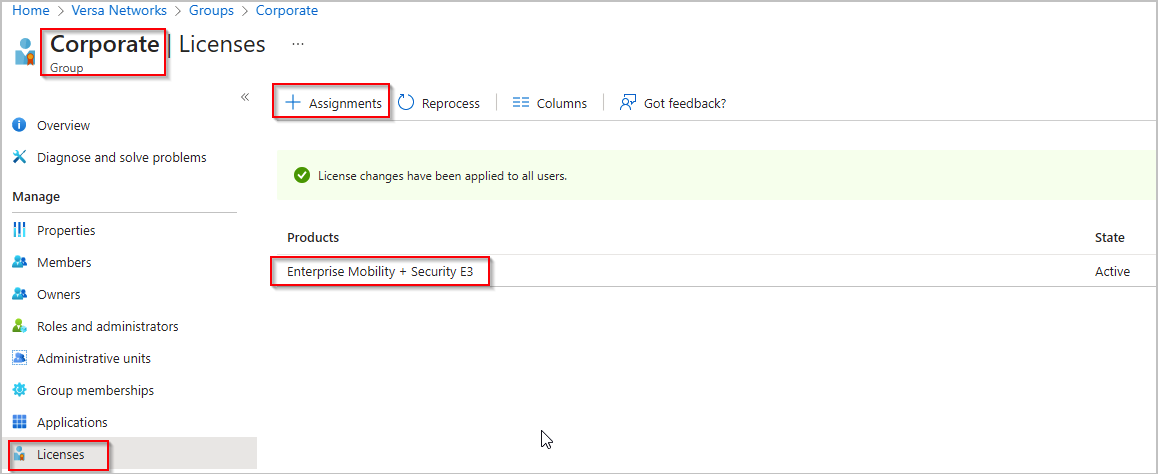
- Create a user group to which you want to assign the UEM license. The license is applied to all users in the group. In the example below, the user group is Corporate.

- Click Corporate, then assign the UEM license to the user group (here, Corporate).
- Add the Corporate user group to the Microsoft Intune application under Mobility (MDM and MAM).


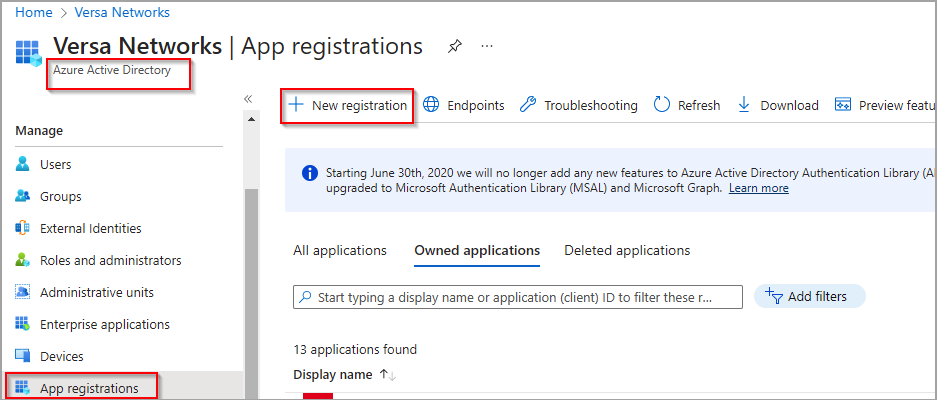
- Go to App Registrations and register the application. Registering an application is required for the communication between the gateways and UEM.

- Go to the Certificates & Secrets screen and generate a client secret if one has not already been created.


- In the API Permissions screen, add API permissions to the application. Add all the permissions, as shown below.

- Go to Enterprise applications and select your application, and then select Users and Groups in the left menu bar.
- Assign users and groups to application for UEM.

Configure UEM on the Intune Portal
- Log in to https://endpoint.microsoft.com/, select Devices in the left menu bar and create compliance policies for Windows clients.

The following example shows that a compliance policy called Corporate-policy was created and assigned to the Corporate group. The compliance settings ensure that Firewall is enabled on the client machine.

- Enroll the client machine in UEM. The example below includes the names of two machines, one with Firewall disabled to make it non-compliant.
- vsa-client-sanj—compliant machine
- vsa-client-ashb—non-compliant machine
- Open the link below in Microsoft Edge or Google Chrome:
ms-device-enrollment:?mode=aadj
- Enter your email and password.
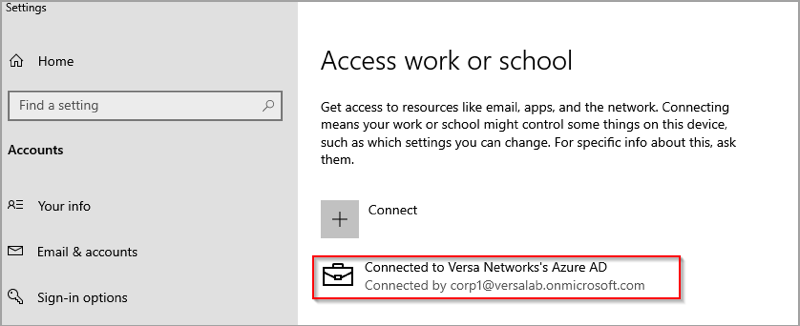
- On the next page, select Join, and then click Done.
- Restart your PC.
- After your PC reboots, select Other user.
- Sign in using the email credentials you used for enrollment.
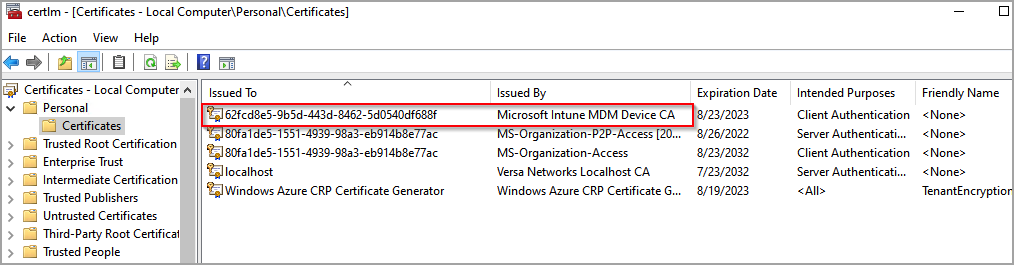
- Verify that you are properly enrolled and the UEM certificate is present in the Computer certificate store.
NOTE: If you do not sign in with AD credentials on the client PC, the compliance policy is not evaluated and UEM considers the devices to be compliant.
- Enroll the second client machine, using the same steps as shown above.

- If you are making a remote desktop protocol (RDP) connection to Azure VM's, the username format should be given as shown below. Ensure that New Technology LAN Manager (NTLM) authentication is disabled under the RDP settings on the remote machine.

- Wait 10-15 minutes before the machines are displayed on Microsoft endpoint portal.

Configure UEM in Concerto
- Go to Configure > Security Service Edge > Partner Integration > Unified Endpoint Management.
Note: In Release 12.2.2, the Mobile Device Manager (MDM) was renamed User Endpoint Management (UEM) and moved under Partner Integrations.

- In the Unified Endpoint Management screen, select Microsoft Intune, and then click Get Started.

- In the Microsoft Intune for MDM screen, enter information for the following fields.

Field Description Name (Required) Enter a name for the UEM profile. Description Enter a text description for the UEM profile. Tags Enter tags to associate with the UEM profile. Directory ID (Required) Enter the tenant or directory ID registered on the Intune server. Client ID (Required) Enter the client identifier provided by the Intune server, in string format. Client Secret (Required) Enter the client secret provided by the Intune server, in string format. Authentication Domain (Required) Enter the domain name to use for authentication (login.microsoftonline.com). API Domain (Required) Enter the domain name to use for APIs (graph.microsoftonline.com). - Click Save.
Create a Policy Rule for Non-Compliant Devices
To create a secure client access policy rule to deny or provide restricted access to resources from non-compliant corporate devices:
Note: For complete information about configuring access rules, see Configure SASE Secure Client-Based Access Rules.
- Go to Configure > Security Service Edge > Secure Access > Client-based Access > Policy Rules.

- Click the
 Add icon to configure the policy rule.

- Complete step 1, Operating System, and step 2, Users and Groups. For more information, see Configure SASE Secure Client-Based Access Rules.
- Go to step 3, Endpoint Posture, and then click the Device Compliance Status pane.

- Select Managed Devices, and then select Non-Compliant.
- Click Next, and then complete steps 4, 5, and 6. For more information, see Configure SASE Secure Client-Based Access Rules.
- Go to step 7, Client Configuration.
- In the Client Configuration pane, click Customize.

- Configure the client controls.
Note: It is very important to specify the Certificate Issuer (such as Microsoft Intune MDM Device CA in the example shown above). If you do not specify the Certificate Issuer, the secure access client will not send the device ID when connecting to gateways, with the result that the correct policy will not match.
- Complete the remaining steps.
- In the Review and Submit screen, review the configuration and make any needed changes.
- Click Save to create the policy rule.
Create a Policy Rule for Compliant Devices
To create a secure client access policy rule to allow access to resources from compliant corporate devices:
Note: For complete information about configuring access rules, see Configure SASE Secure Client-Based Access Rules.
- Go to Configure > Security Service Edge > Secure Access > Client-based Access > Policy Rules.
- Click the Add icon to configure the policy rule.
- Complete step 1, Operating System, and step 2, Users and Groups. For more information, see Configure SASE Secure Client-Based Access Rules.
- Go to step 3, Endpoint Posture, and then click the Device Compliance Status box.

- Select Managed Devices, and then select Compliance.
- Click Next, and then complete Steps 4, 5, and 6. For more information, see Configure SASE Secure Client-Based Access Rules.
- Go to step 7, Client Configuration.
- In the Client Configuration pane, click Customize.
- Configure the client controls.
Note: It is very important to specify the Certificate Issuer (such as Microsoft Intune MDM Device CA in the screen shot shown above). If you do not specify the Certificate Issuer, the secure access client will not send the device ID when connecting to gateways, with the result that the correct policy will not match.
- Complete the remaining steps.
- In the Review and Submit screen, review the configuration and make any needed changes.
- Click Save to create the policy rule.
Verify Device Compliance
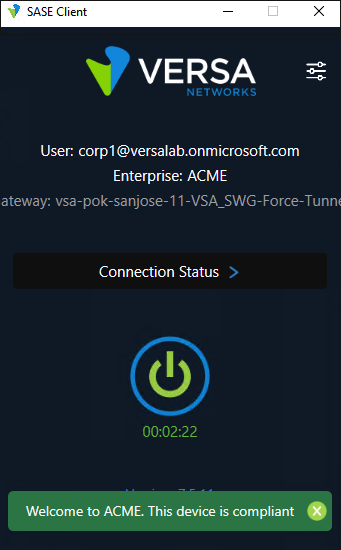
If the device is compliant, you see a message in the Versa Secure Access client similar to the example below:
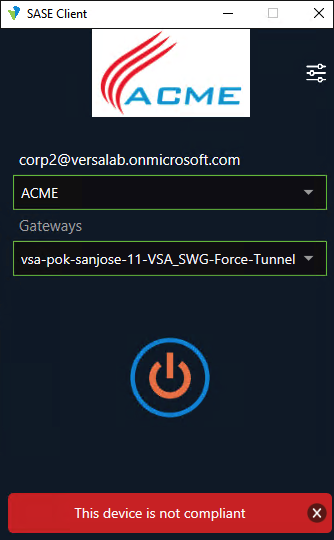
If the device is not compliant, you see the message, "This device is not compliant," as shown below.
Troubleshoot the UEM Configuration
Use the following steps to troubleshoot UEM:
- Verify the provided UEM configurations are valid
- Verify UEM statistics
- Verify that the VSA client sends the Device-ID information to the gateways
- Verify that the Device-ID Information is correctly processed on the portal/gateway
- How to delete the cached device-id entry
Verify the Provided UEM Configurations are Valid
As soon as you publish the configuration, the UEM module triggers API requests to fetch the access tokens by contacting login.microsoftonline.com and graph.microsoftonline.com. The API requests contain the directory ID, client secret, and other parameters. You can verify this after enabling debug logs for UEM in the versa-service.log file. Ensure that the DNS servers are configured correctly to contact the respective API domains.
The response for the access token should return with a 200 OK message, along with the access-tokens payload. The response is saved by the Versa Operating SystemTM (VOSTM) software internally. Any further API communications to fetch the compliance details are generated using the saved access tokens. This can also be verified using the following CLI command:
show orgs org-services org-name objects mdm-profile statistics.
Verify UEM Statistics
If the sequence or the response is not seen, there is most likely some problem with the provided directory ID, client ID, and client secret details. You can verify this in the statistics of the following counters:
- mdm-access-token-req-fail-cnt
- mdm-access-token-null-resp-cnt
Verify that the VSA Client Sends the Device ID Information to the Gateways
When a managed device connects or initiates a pre-registration message, the payload is set to "device_id=true". You can view the request message in the client’s versa_secure_access_client_cp log file.
The portal responds with a 200 Success message. This response indicates the method with which the client is authenticated and its capabilities. It also requests the client to send the device ID using the Microsoft Intune UEM Device CA root certificate defined in the policy configuration.
NOTE: If the device does not send the device ID information, it will not be processed by the correct secure access rule.
Verify that the Device ID Information is Correctly Processed on the Portal/Gateway
Once the second request from the client is sent to the portal/gateway, the information is processed by the respective modules. In this case, the UEM module looks for the device_id field in the extracted client request.
If the device ID is available, UEM queries the configured Intune tenants assigned in the UEM profile by triggering API requests to graph.microsoft.com using the already saved access tokens.
The responses provide useful information about the device that is mapped to the device ID, which is again processed by the UEM module, and a check is performed on key attributes in the response.
This information is saved in the pre-register session logs, which are then used by the secure access policies to validate based on the different compliance states of a managed device.
Supported Software Information
Releases 11.1.1 and later support all content described in this article, except:
- In Release 12.2.2, the Mobile Device Manager (MDM) was renamed Unified Endpoint Management (UEM), and moved under Partner Integrations.