Configure SASE Secure Clientless Access Policy Rules
![]() For supported software information, click here.
For supported software information, click here.
Clientless access is a method of providing secure access to enterprise resources without requiring users to install client software on their devices. Instead, users access resources through a web browser using web-based technologies.
To configure SASE secure clientless access policy rules:
- Go to Configure > Security Service Edge > Secure Access > Clientless Access > Policy Rules.
Note: In Releases 12.1.1 and earlier, the Secure Access folder was called Secure Client Access and Policy Rules was located directly under Secure Client Access (Configure > Security Service Edge > Secure Client Access > Policy Rules). In addition, you configured both client-based and clientless access from Secure Client Access > Policy Rules screens.

If you have not yet configured a clientless access policy rule, the following screen displays:

For information about configuring authentication profiles, see Configure User and Device Authentication. For information about configuring application reverse proxy, see Configure Application Reverse Proxy.
If you have already configured one or more clientless access policy rules, the following screen displays.

- In the horizontal menu bar, you can perform the following operations.

Operation Description Add Create a new secure clientless access policy rule. This button is active when no existing rule is selected. Clone Clone the policy rule. When you select this option, the configuration wizard for the rule displays with the Review & Deploy screen selected. You can rename the default name of the cloned rule, if desired, then click Save.
Reorder Reorder the selected policy rule. A popup window similar to the following displays.
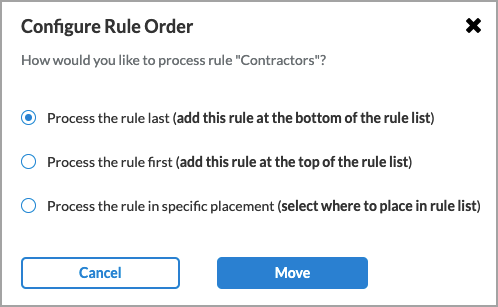
1. Select one of the three options:
- Process the rule last
- Process the rule first
- Process the rule in specific placement—A list of the existing rules displays. Click the position in the list where you want to place the rule.
2. Click Move.
Delete Delete the selected policy rule. A popup window similar to the following displays:

Click Yes to delete the policy rule, or click No to retain the rule.
Refresh Refresh the list of existing rules. - To customize which columns display, click Select Columns and then click the columns to select or deselect the ones you want to display. Click Reset to return to the default columns settings. The available columns are:
- Users
- Source Geo Locations
- Source IP Address
- Application Reverse Proxy
- Status
- Click the
 Add icon to configure a new clientless access policy rule.
 - The Create Clientless Access Rule screen displays. There are four steps to configure for each clientless access rule, organized under Match Criteria, Action, and Review & Configure.

- Match Criteria:
- Users/User Groups
- Source Geo Location & Source IP Address
- Action
- Application Reverse Proxy
- Review & Configure
See the sections below to configure secure clientless access rules.
- Match Criteria:
Configure Users and Groups
To configure users and groups:
- In the Create Clientless Application Access Rule screen, select Step 1, Users & Groups. The following screen displays.

- By default, all users and groups are chosen. To customize the users and groups for the security posture, click Customize. The following screen displays, with Known Users selected by default. Known users are all authenticated users.

- To apply the policy to specific users or groups, select click Selected Users. The following screen displays.

- Select one or more user groups to include in the policy rule.
- Click the Users tab, and then select one or more users to include in the policy rule.

- Click Next to go to the Source Geo Location & Source IP Address screen.
Configure Source Geo Location and Source IP Address
By default, all source geographic locations and all source IP addresses are allowed network access. You can customize either or both of them.
To customize the source geographic locations and source IP addresses:
- In the Create Clientless Application Access Rule screen, select Source Geo Location & Source IP Address.

- To select specific geo locations, click Customize in the Source Geo Location pane. The following screen displays.

- Click Clear All to remove any already selected source locations. (Because all locations are selected by default, they are not displayed.)
- To customize the geographic location by country, state, or city, click the down arrow in the Country box. The Selected section lists the country, state, or city with name and location type.

- To remove a location from the selected list, click the X next to the location type name.
- To remove all locations from the selected list, click Clear All.
- Click the
 Back arrow to return to the Source Geo Location & Source IP Address screen.
 - To select specific IP addresses, click Customize in the Source IP Address pane. In the Source screen, enter information for the following fields.

Field Description Source Address (Group of Fields) - Address Group
Click in the box, and then select one or more address groups. The address groups in the list are those defined in the User Defined Objects section.
If you want to provide one or more specific source IP addresses, you do not need to select an address group. Instead, use the IP Wildcard field to enter the IP address.
To create a new address group, click + Add New, and then enter information for the following fields:

- Click the Enter Addresses section and select the group Type. The type can be Subnet, IP range, IP wildcard, or IPv6 subnet.
- Based on the type selected, enter one of the following and press Return:
- Subnet: An IP address and subnet mask, for example, 10.2.1.0/24
- IP range: An IP address range, for example, 10.2.1.1-10.2.2.2
- IP wildcard: A specific IP addresses, for example, 192.68.0.56/255.255.0.255
- IPv6 subnet: A valid IPv6 subnet
- FQDN: A fully qualified domain name (FQDN)
- Dynamic Address: One or more address object names
- To add additional address group types, click the
Plus icon. To remove an address group type, click the
Minus icon.
- Click Next.
- In the Name & Tags section, enter a name for the address group and any tags you want to associate with the group.

- Click Save.
IP Subnet Enter an IP subnet to include in the match list (for example, 10.0.0.0/24), then press Return. You can add additional IP subnets by entering the subnet and pressing Return for each one. IP Range Enter an IP address ranges to include in the match list (for example, 10.2.1.1-10.2.2.2), then press Return. You can add additional IP address ranges by entering the range and pressing Return for each one. IP Wildcard Enter an IP address and mask to include in the match list (for example, 192.68.0.56/255.255.0.255), then press Return. You can add additional IP addresses and masks by entering the it and pressing Return for each one. Source Address Negate Select to apply the rule to any source addresses except the ones in the Source Address field. - Click Next to go to Application Reverse Proxy, then enter information for the following fields.

Field Description Private Applications Click the down arrow and select one or more private applications to include in the rule. SaaS Applications Click the down arrow and select one or more SaaS applications to include in the rule. Add New Click the Add New icon to add a new application. See Configure Application Reverse Proxy for more information. - Click to go to Review and Configure.

Field Description Name (Required) Enter a name for the rule. Description (Optional) Enter a text description for the rule. Tags (Optional) Enter one or more tags to help identify the rule. A tag is an alphanumeric text descriptor with no spaces or special characters that you use for searching objects. Rule is enabled Click the slider to enable the rule.

Edit Click the  Edit icon to revise any section, as needed.
 - Click Save to create the secure clientless access policy rule.
Supported Software Information
Releases 11.1.1 and later support all content described in this article, except:
- Release 12.2.1 introduces new UI screens to configure secure clientless access policy rules.