Configure Advanced Threat Protection
![]() For supported software information, click here.
For supported software information, click here.
Antivirus software is typically installed on endpoint machines. When new malware outbreaks occur, antivirus software vendors update their definition or data file for the antivirus software so that the software detects new malware. This scenario has the following limitations:
- Because of the volume of malware files and evasion techniques, such as polymorphism, packers, and encryption, signature-based detection of malware is ineffective.
- In case of a malware infection, the impact of the malware is quite significant.
Addressing these scenarios requires real-time, zero-day threat detection that does not require waiting for signature updates to detect and protect against threats.
Versa advanced threat protection (ATP) provides advanced detection mechanisms that detect and prevent organizations from zero-day threats. ATP includes the following detection mechanisms:
- Artificial intelligence (AI) and machine learning (ML)
- MITRE ATT&CK framework
- Multiple sandboxes and dynamic analysis
- Multiple antivirus engines
- Reputation-based matches
- Signature-based matches
- Static analysis
You can configure Versa ATP using sandboxing profiles. Then, in a security policy, you associate an ATP profile with the policy action so that the profile is applied to traffic that matches the policy's match criteria.
When you enable sandboxing, files extracted from matching traffic are submitted to Versa ATP for threat detection. If Versa ATP detects any malware, policy enforcement actions are taken to alert, block, or remediate the affected devices.
To enable ATP in Concerto, you configure ATP profiles to define ATP actions, sandbox rules, and default actions.
Configure ATP Profiles
- Go to Configure > Security Service Edge > Real-Time Protection > Profiles.

- Select the Advanced Threat Protection (ATP) tab. The following screen displays.
The Profiles subtab displays all configured ATP profiles, including implicit profiles. Implicit profiles are predefined in Concerto. You can use them without modification, or you can clone and modify an implicit profile. To use the implicit profiles, SASE needs to be enabled on the tenant and the tenant needs to have VSIA solution tier.
Note: Release 12.2.1 supports two new implicit ATP profiles, Exe_and_Common_File_Types_Advanced_Security and Executables_Advanced_Security.
Note: In Releases 12.2.2 and later, the SSE Elite product bundle includes support for the following file types in these two implicit ATP Profiles:
• Exe_and_Common_File_Types_Advanced_Security bundle: docx, doc, pdf, msoffice, ppt, pptx, xls, xlsx
• Executables_Advanced_Security bundle: exe

- The Global Settings subtab allows you to configure several options that will be applied to all profiles that are created. Any modifications you make on this screen are reflected in all ATP rules that use global ATP settings. You can modify these settings when you configure an ATP rule.
Click the Global Settings tab, then enter information for the following fields.

Field Description Unknown File Types (Group of Fields) - Scan Unknown File Types
Click the slider bar to enable the scanning of unknown file types. By default, this option is disabled. - Block Password Protected Files
Click the slider bar to block password protected files. By default, this option is disabled. Notifications Select a notification profile from the list. Timeout (Group of Fields) - Timeout Action
Select a timeout action. The options are:
- Alert
- Block
- Reject
- Duration to Wait before Timeout
Enter the amount of time the timeout action lasts, in seconds.
Default: 30 seconds
ATP Actions (Group of Fields) - Clean
Select the action to take for files with clean file reputations:
- Alert
- Block
- Reject
- Suspicious
Select the action to take for files with clean file reputations:
- Alert (Default)
- Block
- Reject
- Malicious
Select the action to take for files with clean file reputations:
- Alert
- Block (Default)
- Reject
- Click Save.
- Select the Profiles tab, and then click the
 Add icon. The Create ATP Profile screen displays.
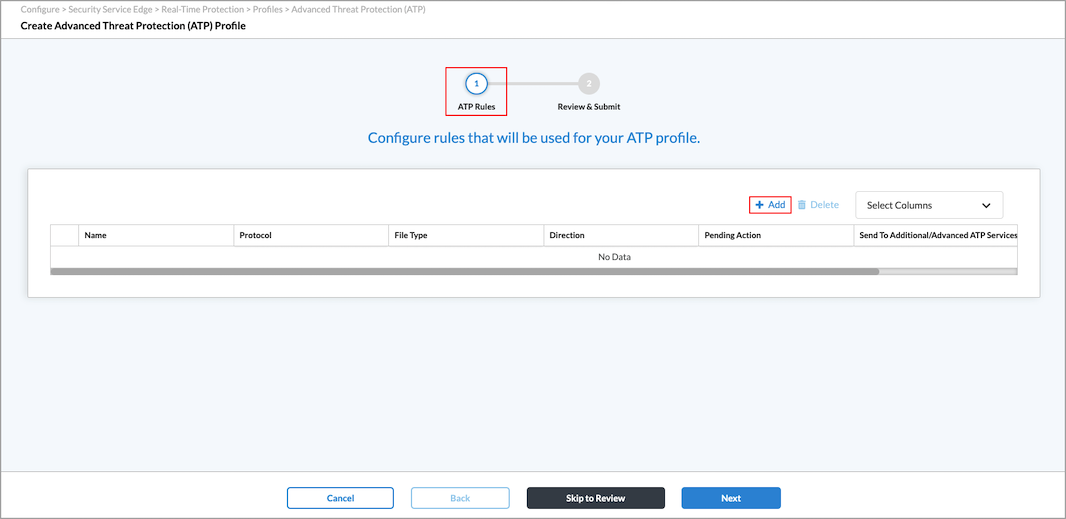
- In Step 1, ATP Rules, click the Add icon to configure ATP rules. In the Add ATP Rule screen, enter information for the following fields.

- Select the types of files to detect and analyze. To select all file types, click Select All. The supported file types are:
7zip ace android appleplist arj avi avif bat bmp bzip2 cab c chm class coff com cpp csv
db deb dll dmg doc docx dwg elf eml evtx exe flv gif gpg gzip html inf iso jar jpeg lha lnk lzh mach_o mdb mdi mht midi mov mp3 mpeg msi msoffice odp pdf pem pgp php pif pl png ppk ppt pptx psd pst py rar reg rm rtf sh svg swf tar targa tiff torrent txt visio vsf wav webp wim wmf wmv xlb xls xlsx xml xz zip - In the Select Type of File Direction field, select one of the following.
Field Description - Both
Click to select both the download and upload file actions. - Download
Click to select the download file action only. - Upload
Click to select the upload file action only. - Click Next to go to Step 2, Actions. You can use the default global ATP action settings or configure custom settings for the ATP rule.
- To use global ATP settings for the rule, select the Global tab. The default global settings display in the ATP Actions, Timeout, and Notification panes. Note that you can modify the global settings in Step 7b, below.

Field Description Config Choose Global. ATP Actions Displays the configured global ATP actions for Clean, Suspicious, and Malicious files. Timeout Displays the action to be taken on a file if sandbox notification times out and the timeout duration period. Notification Displays the notification profile used for notification settings.
Pending Action Choose which action to take on a file while waiting for the file evaluation from the cloud. The actions are:
- Allow and scan first time
- Block
- Wait until timeout
Send to Additional/Advanced ATP Services Click the slider bar to send a file to additional services for full analysis. Disabled by default. - To configure ATP custom actions, select the Custom tab and enter information for the following fields.

Field Description ATP Actions (Group of Fields) - Clean
Select the action to take when a file is determined to be clean.
- Allow
- Alert
- Block
- Reject
- Suspicious
Select the action to take when a file is determined to be suspicious.
- Allow
- Alert
- Block
- Reject
- Quarantine. If you select this option, also select a profile from the Quarantine Profile drop-down list.
- Malicious
Select the action to take when a file is determined to be malicious.
- Allow
- Alert
- Block
- Reject
- Quarantine. If you select this option, also select a profile from the Quarantine Profile drop-down list.
Timeout (Group of Fields) - Timeout Action
Select a timeout action from the list. The options are:
- Allow
- Alert
- Block
- Reject
- Quarantine Profile
Select the quarantine profile. - Duration to Wait Before Timeout
Number of seconds to wait before timing out. Notifications Select a profile from the Notification Profile drop-down list. Pending Action Choose which action to take on a file until the cloud services determination is made. The actions are:
- Allow and scan first time
- Block
- Wait until timeout
Send to Additional/Advanced ATP Services Disabled by default. Click the slider bar to send the files to be evaluated by ATP services such as AI/ML, static analysis, multiAV, and dynamic analysis.
- To use global ATP settings for the rule, select the Global tab. The default global settings display in the ATP Actions, Timeout, and Notification panes. Note that you can modify the global settings in Step 7b, below.
- Click Next to go to Step 3, Review and Submit. Enter information for the following fields.

Field Description Name (Required) Enter a name for the rule. Description (Optional) Enter a description of the rule. Rule is Enabled Click the slider bar to enable the rule. - Review the configuration and edit if needed.
- Click Save to save the ATP rule.
Associate an ATP Profile with an Internet Protection Rule
To enforce Versa ATP detection mechanisms for internet traffic, you associate an ATP profile with an SSE internet protection rule:
- Go to Configure > Security Service Edge > Real-Time Protection > Internet Protection.
- In the Internet Protection Rules List screen, click the
 Add icon to create a rule. The Create Internet Protection Rule screen displays. For more information, see Configure SASE Internet Protection Rules.
 - Select the Security Enforcement screen, and then select Profiles.
- Select the Advanced Threat Protection (ATP) tab, and then click the
 slider to enable ATP.

- Select the ATP profile to associate with the internet protection rule.
- To create a new ATP profile, click Create New. The Create ATP Profile screen displays. For more information, see Configure ATP Profiles, above.
- Review the internet protection rule, and then deploy it.
Software Release Information
Releases 11.4.1 and later support all content described in this article, except:
- Release 12.1.1 supports notification profile selection for ATP rules.
- Release 12.2.1 adds the Global Settings tab for ATP and supports two new implicit ATP profiles, Exe_and_Common_File_Types_Advanced_Security and Executables_Advanced_Security; supports the handling of unknown file types.