Configure User and Device Authentication
![]() For supported software information, click here.
For supported software information, click here.
For users who are using an SD-WAN device to connect to a SSE gateway over an IPsec tunnel, you can create rules to authenticate both the user and the device. You can use user and device authentication to authenticate traffic that enters through Versa SSE gateways to access security services using a non-Versa SSE client. For example, you can authenticate users who connect from a remote location using a site-to-site tunnel to the SSE cloud gateway. You can authenticate these users and devices before SSE gateways route the traffic to internet or private applications.
To authenticate users and devices, you create authentication profiles and create rules to filter users.
To define rules for user and device authentication, you can select destination zones, IP addresses, SSE services, and schedules as match criteria to decide when to authenticate users. You can also create rules with match criteria for users who you do not want to authenticate.
You configure user and device authentication profiles to specify the authentication type for user authentication. You use these authentication profiles in user and authentication rules to specify the method to authenticate users who match the authentication rule criteria.
For information about configuring user and group authentication for Releases 11.3.1 and earlier, see Configure User and Device Authentication.
Configure User and Device Authentication Rules
To configure user and device authentication rules for SSE users and groups:
- Go to Configure > Security Service Edge > User and Device Authentication > Rules.
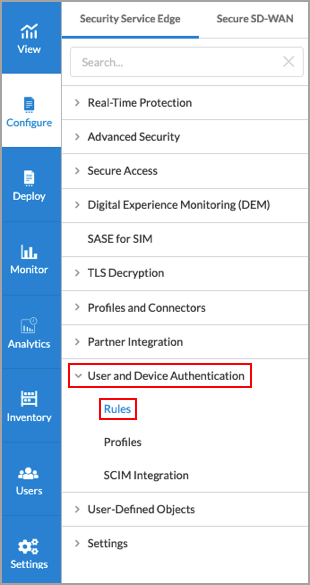
The Rule screen displays.

- To create a new users and groups profile, click + Add. The Create Users and Device Authentication Rule window displays the first step of the workflow:
- For Releases 12.1.1 and later, the first step is Applications and URLs.
- For Releases 11.4.1 and earlier, the first step is Network Layer 3-4. Skip to Step 11 of this procedure to continue.
- For Releases 12.1.1 and later, in Step 1, Applications and URLs, select the match criteria for applications, reputations, and URLs. By default, all applications, URLs, and reputations are included in the match criteria.
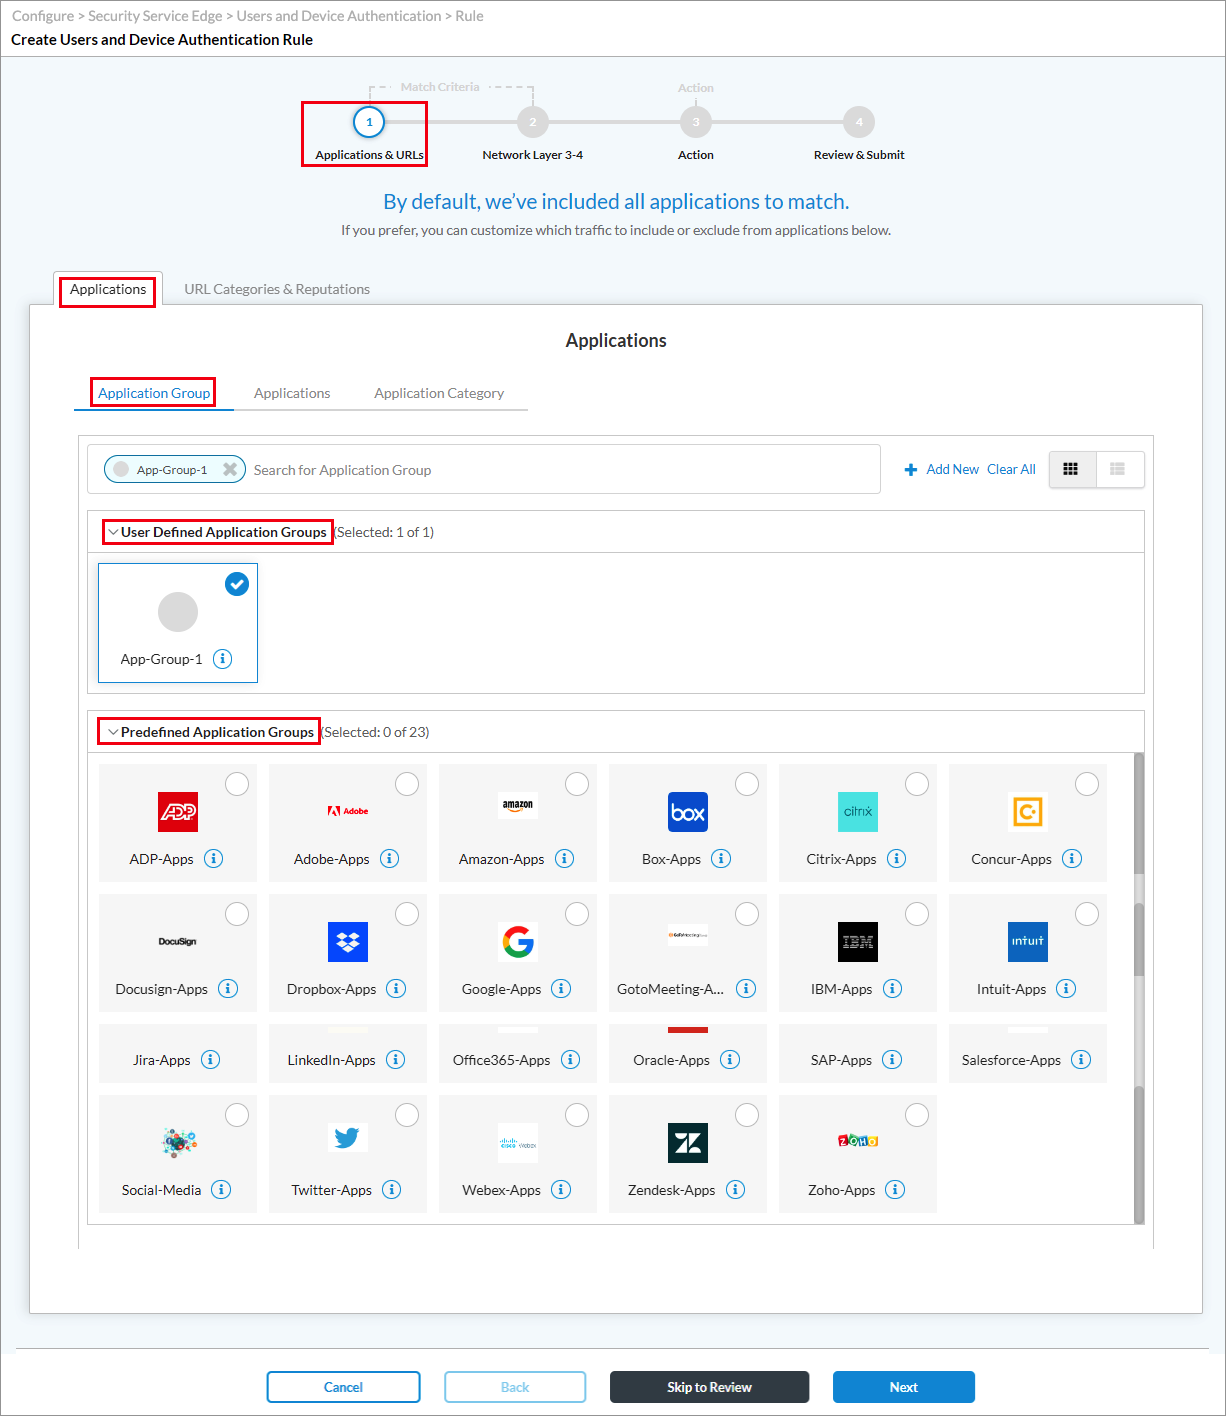
- Select the Applications > Application Group tab, and then select one or more user-defined and predefined application groups for the rule to match.
- Select the Applications > Applications tab, and then select one or more user-defined and predefined applications for the rule to match.

- Select the Applications > Application Category tab, and then select one or more predefined application categories for the rule to match.

- Select the URL Categories and Reputations tab. The following screen displays.

- In the URL Categories field, click the down arrow, and then select one or more URL categories for the rule to match.
- In the Reputations field, click the down arrow, and then select one or more reputations for the rule to match:
- High risk
- Low risk
- Moderate risk
- Suspicious
- Trustworthy
- Undefined
- Click Next.
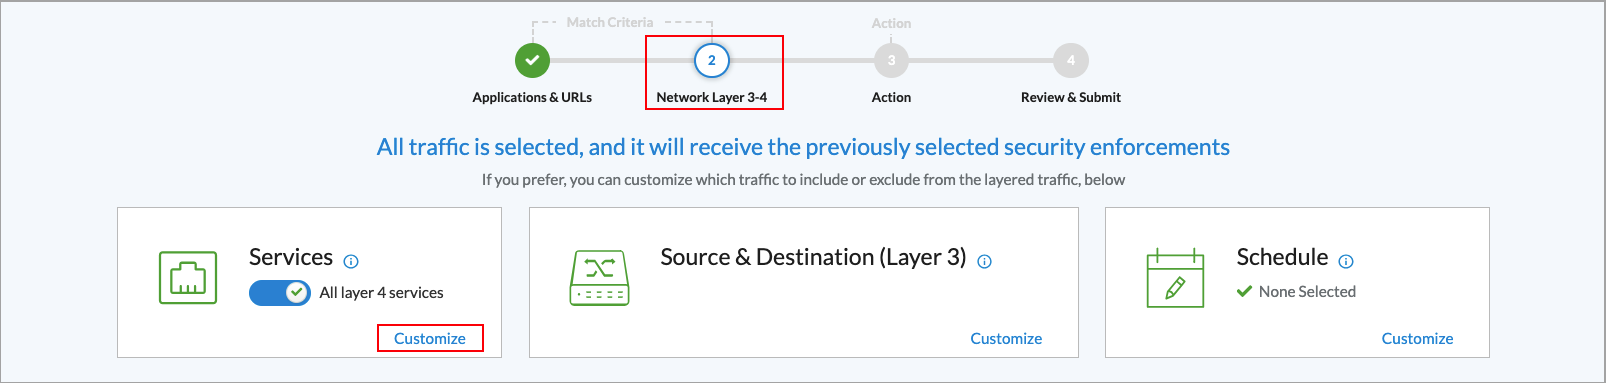
- In Step 1, Network Layer 3-4 (for Release 11.4.1) or in Step 2, Network Layer 3-4 (for Releases 12.1.1 and later), you can customize the Layer 4 services, Layer 3 source and destination information, and schedules to which the previously selected security enforcements should apply. By default, all traffic receives the previously selected security enforcements.

- To customize the Layer 4 services, click Customize in the Services pane.
The Services window displays.

- To find a service, enter the name of the service in the Services field, and then press Enter, or click All Services and then select User-defined Services or Predefined Services to filter the list of service objects.
- To add a custom service object, click + Add User-Defined. The Service window displays. For more information, see Configure SASE Services.
- To customize the source and destination information for a rule, in Network Layer 3-4 screen, click Customize in the Source and Destination Layer box.
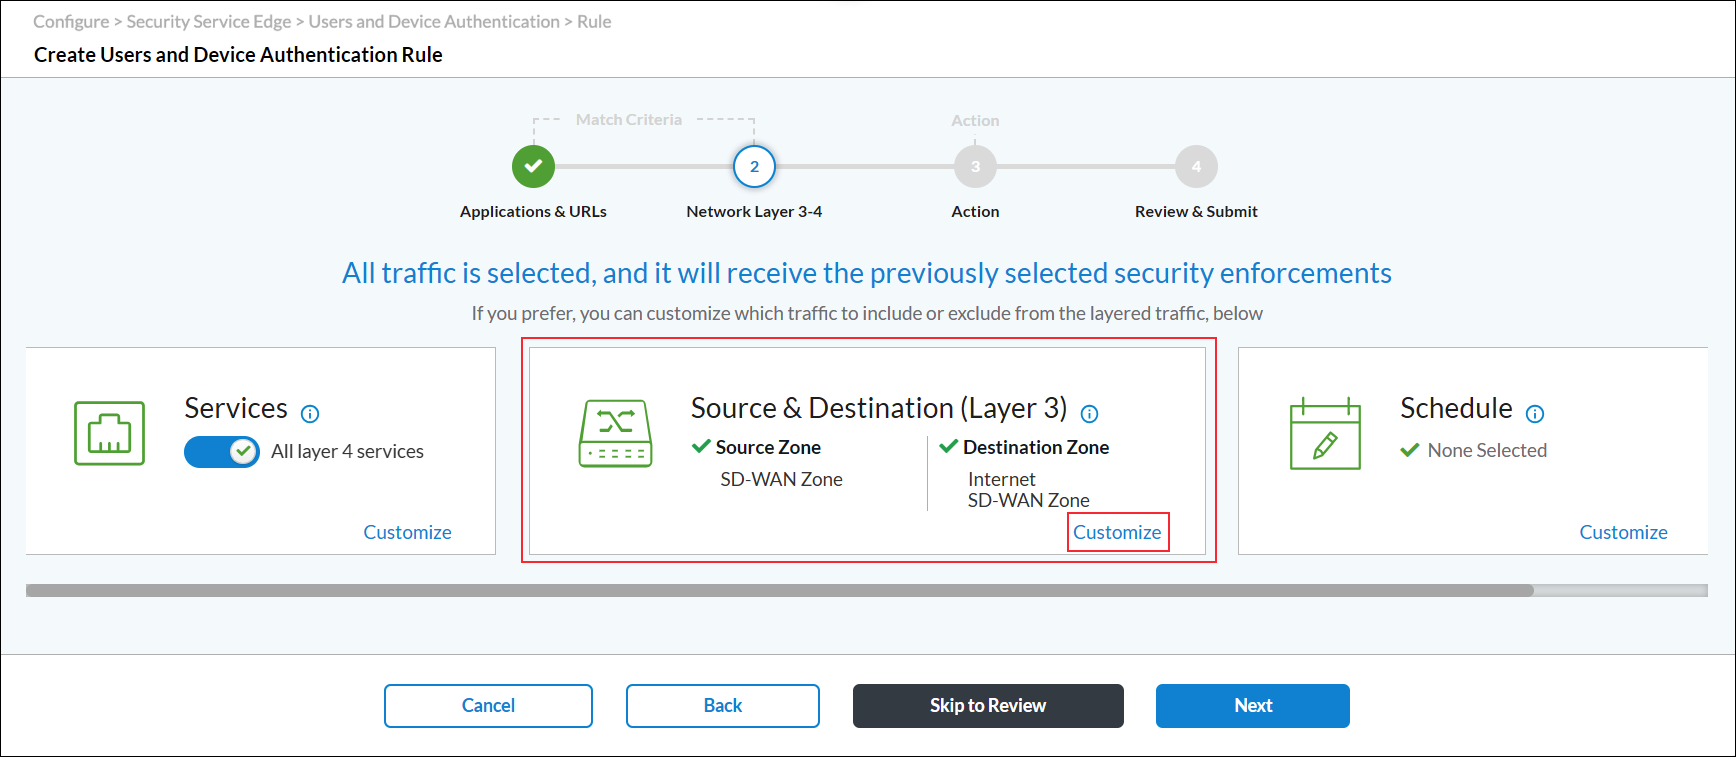
- The Source and Destination (Layer 3) window displays. Select the Source Address tab, and then enter information for the following fields.
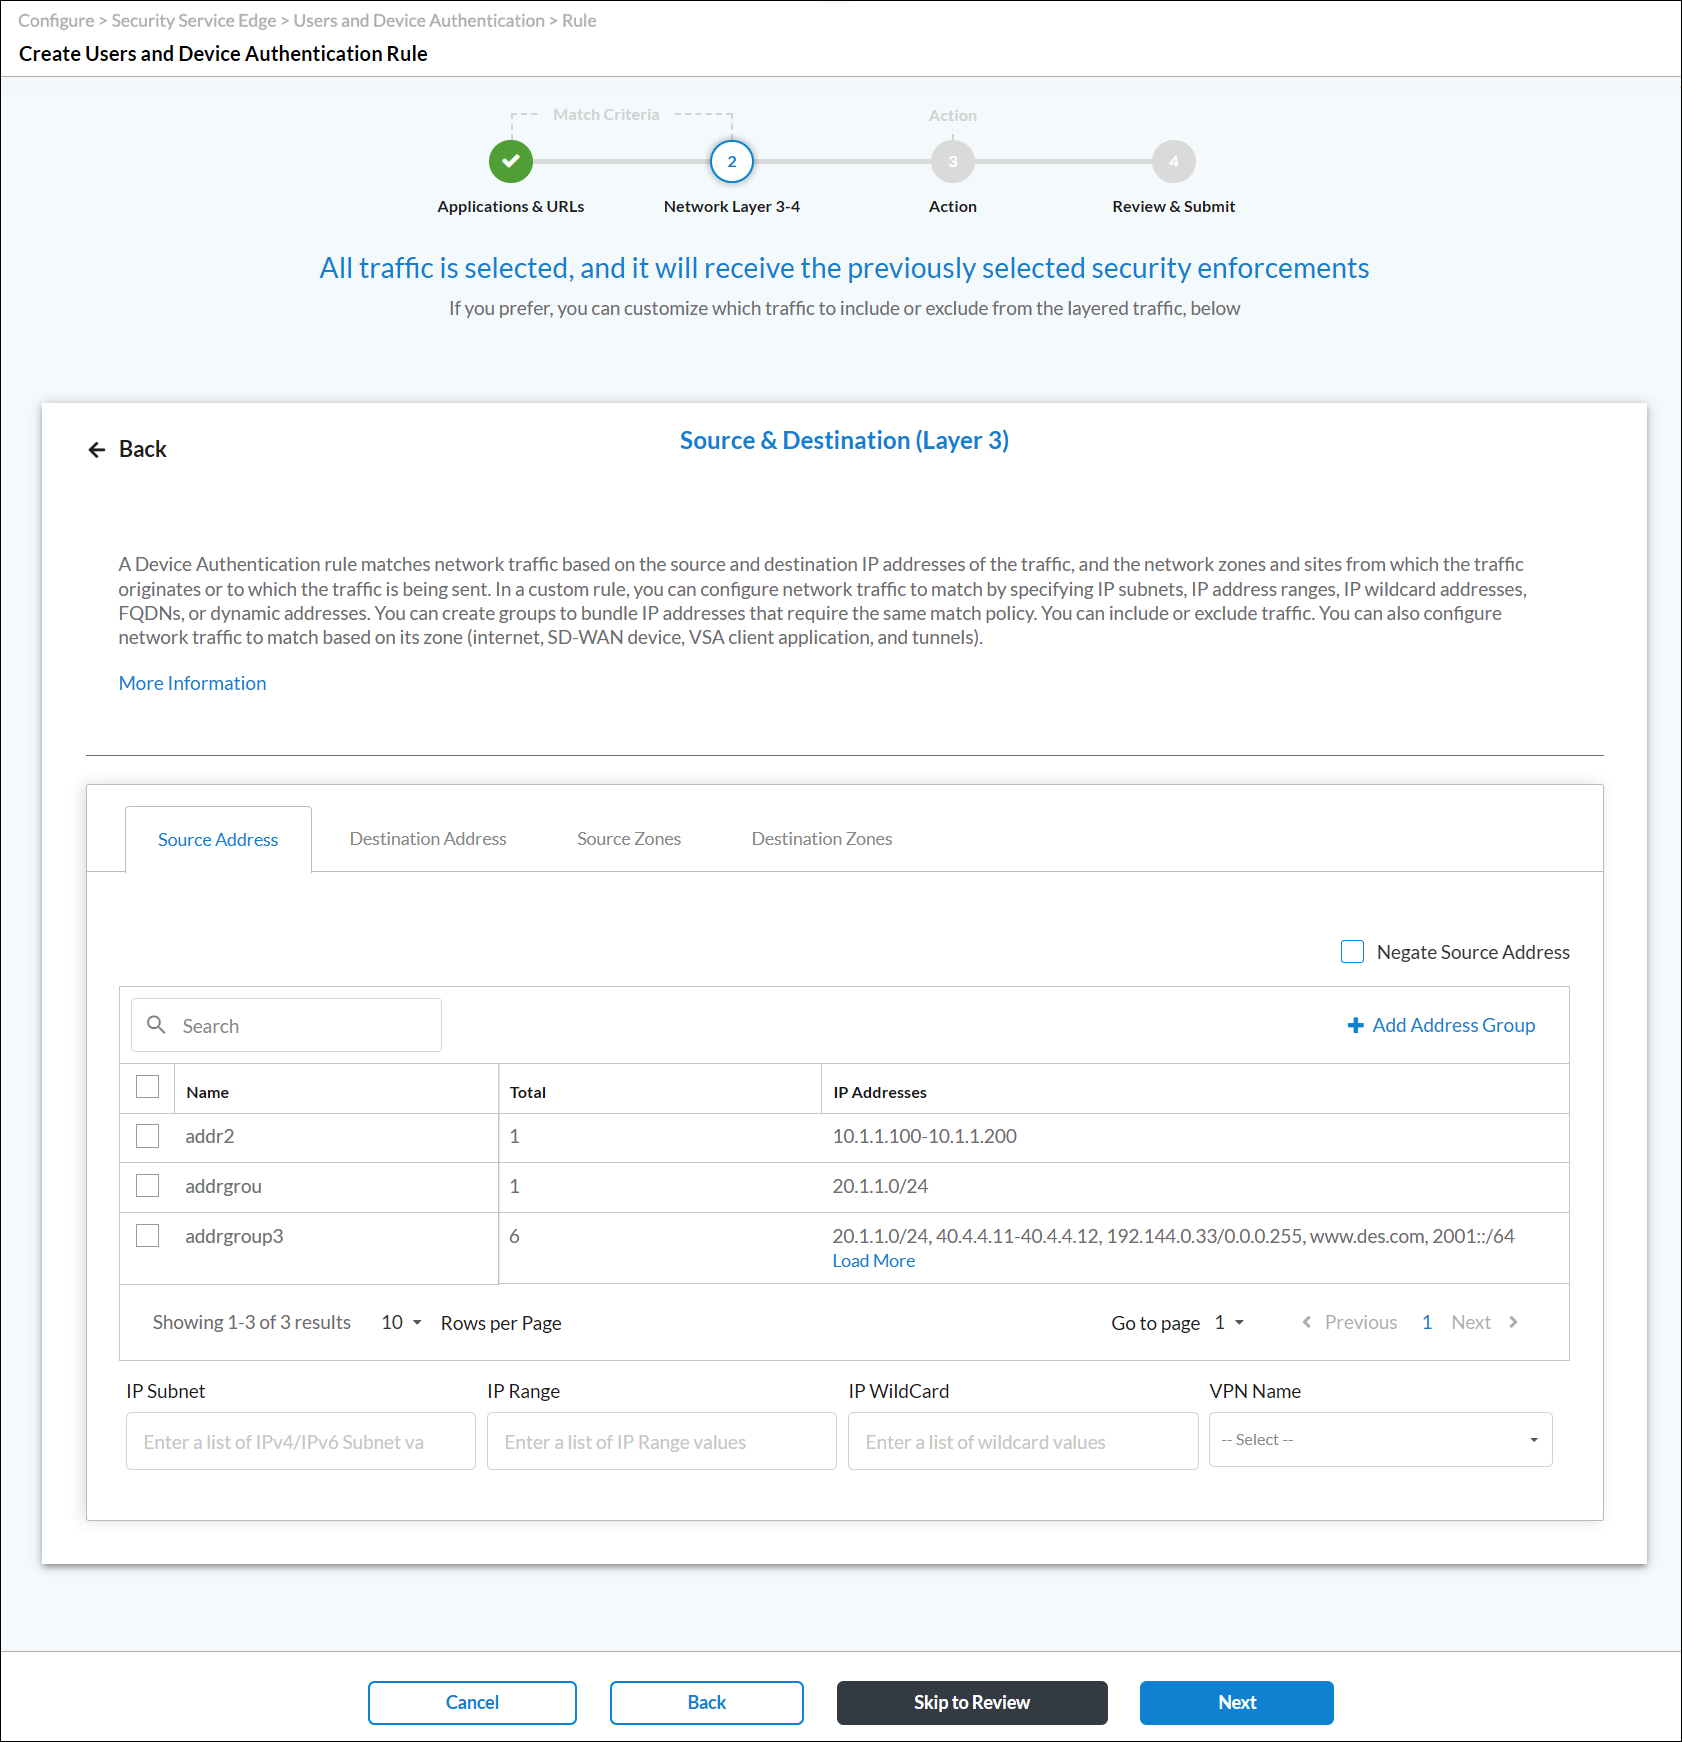
Field Description Negate Source Address Click to match any source addresses except the configured addresses.
Address Group
Select an address group to match. To add a source address group, click  Add Address Group. The Address Group screen displays. For more information, see Configure Address Group Objects.
IP Subnet
Enter an IPv4 or IPv6 subnet. IP Range
Enter an IP address range. IP Wildcard
Enter a list of wildcard IP addresses. VPN Name (For Releases 12.2.1 and later.) Select the VPN through which the IP address is reachable. - Select the Destination Address tab, and then enter information for the following fields.
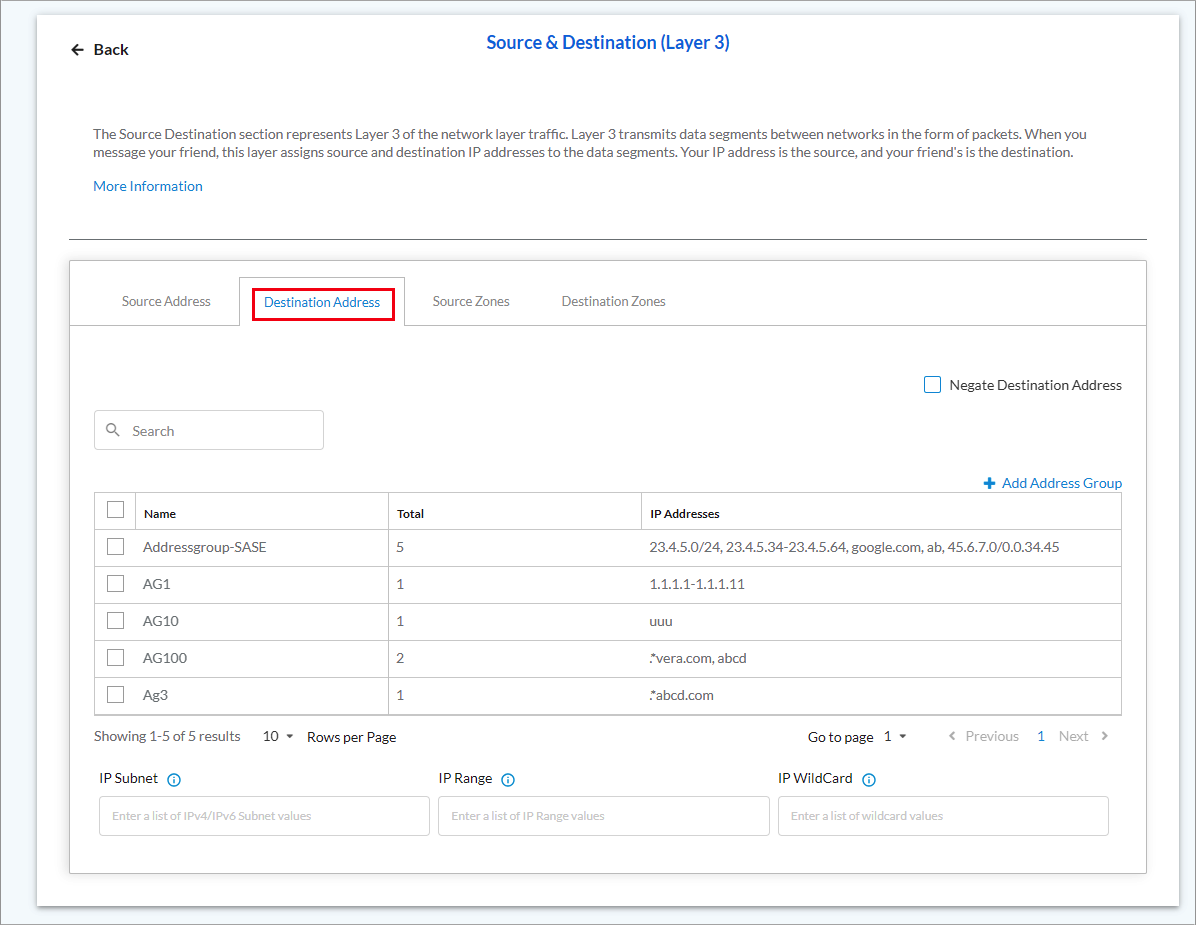
Field Description Negate Destination Address Click to match any destination addresses except the configured addresses.
Address Group
Select an address group to match. To add a source address group, click + Add Address Group. The Address Group screen displays. For more information, see Configure Address Group Objects. IP Subnet
Enter an IPv4 or IPv6 subnet. IP Range
Enter an IP address range. IP Wildcard
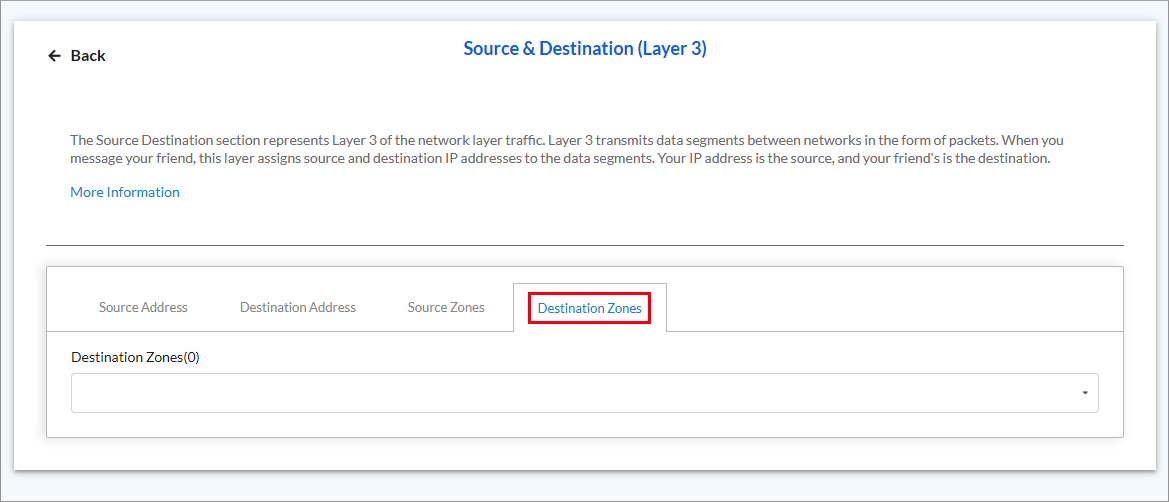
Enter a list of wildcard IP addresses. - Select the Source Zone tab, the and select the user source zone for which to create authentication rule. You must configure a source zone.

- Select the Destination Zone tab, and then select the user destination zone for which to create authentication rule.
- To customize the schedule for when the rule is in effect, in Network Layer 3-4 screen, click Customize in the Schedule box.

The Schedule window displays.

- Select an existing schedule.
- Click Add New to add a new schedule. The Schedule window displays. For more information, see Configure SASE Schedules.
- Click Next. The Step 2, Action (for Release 11.4.1) or Step 3, Action (for Releases 12.1.1 and later) displays.
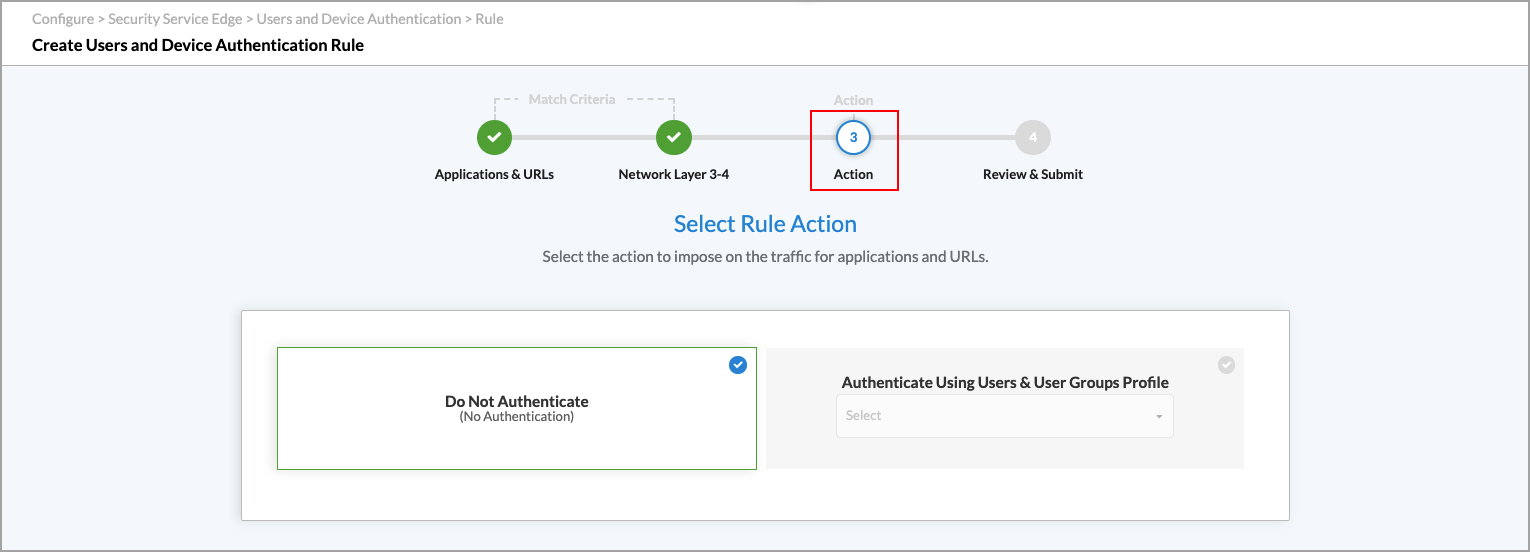
- If you do not want to authenticate users for the match criteria you selected above, click Do Not Authenticate.
- If you want to use a profile to specify the authentication type, click Authenticate Using User and Group Profile, and then select a profile that you configured in Configure User and Device Authentication Profiles, below.

- Click Next. The Step 3, Review and Submit (for Release 11.4.1) or Step 4, Review and Submit (for Releases 12.1.1 and later) displays.
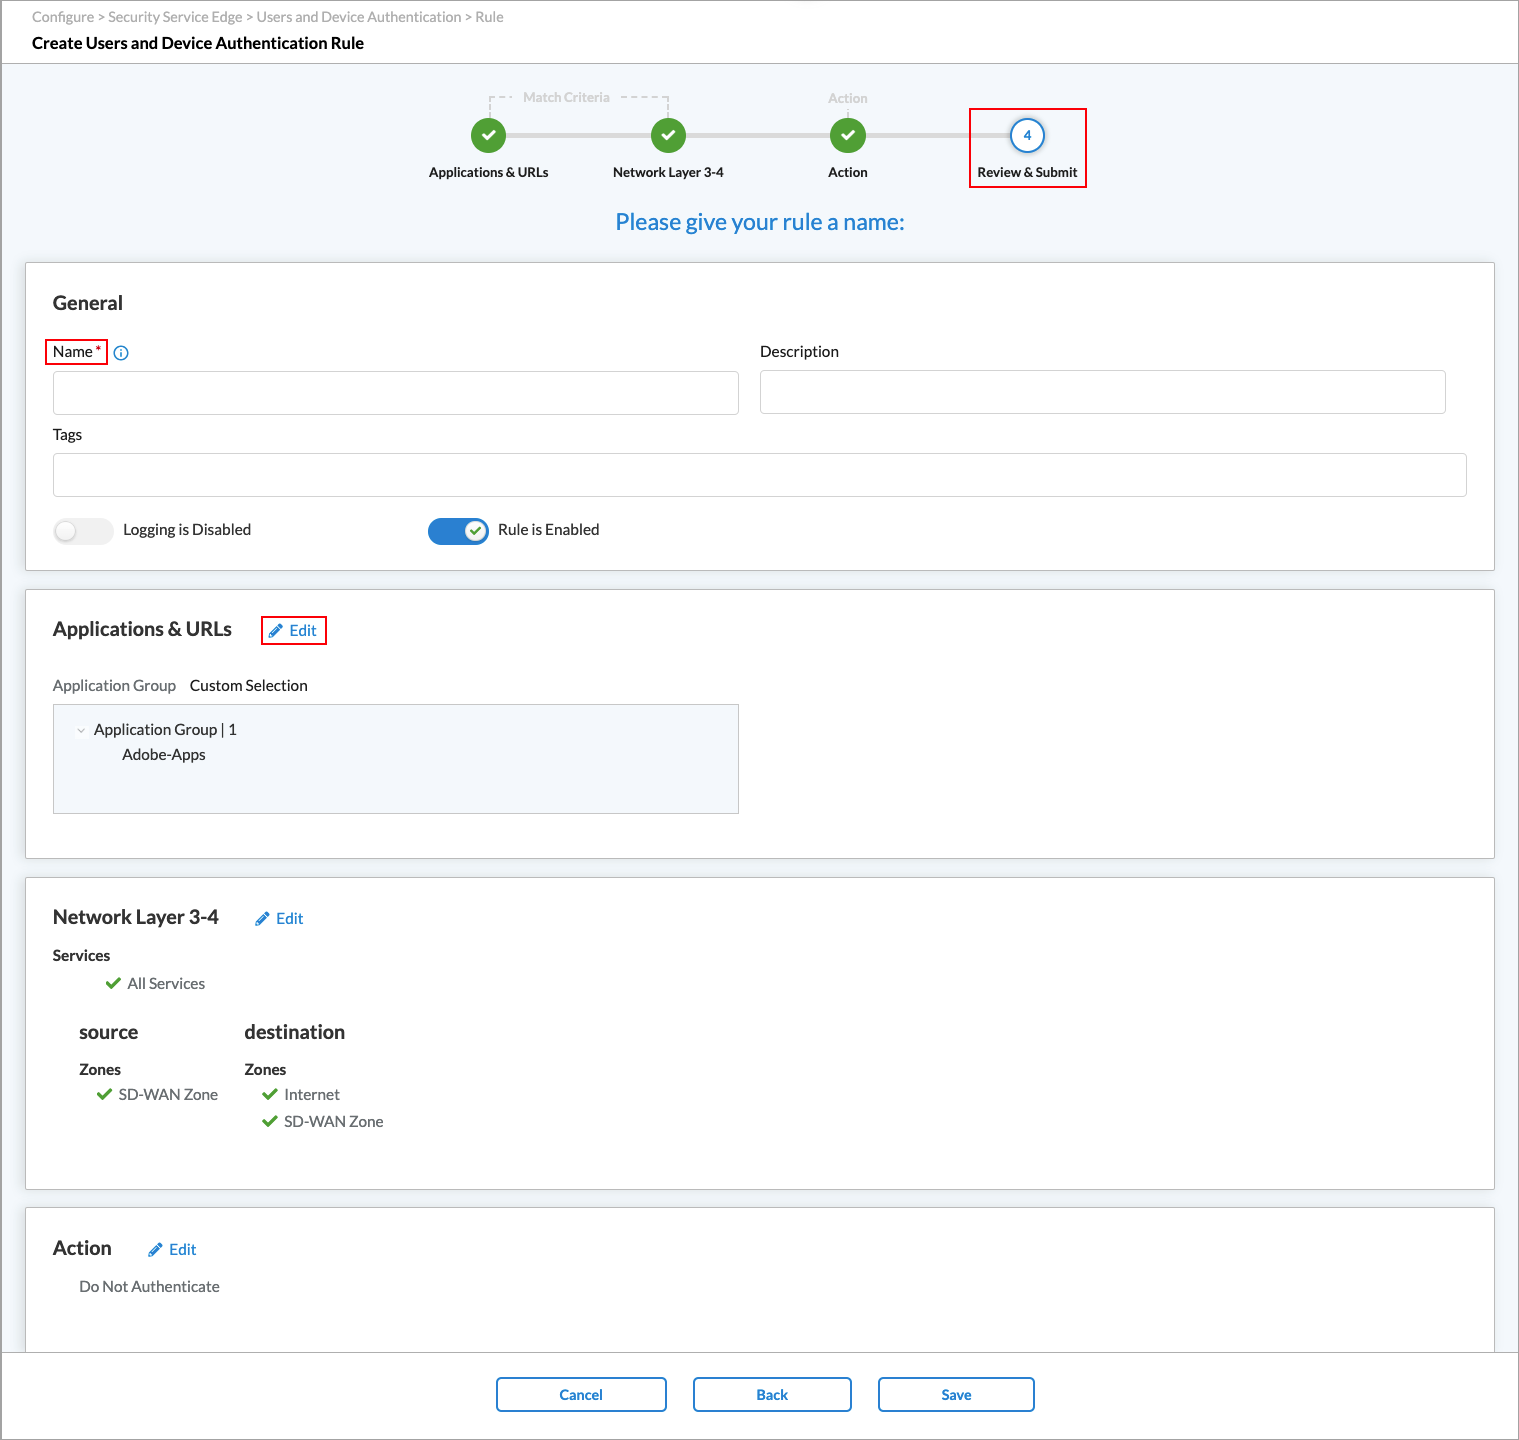
- In the General section enter a name for the rule. Optionally, enter a description and add tags for the rule.
- To enable logging for the rule, slide the toggle to Enabled.
- The rule is enabled by default. Slide the Rule is Enabled toggle to disable the rule.
- Click the
 Edit icon next to any section to make changes.
 - Click Save.
Configure User and Device Authentication Profiles
To specify the authentication type for user authentication, you configure user and device authentication profiles. For each enterprise, you can configure profiles for Lightweight Directory Access Protocol (LDAP), RADIUS, Security Assertion Markup Language (SAML), and Versa Directory.
For Releases 12.2.1 and later, you can configure multiple authentication profiles of each type, except for Versa Directory. You can configure only one Versa Directory profile.
For Releases 12.1.1 and later, you can also configure user and device certificate-based profiles. You can configure both an LDAP and a SAML profile for an enterprise, but for RADIUS and Versa Directory profiles types, you can configure only one per enterprise. You can configure user and device certificate-based profiles with each other, or with LDAP or SAML authentication profiles.
LDAP is a client–server protocol that allows a network device to access an LDAP server, which provides directory services that store descriptive attribute-based information. When an end user sends a request to access a webpage, the Versa Operating SystemTM (VOSTM) device accesses the LDAP server to validate the user. Based on the authentication result, the user is either authenticated or their authentication request is denied. You can configure either a user-based or group-based policy to allow or deny traffic.
RADIUS is a distributed client–server system that secures networks against unauthorized access. A RADIUS server provides an external database that you can use to authenticate users before allowing them to access a network, a device, or related services.
SAML authenticates users so that they can access multiple services and applications. SAML is useful when you want to access multiple services or applications and have authentication for each service or application, for example, Google and its related services. SAML is a common standard for exchanging authentication between parties and is most commonly used for web browser-based single sign-on (SSO).
With Versa directory authentication, you upload lists of users and groups for authentication purposes. You can also add individual users and groups using the GUI.
Certificate-based authentication is a secure method to validate the identity of users and devices. For Releases 12.1.1 and later, Versa SSE supports user and device certificate-based authentication. When you enable certificate-based authentication, the gateway initiates a request to the SSE client for users to provide their certificates during client portal registration and gateway connection.
Note: You must configure the following SSE rules, profiles, and settings in a specific order:
- Configure users and groups, and them publish them to the gateway, as described in this article.
- Configure site-to-site tunnels. For more information, see Configure SASE Site-to-Site Tunnels.
- Configure secure client access profiles and rules. For more information, see Configure SASE Secure Client-Based Access Rules.
You do not need to configure the remaining SSE rules, profiles, and settings in a specific order.
To configure user and device authentication profiles:
- Go to Configure > Security Service Edge > User and Device Authentication > Profiles.

The User and Device Authentication Profiles screen displays.

- To create a new profile, click + Add.
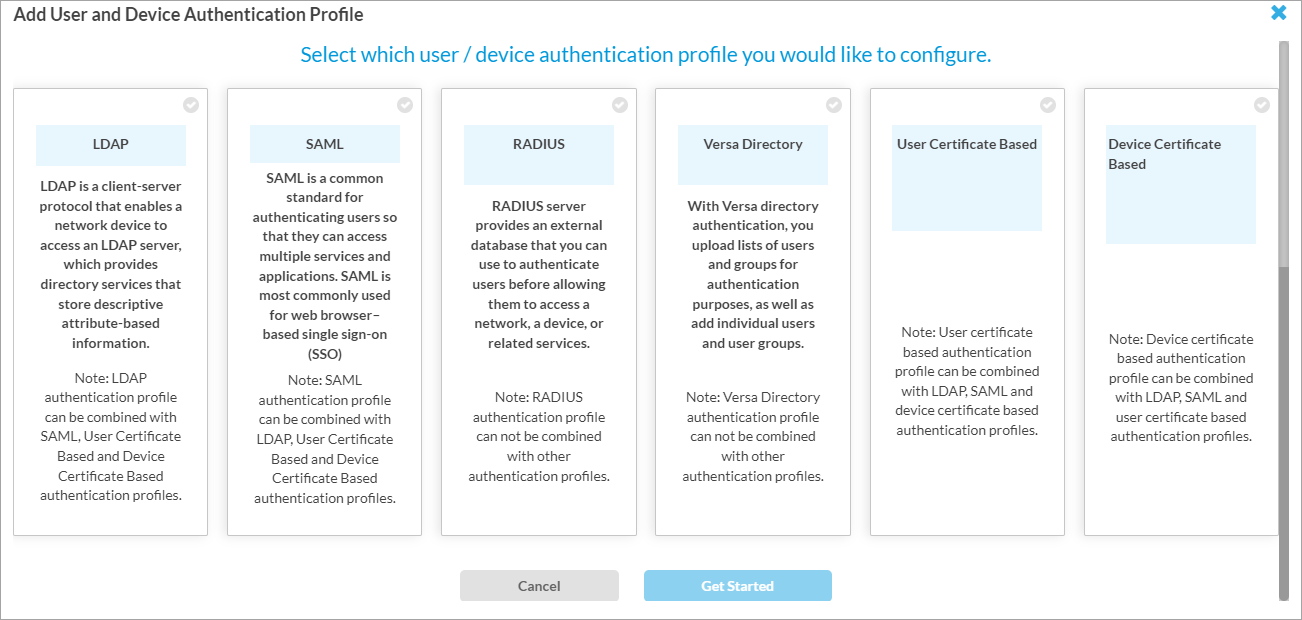
- For Releases 12.2.1 and later, the Add User and Device Authentication Profile screen displays. On this screen, you can configure multiple authentication profiles of each type, except for Versa Directory, which can have only one profile.

- For Release 12.1.1, the Add User and Device Authentication Profile screen displays.
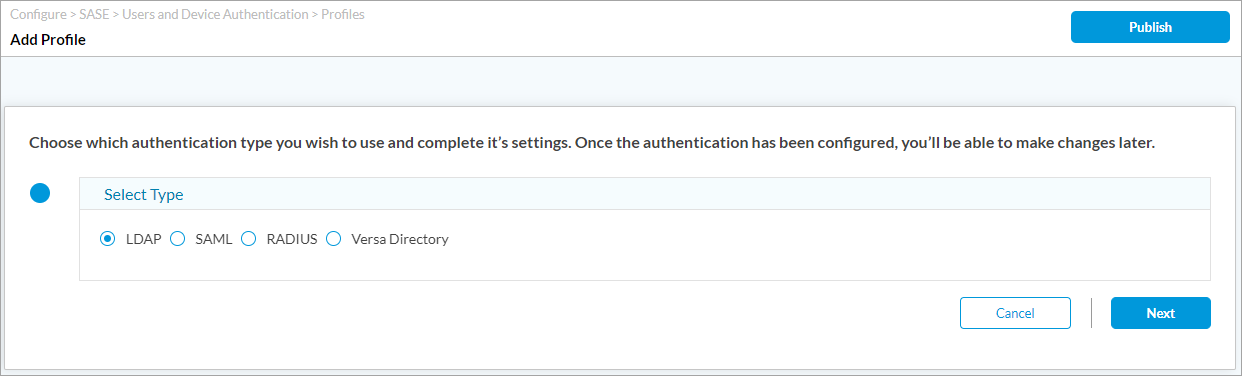
- For Releases 11.4.1 and earlier, the Add Profile screen displays.
- For Releases 12.2.1 and later, the Add User and Device Authentication Profile screen displays. On this screen, you can configure multiple authentication profiles of each type, except for Versa Directory, which can have only one profile.
- Select the type of authentication to configure:
- (For Releases 12.1.1 and later.) Select one of the following options: Device Certificate Based, LDAP, RADIUS, SAML, User Certificate Based, or Versa Directory.
- (For Releases 11.4.1 and earlier.) In the Select Type field, click one of the following options: LDAP, RADIUS, SAML, or Versa Directory.
- Click Next (or Get Started for Releases 12.1.1 and later).
- For the LDAP authentication type, the following screen displays. Enter information for the following fields.

Field Description Server Type Select the server type:
- Active Directory
- Open LDAP
Select Either FQDN or IP Address Click FQDN or IP Address, and then enter the FQDN or IP address of the Active Directory or LDAP server. Routing Instance
Select the name of the tenant routing instance to use to reach the LDAP server. Port
Enter the listening port number on the LDAP server, which allows you to communicate with the LDAP directory service.
Range: 0 through 65535
Default: None
+ Add Secondary Server Click to add a secondary server of the same type. In the Add Secondary Server popup window, enter the required information, then click Add:
- FQDN or IP Address
- Routing Instance
- Port

Enable SSL Click the slider to enable SSL for the LDAP session.
Click the slider again to disable SSL for the LDAP session.
SSL Mode If you enable SSL, select the SSL mode for the LDAP session:
- LDAPS—Use secure LDAP (LDAP over SSL)
- STARTTLS—Use LDAP over TLS
CA Certificate If you enable SSL, select the CA certificate to use for the secure LDAP connection. To add a new CA certificate, click + Add New, and the enter the required information.

Bind DN Enter the bind distinguished name (DN) to use when logging in to the LDAP server. Bind Password Enter the password that the bind DN uses when logging in to the LDAP server. Bind Timeout (sec) Enter the bind timeout period, in seconds.
Default: 30 seconds
Base DN Enter the base distinguished name DN to use when an LDAP client initiates a search. Domain Name Enter the domain name to use for LDAP searches, for example, versa-networks.com. Domain Base Enter the name of the base domain. Cache Expiry Time (mins) Enter the time after which the cache expires, in minutes. When the cache expiry time is reached, the user is logged out.
Default: 10 minutes
Cache Expiration Mode (For Releases 12.2.2 and later.) Select the mode to use to end a session:
- Fixed Interval—Use the time specified in the cache expiration as the time interval to end a session.
- Inactivity—Use the time specified in the cache expiration as the interval of inactivity after which to end a session.
Cookie Expiry Time (For Releases 12.2.2 and later.) Enter the amount of time after which the cookie for the authentication profile expires, in minutes. When the cookie expires, the user will need to log in again.
Default: 720 minutes
If you do not manually configure the cookie expiry time, the default value of 720 minutes is applied and this value will take precedence over the Cache Expiry Time in VOS. Also, the "Caching mode" is set to hybrid internally and is not configurable.
Note that the default value is set to 720 minutes even if the Cookie Expiry Time field is blank in the Concerto UI.
Concurrent Logins Enter the number of concurrent logins allowed.
Range: 1 through 255
Default: 1
Search Timeout (sec) Enter the search timeout period, in seconds.
Default: 30 seconds
- Click Next.
- The Define User/Group Profile screen displays. Enter information for the following fields.
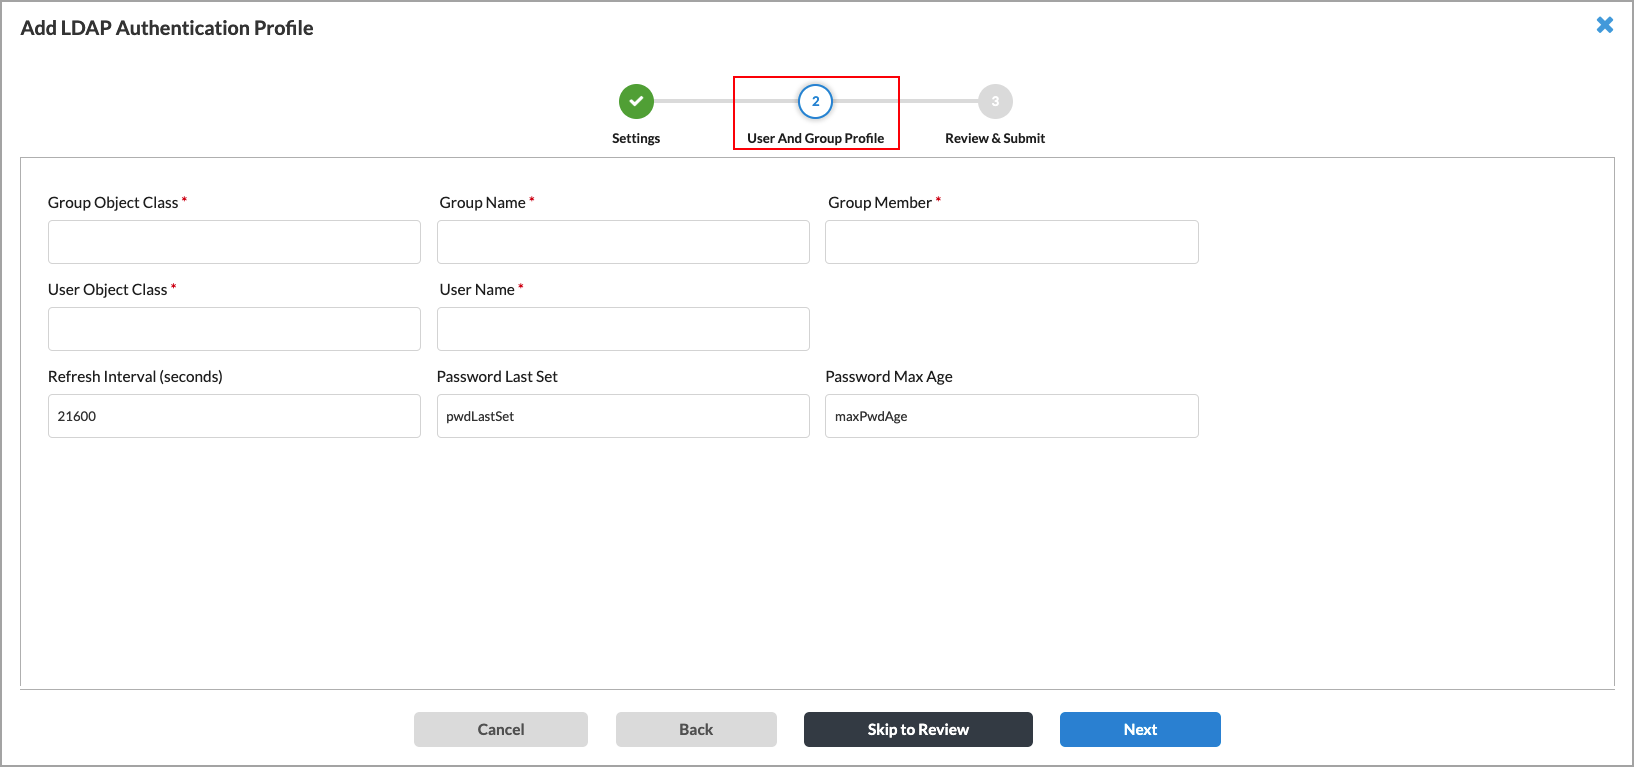
Field Description Group Object Class (Required) Enter the group object class provided by your administrator. Group Name (Required) Enter the group name provided by your administrator. Group Member (Required) Enter the group member provided by your administrator. User Object Class (Required) Enter the user object class provided by your administrator. User Name (Required) Enter the format of the username, for example, User Principal Name. Refresh Interval Enter how often to refresh the LDAP profile information, in seconds.
Range: 60 through 86400 seconds
Default: 21600 seconds
Password Last Set Enter the time when the user password was last set or updated. Password Max Age Enter the validity period of the password. - Click Next. (For Releases 11.4.1 and later.) The Provide Information screen displays. This screen is common for all authentication types. Enter the required information, as described in Step 26.
- For the SAML authentication type, the following screen displays. Enter information for the following fields.
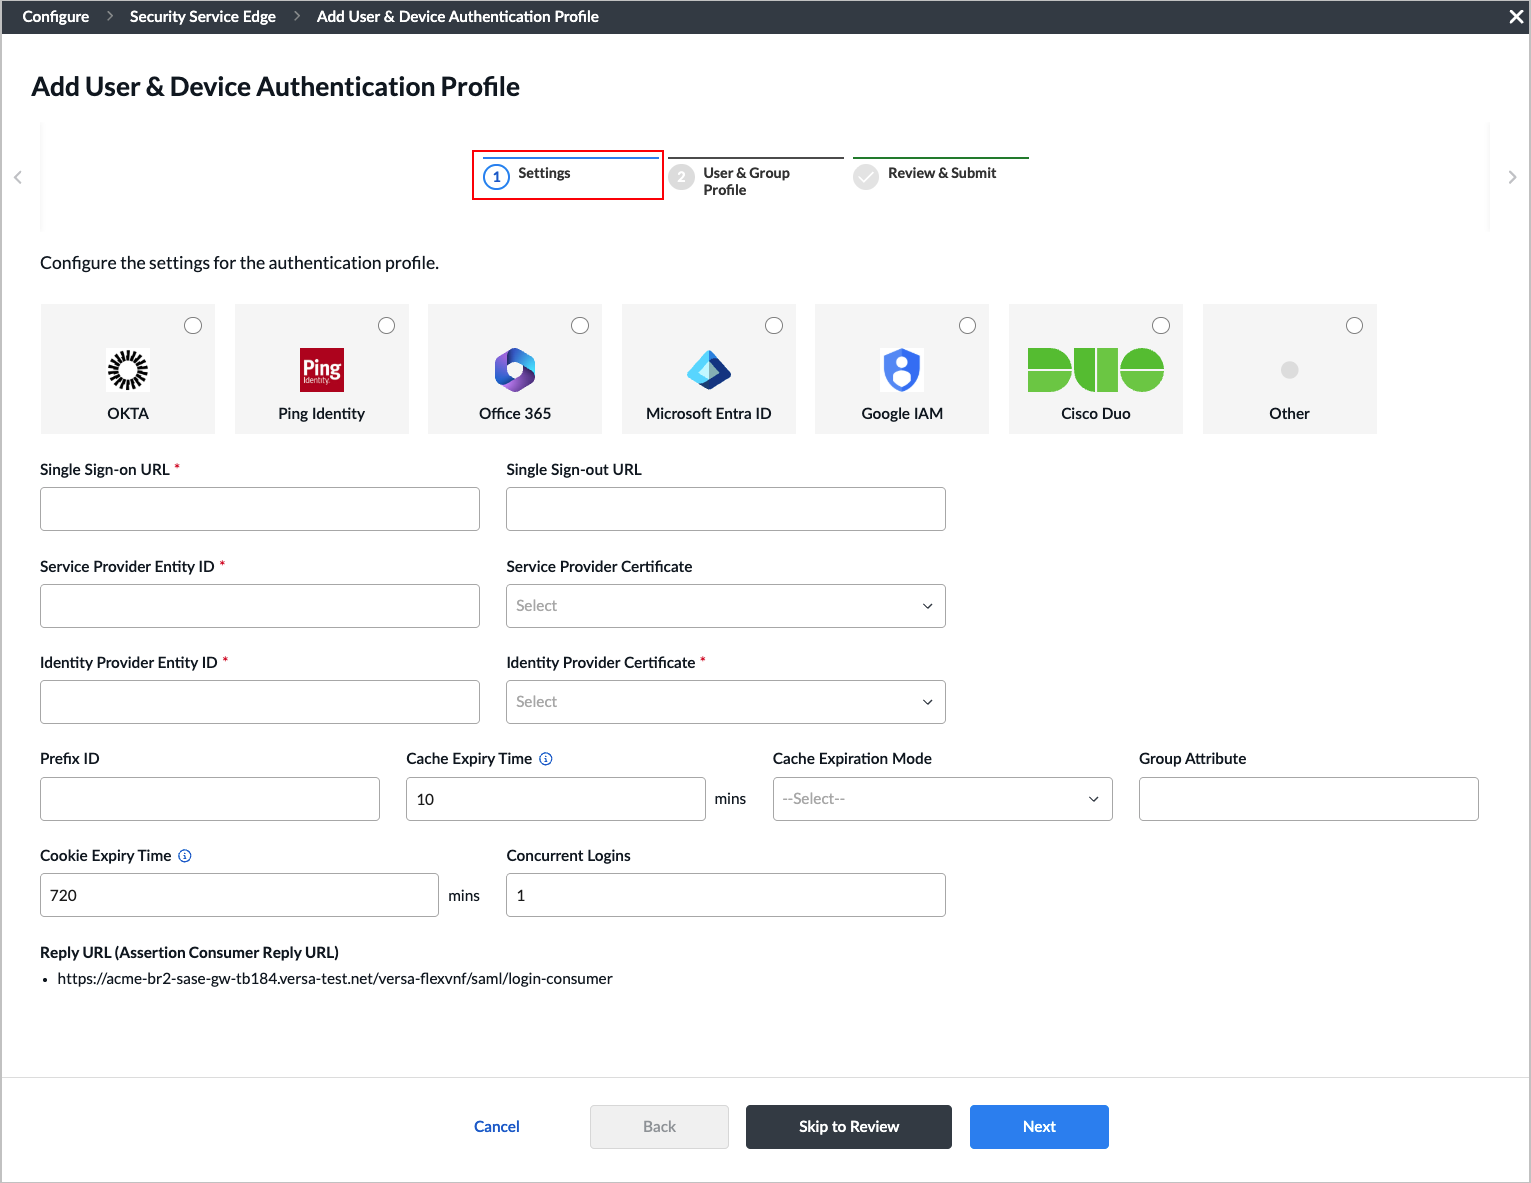
Field Description Select SAML Type Select the SAML type:
- Cisco Duo
- Google IAM
- Microsoft Entra ID
- Office 365
- Okta
- PingIdentity
- Other
Single Sign-on URL (Required) Enter the URL of the identify provider (IdP) to use for single sign-on. Single Sign-out URL Enter the URL to point to for single sign-out. Service Provider Entity ID (Required) Enter the entity ID of the service provider. Service Provider Certificate Select the certificate that the service provider uses to authenticate. Identity Provider Entity ID (Required) Enter the entity ID that uniquely identifies the SAML IdP. Identity Provider Certificate (Required) Select the authentication certificate issued by the IdP. Prefix ID Enter the name of the external IdP. Cache Expiry Time (mins) Enter the time after which the cache expires, in minutes. When the cache expiry time is reached, the user is logged out.
Default: 10 minutes
Cache Expiration Mode (For Releases 12.2.2 and later.) Select the mode to use to end a session:
- Fixed Interval—Use the time specified in the cache expiration as the time interval to end a session.
- Inactivity—Use the time specified in the cache expiration as the interval of inactivity after which to end a session.
Group Attribute Enter the SAML group attribute to identify group value from the SAML response. Cookie Expiry Time (For Releases 12.2.2 and later.) Enter the amount of time after which the cookie for the authentication profile expires, in minutes. When the cookie expires, the user will need to log in again.
Default: 720 minutes
If you do not manually configure the cookie expiry time, the default value of 720 minutes is applied and this value will take precedence over the Cache Expiry Time in VOS. Also, the "Caching mode" is set to hybrid internally and is not configurable."
Note that the default value is set to 720 minutes even if the Cookie Expiry Time field is blank in the Concerto UI.
Concurrent Logins Enter the number of concurrent logins allowed.
Range: 1 through 255
Default: 1
Reply URL (Assertion Consumer Reply URL) Enter the assertion consumer reply URL from which the application receives the authentication token. SAML also refers to this to as the Assertion Consumer Service (ACS). - Click Next. (For Releases 11.4.1 and later.) The Location of Users and User Groups screen displays. Enter information for the following fields.
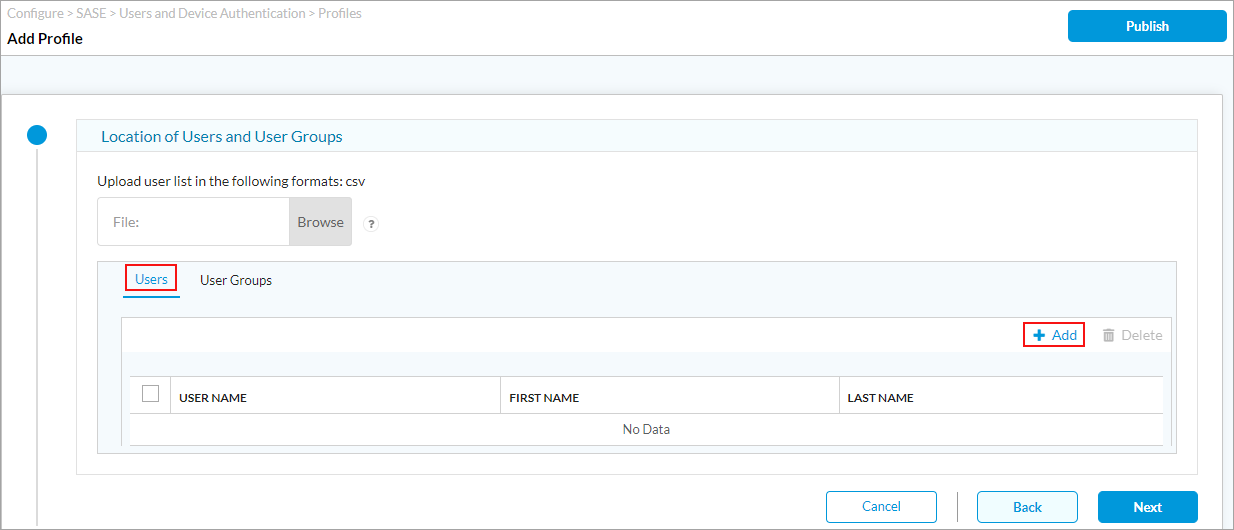
For Releases 12.1.1 and later, the following screen displays.

Field Description Upload user list in the following formats: csv If you select the Users tab in the Define Settings section, click File: Browse. In the popup window, select a user list file in CSV format to upload. Each line in the CSV file must be in the following format:
- User Name*, First Name, Last Name, Password*, Email*, Phone, Description, Group Name. (Note that fields marked with an asterisk (*) are mandatory.)
Users tab Click + Add to add a new user. In the Add User screen, enter the required information. When you select LDAP or SAML as the authentication type, the following screen displays:
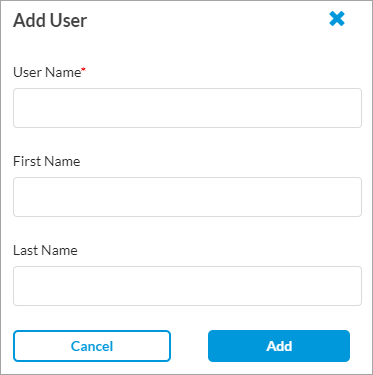
For Versa Directory, the following screen displays when you click + Add to add a user:
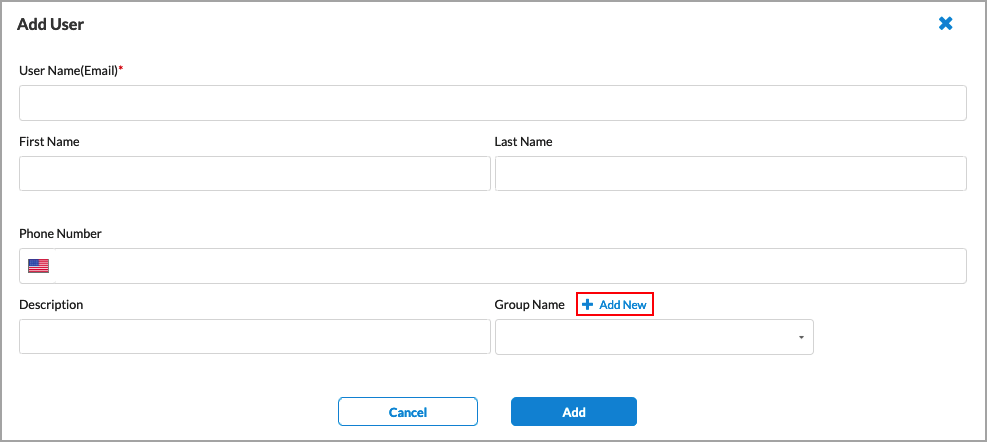
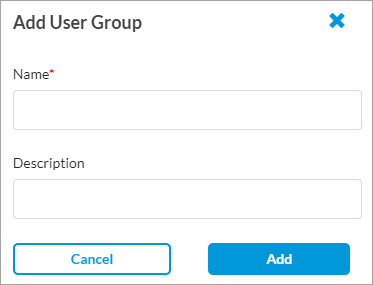
Click + Add New to add a new user group, as shown below in the User Groups tab.
Upload group list in the following formats: csv If you select the User Groups tab in the Define Settings section, click File: Browse. In the popup window, select a user group file in CSV format to upload. Each line in the CSV file must be in the following format:
- Group Name*, Description

User Groups tab Click + Add to add a new user group. In the Add User Group screen, enter the required information.
- Click Next. The Provide Information screen displays. This screen is common for all authentication types. Enter the information as described in Step 16.
- If you select RADIUS as the authentication type, the following screen displays. Enter information for the following fields.

Field Description IP Address (Required) Enter the IP address of the RADIUS server. Port (Required) Enter the port number to use on the RADIUS server. VPN Name Select the VPN instance to use to connect to the RADIUS server. Shared Secret Enter the RADIUS shared secret (password) string. Cache Expiry Time Enter the time in minutes after which the cache expires.
Default: 10 minutes
Concurrent Logins Enter the number of concurrent logins allowed.
Range: 1 through 255
Default: 1
- Click Next. The Location of Users and User Groups screen displays. Enter the information as described in Step 10.
- Click Next. The Provide Information screen displays. This screen is common for all authentication types. Enter the information as described in Step 16.
- If you select Versa Directory as the authentication type, the Location of Users and User Groups screen displays. Enter the information as described in Step 10.
- (For Releases 12.1.1 and later.) If you select User Certificate Based as the authentication type, the Add User Certificate Authentication Type screen displays. In the Settings screen, enter information for the following fields.
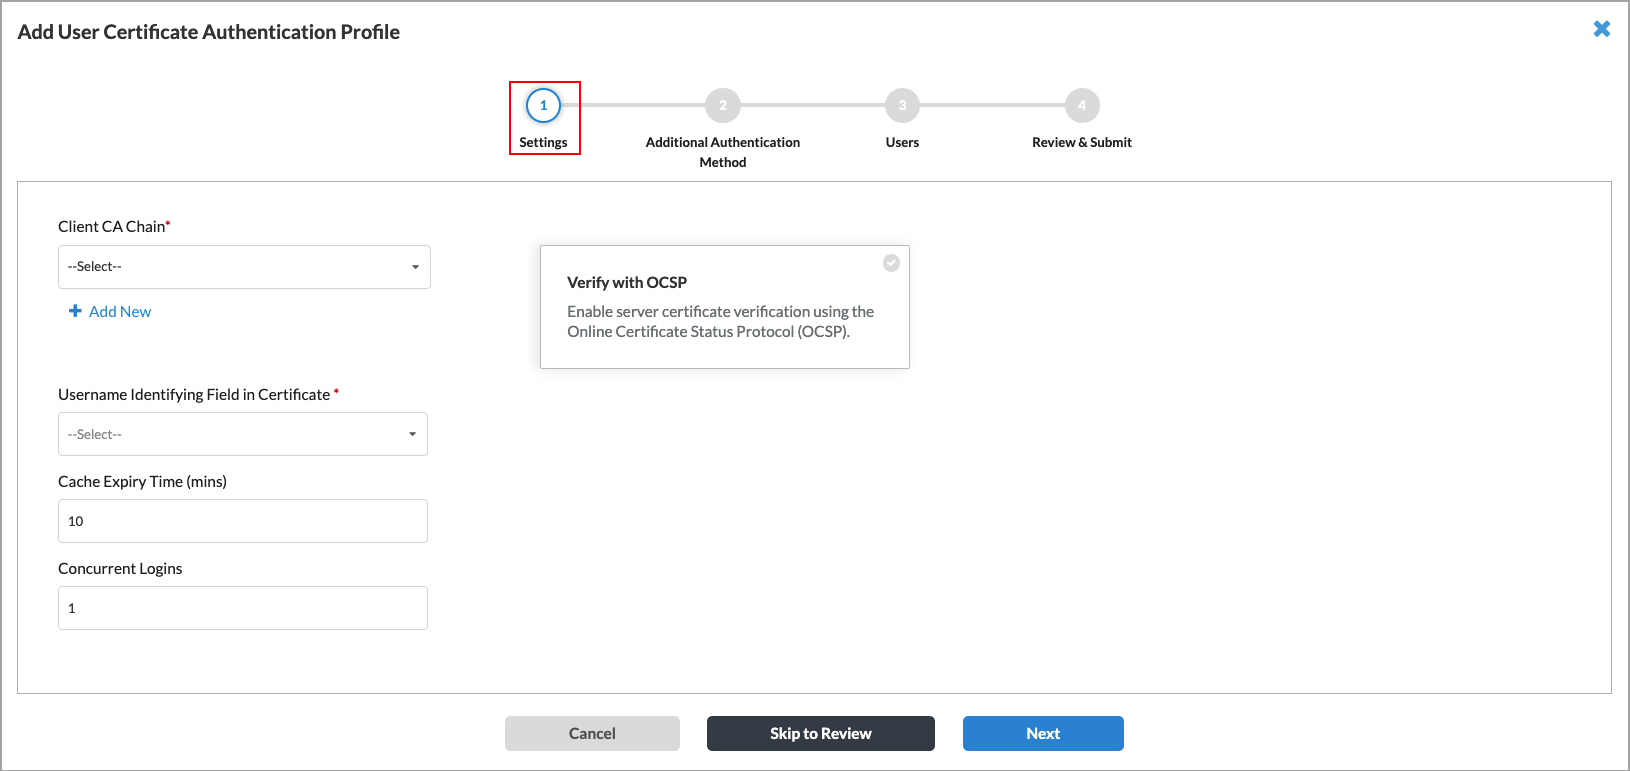
Field Description Client CA Chain (Required) Select the client CA certificate chain to authenticate the user. To add a new CA certificate, click + Add New. The Add CA Certificate window displays. For more information, see Configure SASE Certificates. Username Identifying field in Certificate (Required) Select the field that Concerto uses to validate a name match in the client certificate:
- Subject-Alternative-name Email
- Subject Alternative-name Principal Name
- Subject Common-name
Cache Expiry Time Enter the time in minutes after which the cache expires.
Default: 10 minutes
Concurrent Logins Enter the number of concurrent logins allowed.
Range: 1 through 255
Default: 1
Verify with OSCP Click to enable verification of server certificate using Online Certificate Status Protocol (OCSP). The following fields display:
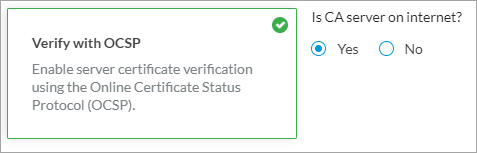
Yes is selected by default and if you select Yes, Concerto uses the CA server on the internet for OCSP verification.If you select No, enter the VPN name to check for to server certificate.
- Click Next or select Step 2, Additional Authentication Method. The following screen displays.

- To enable multi-factor authentication using LDAP or SAML profiles, slide the Multi-factor Authentication Disabled toggle. This is disabled by default.
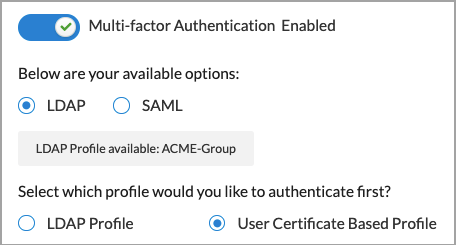
- If LDAP and SAML profiles are configured, the profiles display.
- (Releases 12.1.1 and earlier) Click Add Profile to add a profile. For adding LDAP profiles, follow Step 5 through 7 and for SAML profile, follow Steps 9 through 11.
- Click Next. The Users and User Groups screen displays. Enter the information as described in Step 10.
- (For Releases 12.1.1 and later.) If you select Device Certificate Based as the authentication type, the Add Device Certificate Authentication Type screen displays. In the Settings screen, enter information as described in Step 16.

- Click Next or select Step 2, Authentication Order. The following screen displays.

Field Description Prelogon Device Authentication (For Release 12.2.1) Click the slider bar to enable prelogon Device Authentication to authenticate using a device certificate instead of user credentials. Device Authentication Click the slider bar to enable Device Authentication to authenticate in postlogon with MFA using device certificate authentication and user credentials. If you enable device authentication, the following screen displays.
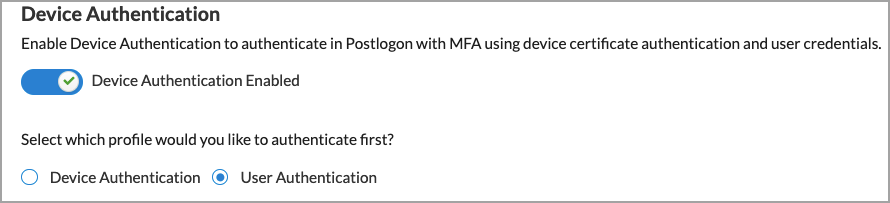
Select which profile to authenticate first.
- (For Release 12.2.1) Click Next.
- (For Releases 12.1.1 and earlier.) If you have configured a user certificate-based authentication profile, select Device Authentication or User Authentication to specify which profile to use first for authentication. Device Authentication is select by default.
- (For Releases 11.4.1 and earlier.) Click Next. In the Provide information screen, enter information for the following fields.
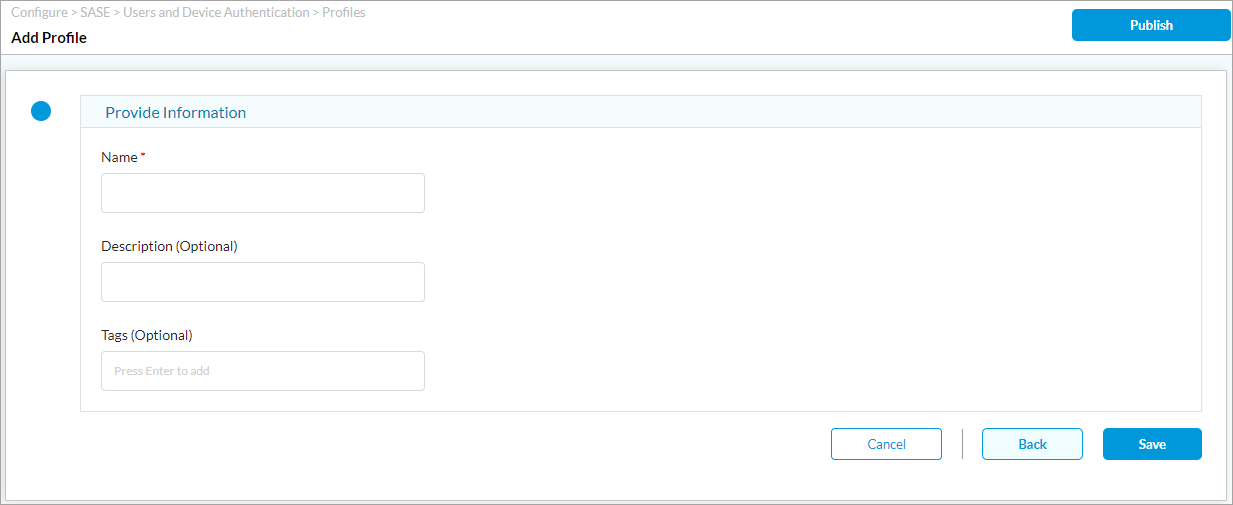
Field Description Name Enter a name for the authentication profile, for example, ACME-SAML-Profile or ACME-LDAP-Profile. Description Enter a text description for the text authentication profile. Tags Enter tags to associate with the authentication profile. - Click Save.
- (For Releases 12.1.1.) Click Next. The Review and Submit screen displays. This screen is common for all authentication types.

- In the General box, enter a name for the rule, and optionally, enter a text description for the rule and one or more tags.
- Review the selected settings. Click the Edit icon to change a setting, as needed.
- Click Save to create the authentication profile.
Configure Versa Directory Authentication Using an IAM Server
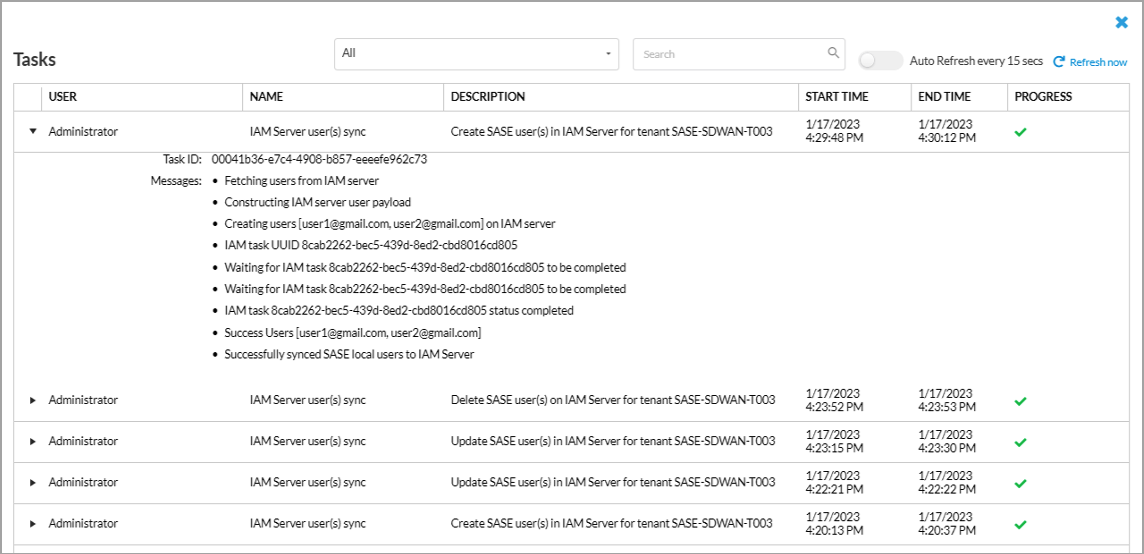
You can use an identity and access management (IAM) server to store local-user data and to send activation emails to local users. Concerto uses the users and groups profile to store user data and then uses IAM user APIs to store user data on the IAM server. IAM user API calls are asynchronous. You can track these calls in the Concerto Tasks screen, which opens after you complete and save the User and Groups configuration screen.
Note: Only newly created Users and Groups profiles use the IAM server.
To configure SSE IAM server information:
- Log in as a service provider system administrator.
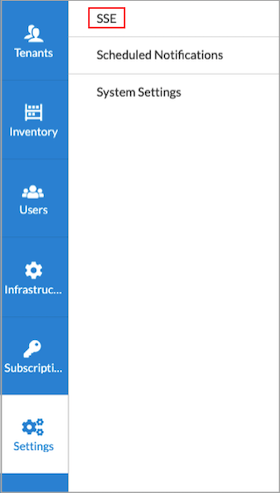
- Go to Settings > SSE.
- In the SSE Infrastructure Settings screen, enter information for the following fields.
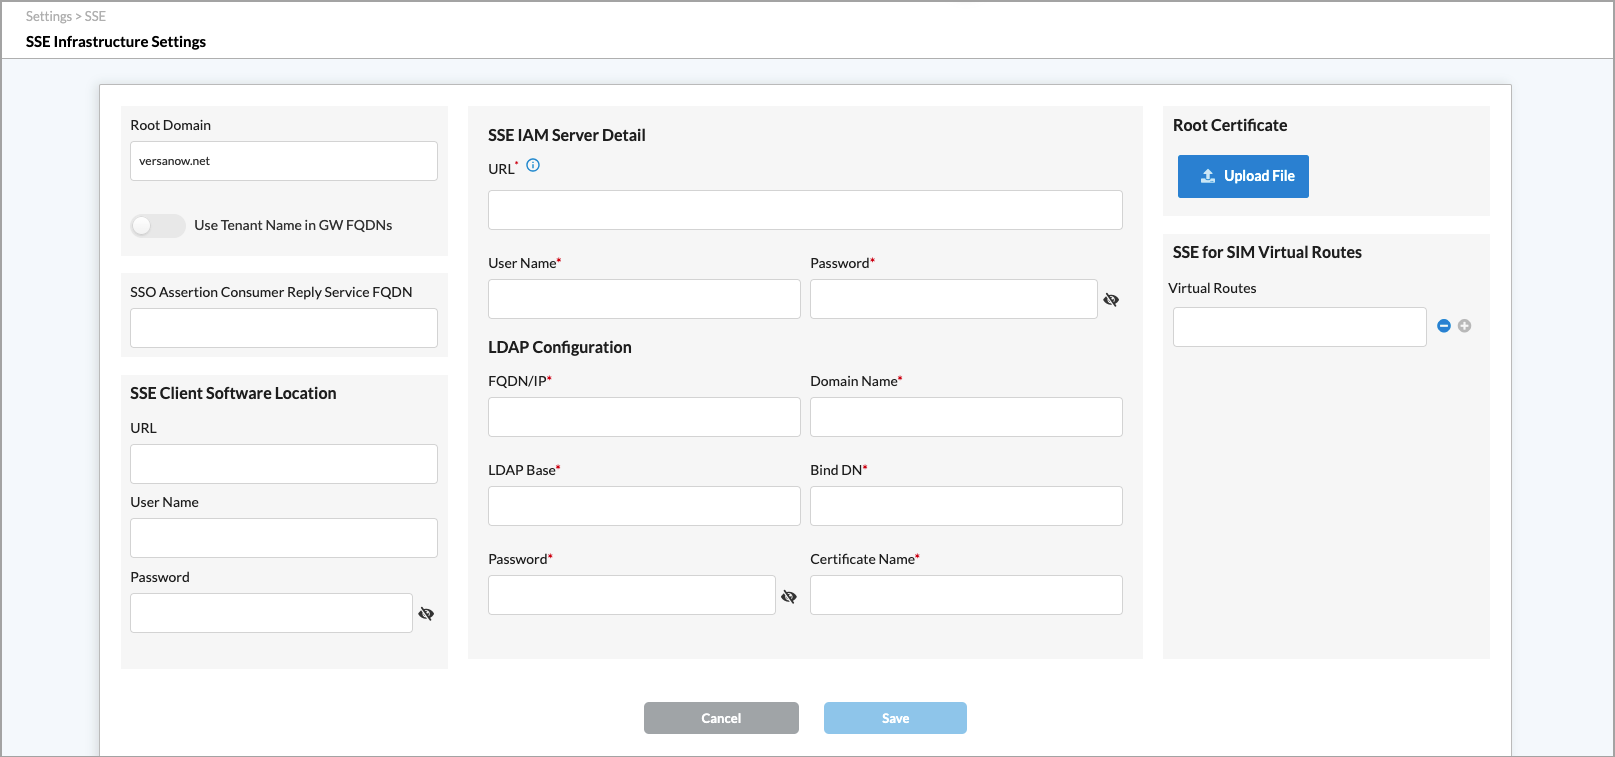
Field Description Root Domain Enter the root domain, for example, versanow.net. Use Tenant Name in GW FQDNs Click the slider to use the tenant name in the SSE gateway FQDNs.

SSE IAM Server Detail (Group of Fields) - URL
Enter the URL of the SSE IAM server. - Username
Enter the username to use for the SSE IAM server. - Password
Enter the password to use for the SSE IAM server. SSE Client Software Location (Group of Fields) - URL
Enter the URL where the SSE client software is located. - Username
Enter the username to use to access the SSE client software location. - Password
Enter the password to use to access the SSE client software location. LDAP Configuration (Group of Fields) - FQDN/IP
Enter the FQDN of the LDAP server. - Domain Name
Enter the LDAP domain name. - LDAP Base
Enter the LDAP base domain name. - Bind DN
Enter the bind distinguished name (DN) to use when logging in to the LDAP server. - Password
Enter the password that the bind DN uses when logging in to the LDAP server. - Certification Name
Enter the name of the certificate to use for the LDAP connection.
- Click Save.
Select Default User and Device Authentication Profile
For Releases 12.2.1 and later.
You can specify the default user and device authentication profile to authenticate the SSE clients of a tenant. Optionally, you can specify authentication profiles for specific domains.
To select the default user and device authentication profile:
- Go to Configure > Secure Access > Client-based Access > Settings.

The Settings screen displays with the Default Authentication Profile tab selected by default. Enter information for the following fields:

Field Description Default Authentication Profile Select the default user and device authentication profile for your tenant. For more information, see Configure User and Device Authentication Profiles, above. Define Authentication for Specific Domains (Group of Fields) Click the  Add icon to associate an authentication profile with an email domain. Click the
  Delete icon to delete.
 - Domains
Enter the email domain. - Authentication Profile
Select the authentication profile to associate with the email domain. - Click Save.
Use Case: Configure SAML-Based SSO Using Okta on Versa SWG
This section describes a use case for configuration and integration of SAML-based single sign-on (SSO) using Okta with the Versa Secure Web Gateway (SWG) solution for secure remote access.
Integrating SAML-based SSO using Okta with Versa SWG enables an enterprise to implement SSO for seamless and secure user authentication. This integration allows enterprise users to access corporate and cloud applications through Versa SWG while enforcing zero-trust policies based on identity, device compliance, and user context. The enterprise can enforce user identity-based security policies using Okta SAML authentication for all on-premise and remote users. Versa SWG uses SAML to delegate authentication to Okta Identity Provider (IdP), ensuring that users are verified before accessing web resources. This eliminates the need for multiple logins, enhances security, and ensures policy-based access control.
The following diagram shows a high level overview of how SAML integration works as a service provider-initiated IDP.

In the use case, the user initiates a connection (authentication request) through Versa secure access client to the Versa cloud gateway (service provider). Versa cloud gateway redirects the authentication request to Okta (IdP) and the user enters the username and password on the Okta login page. After authenticating the user, Okta sends a SAML response to the user's browser. Versa cloud gateway validates the SAML response received from the user's browser and provides user access to the network.
Configure Service Provider–Initiated SSO
To configure service provider–initiated SSO using Okta, you do the following:
In Okta:
- Create a SAML connection application in Okta
- Create Okta users and groups
- Gather information from Okta to use when configuring the SAML authentication profile in Concerto
In Concerto:
- Configure a User Authentication Profile in Concerto
- Configure User Restrictions for Secure Client Access
In Versa SASE Client:
Create a SAML Connection Application in Okta
To create a SAML connection application:
- Create an account in www.okta.com.
- Log in to the Okta administrative console with your credentials.
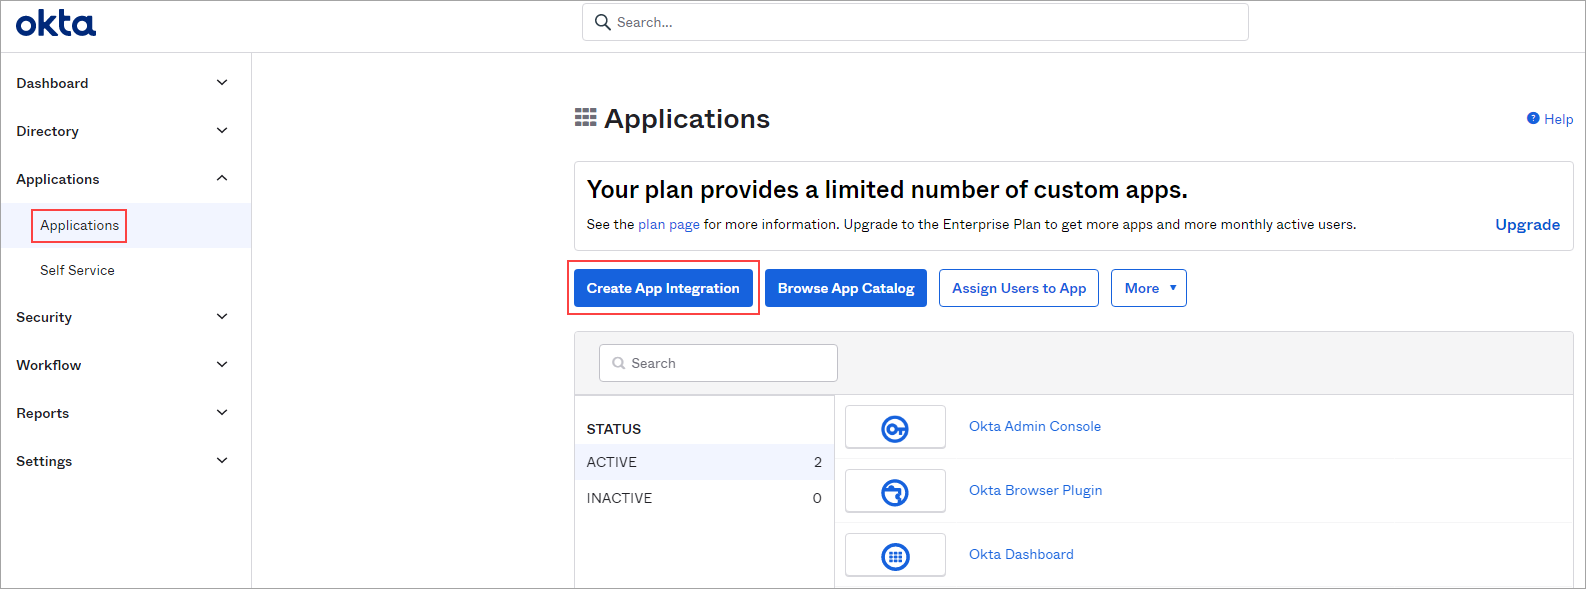
- In the left menu bar, select Applications > Applications.
- Click Create App Integration.
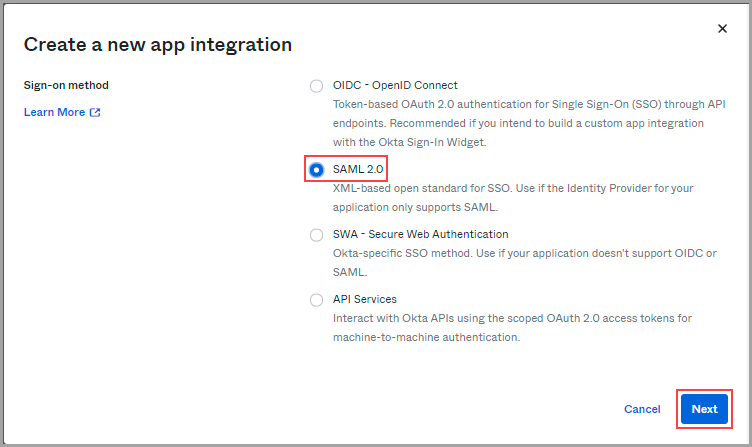
- In the Create a New App Integration window, click SAML 2.0, and then click Next.
- In the General Settings > App name field, enter an Application name, and then click Next.

- In Step 2, Configure SAML page, enter information for the indicated fields.
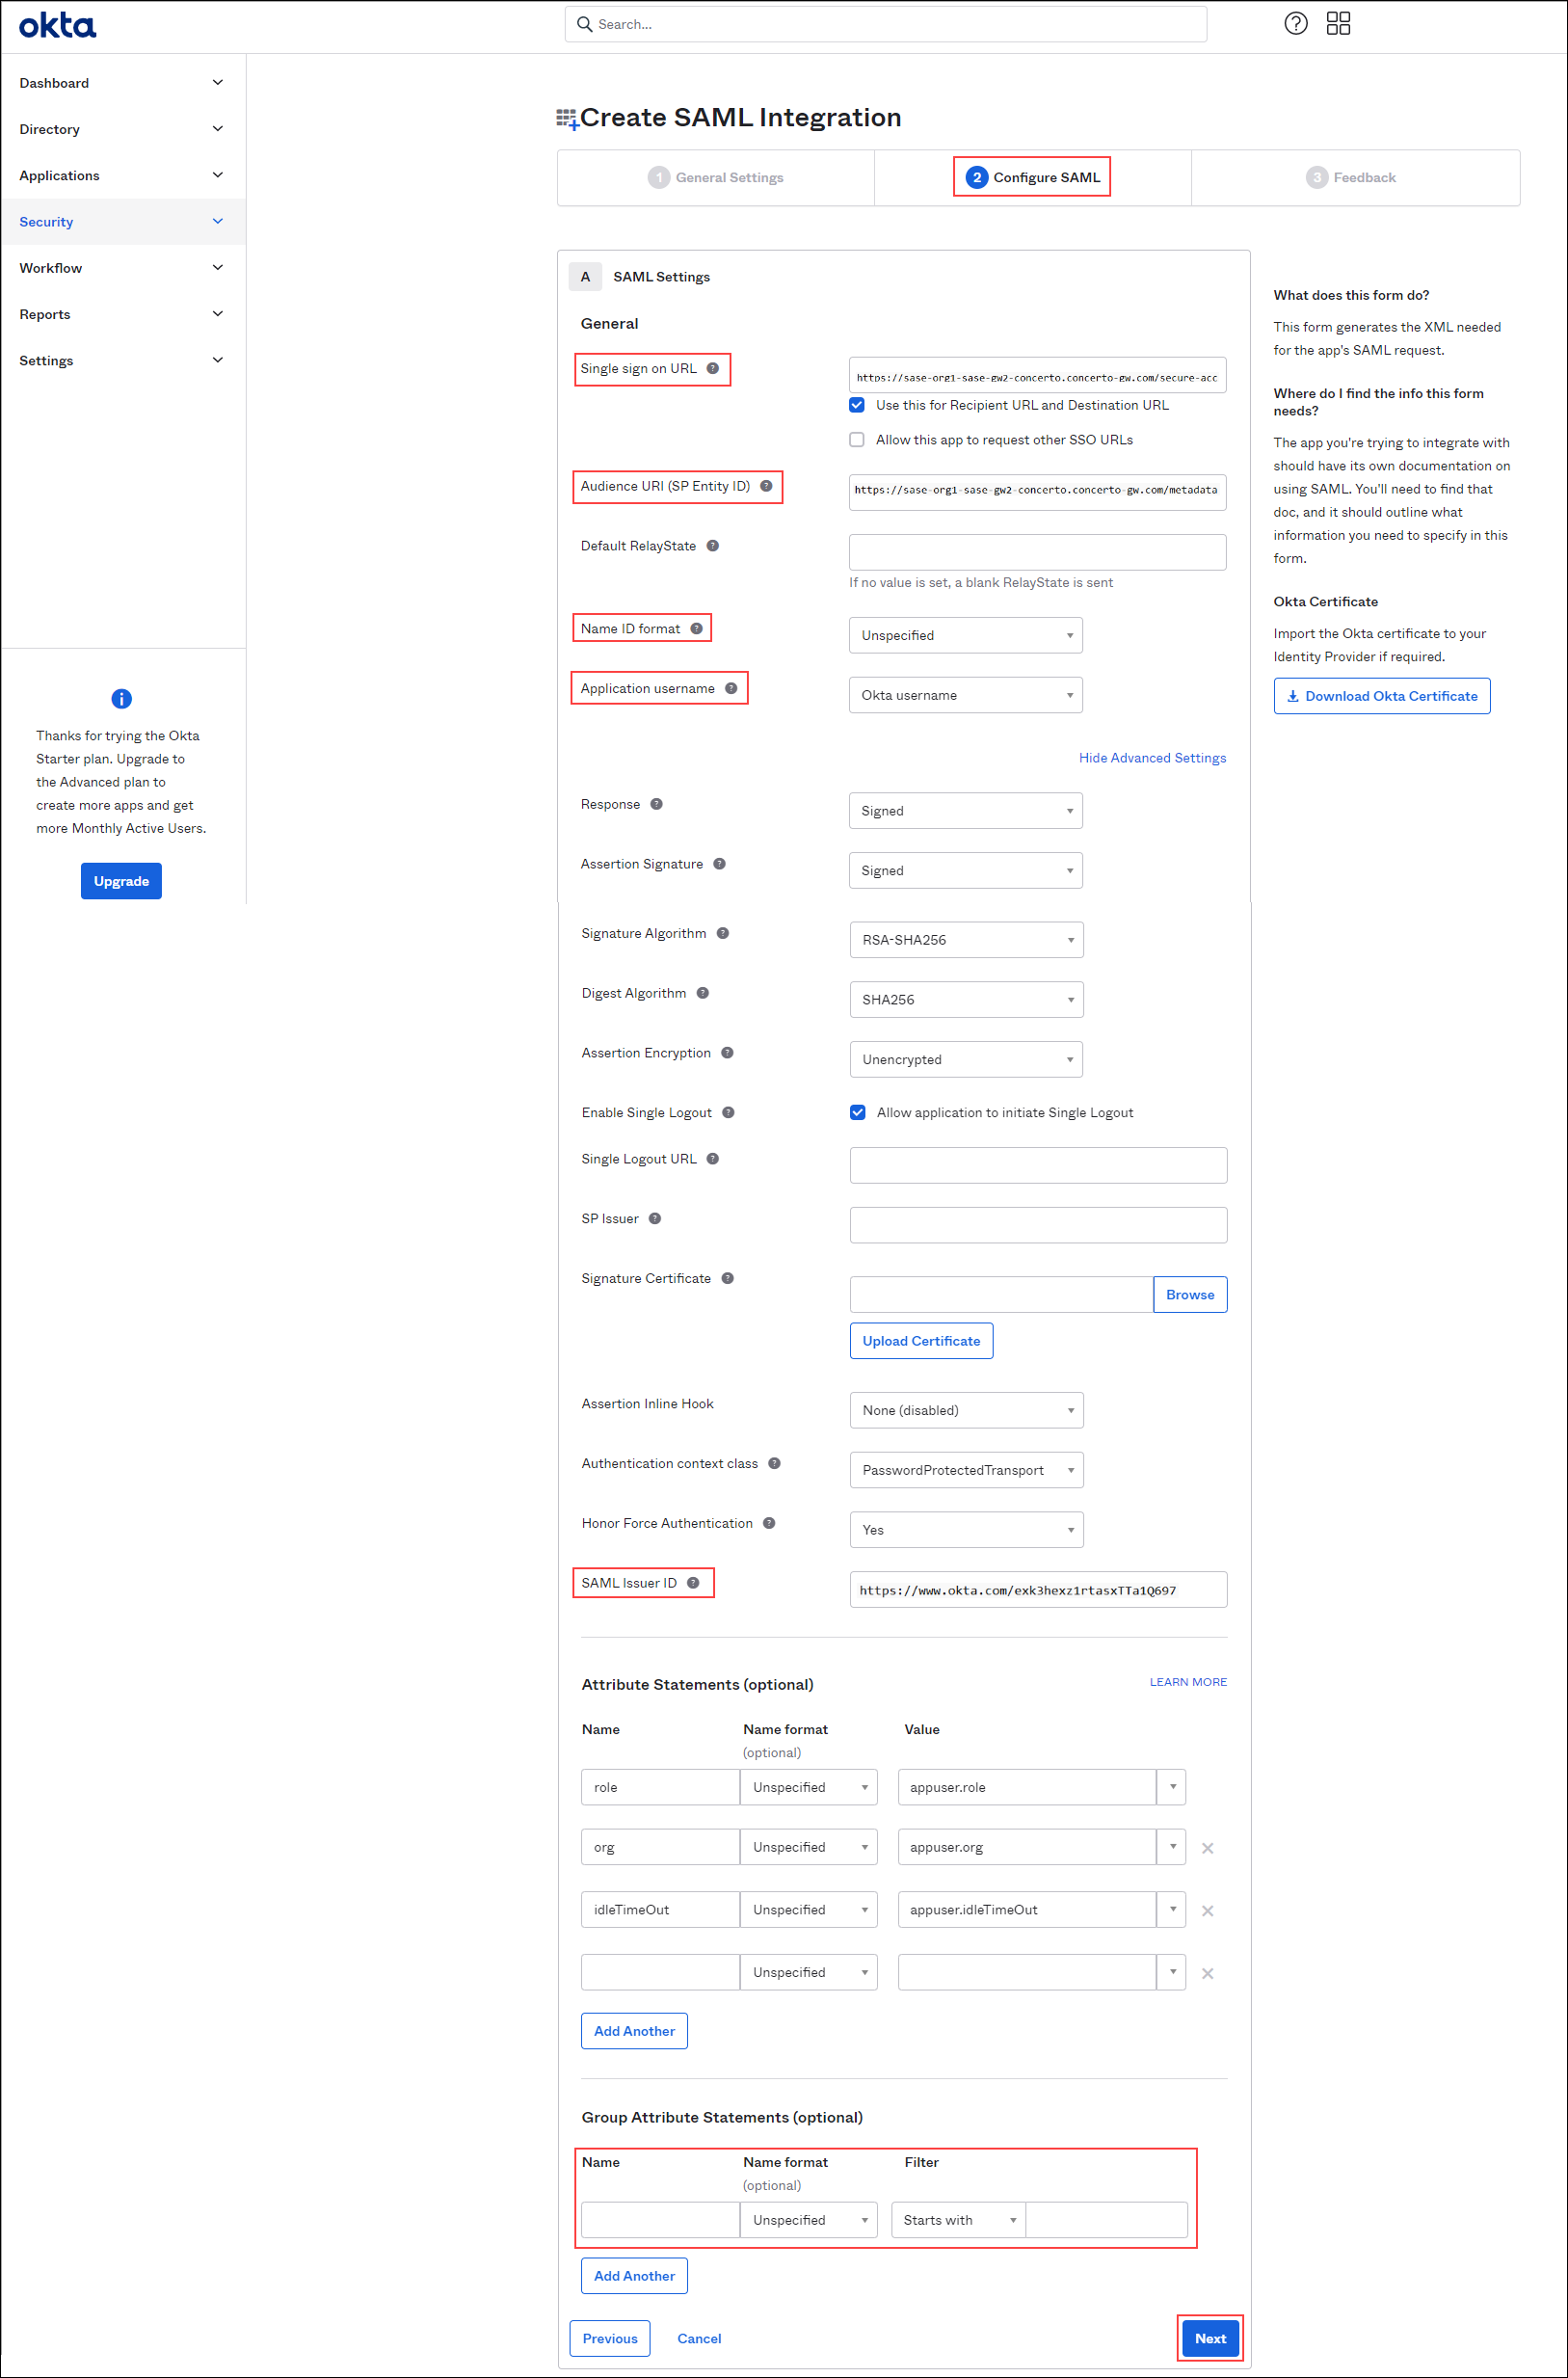
Field Description Single Sign-On URL Enter the URL of the identify provider (IdP) to use for single sign-on to which Okta sends OAuth responses. For this use case, the URL is https://sase-org1-sase-gw2-concerto.concerto-gw.com/secure-access/services/saml/login-consumer.
The SSO URL can be a gateway FQDN or a group FQDN and must be resolvable by a DNS server. If the DNS server cannot resolve the URL, you must manually add an entry in the local /etc/hosts file.
Audience URI (SP Entity ID) Enter the service provider entity ID. For example, https://sase-org1-sase-gw2-concerto.concerto-gw.com/metadata. Show Advanced Settings Click to display the advanced settings. Name ID Format Select EmailAddress. Application username Select the application user name as the Okta username. SAML Issuer ID The value for this field is auto-generated by OKTA. The SAML issuer ID is the unique identifier (entity ID) that Okta uses when acting as the Identity Provider (IdP) for an SAML application Group Attributes Statements Create group-based mappings in Versa Cloud Gateways, while creating internet protection rules and other user-based policies. - Name
Enter the group name schemas.microsoft.com/ws/2008/06/identity/claims/groups. - Name Format
Select Unspecified. - Filter
Select Matches regex and enter the value as .* - Click Next.
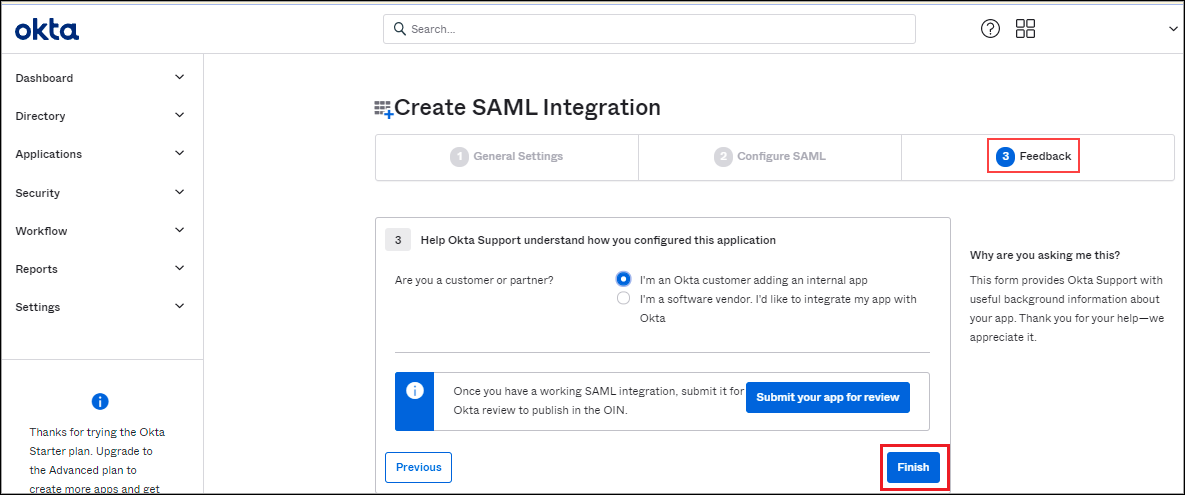
- In the Feedback page, click Finish to accept the default settings and complete the configuration.
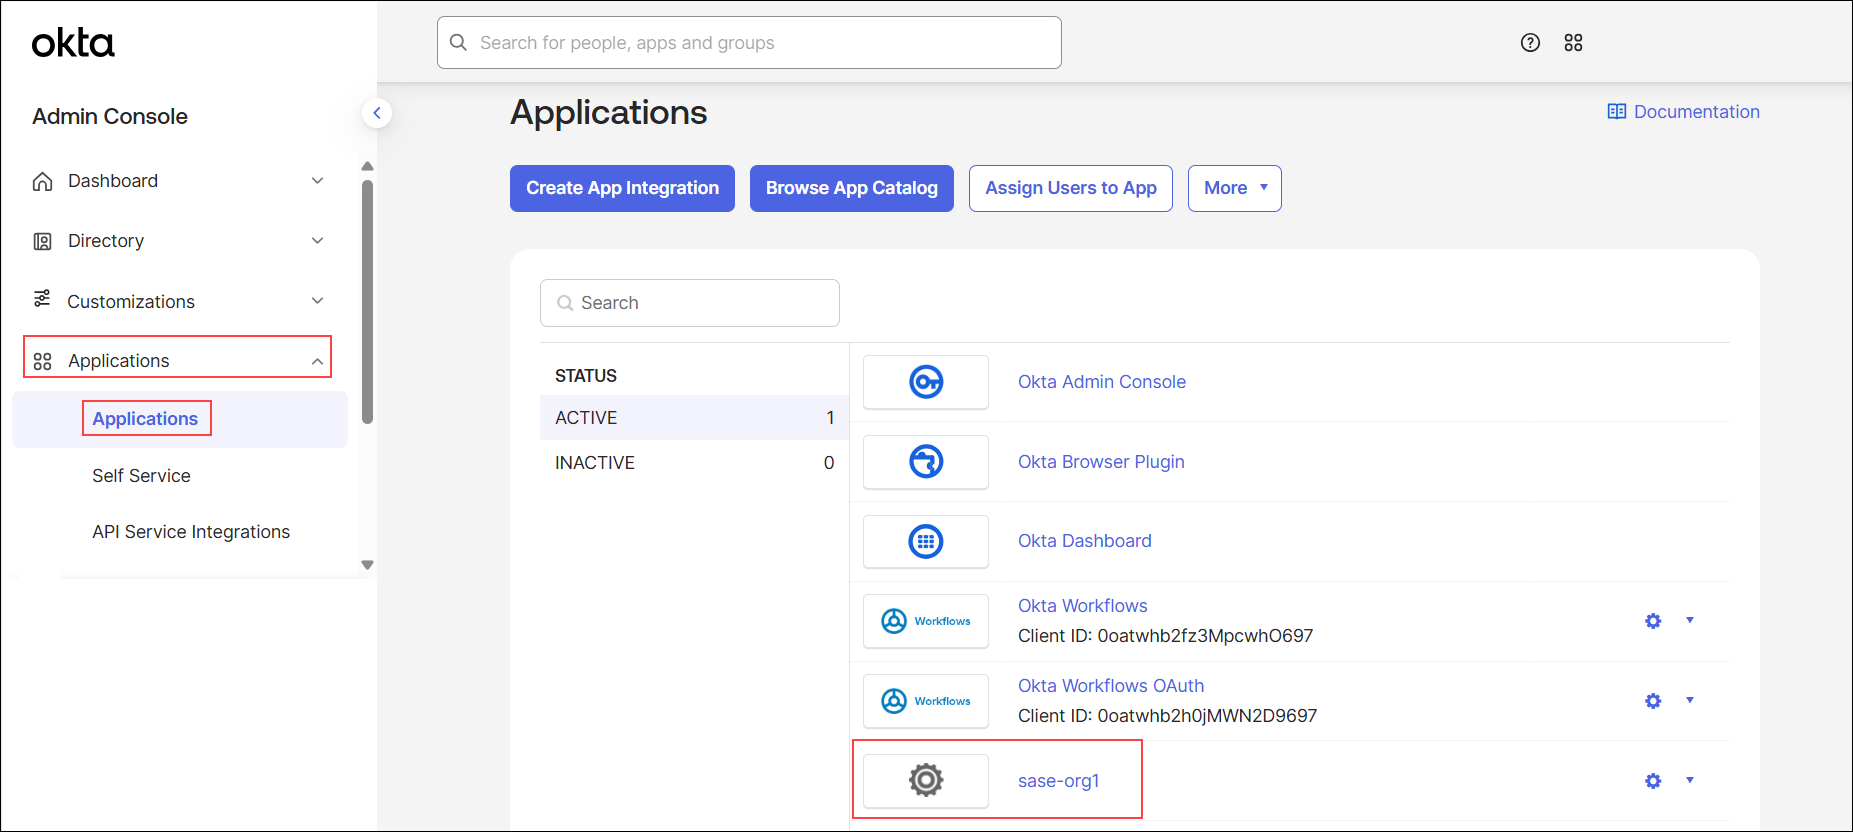
The newly created SAML connect application (here, sase-org1) displays in the Applications window.

Create Okta Users and Groups
To create groups and users:
- In the left menu bar, select Directory > Groups, and then click Add Group.

- In the Add Group window, enter a group name (here, ENGINEERING-GROUP) and description, and click Save.

- Click the
 Refresh icon in the web browser. The Groups page displays the newly created group (ENGINEERING-GROUP).

- To assign the SAML connect application to an Okta group:
- Click the group name (here, ENGINEERING-GROUP).
- Select the Applications tab, and then click Assign Applications.

- Click Assign towards the application, and then click Done.

- To create a new user:
- Select Directory > People in the left menu bar, and then click Add Person.

- In the Add Person window, enter the user information as per requirement.

Field Description User Type Select the user type as User. First Name Enter the first name. Last Name
Enter the last name. Username Enter a username. The username must be an email. Primary Email Enter a primary email. Secondary Email (Optional) Enter a secondary email. Groups (Optional) Enter the group name to which the user must be mapped. Activation Select Activate Now and enter a password. - Click Save.
- Select Directory > People in the left menu bar, and then click Add Person.
Gather Information from Okta for the SAML Authentication Profile Configuration
You need the SSO URL and IdP issuer information from Okta to configure the SAML SSO profile in Concerto.
To gather the SSO URL and IdP issuer information from Okta:
- In the left navigation bar, select Applications > Applications, and then click the SAML application created in Create an Application, above.
- Select the Sign On tab, and then click View SAML Setup Instructions.

- Make a note of the SSO URL and IDP issuer information, and click Download certificate.

- Download the certificate file and rename it with a .crt extension.
- Select the General tab, and then make a note of the metadata URL in the SAML Settings section.

Configure a User Authentication Profile in Concerto
You configure a user and device authentication profile in Concerto to define SAML SSO as the authentication method with Okta acting as the IdP.
To configure the authentication profile in Concerto:
- Log in to Concerto.
- Go to the Tenants dashboard screen and select a tenant.

- Go to Configure > Security Service Edge > User and Device Authentication > Profiles.
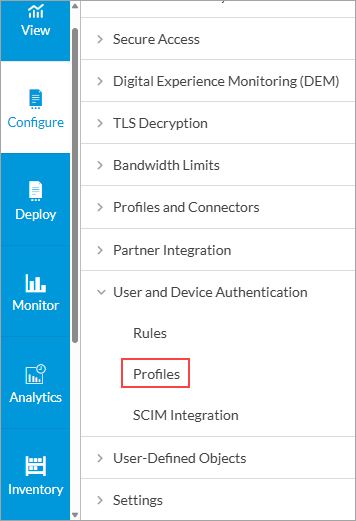
- In the User and Device Authentication Profile screen, click + Add.

- In the Add User and Device Authentication Profile screen, select SAML, and then click Get Started. The Add SAML Authentication Profile screen displays.

- Select step 1, Settings, and then enter information for the following fields. Note that this includes information that you gathered in Gather Information from Okta for SAML Authentication Profile in Concerto, above.

Field Description Select SAML Type Select the SAML type as Okta. Single Sign-on URL (Required) Enter the identity provider single sign-on URL retrieved from Okta. Service Provider Entity ID (Required) Enter the entity ID of the service provider retrieved from Okta. Identity Provider Entity ID (Required) Enter the entity ID (metadata URL) that uniquely identifies the SAML identity provider retrieved from Okta. Identity Provider Certificate (Required) Upload the identity provider certificate.
To upload the certificate:
- Click the + Add New button.
- In the Add Certificate /CA Chain/Private Key window, enter the CA chain name, and then click Upload File.

- Select the .crt file and click Add. The screen displays the details of certificate file uploaded.

Prefix ID Enter the prefix ID as Okta. - Click Next to go to step 2, Users and User Groups.
- Select the Group List tab and click + Add.

- In the Add User Group window, enter the user group that you created in the Okta application (here, Engineering-Group).

- Click Add. The user group displays under Groups.

- Click Next to go to step 3, Review and Submit.
- In the General section, enter a name for the SAML authentication profile. You can also enter a description and tags.

- Click Save. You can map multiple users and groups created on the Okta application to Versa SWGs for user validations, authorization, and traffic restrictions.
- Publish the configuration to the SWG. For more information, see Publish SASE Gateways.
Note: If automatic user and group provisioning is required, you can do it using system cross-domain identity management (SCIM) integration through Versa Messaging Service (VMS). See Provision SCIM Service on Versa SASE.
Configure User Restrictions for Secure Client Access
An enterprise administrator can control which users should connect to the SWG by mapping the SAML users and groups in the secure access client-based policy rules.
To configure user restrictions for secure client access:
- Go to Configure > Security Service Edge > Secure Access > Client-based Access > Policy Rules.
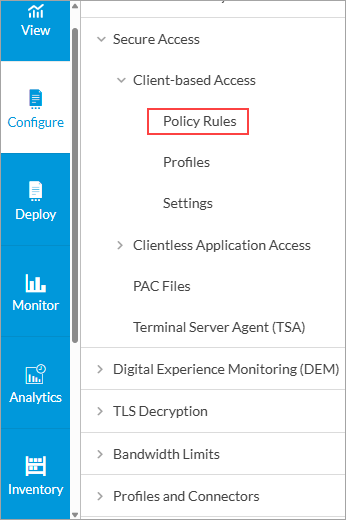
The Client-based Access Rules screen displays all configured secure client-based access rules.
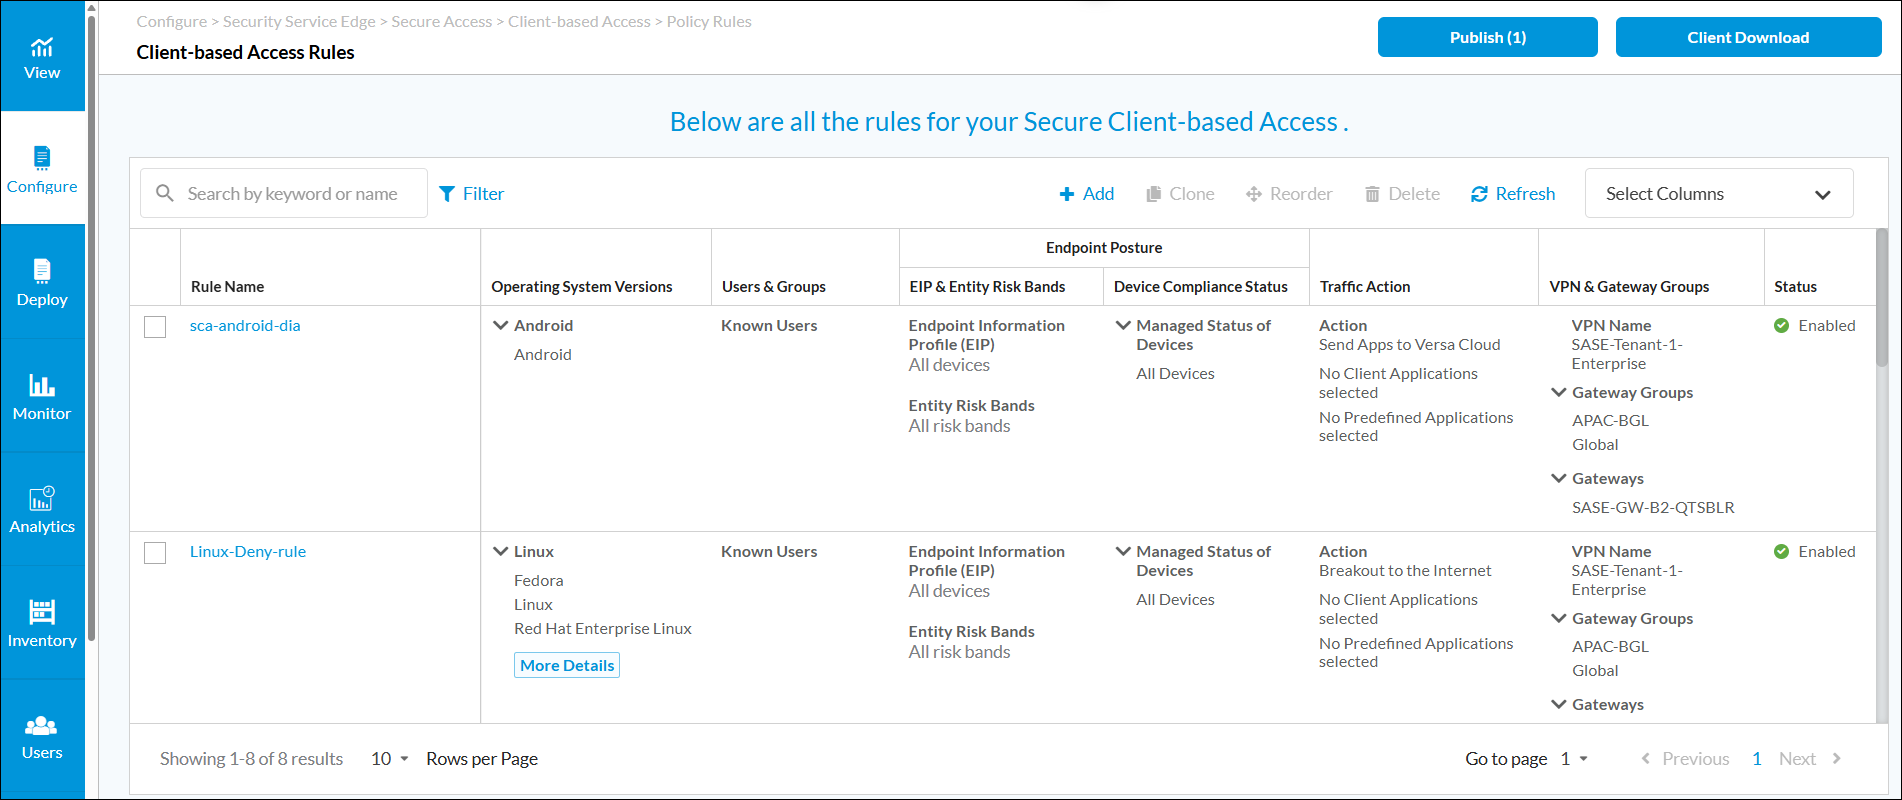
- Select a rule name to edit the rule.
- Select Step 2, Users and Groups, and then click Customize.

- Enter information for the following fields.

- In the Enable Rule drop-down, select SAML.
- Select the User Groups tab, and then select the name of the group to which to apply the rule in the Enable Rule drop-down list. The list of user groups is shown in the main pane.
- Select Step 9, Review and Configure, and then click Save.

- Publish the configuration to the SWG. For more information, see Publish SASE Gateways.
Connect to Versa SASE Client Using Okta
To verify that you can connect to Versa SASE client using Okta:
- Go to the Windows client and open Versa SASE client.
- In the SASE client home screen, click the
 Settings icon.

- In the settings screen, click the enterprise name (here, sase-org1) in the Enterprise list.

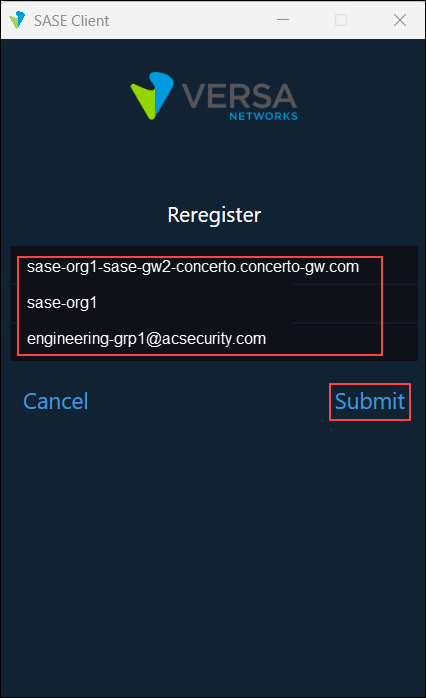
- In the enterprise settings screen, click Reregister.

- In the Reregister screen, enter the gateway FQDN, organization name, and Okta username, and then click Submit.
- In the Okta SSO portal, enter the username, and then click Next.

- Enter the multi-factor authentication code that you received on your mobile from the Okta application.

- Enter the Okta password, and then click Verify.

The SASE client screen displays that Okta is successfully registered to the portal.

- Select the gateway, and then click the Connect button.

Monitor the Users Connected to the SWG
To check if the users are connected using the correct username and password:
- Click Monitor, and then click on the Honeycomb button.

- Click on the region where the gateway is hosted. In this example, the gateway is hosted in the Chennai region.

- Click on the gateway where the user is connected, and then click Monitor Appliance.
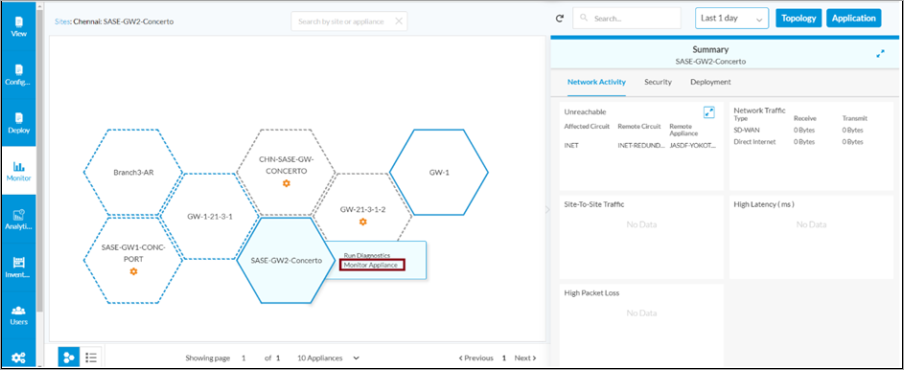
- Select the Services > NGFW > User Identification tab. In the Select drop-down list, select Live Users. The monitor screen displays live users connected to the gateway.

View Analytics Information for Secure Access Users
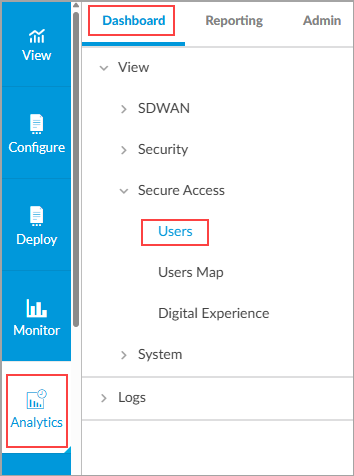
- To view Analytics information about a tenant's secure access users, select Analytics > Dashboard > Secure Access > Users.
- In the Dashboard tab, select a tenant.
- To view usage information, select the Usage tab. The Usage tab displays the following information for users connected to the gateway:
- Statistics per User
- Top users by Bandwidth
- Statistics per User

- To view registry information, select the Registry tab. The Registry tab displays the following charts and table:
- Top client OS
- Top secure access client version
- Appliances with secure access users
- Registrations

Supported Software Information
Releases 11.4.1 and later support all content described in this article, except:
- Release 12.1.1 adds support for device certificate and user certificate-based authentication profiles.
- Release 12.2.1 adds support for the VPN name option to include in the source address match list, and allows you to select a default user and device authentication profile for a tenant.
- Release 12.2.2 adds support for the cache expiration mode and cookie expiry time fields for SAML and LDAP authentication profiles.
Additional Information
Configure SASE User-Defined Objects
Configure User and Device Authentication