Configure Address Objects
![]() For supported software information, click here.
For supported software information, click here.
Traffic that enters Versa Operating SystemTM (VOSTM) devices through physical network interfaces (PNICs) or virtual network interfaces (VNICs) is associated with a security zone, which applies the appropriate zone protection to ensure that only clean traffic enters the VOS device. Versa SD-Security allows you to apply various types of security policies and profiles to the traffic it enters a security zone, including policies and profiles for stateful firewalls, DDoS, and SD-WAN. All these security policies have match criteria based on source zone, destination zone, source address, destination address, geolocation, IP headers, service, and schedule. When you define a security policy, you can configure objects such as addresses, address groups, services, schedules, and logging profiles. You can reuse these objects in multiple security policies.
This article describes how to configure address objects that you can include in security policies and profiles. For information about defining security policies that include address objects and address group objects, see Configure Security Access Policy Rules in the Configure Stateful Firewall article.
Configure Address Objects
An address object specifies match criteria based on source IP address, destination IP address, or a combination of both. You include address objects in a policy rule, and you can use the same address object in multiple policies and policy rules. The following table lists the limit for each feature of an address object:
| Feature | Limit |
|---|---|
|
Total number of address groups for each organization |
No limit |
|
Total number of address types for each address group |
6 |
|
Total number of IPv4 subnets for each address group |
32767 without address files and no limit for address files |
|
Total number of IPv4 ranges for each address group |
32767 without address files and no limit for address files |
|
Total number of IPv4 wildcards for each address group |
32767 without address files and no limit for address files |
|
Total number of IPv6 subnets per address group |
32767 without address files and no limit for address files |
|
Total number of FQDNs per address group |
32767 |
|
Total number of characters in an FQDN of an address group |
127 characters |
|
Total number of dynamic addresses for each address group |
32767 |
|
Total character length of an FQDN in a dynamic address of an address group |
127 characters |
|
Total character length of an address group name |
127 characters |
|
Total character length of an address group tag |
63 characters |
|
Total number tags in an address |
6 tags |
|
Total number of schedules for each organization |
No Limit |
|
Total number of characters in a schedule name |
31 characters |
|
Total number of characters in a schedule tag |
63 characters |
|
Total number of schedule tags |
6 tags |
|
Total number of services for each organization |
No Limit |
|
Total number of TCP source/destination ports for each service |
1 through 65535 |
|
Total number of UDP source/destination ports for each service |
1 through 65535 |
To configure an address object:
- In Director view:
- Select the Administration tab in the top menu bar.
- Select Appliances in the left menu bar.
- Select a device name in the main panel. The view changes to Appliance view.
- Select the Configuration tab in the top menu bar.
- Select Objects & Connectors > Objects > Address in the left menu bar.

- Click the
 Add icon. In the Add Address window, enter information for the following fields.

Field Description Name (Required) Enter a name for the address object.
Value: Text string from 1 through 255 characters
Default: NoneDescription Enter a text description for the address object.
Value: Text string from 1 through 255 characters
Default: NoneTags Enter a keyword or phrase that allows you to filter the address object.
Value: Text string from 1 through 255 characters
Default: NoneType and Address/Prefix
(Required)Select the type of IP address to match and the value to match. The name of the Address/Prefix field changes depending on the value you select in the Type field.
- IPv4 (type);
IPv4 Address/Prefix (match)
Evaluate the address match using an IP address within the IPv4 prefix specified in the IPv4 Address/Prefix field. This is the default. - IPv4 Wildcard Mask (type);
IPv4 Wildcard Mask (match)

Enter a wildcard mask for an IPv4 address. The bits in the mask can be on (1) or off (0). Only the bits that are enabled in the mask are used to determine whether an IPv4 address matches. For example, if you enter the IPv4 wildcard mask 100.100.0.0/255.255.0.0, the IP address 100.100.5.6 matches and the IP address 200.100.5.6 does not match. As another example, if you enter the IPv4 wildcard mask 1.1.0.1/255.255.0.255, the IP address 1.1.20.1 matches, while 1.1.20.5 does not match.
You can configure overlapping wildcard addresses.
A single session can match a maximum of 16 wildcard addresses.
You can configure wildcard address objects individually or as part of address groups.
You cannot combine an address prefix (or range) match with wildcard addresses to match a source or destination address.
You can define IPv4 address wildcard masks in address object rules used for rules in the following types of policies:
- Application QoS (App QoS)—For more information, see Configure CoS.
- Policy-based forwarding (PBF)—For more information, see Configure Policy-Based Forwarding.
- SD-WAN—For more information, see Configure SD-WAN Policy and Configure SD-WAN Traffic Steering.
- Security—For more information, see Configure NGFW.
You cannot use IPv4 address wildcard masks for rules in the following types of policies:
- CGNAT—For more information, see Configure CGNAT.
- HTTP/HTTPS proxy—For more information, see Configure HTTP/HTTPS Proxy.
- IP filtering—For more information, see Configure IP Filtering.
- QoS—For more information, see Configure CoS.
- IPv4 Range (type);
IPv4 Range (range)

Evaluate the address match using an IP address within the IPv4 address range specified in the IPv4 Range field.
- IPv6 Address/Prefix (type);
IPv6 Address/Prefix (range)

Evaluate the address match using any of the IP addresses within the IPv6 address range specified in the IPv6 Address/Prefix field.
- IPv6 Wildcard Mask (type);
IPv6 Wildcard Mask (match)

(For Releases 22.1.2 and later.) Enter a wildcard mask for an IPv6 address. The bits in the mask can be on (1) or off (0). Only the bits that are enabled in the mask are used to determine whether an IPv6 address matches. For example, if you enter the IPv6 wildcard mask 2002:E000::/20, the first 20 bits must be an exact match, and the IPv6 address must start with 2002:E.
You can configure overlapping wildcard addresses.
A single session can match a maximum of 16 wildcard addresses.
You can configure wildcard address objects individually or as part of address groups.
You cannot combine an address prefix (or range) match with wildcard addresses to match a source or destination address.
You can define IPv6 address wildcard masks in address object rules used for rules in the following types of policies:
- Application QoS (App QoS)—For more information, see Configure CoS.
- Policy-based forwarding (PBF)—For more information, see Configure Policy-Based Forwarding.
- SD-WAN—For more information, see Configure SD-WAN Policy and Configure SD-WAN Traffic Steering.
- Security—For more information, see Configure NGFW.
You cannot use IPv6 address wildcard masks for rules in the following types of policies:
- CGNAT—For more information, see Configure CGNAT.
- HTTP/HTTPS proxy—For more information, see Configure HTTP/HTTPS Proxy.
- IP filtering—For more information, see Configure IP Filtering.
- QoS—For more information, see Configure CoS.
- FQDN (type);
FQDN (match)
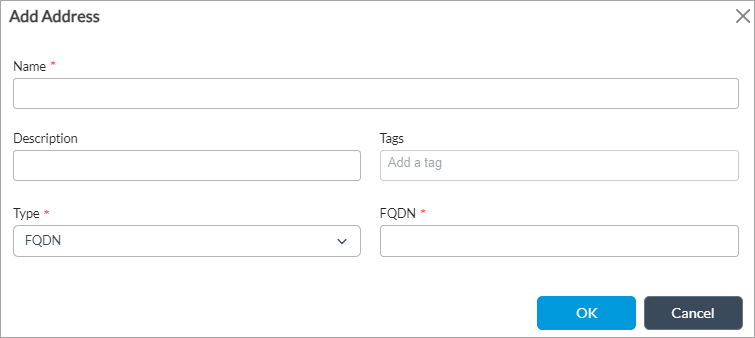
Evaluate the address match using an IP address returned in a DNS query that resolves the fully qualified domain name (FQDN) into an IP address. The FQDN cannot contain any wildcard characters. Ensure that you also configure a routing instance through which the DNS server is reachable so that the VOS device can resolve the FQDN. For more information, see Configure DNS Servers.
- Dynamic Address (type);
no range
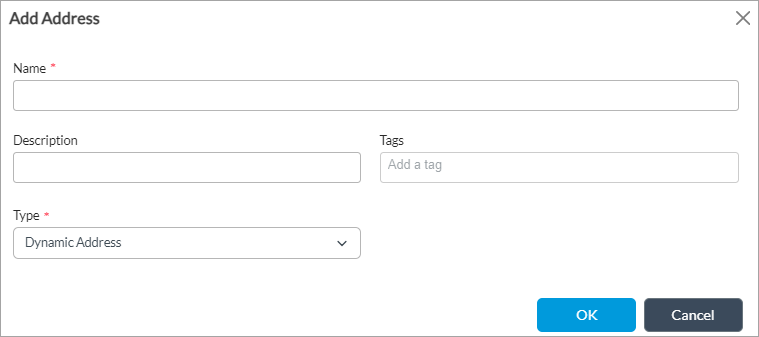
(For Releases 22.1.3 and later.) Use a dynamic address object, which is a container for an IP address list that can change dynamically. Using dynamic addresses in a policy allows you to perform a configuration before the IP addresses are known, thus avoiding the need to update the configuration each time IP addresses are added or deleted. You typically configure dynamic address objects for hosts whose IP addresses may change later, for example, if you are performing a live migration of virtual machines (VMs) using the vSphere vMotion technology to migrate a VM from one cluster to another, which changes the IP address of the VM.
To configure a dynamic address object, issue the set orgs org-services tenant name objects addresses address object name dynamic-address CLI command.
To update the list of IP addresses associated with a dynamic address object without updating the configuration, issue the request orgs org-services tenant name objects dynamic-address add name tenant name address private-internet-IP address CLI command.
- IPv4 (type);
- Click OK.
View References to and Edit Address Objects
For Releases 22.1.3 and later.
For address objects that you have created, you can display the templates and devices that reference them. If the address object is referenced by a common template, also called a datastore template, different service templates for the same tenant can refer to the same address objects. When the address objects are displayed, you can edit them.
To view and edit the references to an address object:
- In Director view:
- Select the Administration tab in the top menu bar.
- Select Appliances in the left menu bar.
- Select a device name in the main panel. The view changes to Appliance view.
- Select the Configuration tab in the top menu bar.
- Select Objects & Connectors > Objects > Address in the left menu bar.
- Click the
 vertical ellipsis to view the references to the address object.

- In the Address horizontal bar, click an item in the Instance Occurrence column to display where the address objects are referred.

- Click
 Edit icon to edit the address object.
Delete Address Object References
For Releases 22.1.3 and later.
You can delete an object reference, which allows you to delete it from a template or device.
To delete an address object reference:
- In Director view:
- Select the Administration tab in the top menu bar.
- Select Appliances in the left menu bar.
- Select a device name in the main panel. The view changes to Appliance view.
- Select the Configuration tab in the top menu bar.
- Select Objects & Connectors > Objects > Address.
- Select the device, and then click the
 Delete icon.

- In the Confirm Delete popup window, click Yes.

- If an address object is referenced in a template or device, a popup window displays.

- To view the address object references, click View Reference.
- Click Delete Anyway to delete the address object reference.
Upload Address Files
You can upload address files to block (deny list) or allow (accept list) an IP address or a group of IP addresses. You can then associate an address file with an address group and apply the address group to a security access policy. Depending on the policy, the addresses are allowed or blocked.
The address file must be a text file saved in CSV format.
Each entry must include the following:
- Name—Name of the address file to associate with the IP address or IP address group
- Type—IPv4-prefix, IPv4-range, IPv6-prefix, or IPv6-range
- Value—IP address, subnet mask, or range
For example:
address_list1,ipv4-prefix,167.114.0.0/16
address_list2,ipv4-range,223.252.16.1-223.252.16.10
address_list3,ipv4-prefix,223.252.11.0/24
address_list4,ipv6-prefix,2a03:2880:2040:7f21:face:b00c:0:25de/128
address_list5,ipv6-prefix,2a03:2880:2040:7f21:face:b00c::/96
If you create a Microsoft Excel file and save it as a .csv file, you must enter the Name, Type, and Value data in separate columns without commas after each entry. For example:
| Row | Name | Type | Value |
|---|---|---|---|
| 1 | address_list1 | ipv4-prefix | 167.114.0.0/16 |
| 2 | address_list2 | ipv4-range | 223.252.16.1–223.252.16.10 |
| 3 | address_list3 | ipv4-prefix | 223.252.11.0/24 |
| 4 | address_list4 | ipv6-prefix | 223.252.11.0/24 |
| 5 | address_list5 | ipv6-prefix | 2a03:2880:2040:7f21:face:b00c:0:25de/128 |
| 6 | address_list6 | ipv6-prefix | 2880:2040:7f21:face:b00c::/96 |
Note that if you upload a file that has the same name as an existing file, it replaces the existing file and overwrites all the addresses in the file.
To upload an address file:
- In Director view:
- Select the Administration tab in the top menu bar.
- Select Appliances in the left menu bar.
- Select a device name in the main panel. The view changes to Appliance view.
- Select the Configuration tab in the top menu bar.
- Select Objects & Connectors > Objects > Custom Objects > Address Files in the left menu bar. The main pane displays a table of uploaded address files, and the Director tab in the horizontal menu is selected.

- Click the
Upload icon. The Upload Address Files to Director popup window displays.

- Click Browse, select an address file, and then click OK. The main pane displays the address file that has been uploaded to the Director node.
- Select the Appliance tab.
- Click the
Upload icon. The Upload Address Files to Appliance popup window displays.

- In The Filename field, select an address file. This drop-down list displays the files that you upload from the Director tab.
- Click OK.
Configure Address Group Objects
You can group website addresses, address objects, and other address groups to form address groups. Grouping addresses allows you to collectively apply the same security policies and rules to multiple addresses that require the same security handling instead of having to apply security policies to addresses individually.
To configure address group objects:
- In Director view:
- Select the Administration tab in the top menu bar.
- Select Appliances in the left menu bar.
- Select a device name in the main panel. The view changes to Appliance view.
- Select the Configuration tab in the top menu bar.
- Select Objects & Connectors > Objects > Address Groups. The main pane displays the configured address group objects.

- Click the
 Add icon. The Add Address Group window displays. If you select Static as the value for Type, the following screen displays. Enter information for the following fields.

Field Description Name (Required) Enter a name for the address group object.
Value: Text string from 1 through 255 characters
Default: NoneDescription Enter a text description for the address group object.
Value: Text string from 1 through 255 characters
Default: NoneTags Enter a keyword or phrase that allows you to filter the address object.
Value: Text string from 1 through 255 characters
Default: NoneType (For Releases 22.1.1 and later.) Select the address type for the group:
- Static (default)
- Dynamic
If you select Static, the following fields display in the lower part of the screen:

- Address—Click the
icon to select IP addresses or address groups to add to the address group object. Click +New Address to add a new address object. For more information, see Configure Address Objects, above.
- Address File—Click the
icon to select an address file. For more information about uploading address files, see Upload Address Files, above.
Select Dynamic to add dynamic IP addresses address for cloud resources. The following screen displays:

(For Releases 22.1.1 and later.) Click + Add in the Match Terms (OR) section to add matching terms. The Add Match Terms (OR) screen displays.
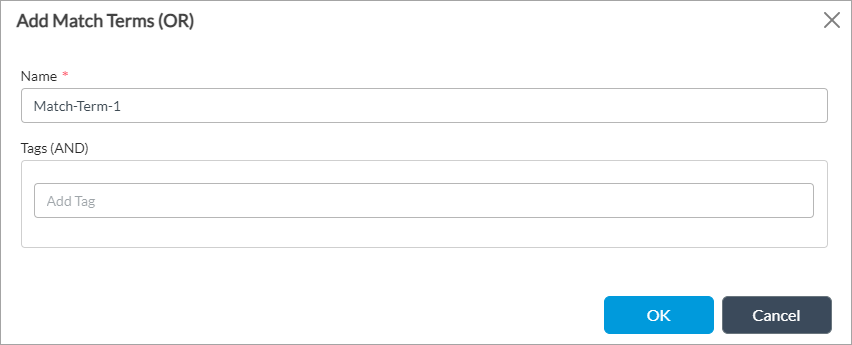
- Match Term—Enter a name for the match term. The term Match Term displays by default followed by the serial number of the match term, which you can edit. For example, the first match term name display sas Match-Term-1.
- Tags (AND)—If cloud workload protection (CWP) is enabled for the CMS connector, this field displays the tags for the cloud service provider associated with CMS connector. You can select the necessary tag. If cloud resource tags are not displayed, you can enter custom tags. For more information, see Add a CMS Connector.
- Click OK.
Upload IP Subnet CSV File for Tag Mapping
For Releases 23.1.1 and later.
You can upload an IP subnet CSV file and use tags associated with IP subnets in the dynamic address group, and apply the address group to a security access policy. The address file must be a text file saved in CSV format. You must follow the file naming convention versa-ip-subnet-tag-mapping.csv, which has the IP addresses and tags.
Note that when you upload an IP subnet file, it overwrites the existing IP subnet file on the server.
To upload an IP subnet file:
- In Director view, select the Administration tab in the top menu bar.
- Select Organizations in the left menu bar.
- In the Organizations dashboard, select an organization, and then click IP Subnets in the top-right corner of the screen.
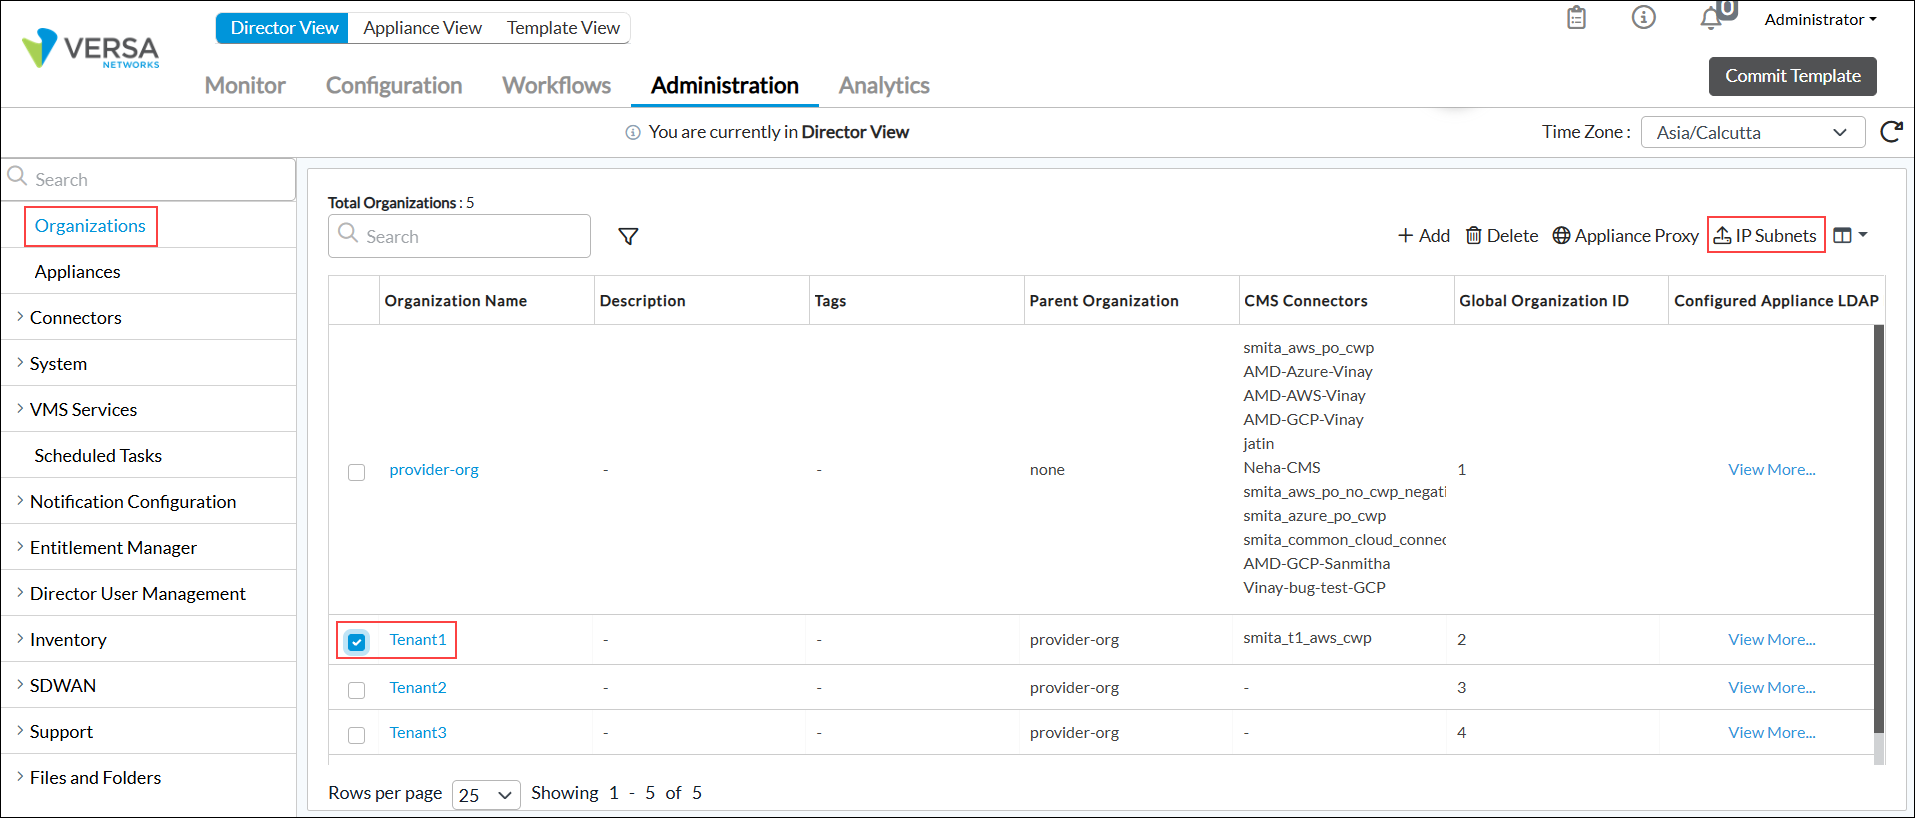
- In the Upload IP Subnets window, click Browse and select an IP subnets file to upload. The file must be in CSV format.

- Click OK.
Apply an Address Object to an Access Policy
You apply an address object, address or address group, to a security access policy. To define and configure a security access policy, see Configure Security Access Policy Rules in the Configure Stateful Firewall article.
To apply an address object to an access policy:
- In Director view:
- Select the Administration tab in the top menu bar.
- Select Appliances in the left menu bar.
- Select a device name in the main panel. The view changes to Appliance view.
- Select the Configuration tab in the top menu bar.
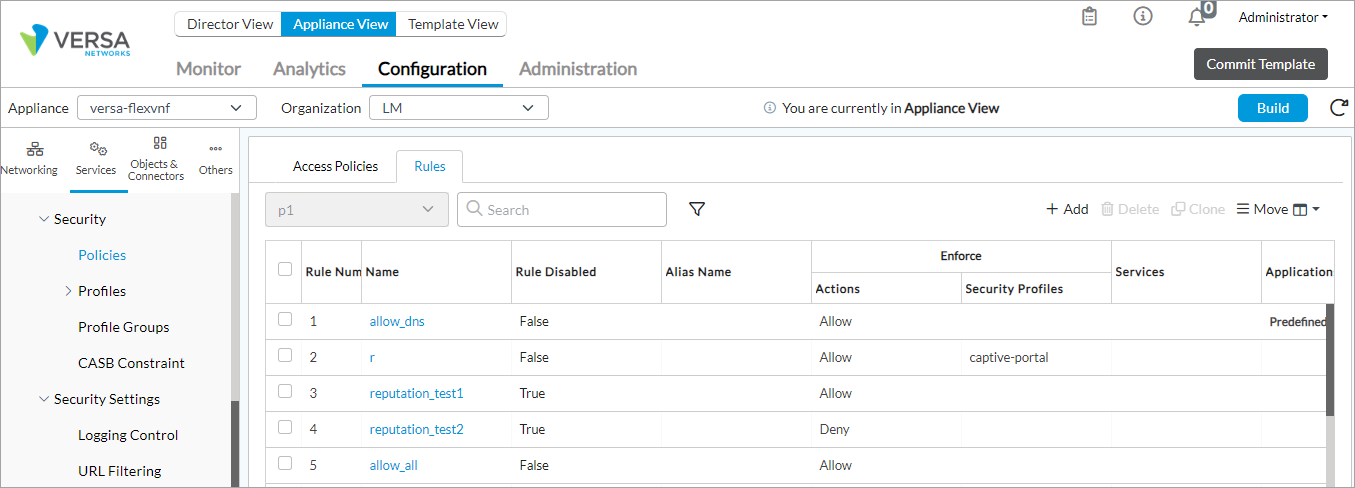
- Select Services > Next Gen Firewall > Security > Policies in the left menu bar.
- Click the Rules tab and select a security access policy rule.
- In the Edit Rule popup window, click Source tab.

- Click + in the Source Address section to select address objects or address groups objects to associate with the rule. For more information, see Configure Address Objects and Configure Address Group Objects, above.
- To add an address object click + New Address. The Add Address screen displays. For more information, see Configure Address Objects, above.
- To add an address group object click + New Address Group. The Add Address Groups screen displays. For more information, see Configure Address Group Objects, above.
- Click the
eye icon to edit the object address. The Edit Address screen displays. For more information, see Configure Address Objects, above.

- Click OK.
- Click the Destination tab.

- Click + in the Destination Address section to select address objects or address groups objects to associate with the rule. For more information, see Configure Address Objects and Configure Address Group Objects, above.
- To add an address object click + New Address. The Add Address screen displays. For more information, see Configure Address Objects, above.
- To add an address group object click + New Address Group. The Add Address Groups screen displays. For more information, see Configure Address Group Objects, above.
- Click the
eye icon to edit the object address. The Edit Address screen displays. For more information, see Configure Address Objects, above.

- Click OK.
Monitor Policies
You monitor policies that you associate with address objects to view the traffic flow details when a policy is used. For more information, see Monitor VOS Device Services.
To monitor policies:
- Select the Administration tab in the top menu bar.
- Select Appliances in the left menu bar.
- Select a device name in the main panel. The view changes to Appliance view.
- Select the Monitor tab in the top menu bar.
- Select the Provider Organization > Services tab.
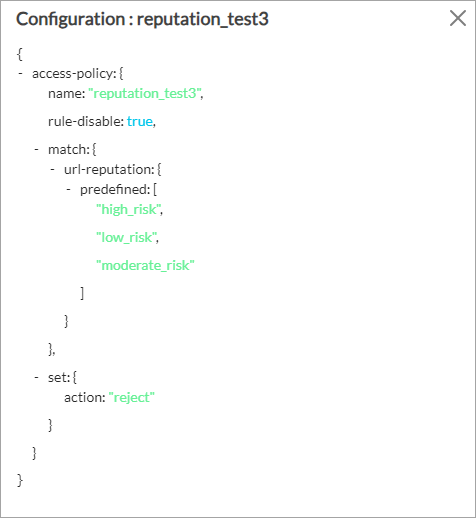
- Select NGFW > Policies. The NGFW policy statistics displays.

Click a rule name to view its configuration.
Monitor Address Groups
For Releases 23.1.1 and later.
You can monitor the binding of tags to IP addresses and IP address groups that you associate with an IP subnet file.
To monitor address groups:
- In Director view:
- Select the Administration tab in the top menu bar.
- Select Appliances in the left menu bar.
- Select a device name in the main panel. The view changes to Appliance view.
- Select the Monitor tab in the top menu bar.
- Select the Networking tab in the horizontal menu bar.
- Select Address Groups. The Name column shows the address group name and the IPS column shows the corresponding IP addresses.

View Firewall Analytics Logs
For Releases 23.1.1 and later.
- In Director view, select the Analytics tab in the top menu bar.
- Select Logs > Firewall in the left menu bar. The logs dashboard displays with the Logs tab selected by default.
- Select an organization and a device. The following screen displays.

For more information, see Firewall Log Screens.
Supported Software Information
Releases 20.2 and later support all content described in this article, except:
- Release 22.1.1 adds support for adding match terms and cloud workload protection tags for dynamic address groups.
- Release 22.1.2 adds support for specifying a wildcard mask in IPv6 addresses.
- Release 22.1.3 adds support for viewing, editing, and deleting address object references.
- Release 23.1.1 adds support for uploading IP subnets file for tag mapping for dynamic address groups and monitor address group objects.
Additional Information
Configure CGNAT
Configure CoS
Configure DNS Servers
Configure HTTP/HTTPS Proxy
Configure IP Filtering
Configure NGFW
Configure Policy-Based Forwarding
Configure SD-WAN Policy
Configure SD-WAN Traffic Steering
Configure Stateful Firewall
Monitor VOS Device Services
Monitor the Cloud Workload
Overview of Configuration Templates
