Provision SCIM Service on Versa SASE
![]() For supported software information, click here.
For supported software information, click here.
A Versa SASE tenant can configure system cross-domain identity management (SCIM) to notify the Versa SASE gateways and the Versa advanced security cloud (ASC) about changes to users and groups in the tenant’s identity provider (IdP). The Versa SCIM software interoperates with all SAML-based SCIM providers, including Microsoft Entra, Okta, and Ping Identity. The Versa SCIM server communicates with the customer IdP using APIs, and it supports all create, read, update, and delete (CRUD) operations, which are part of SCIM 2.0.
SCIM is a microservice hosted in Versa ASC that acts as a server. SAML authentication does not automatically populate user and group information, but SCIM automatically updates user and group data—such as add, delete, or modify actions—to the VOS and Concerto gateways. SCIM helps push configurations from IdP servers to Concerto. For example, when you create email accounts during the employee onboarding process, SCIM enables the sharing of this information from the IdP server to Concerto.
This article describes the how to enable SCIM from Concerto, how to provision SCIM users and groups using Microsoft Entra and Okta, how to associate provisioned users and groups with policy rules, and to view SCIM logs.
SCIM Provisioning Flow
The SCIM provisioning process includes the following stages:
- Tenant administrator enables SCIM services for the tenant on the Concerto portal.
- Versa SASE Concerto portal informs about the tenant’s intent to use Versa SCIM.
- Tenant administrator clicks the link in Concerto to generate the tenant-specific authentication token and then specifies the URI at which to save the authentication token.
- Versa SASE Concerto portal requests and receives the tenant-specific URI and authentication token from the Versa SCIM service, and makes these available to the tenant administrator.
- Tenant administrator uses the tenant-specific URI and authentication token to configure the SCIM settings on the tenant’s IdP to interface with Versa SCIM.
- Tenant administrator configures users and groups on the tenant’s IdP.
- Tenant IdP uses the tenant-specific URI and authentication token to inform Versa SCIM about all CRUD operations allowed for users and groups.
- Versa SCIM informs the Versa SASE gateways and Versa advanced security cloud about all CRUD operations allowed for users and groups that it learned from the tenant’s IdP using SCIM.
Generate SCIM Token and URL from Concerto for Provisioning
When you enable SCIM, Concerto sends REST API requests towards SCIM through the Director node, which then passes the requests to VMS and back to SCIM. SCIM enables Concerto to dynamically retrieve user and groups information.
To enable SCIM:
- Go to Configure > Security Service Edge > User and Device Authentication > SCIM Integration.
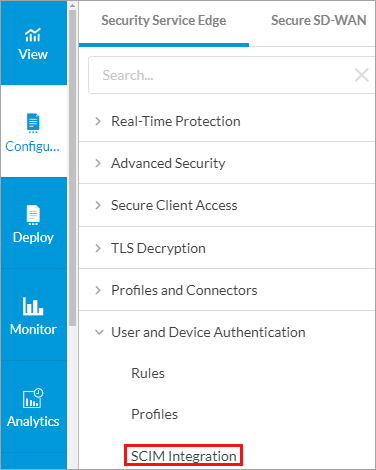
The System for Cross-Domain Identity Management (SCIM) screen displays.

- Click Add. The Add SCIM popup window displays.
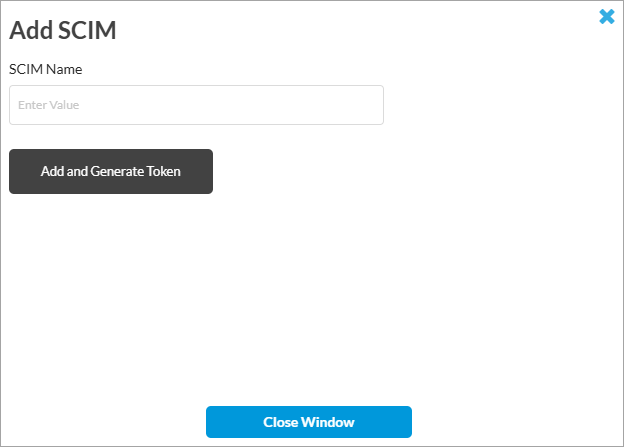
- Enter a name in the SCIM Name field. Ensure that you use a unique name to identify the IdP from which users or user groups are provisioned.
- Click Add and Generate Token. The following window displays.

- Copy the SCIM URL and token and save them. The URL includes the tenant name, VMS ID, SCIM cloud server FQDN, and the SCIM name that you provide in the Add SCIM screen. You use this URL and token when you provision SCIM using Microsoft Entra ID or Okta. Entering these details in Entra and Okta creates a channel between the IdP and SCIM cloud server. For more information, see Provision SCIM Using Microsoft Entra ID and Provision SCIM Using Okta below.
- To regenerate the token for SCIM, click Regenerate on the System for Cross-Domain Identity Management (SCIM) screen.
Provision SCIM Using Microsoft Entra ID
To provision SCIM using Microsoft Entra ID, Versa Networks first emails the customer information about the SCIM REST endpoint and bearer token, which the customer needs to configure on the IdP. The following screenshot shows an example of provisioning Microsoft Entra ID to use the tenant-specific REST endpoint and bearer token to interface with and authenticate the Versa SCIM server.

Note that Versa SCIM shares the tenant URL by email and also on the Concerto UI. The Secret Token is a bearer token, and the tenant's administrator can refresh it.
All IdP platforms support schedule-based provisioning, also called batch-based provisioning, of users and user groups, and they support on-demand provisioning of users.
Create a User on the Tenant’s IdP
The tenant administrator uses on-demand provisioning to create a user on the tenant's IdP. The following screenshot shows an example in which a tenant administrator adds an existing user (sales1), to an existing group (ACME-Sales). For on-demand provisioning, you can add up to five users at a time. Information about the users is made available immediately to all SCIM message receivers, including the Versa SCIM server.

When the Entra IdP successfully adds an on-demand user to the group, a screen similar to the following screenshot displays.

When user provisioning is successful on an IdP, the IdP sends an HTTP POST call to the tenant-specific Versa SCIM endpoint. This call contains the user and user group information. For example:
{'schemas':
    ['urn:ietf:params:scim:schemas:core:2.0:User',
    'urn:ietf:params:scim:schemas:extension:enterprise:2.0:User'],
    'externalId': 'c4546ef3-050b-4629-9906-ef926225bf70',
    'userName': 'sales1@versalab.onmicrosoft.com',
    'active': True,
    'displayName': 'Sales1',
    'meta': {'resourceType': 'User'}
}
Versa SCIM processes the payload, makes the changes for the tenant, and passes the information to Versa Networks infrastructure components, such as the Versa SASE gateways, Versa advanced security cloud, and Versa Concerto, as detailed in the end-to-end communication flow.
Provision Scheduled-Based Users by IdP
The following screenshot shows an example of scheduled-based provisioning of users and groups on Entra IdP.

The following screenshot shows an example of feedback from Entra IdP when the scheduled-based provisioning of two users to a group is successful.

Based on the configured schedule on the tenant's IdP, the IdP SCIM software publishes information about the CRUD operations allowed for users and groups to SCIM message receivers, such as the Versa SCIM server. The Versa SCIM server, the Versa SCIM agent, and the Versa SASE gateway handle CRUD operations for on-demand users and user groups and batch users and user groups identically.
The following screenshot shows an example of feedback from Entra IdP when the scheduled-based provisioning of five users to a group is successful.

The following screenshot shows an example of a log maintained by an IdP such as Microsoft Entra. A tenant administrator can review these logs for SCIM-related serviceability.

Provision SCIM Using Okta
To provision SCIM using Okta, Versa Networks first emails the customer information about the SCIM REST endpoint and bearer token, which you must configure on the IdP. Provisioning SCIM using Okta establishes a connection between Okta IdP and the SCIM microservice. After this, you add users and groups in Okta and push these records to the Versa application.
To provision SCIM using Okta:
- Log on to the Okta portal.
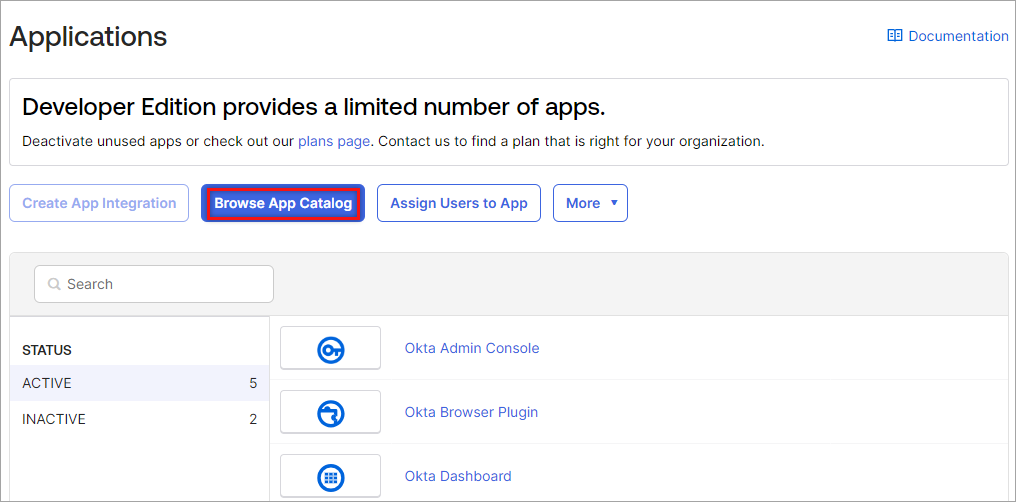
- On the Okta homepage, click Applications in left menu. The Applications window displays.

- Click Browse App Catalog. The Browse App Integration Catalog window displays.
- In the Browse App Integration Catalog window, search for SCIM 2.0 using the search field.

- Select SCIM 2.0 Test App (Basic Auth).
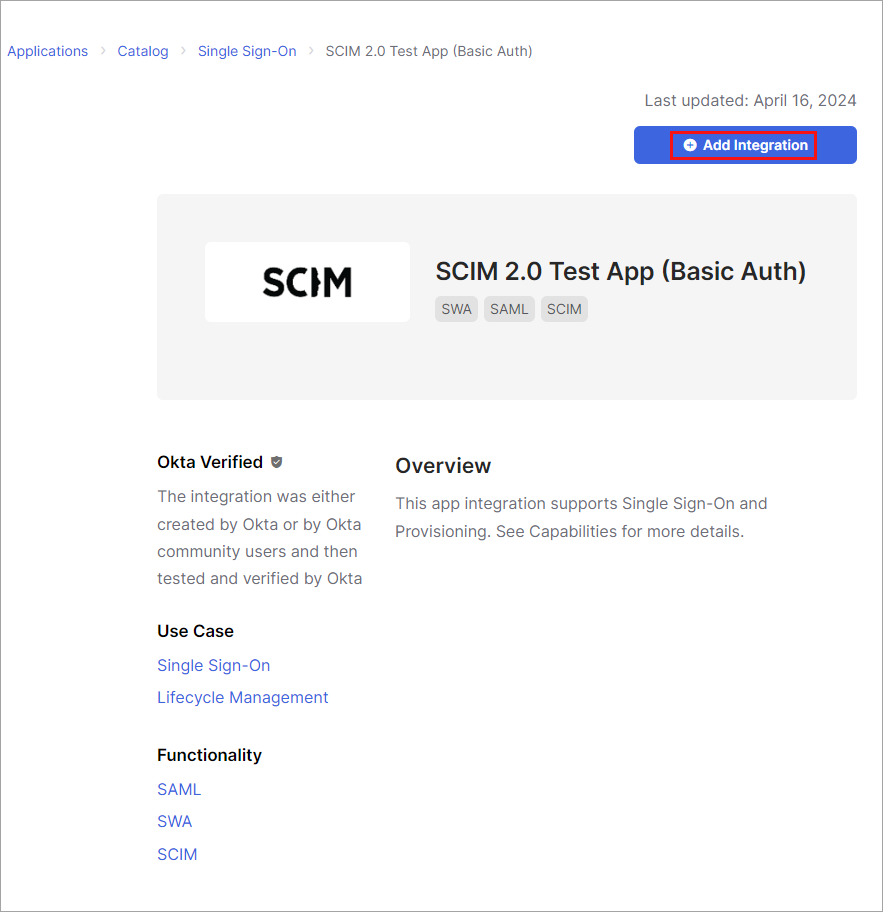
- Click + Add Integration. The Add SCIM 2.0 Test App (Basic Auth) screen displays with the General Settings tab selected.
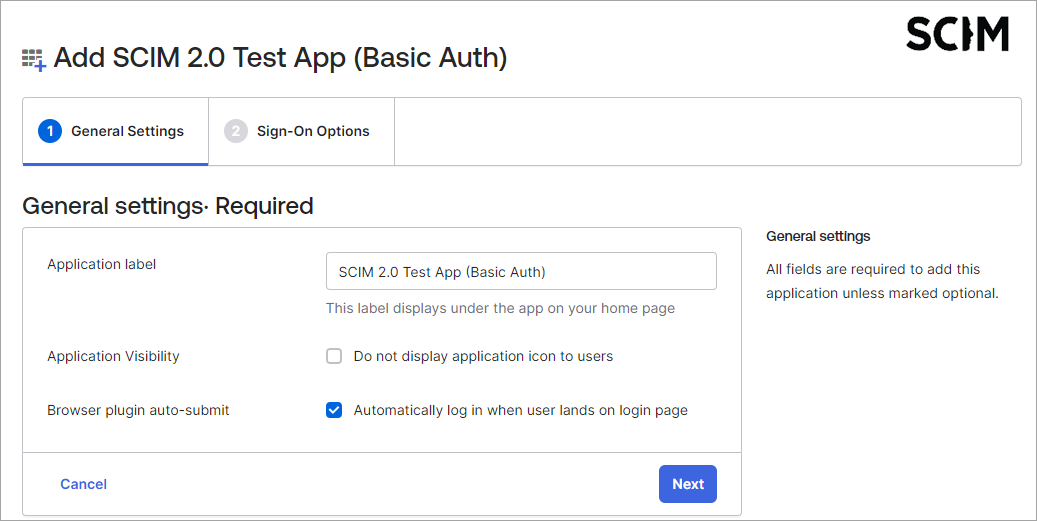
- Click Next to go to the Sign-On Options tab.

- Make changes, if required, and click Done. This completes the SCIM integration flow.
- Select Applications from the left menu, and then select Versa-Customer-Experience.

- In the Versa-Customer-Experience window, select Provisioning > Integration. The SCIM Connection window displays.

- In the SCIM connector base URL field, enter the URL that you received during tenant registration.
- In the Bearer field under HTTP Header, enter the authorization token that you received during registration.
- To test the configuration, click Test Connector Configuration.
- Click Save.
Add Users and Groups
To add users on Okta:
- On the Okta homepage, click Directory > People in the left menu. The People page displays.

- Click Add Person. In the Add Person window, enter the user information.

- Click Save, or click Save and Add Another to add another user.
To add user groups:
- On the Okta homepage, click Directory > Groups in the left menu. The Groups page displays.
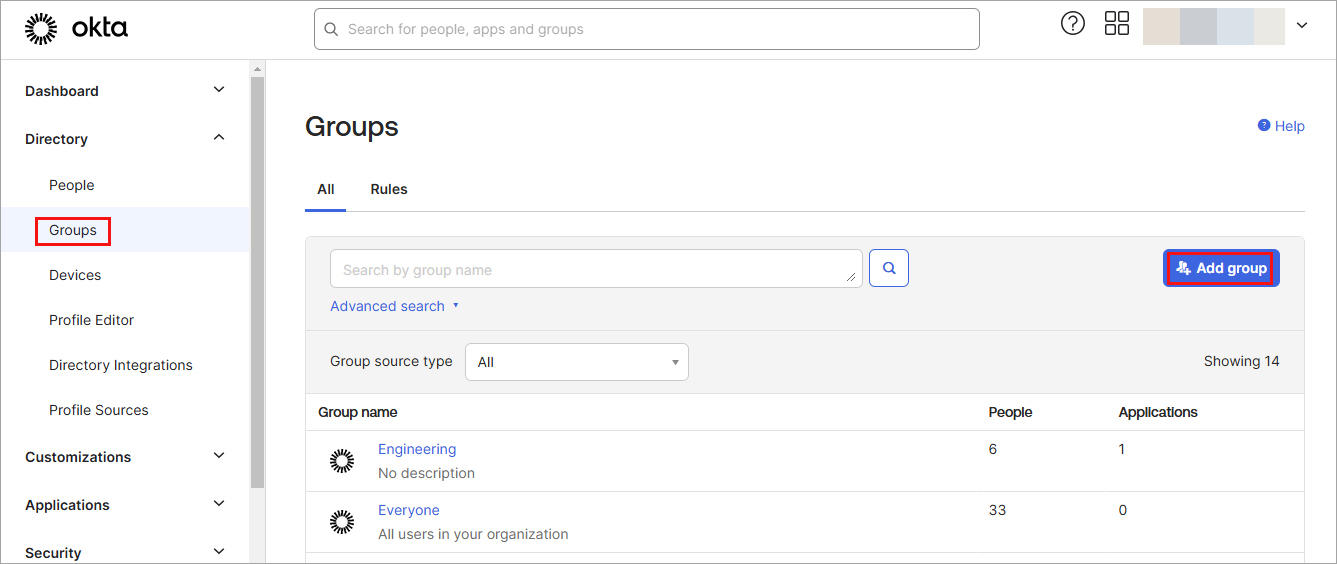
- Click Add Groups. The Add Groups popup window displays.

- Enter a name and description for the group.
- Click Save.
- To assign users to a group, select a group from the Groups main window. The following screen displays.
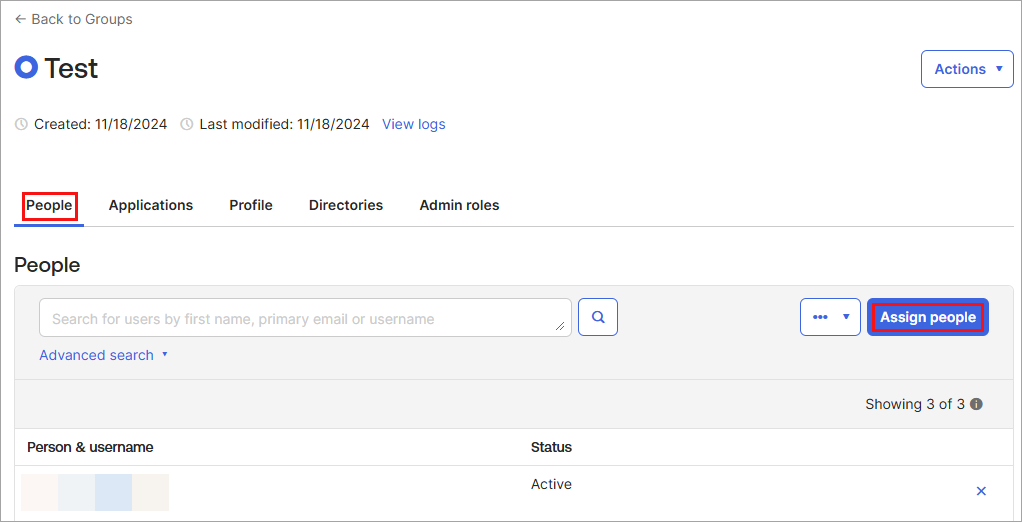
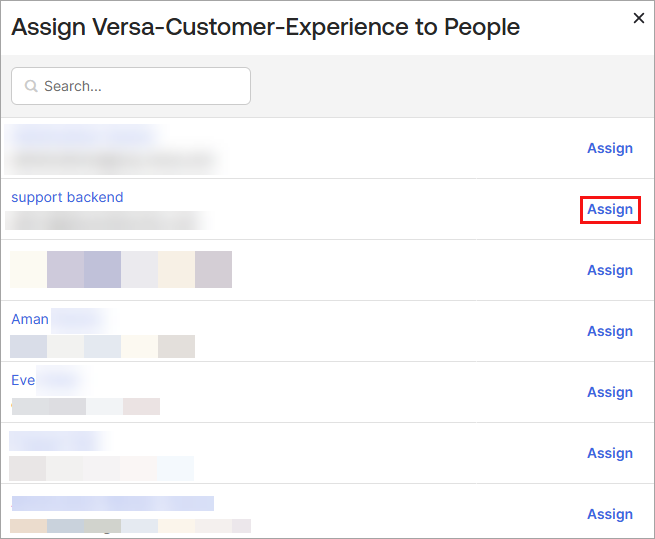
- On the People tab, click Assign People. The following screen displays.

- Click the + icon next to each user name to add users to the selected group.
- Click Done.
Assign Users and User Groups to the Versa Application
To assign users and groups from Okta to the Versa application:
- On the Okta homepage, click Applications in the left menu. The Applications window displays.

- Select the Versa application (here, Versa-Customer-Experience). The following screen displays.

- Select the Assignments tab and click Assign. Select Assign to People to add individual users, or select Assign to Groups to add user groups.

- If you select Assign to People, the following screen displays.
- Click next to one or more users that you want to add. The following screen displays for each user.

- Click Save and Go Back to add a user to the application.
- If you select Assign to Groups in Step 3, the following screen displays.

- Click Assign to add a group. The following screen displays for each group you add.

- Click Save and Go Back to add a user group to the application.
Push Groups to Application
To push user groups to the Versa application:
- On the Okta homepage, click Applications in left menu. The Applications window displays.
- Select the Versa application (here, Versa-Customer-Experience) and select the Push Group tab.
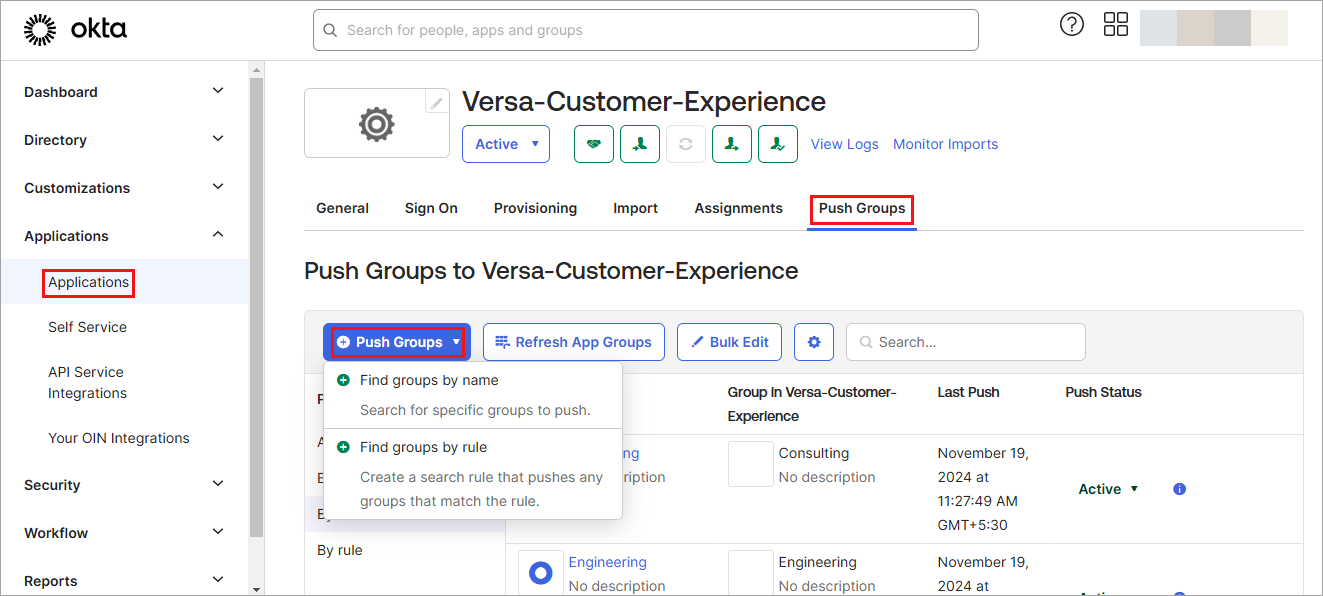
- Click + Push Groups and search for groups by name or by rule. Here, we use Push Groups by Name.
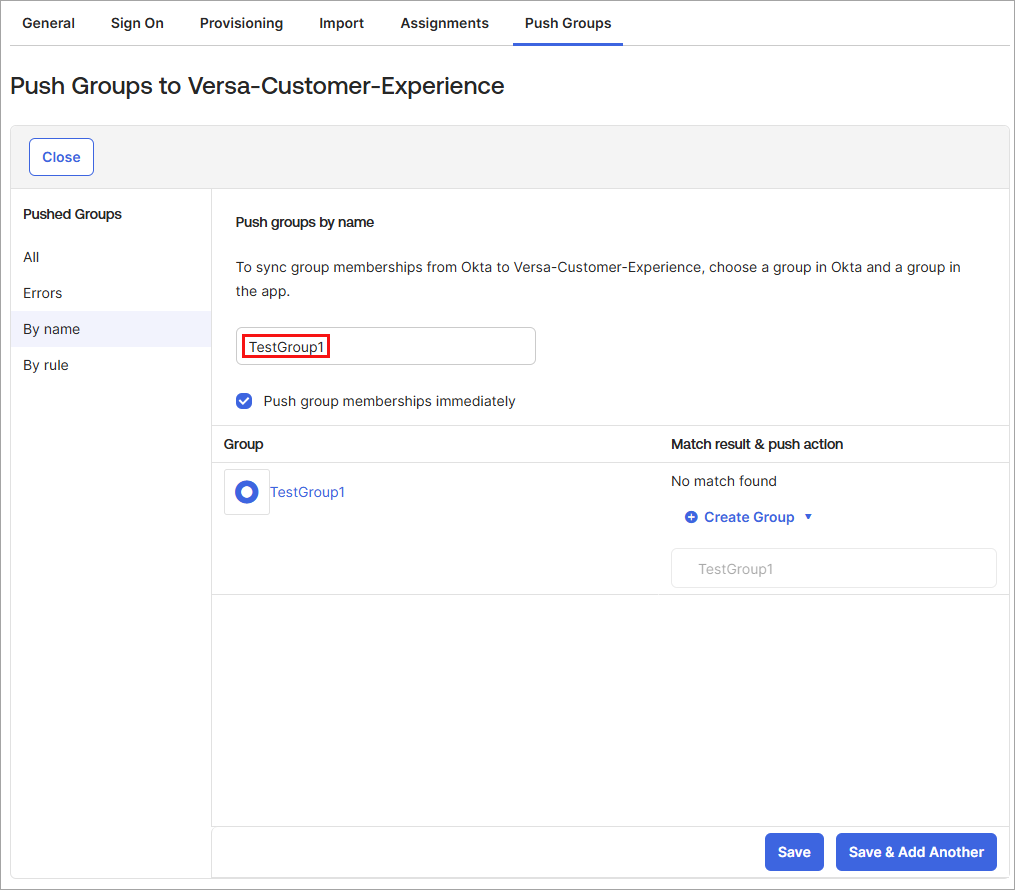
- Click Save, or click Save and Add Another to add another group. When you save a group, the group name (here, Test Group1) displays on the Push Groups tab.

- Click Active and click Push Now to push the group to the Versa application.
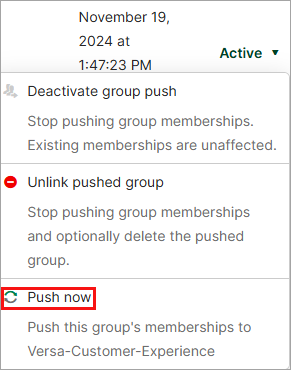
This pushes the group to Concerto and the VOS software. You can then associate these users or groups with policy groups in Concerto. For more information, see Associate SCIM Users and Groups with Policy Rules, below.
Associate SCIM Users and Groups with Policy Rules
After you provision users or user groups from your IdP (Entra or Okta), you can use the users or groups as match criteria in rules for internet protection, private app protection, TLS decryption, and SASE client access in Concerto. This section includes an example of how to use SCIM-provisioned users or groups in an internet protection rule. These steps are similar for other policy rules.
To associate users or user groups with an internet protection rule rule:
- Go to Configure > Real-Time Protection > Internet Protection.
- In the Internet Protection Rules List screen, click + Add to create a rule. The Create Internet Protection Rule screen displays.
- Click 2 to go to Users and Groups.
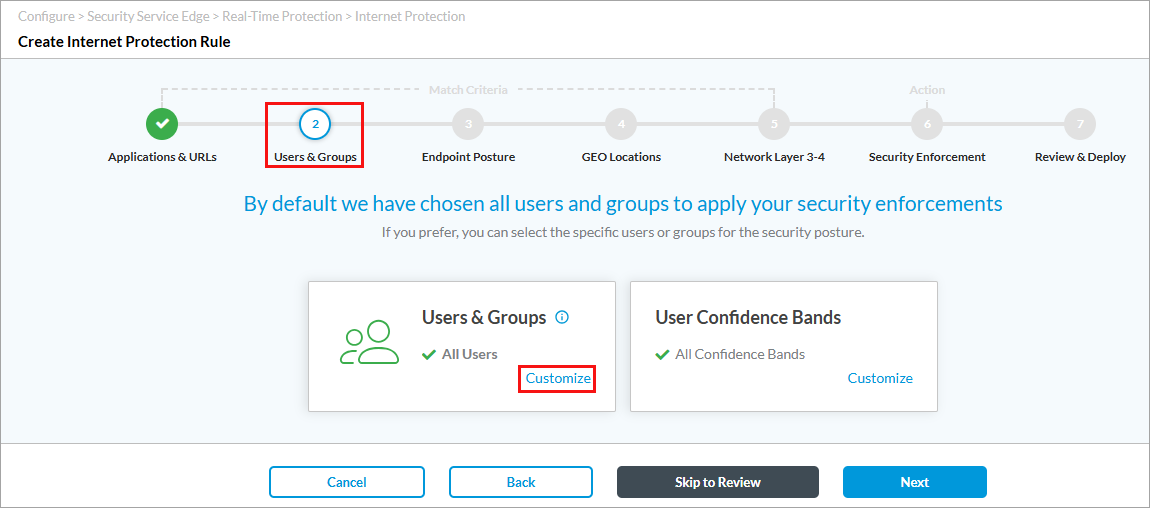
- Click Customize under Users and Groups. The following screen displays.

- Click Selected Users, and then select SCIM from the drop-down list. The User Group tab displays the user groups that you provisioned using IdP.
- In the adjacent drop-down list, select a user group, or select View All SCIM to view all user groups.
- Click the box before the user group name to select a group.
- To select users provisioned from IdP, select the Users tab and select the users you want to add to the rule.

- For information about configuring other parameters, see Configure SASE Internet Protection Rules.
- Click 7 to go to Review and Deploy, and then click Save to deploy the new internet protection rule.
For information about matching SCIM user and user groups in other policy rules, see Configure SASE Private Application Protection Rules, Configure SASE TLS Decryption, and Configure SASE Secure Client Access Rules.
View SCIM Logs
To view logs of the users and user groups provisioned using IdP:
- Go to Analytics > Logs > IAE.
- Select the IAE Entitlement tab to view logs.

Supported Software Information
Concerto Releases 12.2.1 and later support all content described in this article.