Configure Direct Breakout to the Internet
![]() For supported software information, click here.
For supported software information, click here.
Direct internet access (DIA) enables local breakout of internet-bound traffic or public cloud traffic directly from a branch to the internet. The following are the primary advantages of DIA:
- Prioritization of traffic flows.
- Reduced latency and cost savings as a result of direct routing and traffic flow optimization.
- Reduced bandwidth consumption—You can forward non-business traffic, such as the traffic from gaming, Facebook, and other applications, directly to the internet directly rather than having it go through an SD-WAN hub. Doing so decreases SD-WAN hub bandwidth, preventing it from getting overloaded.
This article describes the steps to configure direct breakout to the internet:
- Configure a split tunnel to use for DIA traffic.
- Configure a policy that breaks out traffic to the Internet. This article shows examples of three different policies.
Configure a Split Tunnel for DIA
To enable DIA, the VOS software leverages the split tunnel mechanism, which allows a branch to use the same or multiple internet links for both internet and VPN traffic. Split tunnels allow a branch to simultaneously access dissimilar security domains such as a public network (for example, internet) and a local LAN or WAN, using the same or different network connections.
To configure a tunnel for DIA:
- In Director view, select the Workflows tab in the top menu bar.
- Select Template > Templates in the left menu bar.
- Click the
 Add icon to create a new template or click the name of an existing template to modify it. The Create Template or Edit Template popup window displays. For complete information about creating templates, see Create and Manage Post-Staging Templates.
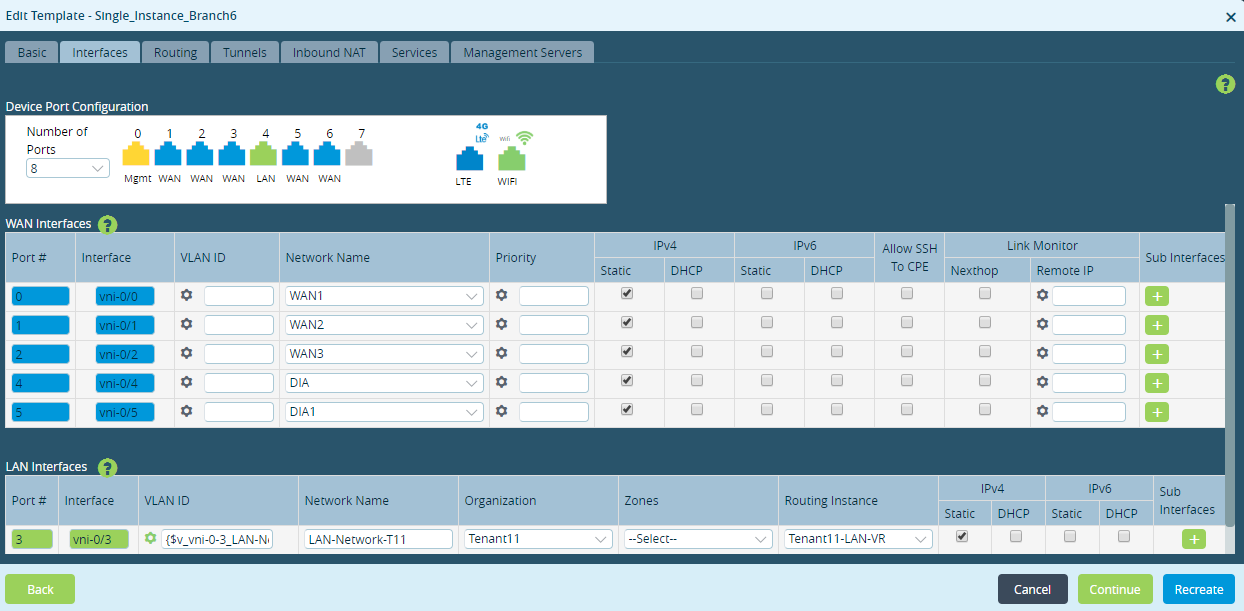
 - Select the Interfaces tab.
- In the Device Port Configuration group of fields, click each port icon and select WAN as the type of interface. Then in the WAN Interfaces table, configure each WAN interface.
- Select the Tunnels tab to create a split tunnel. Select the name of the VRF and the WAN interface, and click DIA. as shown below. Then click Recreate.

- Click Recreate.
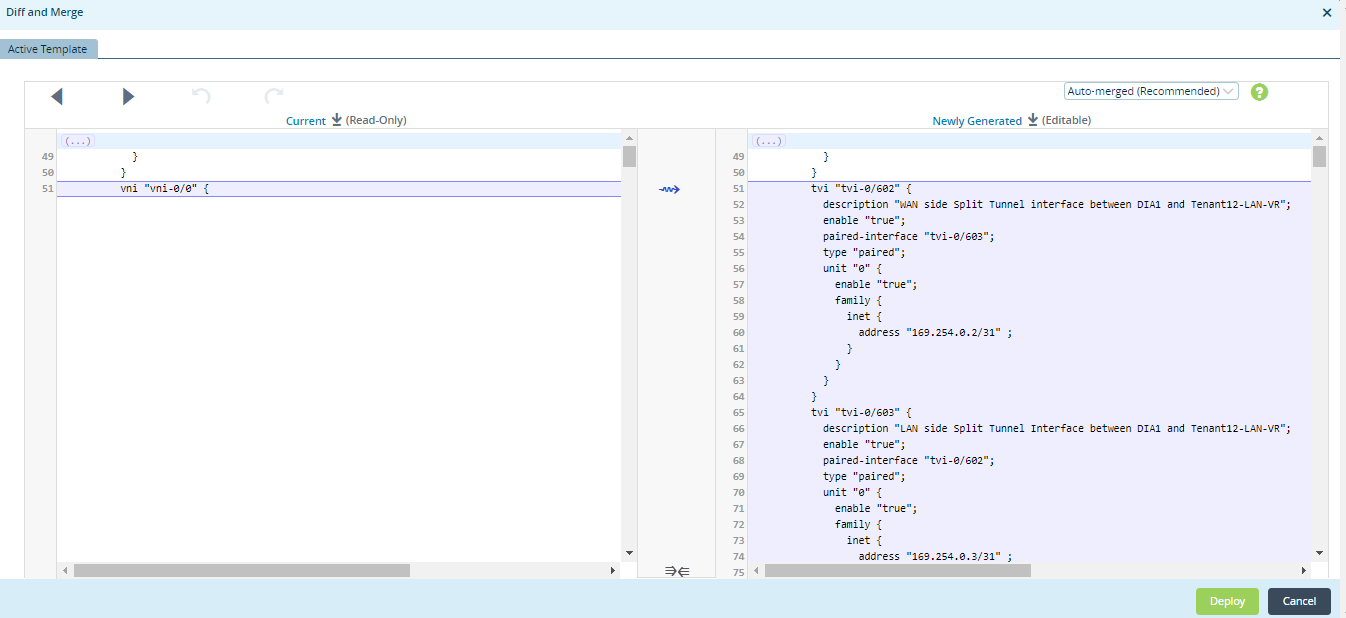
- The Diff and Merge window displays. Click Deploy.
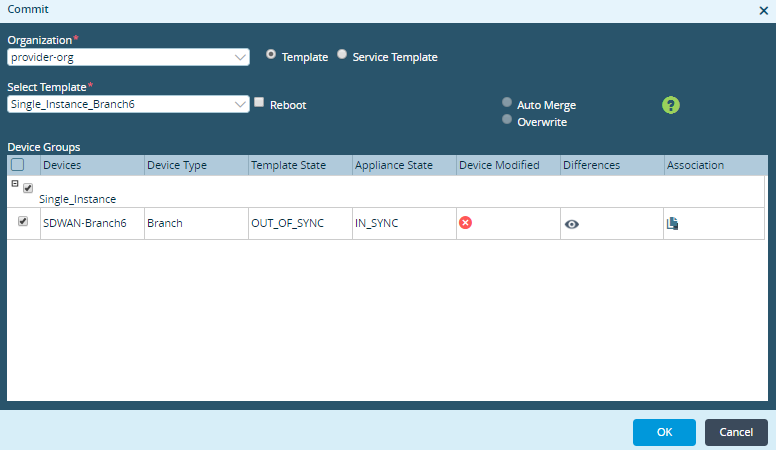
- In the main Templates window, select the template you deployed and click Commit Template.

- Click OK in the Commit popup window to commit the updated template.
To verify the DIA tunnel configuration:
- Issue the show interface brief CLI command to view details about the interfaces. The output shows that the split tunnel has been created.
- Issue the show bgp neighbor brief CLI command to check whether the BGP session has been established over the split tunnel to advertise the default route in the LAN routing instance. This route is used to forward the internet traffic directly, bypassing the hub device.
- Issue the show routing-instance DIA-routing-instance-name CLI command to verify that the static route has been created in the DIA routing instance and has been redistributed in BGP.
- Issue the show routing-instance LAN-routing-instance-name CLI command to verify that the default route received in the LAN routing instance has the next-hop TVI IP address on the DIA routing instance.
Supported Software Information
Releases 20.2 and later support all content described in this article.