Activate a Private SASE Gateway and Deploy Tenants on a Private SASE Gateway
![]() For supported software information, click here.
For supported software information, click here.
This article provides step-by-step procedures for deploying and activating tenants on a private SASE gateway device. When you enroll in the SASE gateway service, a tenant is instantiated on the SASE gateway and an instance of the SASE gateway becomes available in the Versa Titan customer dashboard.
After a SASE gateway device is activated, if you have purchased a SASE gateway for the VSA server, you log in to the SASE gateway as an MSP user and install the VSA certificates. After you install these certificates, the MSP can create tenants, and Titan then copies the VSA certificates to the tenants.
Activate a Private SASE Gateway
- Log in to Titan Portal as an MSP.
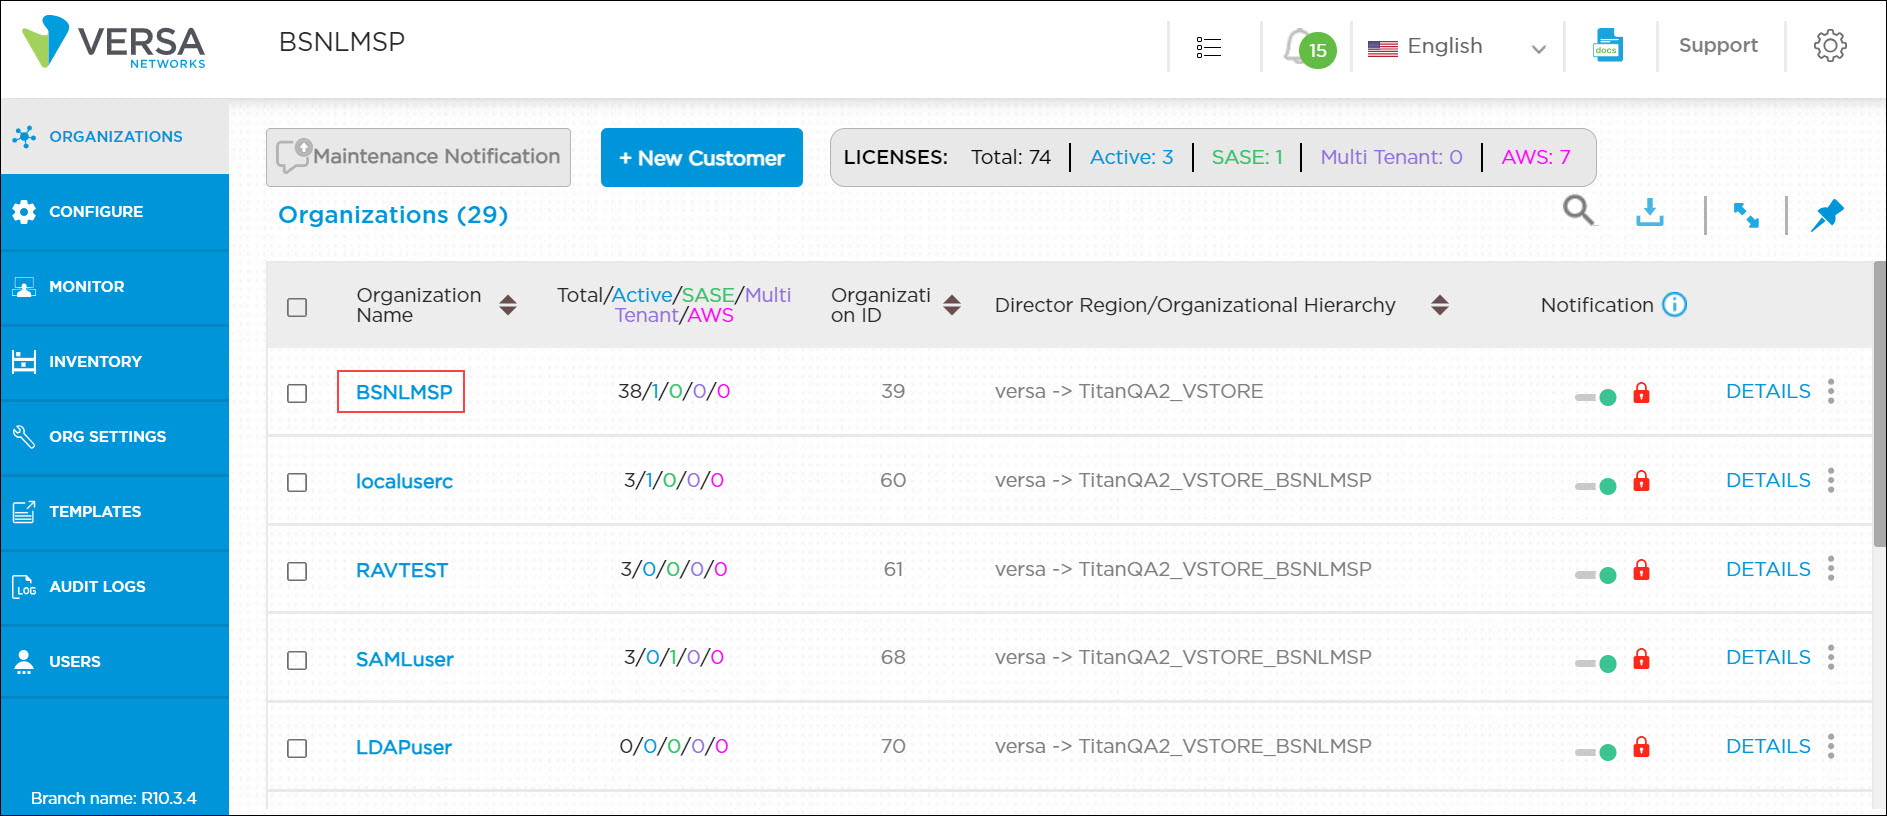
- In the Organization dashboard, click the MSP provider organization in the grid.

- Create a site for the SASE gateway.

- Click Save, and then click the down arrow next to Save to display the Deploy popup window.
- Click Deploy.
- Activate the device using the Versable, GZTP, or WiFi method. For information about activating using GZTP or WiFi, see Activate an Appliance. For information about activating using Versable, see Activate Using Versable.
- Add a CA certificate, a CA chain, and upload key file on the device.

Deploy Tenants on a Private SASE Gateway
- Log in to Titan Portal as an MSP.
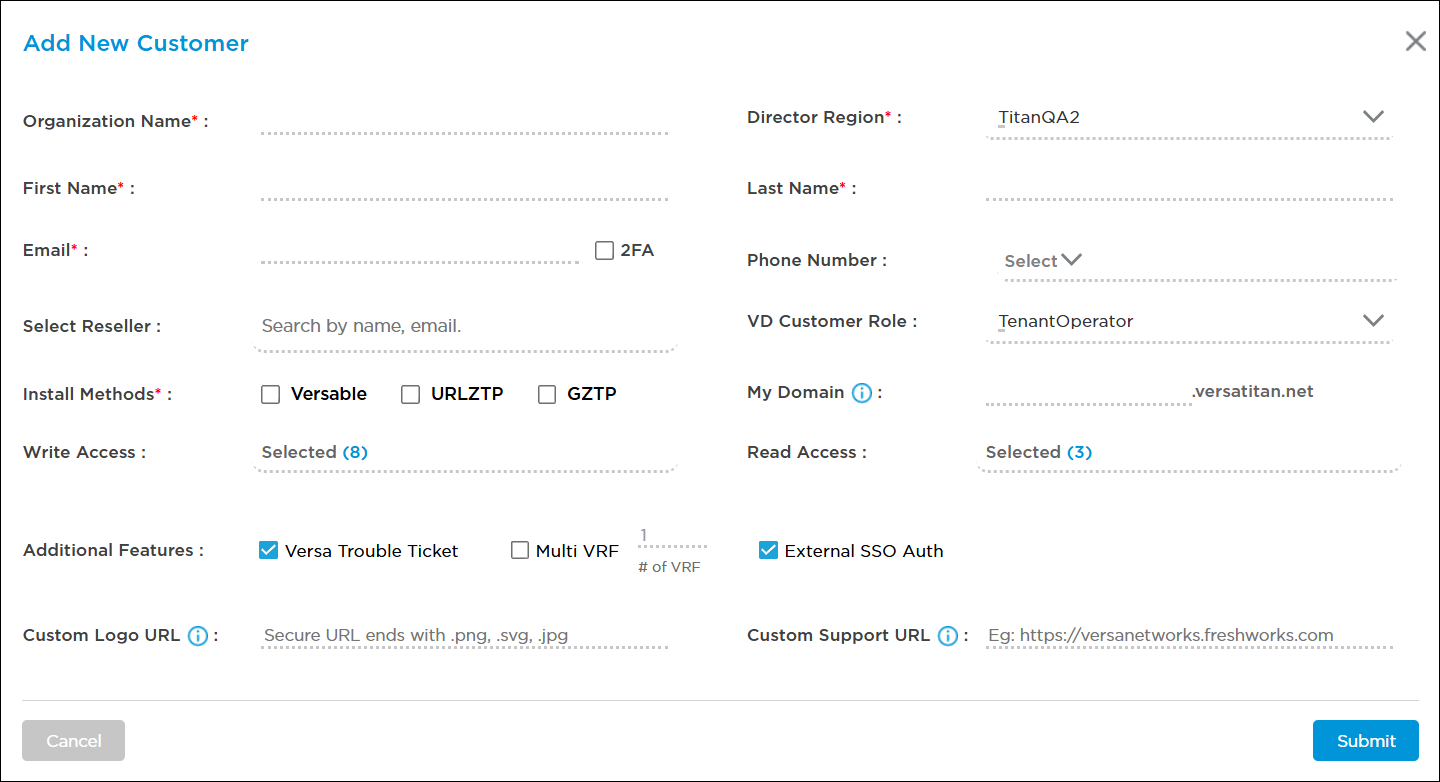
- In the Organizations dashboard, click +New Customer.

- Enter the customer information, and select a region, the Versa Director customer role, and an activation method, and then click Submit.
- In the Organizations dashboard, locate the organization in the grid, click the 3-dot icon, and then click Add Devices.

- In the Add Device Details popup window, add information for cloud gateways, licenses, and user authentication.

- Click Submit.
To modify a tenant's configuration:
- Log in to Titan Portal as an MSP.
- In the Organization dashboard, select the Tenant.
- In the Configure dashboard, click Configure.

- In the configuration window, click Tenant, select the Tenant, and then click Continue.

- Modify the tenant's configuration as desired.
- Click the down arrow next to Save to display the Publish popup window.
- Click Publish.
Supported Software Information
Releases 11.0 and later support all content described in this article.