Configure a Gateway To Use an LDAP Server for User Authentication
![]() For supported software information, click here.
For supported software information, click here.
You can configure a gateway to use an LDAP server to authenticate remote secure access users. To do this, you must first do the following:
- Configure an LDAP server profile, as described in Configure an LDAP Server Profile.
- Configure a user and group profile, as described in Configure a User and Group Mapping Profile.
- Configure an authenticator profile, as described in Configure an Authenticator Profile.
- Configure an authentication profile, as described in Configure an Authentication Profile.
Then, you create an LDAP group security policy and update the secure access portal to use the LDAP profile, as described in the sections below. After you complete the LDAP configuration on the gateway, security policies on the gateway use the users and groups in the LDAP database for application and resource-access control and for secure-access connectivity.
Before you configure a gateway to use an LDAP server for user authentication, you must do the following:
- Create a secure access portal and gateway with local user authentication in the appropriate organization and on the VOS device that will act as a secure access gateway.
- Create a security group in Active Directory and add users to the group.
- Create one or more users in the local user authentication database.
- Register one or more users in the secure access client application.
Create an LDAP Group Security Policy
You create an LDAP group security policy to authenticate users. Before you create the policy, ensure that you have created a security group in Active Directory and added users to the group. For more information, see Configure AAA.
To authenticate users using an LDAP group security policy:
- In Director view:
- Select the Configuration tab in the top menu bar.
- Select Templates > Device Templates in the horizontal menu bar.
- Select an organization in the left menu bar.
- Select a template in the main pane. The view changes to Template view.
- Select the Configuration tab in the top menu bar.
- Select Services > Next-Gen Firewall > Security > Policies in the left menu bar.
- Select the Rules tab in the horizontal menu bar.

- Click the
 Add icon. The Add Rule popup window displays.
 - Select the General tab, and enter a name for the rule.

- Select the Users/Groups tab, and enter information for the following fields.
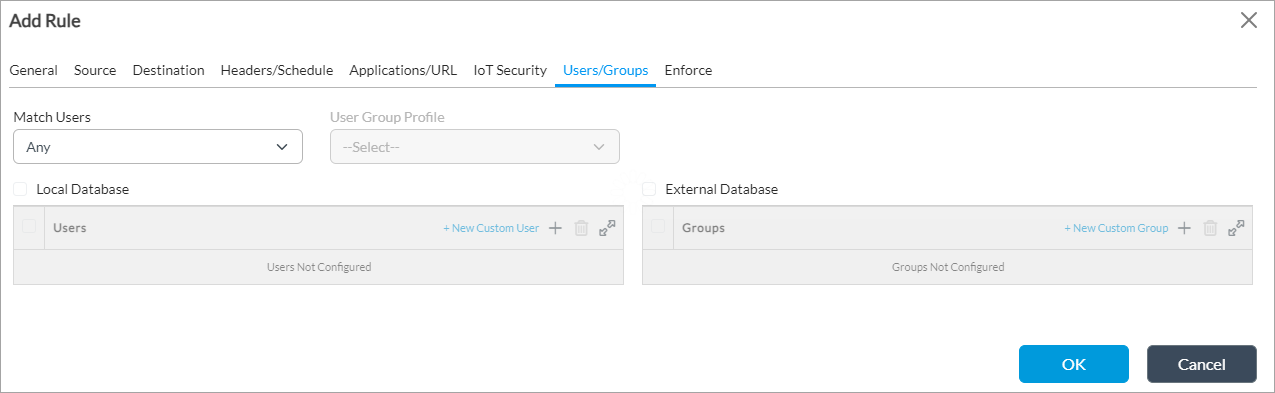
Field Description Match Users Select the user to match:
- Any
- Known
- Selected
- Unknown
User/Group Profile Select a user group profile. Groups (Table) Click the Add icon, and enter the name of the security group you created in Active Directory. - Click OK.
Update the Secure Access Portal and Gateway To Use an LDAP Profile
To have the secure access portal to use the LDAP profile instead of the local database profile:
- In Director view:
- Select the Configuration tab in the top menu bar.
- Select Templates > Device Templates in the horizontal menu bar.
- Select an organization in the left menu bar.
- Select a template in the main pane. The view changes to Appliance view.
- Select the Configuration tab in the top menu bar.
- Select Services > Secure Access > Portal > General in the left menu bar.

- In the General window, click the
 Edit button. The Add Services popup window displays.

- In the Authentication field, select the name of the LDAP profile to use instead of the local database profile.
- For information about configuring the other fields on the Add Services popup window, see Configure a Secure Access Portal.
- Click OK.
To have the secure access gateway to use the LDAP profile instead of the local database profile:
- Select Services > Secure Access > Gateway > General in the left menu bar.

- In the General window, click the Edit button. The Add Services popup window displays.

- In the Authentication field, select the name of same LDAP profile that you used for the Portal service.
- For information about configuring the other fields on the Add Services popup window, see Configure a Secure Access Gateway.
- Click OK.
Supported Software Information
Releases 20.2.2 and later support all content described in this article.
Additional Information
Configure AAA
Configure the Versa Secure Access Service
Configure User and Group Policy