Apply and Use MIP Labels in Versa DLP
![]() For supported software information, click here.
For supported software information, click here.
An Azure connector connects a system or service, such as Microsoft Information Protection (MIP), to Azure. In order to receive MIP labels, also known as Purview Information Protection labels, create and connect to your Azure account through an Azure connector. After you create an Azure connector in Versa SASE, you can use and apply MIP labels in data loss prevention (DLP) policies. For information about creating and configuring MIP sensitivity labels, see the Microsoft MIP (Purview) documentation.
Note: MIP is supported only on .pdf, .docx, .xslx, and .pptx files.
The Azure connector integration with DLP extends MIP protection beyond the Microsoft ecosystem to any SaaS application, email, or web upload that passes through the SASE gateway. DLP natively reads MIP labels embedded in Microsoft Office files and PDFs. Sensitivity label definitions are automatically synchronized from the Azure Active Directory (AD) tenant.
DLP policies can block, alert, encrypt, or re-label files based on their MIP sensitivity classification. Re-labeling files allows the sensitivity labels to be upgraded automatically when policy violations are detected.
MIP labels work with DLP as follows:

- Label Applied—You label files in Office 365 (for example, Company-Confidential).
- File in Transit—You upload or email a file through the Versa SASE gateway.
- DLP Inspection—Versa DLP reads the MIP label metadata from the file.
- Policy Action—DLP enforces a policy action on the file, such as block, alert, encrypt, or re-label.
To apply and use MIP labels in Versa DLP, you do the following:
- Assign MIP Labels to Office 365 Files
- Configure an Azure Connector
- Create a DLP File Rule with MIP Labels
Prerequisites
To sign in to the Versa Operating SystemTM (VOSTM) application in the Azure AD, you need the following information from your Azure account:
- Application ID
- Client secret
- Subscription ID
- Tenant ID
To find this information, see Get the Application ID, Tenant ID, and Client Secret section in Install on Azure.
Assign MIP Labels to Office 365 Files
You assign MIP labels to Office 365 files in Microsoft Office applications such as Word, Excel, PowerPoint, and Outlook. You can assign the MIP labels in desktop applications or in Web applications.
Assign MIP Labels in Microsoft Office Desktop Applications
- Open the file in the Office application.
- Go to Home tab, and then click the Sensitivity button in the horitonal menu. Note that the sensitivity button may appear under File > Info > Protect Document > Apply Sensitivity Label, depending on the version of the application.
- Select the appropriate sensitivity label from the drop-down list (for example, Confidential, Highly Confidential, Internal).
- Save the file. The label persists with the file across devices, applications, and cloud services.
Assign MIP Labels in Microsoft Office Web Applications
- Open the file from SharePoint Online or OneDrive.
- Click the Sensitivity button in the top ribbon/toolbar.
- Select the desired label from the list. The label and its protections are applied immediately.
Configure an Azure Connector
- Go to Configure > Security Service Edge > Profiles and Connectors > Azure Connector for MIP.

If there is no existing Azure connector, the following screen displays:

Otherwise, the following screen displays:

- Click Get Started or the
 Add icon. The Azure Connectors for MIP screen displays.
 - In the Azure Connector Configuration section, enter information for the following fields to authenticate Versa with the Azure AD tenant to fetch MIP label definitions. For information on how to find the values for these fields in your Azure account, see Create an Azure AD Application.

Field Description Subscription ID Enter the Azure subscription ID. Client Enter the Azure application ID. Tenant ID Enter the Azure directory ID. Key Enter the Azure authentication key. - Click Next.
- In the Name, Description & Tags section, enter a name for the Azure connector. You can also enter a description and one or more tags. A tag is an alphanumeric descriptor, with no white spaces or special characters, that you can use to search the connectors.

- Click Save.
Create a DLP File Rule with MIP Labels
- Go to Configure > Security Service Edge > Real-Time Protection > Profiles.

The following screen displays.
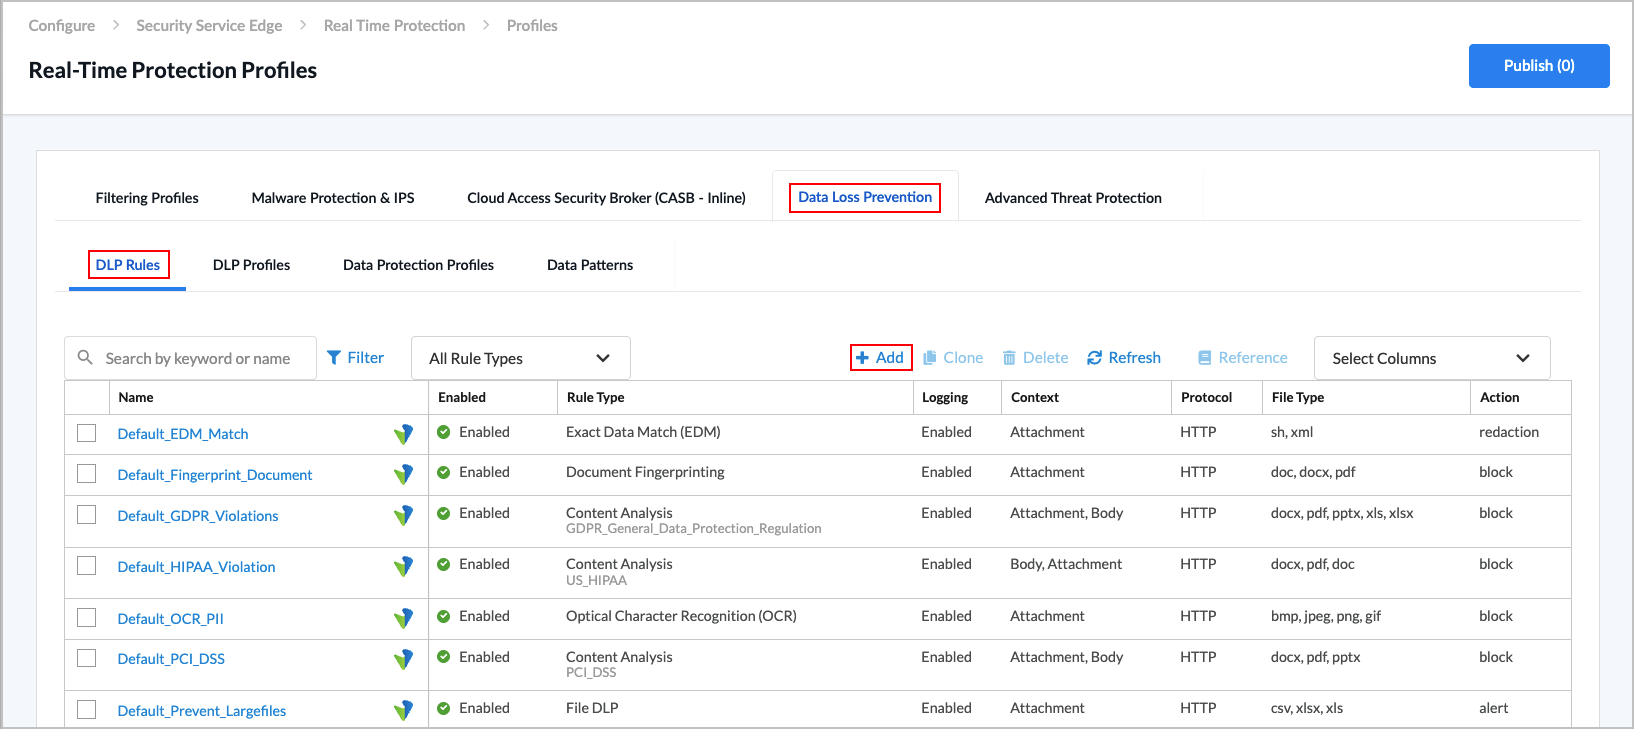
- Select the Data Loss Prevention > DLP Rules tab in the horizontal menu.
- Click the Add icon. The following screen displays.

- Click File DLP to configure file-based protection using file attributes, including MIP labels. The following screen displays.

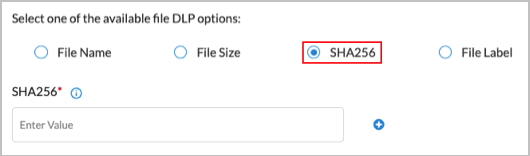
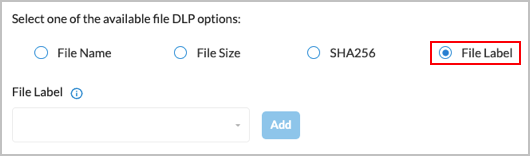
- In workflow step 1, File DLP, select the type of match criteria that you want to use for the rule:
- File Name
- File Size
- SHA256
- File Label
- Enter information for the following fields, based on your match criteria selection.
Field Description Filename Enter a name for the file. File Size (Group of Fields) Define the allowed file size range. The action in the rule is taken on files that are outside this range. Files with a size between the configured minimum and maximum size are allowed.
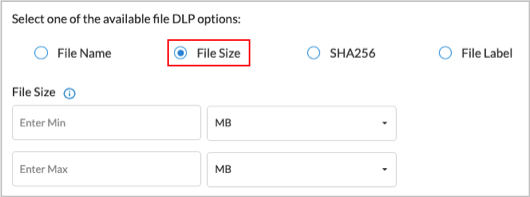
- Enter Min—Enter the minimum size of the DLP file that is allowed, and then select the size unit, either megabytes (MB), gigabytes (GB), kilobytes (KB), or bytes. The configured action is taken on all files that are smaller than the minimum size and that match the configured file type. If you set the minimum size to 0, the maximum DLP file size is used for the action.
- Enter Max—Enter the maximum size of the DLP file that is allowed, and then select the size unit, either megabytes (MB), gigabytes (GB), kilobytes (KB), or bytes. The configured action is taken on all the files that are larger than the maximum size that match the configured file type.
SHA256 Enter the secure hash algorithm 256-bit (SHA256) for the rule to match. Click the
 Plus icon to enter multiple SHA256 values.
File Label Select a MIP file label to match, for example, Company-Top-Secret or Company-General, and then click Add.
- Click Next or select workflow step 2, File Type.

- Select the target file types to be analyzed. Note that MIP is supported only on the following file types:
- .docx
- .pptx
- .xslx
- Click Next or select workflow step 3, Configure Activity, Protocol, and Context, and then enter information for the following fields.

Field Description Activity Select the direction of the traffic on which to apply the rule:
- Both—Apply the rule to both download and upload traffic.
- Download—Apply the rule when the client requests data from a server.
- Upload—Apply the rule when the client posts data to a server.
Protocol Click the protocol to scan:
- Web Protocol
- HTTP
Context Select one or more HTTP contexts of data to scan:
- Attachment—Data in an attachment
- Body—Data in the body
- Header—Data in the header of a packet
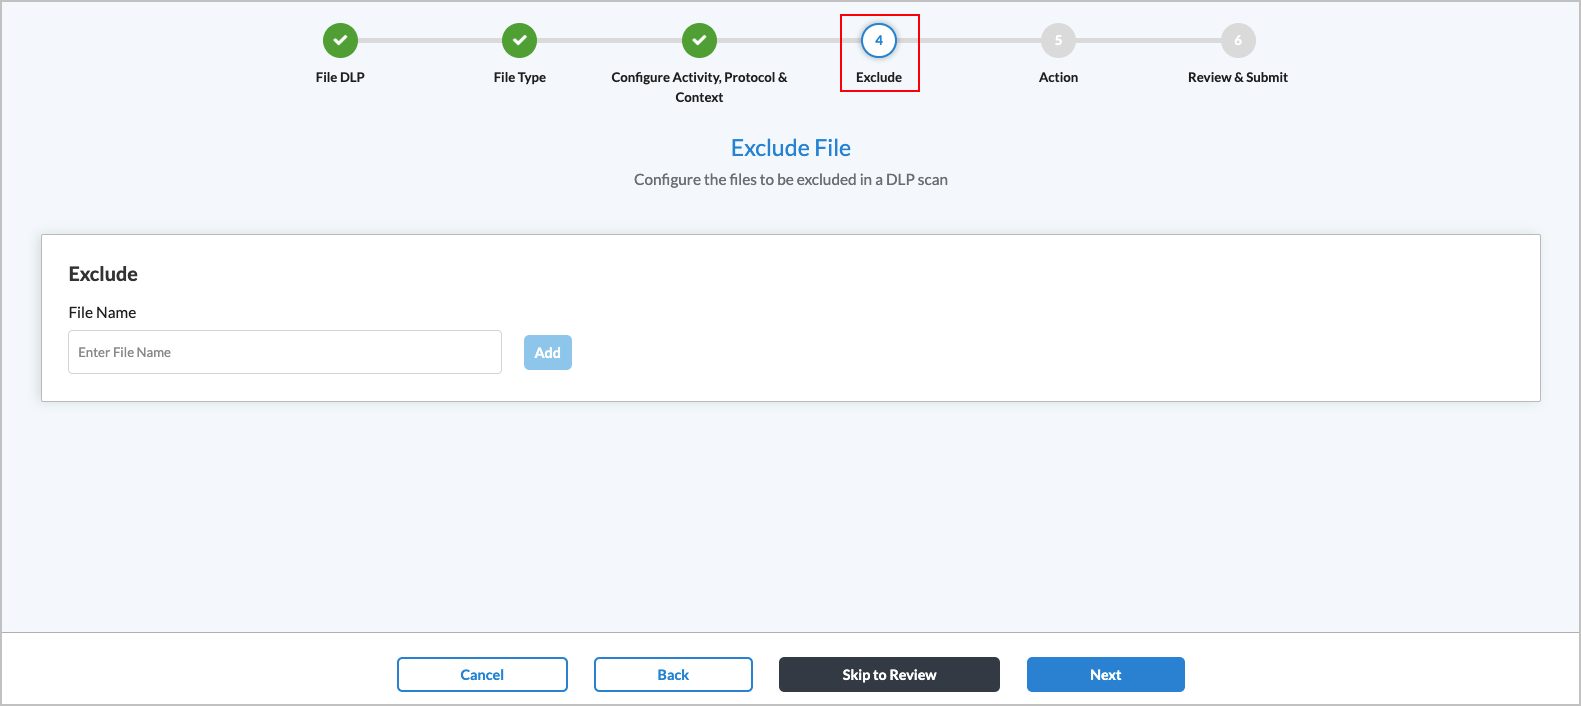
- Click Next or select workflow step 4, Exclude.
- In the File Name field, enter the name of a file to exclude, for example, budget.xlsx, and then click Add. The filename displays to the right of the Add button. You can exclude multiple files. To delete a filename from the list, click the
 Trash icon next to the filename.
- Click Next or select workflow step 5, Action.
- Enter information for the following fields.
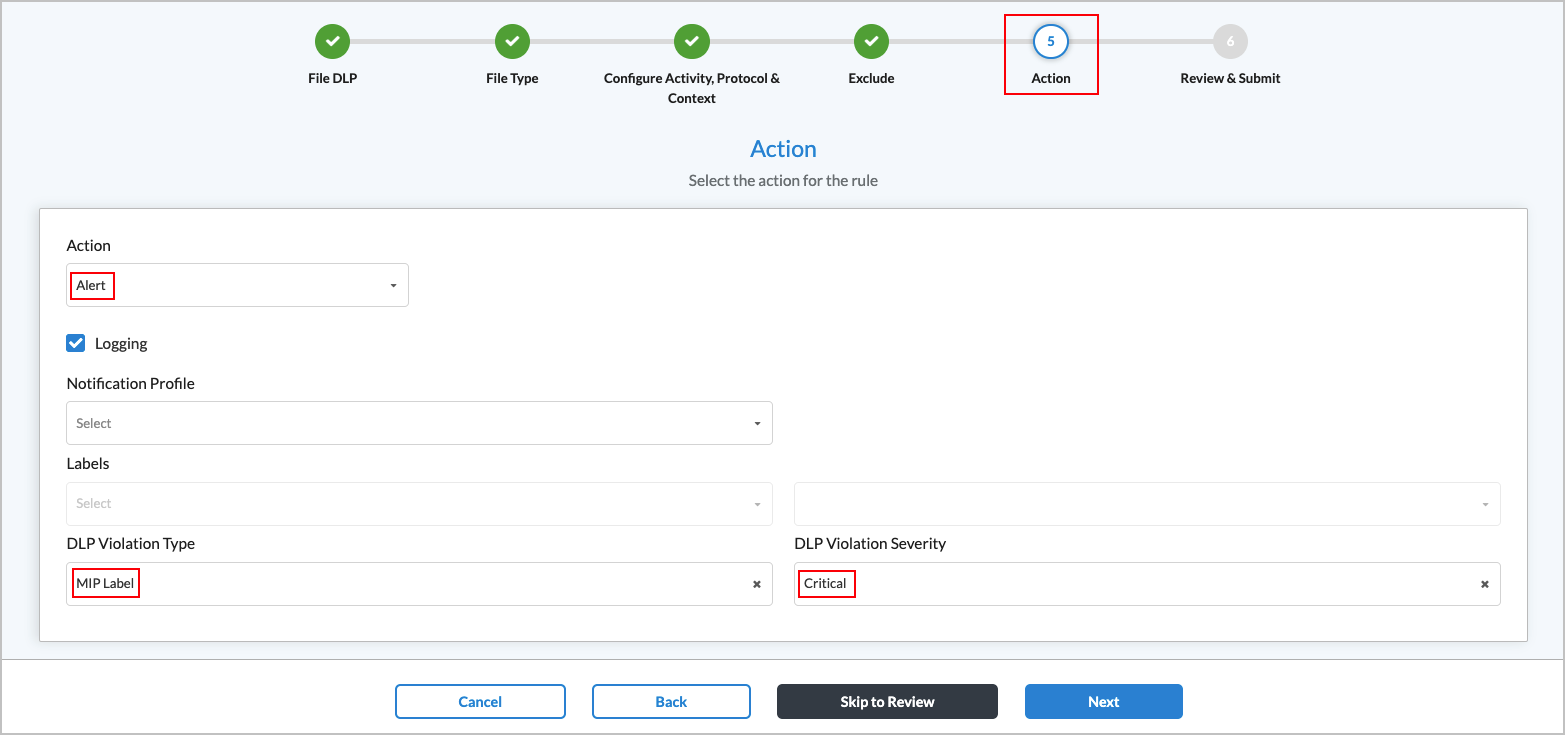
Field Description Action Select an action to take if the traffic matches the rule:
- Alert—Allow traffic to pass and log it to Versa Analytics.
- Block—Drop the traffic without sending a notification to the client host that originated the traffic.
- Encrypt—Encrypt the traffic before sending it.
Logging Click to enable LEF logging to Analytics, which logs all actions to Versa Analytics, except for actions that explicitly do not log. If you do not enable logging, no logging information is sent to Versa Analytics. Notification Profile Select a notification profile. To configure a notification profile, see Configure Notification Profiles. Labels (Optional) Select Set Label to re-label files when detected, for example, upgrade to 'Company-Secret'. Threat Type Select MIP Label.
Threat Severity Select Critical.
- Click Next or select workflow step 6, Review and Submit.
- Enter a name for the rule in the Name field.
- The rule is enabled by default. Click the toggle if you want to disable the rule.
- To change any of the information in the remaining sections, click the
 Edit icon for that section, and then make the required changes.
 - Click Save to create the DLP file rule.
Use Cases
The following use cases are examples of how DLP policies with MIP labels can prevent exfiltration of sensitive information.
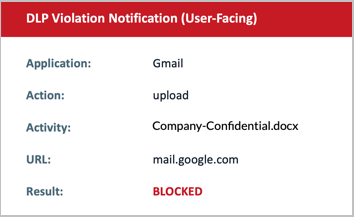
Use Case 1
A user attempts to upload a file labeled 'Company-Confidential' as an email attachment in GmailTM. Versa DLP inspects the file in transit, detects the MIP sensitivity label, and blocks the upload.
 .
. 
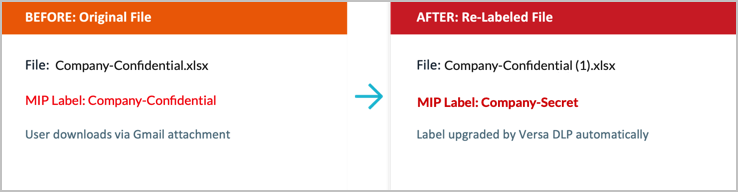
Use Case 2
In this use case, the DLP rule used in use case 1 is changed from Block to Alert with Set Label: Company-Secret. When a user downloads a file labeled Company-Confidential, Versa DLP allows the transfer but automatically upgrades the sensitivity label to Company-Secret.
Software Release Information
Releases 12.2.1 and later support all content described in this article.