Configure Captive Portal
![]() For supported software information, click here.
For supported software information, click here.
To control which URLs users can view when they are accessing internet webpages, you can configure captive portal. For the URLs whose access you want to control, you redirect users to a captive portal webpage on which you can display standard or customized messages that provide information about the webpage. For these webpages, you can control access or or you can block access completely.
For the URLs whose access you want to control, you redirect users to a captive portal page (a user intercept page) on which you can display a standard or customized message that provides information about the page. As part of URL-filtering policy enforcement, you can redirect users to captive portal pages. For the captive portal page itself, you can display one of the standard Versa Operating SystemTM (VOSTM) pages, or you can upload and use a custom page. When you select the ask, block, or justify action in a URL-filtering profile, the captive portal page for the selected action displays.
Configure Captive Portal Pages
To display the default VOS captive portal pages with default messages, you configure predefined captive portal actions. You can also customize messages on the default captive portal pages or upload custom captive portal pages.
To configure captive portal pages:
- Go to Configure > Settings > Captive Portal.

- The Customize User Intercept (Captive Portal) Pages screen displays. From here, you can configure a captive portal page for one of the following actions:
- Ask—The captive portal page prompts the user to confirm that they want to visit the webpage that they are browsing. If a user confirms, they are redirected to the webpage. Otherwise, the operation is canceled.
- Block—The captive portal page denies the user access to the webpage.
- Justify—The captive portal page prompts the user to enter a justification message before allowing them to continue to the requested webpage.
- Cancel—The captive portal page prompts the user to confirm that they want to visit the webpage that they are browsing. If the user confirms, they are redirected to the webpage. Otherwise, the operation is canceled.
Configure the Captive Portal Page for an Ask Action
The Ask User Intercept (captive portal) page will prompt the user to confirm that they want to visit the webpage that they are browsing. If a user confirms, they are redirected to the webpage. Otherwise, the operation is canceled.
- On the Customize User Intercept (Captive Portal) Pages screen, select the Ask tab.

- Versa provides a default Ask page for webpages that you want to control access to. To display the default Ask captive portal page, click Use Default Ask Page.
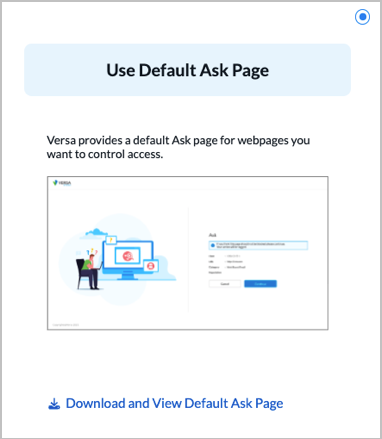
- To view the default Ask page, click Download and View Default Page to download the file in .zip format. Click the index.htm file.
- To edit the Ask message on the default page, click Enter New Ask Message Only.
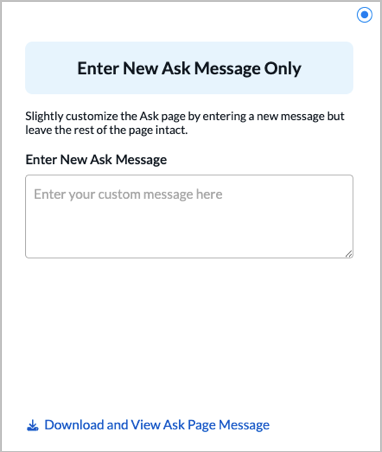
- Enter the message in the Enter New Ask Message field.
- To view the updated Ask captive portal page, click Download and View Page Changes to download the file in .zip format. Click the index.htm file.
- To upload and display a completely custom Ask captive portal page, which can include a different logo, a message, and new fields, click Customize Ask User Page. The following screen displays.

- To download the sample page, which is a .zip file, click the
 Download icon.
 - To upload a custom Ask captive portal page, click the
 Upload File button and then select the file, then click Open. The files for the captive portal webpage must be in a single .zip file. The main index file in the .zip file must be named index.htm, and it must contain the HTML, CSS, and image files for the custom captive portal page.
 - To view the custom Ask page, click Download and View Custom Page.
Configure the Custom Portal Page for a Block Action
The Block User Intercept (captive portal) page will prompt the user to confirm that they want to visit the webpage that they are browsing. If a user confirms, they are redirected to the webpage. Otherwise, the operation is canceled.
- On the Customize User Intercept (Captive Portal) Pages screen, select the Block tab.

- Versa provides a default Block page for webpages that you want to control access to. To display the default Block captive portal page that Versa provides, click Use Default Block Page.

- To view the default Block page, click Download and View Default Page to download the file in .zip format. Click the index.htm file.
- To edit the Block message on the default page, click Enter New Block Message Only.

- Enter the message in the Enter New Block Message field.
- To view the updated Block captive portal page, click Download and View Page Changes in .zip format. Click the index.htm file.
- To upload and display a completely custom Block captive portal page, which can include a different logo, a message, and new fields, click Customize Block User Page. The following screen displays.

- To download the sample page, which is a .zip file, click the Download icon.
- To upload a custom Block captive portal page, click the Upload File button, select the file, then click Open. The files for the captive portal webpage must be in a single .zip file. The main index file in the .zip file must be named index.htm, and it must contain the HTML, CSS, and image files for the custom captive portal page.
- To view the custom Block page, click Download and View Custom Page.
Configure the Custom Portal Page for a Justify Action
The Justify User Intercept (captive portal) page will prompt the user to confirm that they want to visit the webpage that they are browsing. If a user confirms, they are redirected to the webpage. Otherwise, the operation is canceled.
- On the Customize User Intercept (Captive Portal) Pages screen, select the Justify tab.

- Versa provides a default Justify page for webpages that you want to control access to. To display the default Justify captive portal page that Versa provides, click Use Default Justify Page.

- To view the default Justify page, click Download and View Default Page to download the file in .zip format.
- To edit the justify message in the default page, click Enter New Justify Message Only.

- Enter the message in the Enter New Justify Message field.
- To view the updated Justify captive portal page, click Download and View Page Changes. To view the updates, you can also save the .zip file.
- To upload and display a completely custom Justify captive portal page, which can include a different logo, a message, and new fields, click Customize Ask User Page. The following screen displays.

- To download the sample page, which is a .zip file, click the Download icon.
- To upload a custom Justify User captive portal page, click the Upload File button, select the file, then click Open. The files for the captive portal webpage must be in a single .zip file. The main index file in the .zip file must be named index.htm, and it must contain the HTML, CSS, and image files for the custom captive portal page.
- To view the updated Justify captive portal page, click Download and View Page Changes.
Configure the Custom Portal Page for a Cancel Action
The Cancel user intercept (captive portal) page will prompt the user to confirm that they want to visit the webpage that they are browsing. If a user confirms, they are redirected to the webpage. Otherwise, the operation is canceled.
- On the Customize User Intercept (Captive Portal) Pages screen, select the Cancel tab.

- Versa provides a default Cancel page for webpages that you want to control access to. To display the default Cancel captive portal page that Versa provides, click Use Default Cancel Page.

- To view the default Cancel page, click Download and View Default Page to download the file in .zip format. Click the index.htm file.
- To edit the Cancel message on the default page, click Enter New Cancel Message Only.

- Enter the message in the Enter New Cancel Message field.
- To view the updated Cancel captive portal page, click Download and View Page Changes. To view the updates, you can also save the .zip file.
- To upload and display a completely custom Cancel captive portal page, which can include a different logo, a message, and new fields, click Customize Cancel User Page. The following screen displays.

- To download the sample page, which is a .zip file, click the Download icon.
- To upload a custom Cancel User captive portal page, click the Upload File button, select the file, then click Open. The files for the captive portal webpage must be in a single .zip file. The main index file in the .zip file must be named index.htm, and it must contain the HTML, CSS, and image files for the custom captive portal page.
- To view the updated Cancel captive portal page, click Download and View Page Changes.
View or Add CA Certificates for Captive Portal
You can select the certificate authority (CA) certificate to use for the captive server portal over SSL.
To select a CA certificate:
- Click Captive Portal Settings.

- To associate an existing CA certificate with the captive portal, select a certificate in the Previously Uploaded Certificates field. The certificate details display.

- Click Download Certificate to save and view the certificate.
- To add a new CA certificate, CA chain, and private key, click
 Create New. The Add CA Certificate/CA-Chain/Private Key window displays. Select CA Certificate and enter information for the following fields.

Field Description Certificate Name (Required) Enter a name for CA certificate. CA Chain Name (Required) Select a name for the CA chain. A CA chain is an ordered list of certificates, containing an SSL/TLS certificate and CA certificates, that allow the receiver to verify that the sender and all CAs are trustworthy. Pass Phrase Enter the pass-phrase key, or password, to use to encrypt the certificate file. Upload Certificate/Key Bundle File Click to upload the CA certificate/key bundle file. The file must be in .zip format and must contain a key file and a certificate file. - Select CA Chain and enter information for the following fields.
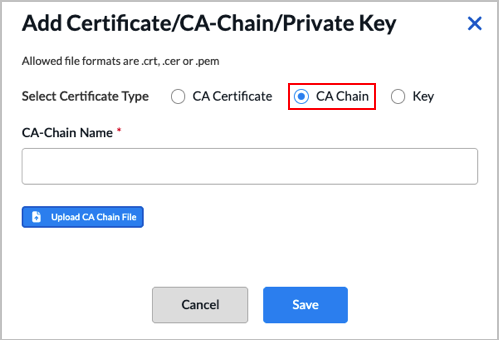
Field Description CA-Chain Name (Required) Enter a name for the CA chain. A CA chain is an ordered list of certificates, containing an SSL/TLS certificate and CA certificates, that allow the receiver to verify that the sender and all CAs are trustworthy. Upload CA Chain File Click to upload the CA chain file. The file must be in .crt, .cer, or .pem format. - Select Key and enter information for the following fields.
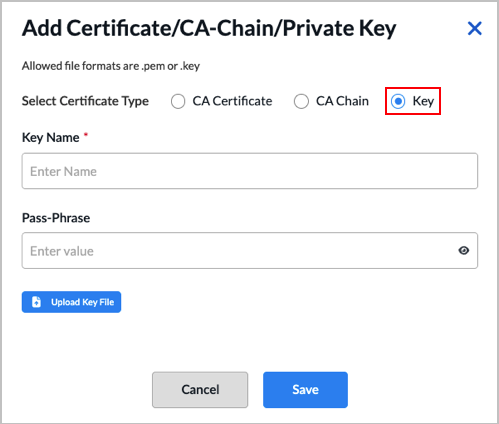
Field Description Key Name (Required) Enter a name for the key. Pass Phrase Enter the pass-phrase, or password, to use to encrypt the key file. Upload Key File Click to upload the key file. The file must be in .pem or .key format. - Click Save.
Supported Software Information
Releases 11.4.1 and later support all content described in this article, except:
- Release 13.1.1 updates the Concerto captive portal UI screens.