Configure SASE User-Defined Objects
![]() For supported software information, click here.
For supported software information, click here.
Objects are configuration elements that you use to build larger configurations, such policy rules and profiles. Versa provides many predefined SASE objects that you can use as they are. You can also define your own objects with which to build policies. You can configure following types of user-defined SASE objects:
- Address Groups
- Applications, which include the following:
- Private applications
- Internet applications
- Client native applications
Note: You can use internet applications only for internet protection rules, and you can use private applications only for private protection rules.
- Application Categories
- Application Groups, which include:
- Internet Application Groups
- Private Application Groups
Note: You can use internet application groups only for internet protection rules, and you can use private application groups only for private protection rules.
- Operating system
- Schedules
- Security Actions
- Services
- URL Categories
Note: You must configure the following SASE rules, profiles, and settings in a specific order:
- Configure site-to-site tunnels. For more information, see Configure SASE Site-to-Site Tunnels.
- Configure secure client access profiles and rules. For more information, see Configure SASE Secure Client-Based Access Rules.
You do not need to configure the remaining SASE rules, profiles, and settings in any particular order.
Configure User-Defined Applications and Application Groups
To configure user-defined applications and application groups:
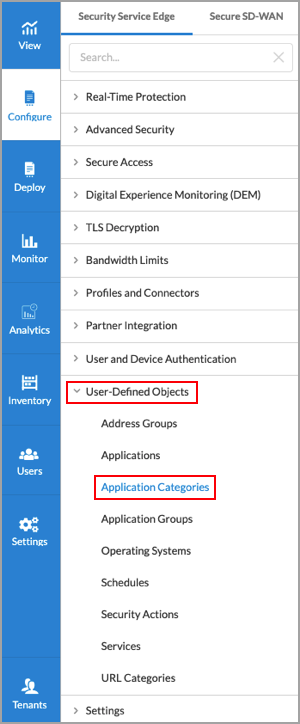
- Go to Configure > Security Service Edge > User-Defined Objects > Applications.
Note: For Releases 12.1.1 and earlier, User-Defined Objects is located at Configure > Security Service Edge > Settings.

By default, the Private Application screen displays.

- To customize which columns display, click Select Columns, and then click the columns select or deselect the columns you want to display. Click Reset to return to the default columns settings.
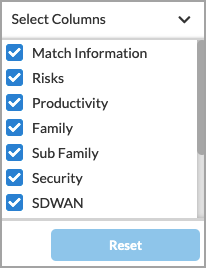
The column options are:
—Match Information
—Risks
—Productivity
—Family
—Subfamily
—Security
—SD-WAN
—General
—Application Image
—Tags
—Last Modified
Configure Private Applications
To configure private applications:
- Go to Configure > Security Service Edge > User-Defined Objects > Applications.
- From the Configure > Security Service Edge > User Defined Objects > Applications default landing screen, select the Private Application tab.
- Click
 Add to add a new private application. In the Add Private Application screen, under Enter Application Details, enter information for the following fields.

Field Description IP Prefix Select, and then enter a valid IP prefix and subnet. Note that if you select IP Prefix, you cannot also select Host Pattern. Host Pattern Select, and then enter a host pattern to match for the HTTP header and TLS Server Name Indication (SNI). Protocol Select a protocol. TCP is the default protocol. Source Port If you select the TCP or UDP protocol, enter the source port number. You can enter a single port value or a range of values; for example, 500 or 1-100.
Range: 0 through 65535
Default: None
Destination Port If you select the TCP or UDP protocol, enter the destination port number. You can enter a single port value or a range of values; for example, 500 or 1-100.
Range: 0 through 65535
Default: None
Precedence Enter a unique priority number to use when multiple applications match the traffic. The application with a higher precedence value is matched first.
Range: 0 through 65535
Default: None
- Click Next.
- In the Application Attributes section, enter the following information.

Field Description Risk Select a risk level. Each application has been assessed and assigned a risk level by the Versa Networks security research team, as follows:
- Level 1—Lowest Risk
- Level 2—Low Risk
- Level 3—Medium Risk
- Level 4—High Risk
- Level 5—Highest Risk
Productivity Select a productivity level. Each application has been assessed and assigned a productivity level by the Versa Networks security research team, as follows.
- Level 1—Lowest Productivity
- Level 2—Low Productivity
- Level 3—Medium Productivity
- Level 4—High Productivity
- Level 5—Highest Productivity
Family Select a family to associate with the application. Subfamily Select a subfamily to associate with the application. Application Tags—Security (For Releases 12.2.1 and later.) Select one or more security tags to associate with the application. Application Tags—SD-WAN (For Releases 12.2.1 and later.) Select one or more SD-WAN tags to associate with the application. Application Tags—General (For Releases 12.2.1 and later.) Select one or more general tags to associate with the application. - Click Next.
- In the Name, Description, Tags and Application Image section, enter information for the following fields.

Field Description Name (Required) Enter a name for the application. Description (Optional) Enter a description of the application. Tags (Optional) Enter one or more tags to to associate with the application. A tag is an alphanumeric text descriptor with no spaces or special characters that you use for searching objects. Upload Application Image (Optional) Click the  Add icon. In the popup window, select an application image and upload it. Images can be in png or svg format.
 - Click Save.
Configure Internet Applications
To configure internet applications:
- Go to Configure > Security Service Edge > User-Defined Objects > Applications.
- Select the Internet Applications and User Defined Internet Application subtabs. The screen displays any user-defined internet applications that you have already configured.

- Click + Add to add a new internet application. In the Add Internet Application screen, under Enter Application Details, enter information for the following fields.

Field Description IP Prefix Select, and then enter a valid IP prefix and subnet. Note that if you select IP Prefix, you cannot also select Host Pattern. Host Pattern Select, and then enter a host pattern to detect. Note that if you select Host Pattern, you cannot also select IP Prefix. Protocol Select a protocol. If you select Host Pattern, TCP is the only protocol available. Source Port If you select the TCP or UDP protocol, enter the source port number. You can enter a single port value or a range of values; for example, 500 or 1-100.
Range: 0 through 65535
Default: None
Destination Port If you select the TCP or UDP protocol, enter the destination port number. You can enter a single port value or a range of values; for example, 500 or 1-100.
Range: 0 through 65535
Default: None
Precedence Enter a unique priority number to use when multiple applications match the traffic. The application with a higher precedence value is matched first.
Range: 0 through 65535
Default: None
- Click Next.
- In the Application Attributes section, enter the following information.
Field Description Risk Select a risk level. Each application has been assessed and assigned a risk level by the Versa Networks security research team, as follows:
- Level 1—Lowest Risk
- Level 2—Low Risk
- Level 3—Medium Risk
- Level 4—High Risk
- Level 5—Highest Risk
Productivity Select a productivity level. Each application has been assessed and assigned a productivity level by the Versa Networks security research team, as follows.
- Level 1—Lowest Productivity
- Level 2—Low Productivity
- Level 3—Medium Productivity
- Level 4—High Productivity
- Level 5—Highest Productivity
Family Select a family to associate with the application. Subfamily Select a subfamily to associate with the application. Application Tags—Security (For Releases 12.2.1 and later.) Select one or more security tags to associate with the application. Application Tags—SD-WAN (For Releases 12.2.1 and later.) Select one or more SD-WAN tags to associate with the application. Application Tags—General (For Releases 12.2.1 and later.) Select one or more general tags to associate with the application. - Click Next.
- In the Name, Description, Tags and Application Image section, enter information for the following fields.
Field Description Name (Required) Enter a name for the application. Description (Optional) Enter a description of the application. Tags (Optional) Enter one or more tags to to associate with the application. A tag is an alphanumeric text descriptor with no spaces or special characters that you use for searching objects. Upload Application Image (Optional) Click the Add icon. In the popup window, select an application image and upload it. Images must be in .png or .svg format. - Click Save.
- (For Releases 12.2.1 and later.) To view predefined internet applications, select the Predefined Internet Applications tab.

Note: In Release 12.2.1 and later, deprecated predefined applications are not displayed. If you had already configured an application object in Releases 12.1.1 and earlier that included a now-deprecated application, and then try to edit that rule, an error message similar to the following is displayed.

- In the Edit Predefined Internet Applications screen, make required changes and click Save.

- In the Confirm popup window, click Save. The modified applications will list in the User Modified Predefined Internet Applications tab.

- (For Releases 12.2.1 and later.) To view user-modified predefined internet applications, select the User Modified Predefined Internet Applications tab.

Configure Client-Native Applications
To configure client-native applications:
- Go to Configure > Security Service Edge > User-Defined Objects > Applications.
- Select the Client Native Application tab. The screen displays any client-native applications that you have previously defined. Note that you use client-native applications when you configure secure client access rules, but you cannot use client-native applications when you configure internet protection rules or private application rules.

- Click Add to add a new client application. In the Application Details screen, enter information for the following fields.

Field Description FQDN Enter the fully qualified domain name (FQDN) to use to access the new client application on a remote server. Click the Add icon to enter additional FQDNs. Note that if you specify the FQDN, you cannot also specify the file path.File Path Enter the path to the new client application on your local computer or laptop. For example, the path to the Outlook application on your local computer or laptop might be /var/lob/apps/outlook.app. Note that if you specify the file path, you cannot also specify the FQDN.
Digital Experience Monitoring (Group of Fields) (For Releases 12.2.2 and later.) You configure DEM settings so that DEM can send probes to client-native application servers. In addition, when creating a DEM profile, you can select applications that are based on FQDNs or file paths. The DEM settings are independent of the FQDN or file path selection. - Host
Enter the IP address or the FQDN of the server that hosts the client-native application. - Protocol
Enter the protocol to use. The options are:
- TCP
- UDP
- Custom Port
Enter the custom port number on the host. - URI Path
Enter a numeric value for the uniform resource identifier (URI). - App Protocol
Select the protocol to use. The options are:
- HTTP
- HTTPS
- Ignore SSL Warning
Click the slider bar to enable SSL warnings. SSL warnings are disabled by default.
- Click Next. The Name, Description, Tags, and Application Image section displays. Enter information for the following fields.

Field Description Name (Required) Enter a name for the application. Description (Optional) Enter a description of the application. Tags (Optional) Enter one or more tags to to associate with the application. A tag is an alphanumeric text descriptor with no spaces or special characters that you use for searching objects. Upload Application Image (Optional) Click the Add icon. In the popup window, select an application image and upload it. Images must be in .png or .svg format. - Click Save.
Configure Application Categories
For Releases 12.2.1 and later.
Custom application categories are used to match information based on the attributes of predefined or custom applications. Versa currently provides 4,763 predefined applications.
For each category, you can create one or more filters:
- Application Risk—Each application has been assessed and assigned a risk level (1 = lowest to 5 = highest) by the Versa Networks security research team.
- Application Productivity—Each application has been assessed and assigned a productivity level (1 = lowest to 5 = highest) by the Versa Networks security research team.
- Application Tags—You can configure up to three types of application tags:
- Security
- SD-WAN
- General
- Application Family and Sub-family—You can select any of five application families and 34 application sub-families.
You can use application categories when configuring internet protection rules.
To configure application categories:
- Go to Configure > Security Service Edge > User Defined Objects > Application Categories.
The Application Categories screen displays.

- To customize which columns display, click the Select Columns arrow, and then select or deselect the columns you want to display. Click Reset to return to the default columns settings. The options are:
- Risk
- Productivity
- Family
- Sub Family
- Security
- SD-WAN
- General
- Click the Add icon to configure a new application category. The Add Application Categories screen displays.

As categories are selected, the application list will adjust to only show the applications the match selected categories. For example, in the sample screen above, 4,763 predefined applications and 61 user-defined applications are selected. Because no filters have yet been configured, these numbers represent the total number of predefined and user-defined applications that are available. The numbers will change you configure the various application filters. If you select multiple filters, the list changes to display the applications that meet all of the filters you selected.
- To customize the application risk filter, click the arrow next to Application Risk, then select one or more application risk filters.

In this example screen, we have selected two risk levels, Level 4 and Level 5. There are 152 Level 4 (high risk) applications and 138 Level 5 (highest risk) applications, for a total of 290 applications. This total matches the sum of the numbers displayed in the Predefined Applications (282) and User Defined Applications (8) tabs. - To customize the application productivity filter, click the arrow next to Application Productivity, then select one or more application productivity filters.

In this example screen, one productivity level, Level 4, is selected. There are 152 Level 4 (high productivity) applications. Of these 152 applications, 34 match the combined filter criteria of Level 4 and Level 5 application risk plus Level 4 application productivity. This total matches the sum of the numbers displayed in the Predefined Applications (30) and User Defined Applications (4) tabs.
- To customize the application tags filter, click the arrow next to Application Tags, then select one or more application tag filters.

In this example screen, one application security tags is selected. There are 10 predefined applications and 1 user-defined application, for a total of 11 applications that match all of the selected filters. This total matches the sum of the numbers displayed in the Predefined Applications (10) and User Defined Applications (1) tabs.
- To customize the application family and sub-family filter, click the arrow next to Application Family and Sub-Family, then select one or more filters.

In this example screen, one application family tag is selected. There are 10 predefined applications and 1 user-defined application, for a total of 11 applications that match all of the selected filters. This total matches the sum of the numbers displayed in the Predefined Applications (10) and User Defined Applications (1) tabs.
- Click Next.
- In the Name, Description, and Tags section, enter information for the following fields.

Field Description Name (Required) Enter a name for the application. Description (Optional) Enter a description of the application. Tags (Optional) Enter one or more tags to to associate with the application. A tag is an alphanumeric text descriptor with no spaces or special characters that you use for searching objects. - Click Save to add the application category.
Configure Application Groups
You can create application groups for both private applications and internet applications. However, you cannot create application groups for client-native applications.
Configure Private Application Groups
To configure private application groups:
- Go to Configure > Security Service Edge > User-Defined Objects > Application Groups.
Note: For Releases 12.1.1 and earlier, User-Defined Objects is located at Configure > Security Service Edge > Settings.

The Private Application Group screen displays any private application groups that you have previously defined. Note that you can include only private applications in private application groups.

- To customize which columns display, click the Select Columns arrow, and then select or deselect the columns to display. Click Reset to return to the default columns settings. The options are:
- Applications
- Application Group Image
- Tags
- Last Modified
- Click Add to add a new private application group.
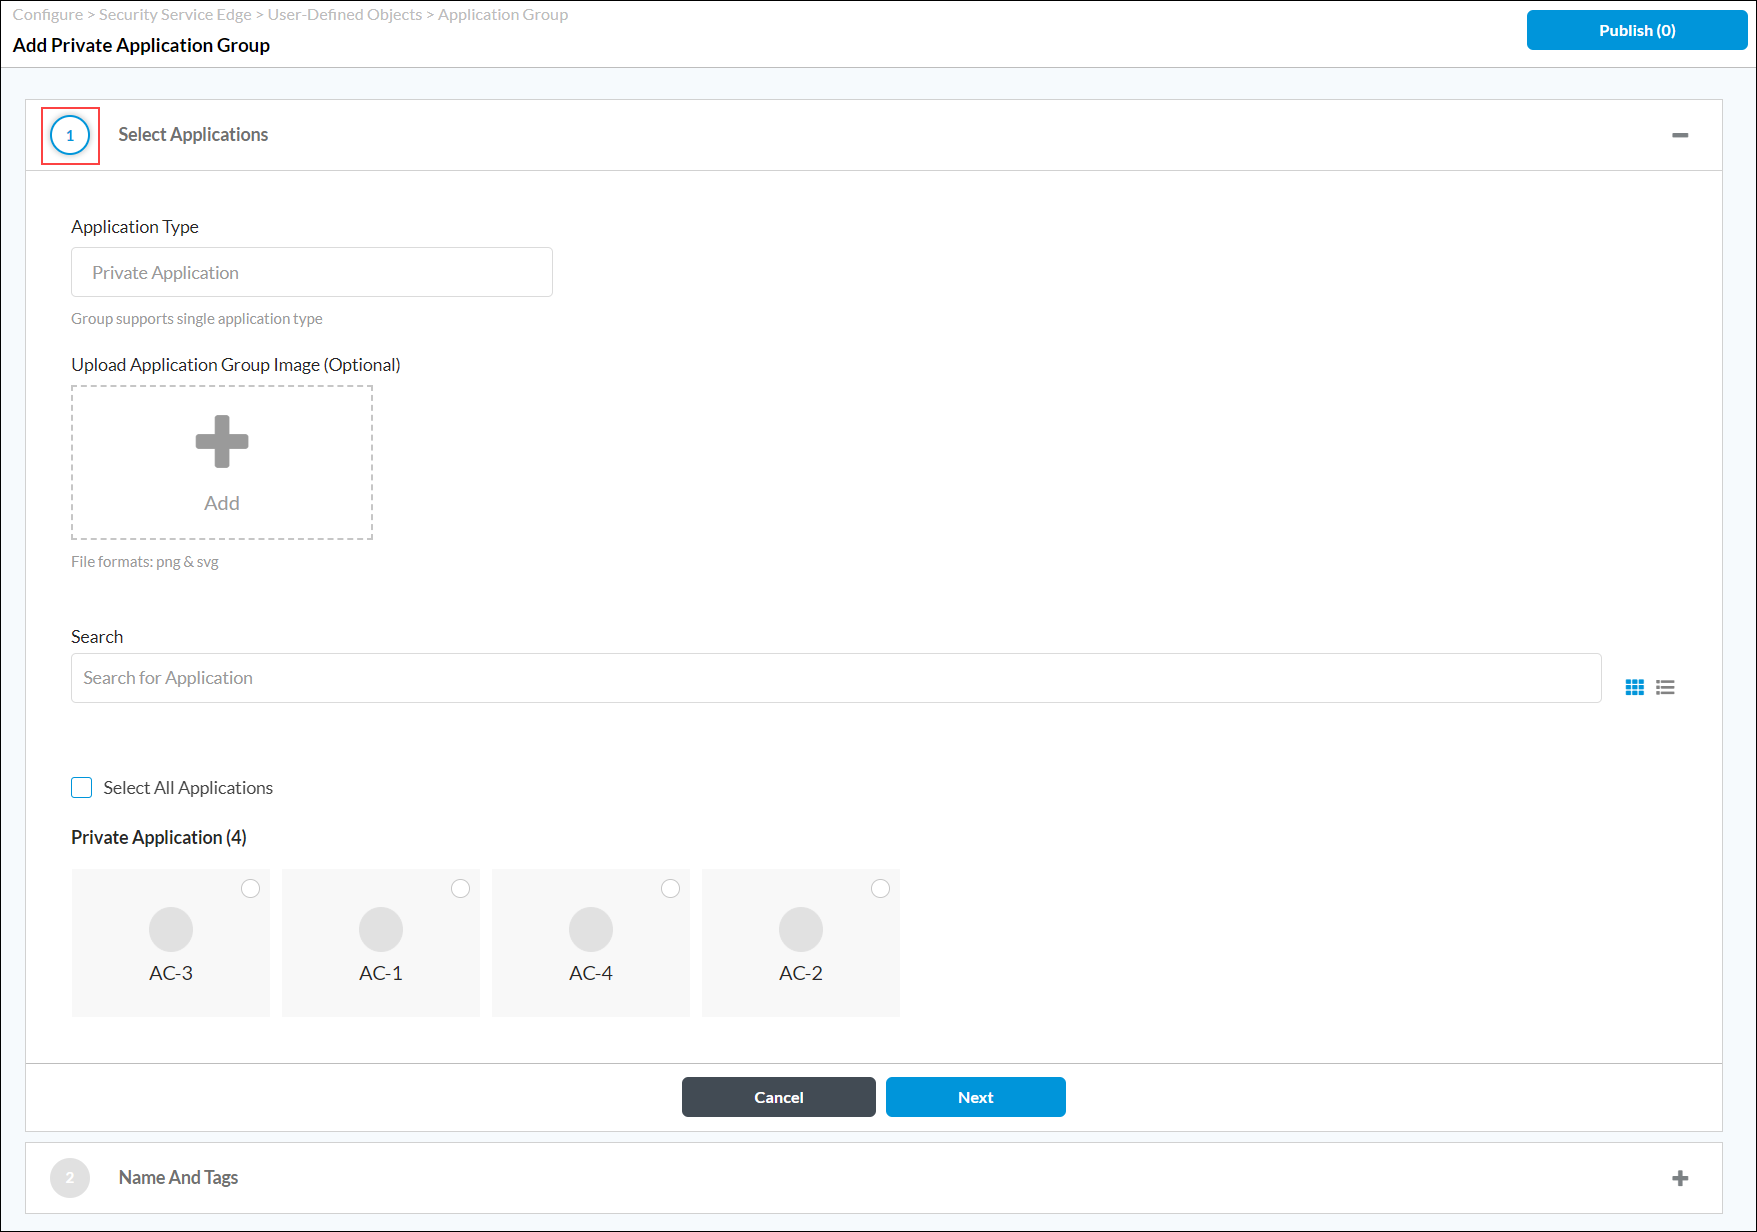
- In the Select Applications section, you can click the Add icon to upload an application group image.
- Use the search bar to find an application, click one or more of the listed applications to add, or click the Select All Application checkbox to add all private applications to the group.
- Click Next. The Name and Tags section displays.

- Enter a name for the private application group and, optionally, one or more tags to include. Click the Enter key to add each tag. A tag is an alphanumeric text descriptor with no spaces or special characters that you use for searching objects.
- Click Save to create the private application group.
Configure Internet Application Groups
To configure internet application groups:
- In the Private Applications default landing screen, select the Application Groups tab, and then select the Internet Application Groups tab. The screen displays any internet application groups that are already defined and the applications included in each group.

- Click + Add to add a new internet application group. The Add Internet Application Group screen displays the available internet applications and predefined applications.

- In the Select Applications section, click the Add icon to upload an application group image.
- Click one or more of the listed applications to add them to the group, or click the Select All Applications checkbox to add all internet applications to the group. You can also use the search bar to search for applications to add to the group.
- Click Next. The Name, Description, and Tags section displays.

- Enter a name for the new internet application group and, optionally, one or more tags to include. A tag is an alphanumeric text descriptor with no spaces or special characters that you use for searching objects.
- Click Save.
Configure Address Group Objects
A SASE address group object configures match criteria based on source IP address, destination IP address, or a combination of both. You can define address groups that are then used when defining internet protection rules, private application rules, and secure client access rules.
To define address groups:
- Go to Configure > Security Service Edge > User-Defined Objects > Address Groups in the left menu bar.
Note: For Releases 12.1.1 and earlier, User-Defined Objects is located at Configure > Security Service Edge > Settings.

The Address Groups screen displays all current address groups.

- Click + Add to add a new IP address group. In the Add Address Group screen, enter information for the following fields.

Field Description Type Select an address group type:
- Address Files
- Dynamic Address
- FQDN
- IP range
- IP wildcard
- IPv6 subnet
- Subnet
IP Addresses Enter IP addresses for the type:
- IP range—Valid IP address range, for example, 10.2.1.1-10.2.2.2
- IP wildcard—Valid IP wildcard, for example, 192.168.0.56/255.255.0.255
- IP6 subnet—Valid IPv6 subnet, for example, 2001:0db8:85a3:0000:0000:8a2e:0370:7334
- Subnet—One or more valid IPv4 subnets, for example, 10.1.1.0/24
Address Files (For Releases 12.1.1 and later.) When you select the Address Files type, select an address file. For more information, see Manage Files and Folders.
To add a new address file:
- Click Add new file.

- In the Upload File popup window, click Browse and select an address file to upload. The file must be in CSV format.

- Click Upload.
- Click the
 Add icon to add a new IP address group. You can add multiple Address Group types, as shown here:

- Click Next. The Name and Tags section displays.

- Enter a name for the new IP address group and, optionally, one or more tags to include. A tag is an alphanumeric text descriptor with no spaces or special characters that you use for searching objects.
- Click Save.
Configure SASE Schedules
Security policy rules work at all dates and times. You can define a schedule object to limit a security policy to specific times, and you then use the schedule objects when defining internet protection rules, private application rules, and secure client access rules.
Policy objects support match criteria based on the time of day. For example, you can define a policy rule that is effective only during certain times of the day, such as lunch hours or after normal working hours.
To configure a schedule object, you configure either a fixed date and time range or a recurring daily or weekly schedule.
To configure schedule objects:
- Go to Configure > Security Service Edge > User-Defined Objects > Schedules in the left menu bar.
Note: For Releases 12.1.1 and earlier, User-Defined Objects is located at Configure > Security Service Edge > Settings.

The Schedules screen displays the schedules that are already configured.

- Click the + Add icon to add a schedule. In the Add Schedule screen, enter information for the following fields.

Field Description Recurrence Select None, Daily, or Weekly. - None
If you select None, enter the following information:
- Start Date—Select a start date.
- Start Time—Select a start time.
- End Date—Select an end date.
- End Time—Select an end time.
- Daily
If you select Daily, enter information for the following fields:

- All Day—Click the slider to schedule the security policy to be in effect all day.

- Start Time—Select a start time from the drop-down list.
- End Time—Select an end time from the drop-down list.
- Weekly
If you select Weekly, enter information for the following fields:
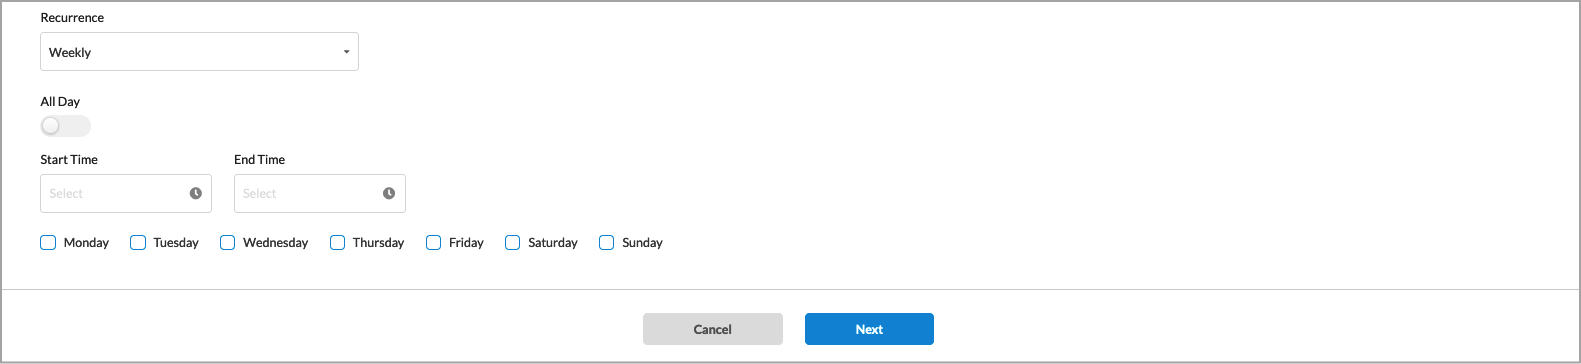
- All Day—Click the slider to schedule the security policy to be in effect all day.
- Start Time—Select a start time.
- End Time—Select an end time.
- Select the days the security policy is to be in effect.

- Click Next. The Name and Tags section displays.

- Enter a name for the new schedule and, optionally, one or more tags to include. A tag is an alphanumeric text descriptor with no spaces or special characters that you use for searching objects.
- Click Save.
Configure SASE Services
Security policies can reference service objects, which define match criteria based on protocol name and number, and on source and destination port number. Versa provides default predefined services and object definitions, and also provides periodic updates to the default services and objects.
You can also create custom service objects. One reason to do this might be if a well-known service runs on a non-standard port or if the predefined services are missing the desired port and protocol combination. Another reason might be to limit the number of ports that an application can use. For example, you could limit FTP to use only port 21 instead of ports 20 and 21.
The custom service objects that you define for a tenant can be used only by that tenant, and they are not visible to any other tenants.
To define service objects:
- Go to Configure > Security Service Edge > User-Defined Objects > Services.
Note: For Releases 12.1.1 and earlier, User-Defined Objects is located at Configure > Security Service Edge > Settings.

The Services screen displays all services that are already configured. To find a particular service, use the search box.

- In the drop-down list to the right of the Search box, select one of the following options:
- All Services (default)
- User Defined
- Predefined
- Click the Add User Defined icon to add a new service. In the Add Service screen, enter information for the following fields.

Field Description Protocol Select a protocol. The options are:
- AH
- ESP
- ICMP
- TCP
- UDP
- 0 to 255
Port (For TCP, UDP, or TCP_OR_UDP protocols only.) Select a port. The options are:
- Source AND Destination
- Source OR Destination
- Source
(For TCP, UDP, or TCP_OR_UDP protocols only.) Enter the source port for the protocol. For multiple entries, use comma-separated single port values or range of port values (using hyphens), for example, 1-100,2-200,3. - Destination
(For TCP, UDP, or TCP_OR_UDP protocols only.) Enter the destination port for the protocol. For multiple entries, use comma-separated single port values or range of port values (using hyphens), for example, 1-100,2-200,3. Source (For TCP, UDP, or TCP_OR_UDP protocols only.) Enter the source port for the protocol.
Range: 0 through 65535
Default: None
Destination (For TCP, UDP, or TCP_OR_UDP protocols only.) Enter the destination port for the protocol.
Range: 0 through 65535
Default: None
- Click Next. The Name and Tags section displays.

- Enter a name for the new service and, optionally, enter a description and one or more tags. A tag is an alphanumeric text descriptor with no spaces or special characters that you use for searching objects.
- Click Save to add the new service.
Configure Custom Security Actions
For Releases 11.4.1 and later.
For URL filtering, you can can select a user-defined action as the action to take when a filter matches.
To configure user-defined security actions:
- Go to Configure > Security Service Edge > User-Defined Objects > Security Actions.
Note: For Releases 12.1.1 and earlier, User-Defined Objects is located at Configure > Security Service Edge > Settings.

The Security Actions screen displays the security actions that are already configured. To locate a particular action, use the search box.
Note: Release 12.2.1 supports three new built-in security actions: GenAI_sanctioned, GenAI_tolerated, and GenAI_unsanctioned.

- Click the + Add Security Actions icon to add a new action. In the Add Security Actions screen, enter information for the following fields.

Field Description Security Action Type Select the type of action to which to apply the action when the page is redirected. The action type options represent the module for which the user-defined action was configured. For example, if you select URLF, the action can be used only in URL-filtering profiles.
- All—Apply to all action types.
- CASB—Apply to cloud access security broker (CASB) profiles.
- Decryption—Apply for decryption.
- DNS—Apply for DNS traffic.
- IP Reputation—Apply for IP-filtering profiles.
- IPS—Apply for the intrusion detection and prevention system.
- URLF—Apply for URL-filtering profiles.
Action Select the action to take when the user is redirected to a captive portal. Note that not all actions are available for all action types.
- Allow—Allow the URL without generating an entry in the log.
- Ask—The browser presents an information page that allows the user to either cancel the operation by clicking Cancel or continue with the operation by clicking OK.
- Block—Block the URL and generate an entry in the URL-filtering log.
- Custom Redirection—The browser redirects the user to the URL configured in the Redirection URL field. Then, in the Redirection URL field, enter the redirection URL to redirect a user from one URL to another.
- Drop Packet—The browser waits for a response from the server and then drops the packets.
- Drop Session—The browser waits for a response from the server and then drops the session.
- Inform—The browser presents an information page that prompts the user to continue after clicking OK.
- Justify—The browser presents an information page that allows the user to either cancel the operation by clicking Cancel or continue with the operation after entering a justification message and clicking OK.
- Override—This action generates an entry in the URL-filtering log. The browser prompts the user to enter a PIN. Then, in the Override PIN field, enter a 4- to 6-digit PIN.
- Reset Client—The host responds by sending a TCP Reset packet to the client, and the browser displays an error message indicating that the connection has been reset.
- Reset Client and Server—The host responds by sending a TCP Reset packet back to the client and server. The browser displays an error message indicating that the connection was reset.
- Reset Server—The host responds by sending a TCP Reset packet to the server. The browser waits for a response from the server and then drops the session.
- Sinkhole—Return a false IP address to the URL, thus blocking a DNS sinkhole. A DNS sinkhole spoofs DNS servers to prevent the resolution of the hostnames associated with URLs. This action can help you identify infected hosts in a network if a firewall is unable to find the original source IP address of DNS request sender. Sinkhole malware DNS queries create responses to the client host queries directed at malicious domains and try to connect to a sinkhole IP address instead of connecting to malicious domains. You can check the traffic logs to identify infected hosts. You can apply the sinkhole to all, DNS, IP reputation, and URL-filtering action types. Configure the following sinkhole parameters:
- Domain Name—Enter the domain name in which the LDAP server resides.
- IP Address—Click the Add icon to enter one or more IP addresses.
- TTL—Enter the time-to-live (TTL) value, in seconds.
Range: 1 through 65535 seconds
Default: 30 seconds
Decrypt Bypass Click to disable SSL encryption for matching traffic, to allow you to define websites that are not subject to decryption. Log Captive Portal Actions Click to log captive portal actions. If you do not enable logging, the custom message that you enter in the Message field is not displayed in the log displayed in Versa Analytics. Expiration Time Enter how often to redirect a user to the URL, in minutes. When a user first enters a URL and is redirected to a captive portal page, the Versa Operating SystemTM (VOSTM) device creates a cache entry, which expires after a global expiration time. While the cache entry is active, the device does not enforce the captive portal action, and users can view the webpage at the initial URL and at all URLs that belong to the same URL category, without seeing the captive portal page, with one exception. If the action is Block, all URLs are redirected to the Block page, regardless of the expiration time
Range: 1 through 65535 minutes
Default: 1 minute
Message Enter a message to display on the captive portal page. - Click Next. In the Enter Name, Description, and Tags section, enter information for the following fields.

Field Description Name (Required) Enter a name for the security action. Description Enter a text description. Tags Enter one or more tags. A tag is an alphanumeric text descriptor with no spaces or special characters that you use for searching tunnels. - Click Save.
Configure Custom URL Categories
For Releases 11.4.1 and later.
You can create custom URL category objects on a per-tenant basis. You assign a unique name to each custom URL category, and you use a string or pattern match to define information about the URLs. You also associate a reputation value with the URL category. You can use a custom URL category in NGFW and SD-WAN policy rules to specify match criteria for a Layer 7 URL category. You can also specify custom URL categories in the category-based action rules and reputation-based action rules of a URL-filtering profile.
Do not include "http://" or "https://" in the URL pattern or string. Enter only the domain and path (for example, www.example.com or .*example.*). VOS performs URL matching against the normalized URL, which excludes the protocol prefix.
To configure custom URL categories:
- Go to Configure > Security Service Edge > User-Defined Objects > URL Categories.
Note: For Releases 12.1.1 and earlier, User-Defined Objects is located at Configure > Security Service Edge > Settings.
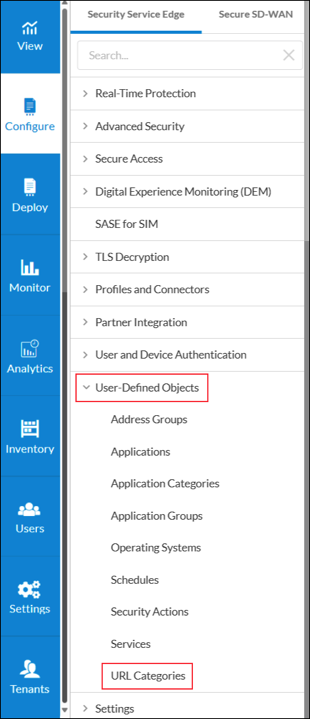
The URL Categories screen displays the URL categories that are already configured. To find a particular category, use the search box.
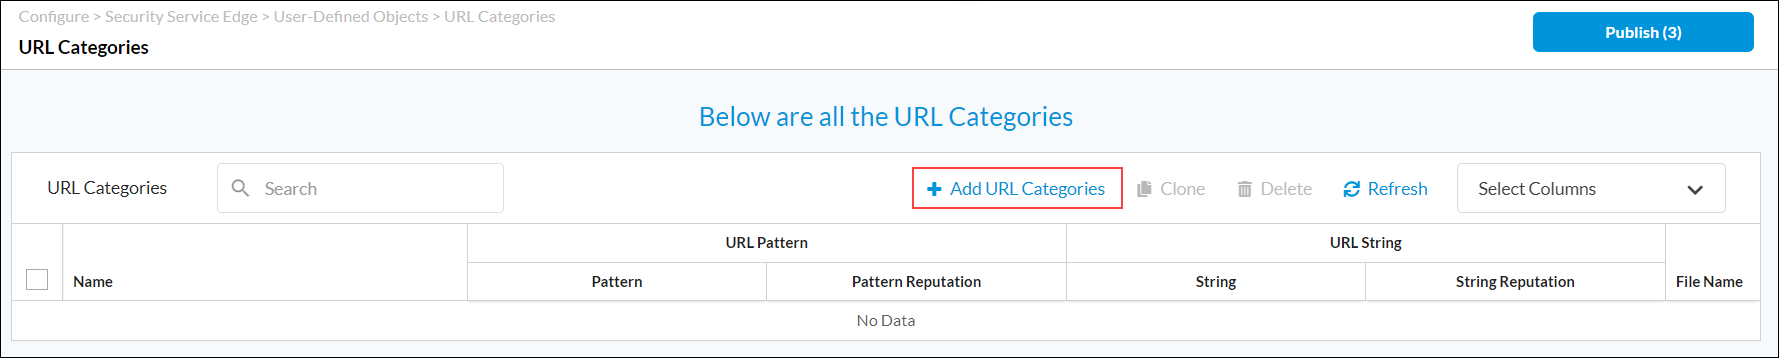
- To customize which columns display, click the Select Columns arrow, and then select or deselect the columns to display. Click Reset to return to the default columns settings. The options are:
- Pattern
- Pattern Reputation
- String
- String Reputation
- File Name
- Click the Add URL Categories icon to add a new URL category. In the URL Patterns section, enter information for the following fields.

Field Description Patterns Enter a URL pattern to match and group the URLs. Note that the pattern must be a regular expression in PCRE syntax, subject to the limitations of the Hyperscan library. For example, use "^(www\.)?versa-networks\.com\/" to match Versa Networks URLs. If your regex includes special characters such as a backslash (\) or an open curly brace ({), you must escape them by preceding with an extra backslash. Reputation Select a predefined reputation, and then assign it to the URL match pattern. - Click Next. In the URL Strings section, enter information for the following fields.

Field Description String Enter a URL string that you want to group. Reputation Select a predefined reputation, and then assign it to the URL string. - (For Releases 12.1.1 and later.) Click Next. In the URL Files section, select a URL file. To add a new URL file, click Add New File.
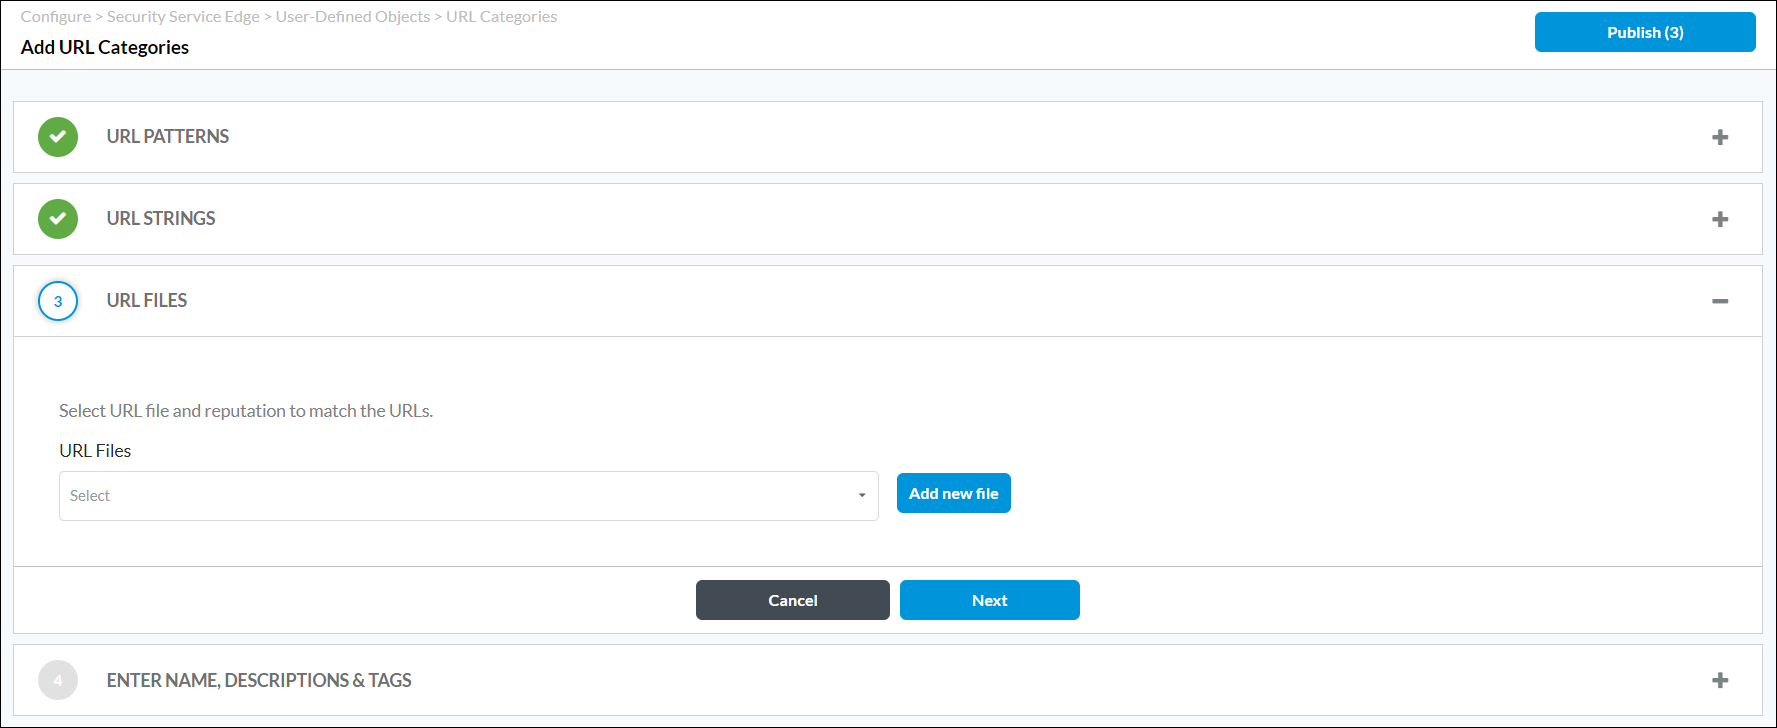
In the Upload File popup window, click Browse, select a URL file to upload, and then click Upload. The file must be in CSV format. For more information, see Manage Files and Folders.

- Click Next. In the Enter Name, Description, and Tags section, enter information for the following fields.

Field Description Name (Required) Enter a name for the URL category. This name is displayed in the category list when defining the URL-filtering policies and in the match criteria for URL categories in policy rules. Description Enter a text description for the URL category. Tags Enter one or more tags for the URL category. A tag is an alphanumeric text descriptor with no spaces or special characters that you use for searching URL categories. - Click Save.
Add Operating System Objects
For Releases 12.2.1 and later.
You can use predefined operating system objects or you can create custom operating systems. You can select the custom operating systems when you configure operating systems for a secure client access rule.
To create a custom operating system:
- Go to Configure > Security Service Edge > User-Defined Objects > Operating Systems.

- Click the
 icon to add a new operating system.

- In Step 1, Operating Systems and Versions, enter information for the following fields.

Field Description Predefined Operating System Click to select a predefined operating system to match the OS object. Patterns Click to enter a pattern to match the OS object. In the Patterns field, enter a pattern and click the
 Add icon.
Enter the pattern using the syntax /regex/regex-options. In this field, you can use the standard Perl-compatible regular expression (PCRE) pattern i, to indicate a case-insensitive match. You cannot use other PCRE patterns.
For example, to match any Windows version, enter the pattern /windows/i, where i ignores the case. This pattern matches a query for Windows regardless of the case, matching, for example, windows, Windows, and WINDOWS.
If you enter a pattern, you cannot also select a value in the Predefined Operating System field.
OS Category Select an OS object category:
- Android
- Apple
- Linux
- Windows
Predefined Operating System Select a predefined OS object to match:
- Android
- Fedora
- iOS
- iPadOS
- MacOS
- MacOS X
- MacOS X Server
- OS X
- RedHat Enterprise Linux
- Ubuntu
- Windows 7
- Windows 8
- Windows 8.1
- Windows 10
- Windows 10 Mobile
- Windows 11
- Windows Server 2012
- Windows Server 2012 R2
- Windows Server 2016
- Windows Server 2019
- Windows Server 2022
- Windows Vista
- Windows XP
If you select a value in the Predefined Operating System field, you cannot also enter a pattern in the Pattern field.
Build Versions Enter a build version for the OS object. The version can be a single version, a range of versions, or a comma-separated list of versions. For syntax examples, see the description of the Versions field, below. Security Package Versions Enter the security package version of the OS object. The version can be a single version, a range of versions, or a comma-separated list of versions. For syntax examples, see the description of the Versions field, below. Versions Enter the version of the OS object that you selected in the Security Package Versions field. The version can be a single version, a range of versions, or a comma-separated list of versions, using the syntax in the following examples:
Example of a single-version
- 10.0
- 10-15 (versions 10 through 15)
- 10.2-15 (versions 10.2 through 15)
- 10.2.2-15 (versions 10.2.2 through 15)
- 10.2-15.2 (versions 10.2 through 15.2)
- 10.2.2- (versions 10.2.2 and later)
- 10.2- (versions 10.2 and later)
- -10.2 (versions prior to 10.2)
- -10 (versions prior to 10)
- 10, 11, 12, 13, 16
- 10.2, 10.3, 10.6
- 10.2, 10.3.5, 12.2-18, 20- (10.2,10.3.5, 12.2 through 18, and 20 and later)
-
Click Next. In Step 2, Enter Name, Descriptions and Tags, enter information for the following fields.

Field Description Name (Required) Enter a name for the OS object. Description Enter a text description for the OS object. Tags Enter one or more tags for the OS object. A tag is an alphanumeric text descriptor with no spaces or special characters that you use for searching an OS. -
Click Save.
To associate a custom operating system to a secure client access rule, see Configure SASE Secure Client-Based Access Rules.
Associate Custom Security Actions and Custom URL Categories with Security Profiles
For Releases 11.4.1 and later.
You can associate custom security actions and custom URL categories that you configure with the following security profiles:
- CASB
- Decryption
- DNS filtering
- IP filtering
- IPS
- IPS override
- URL filtering
The following use case describes how to associate a custom security action and a URL category with the URL-filtering profiles. You can use the same method for other security profiles, and to associate the predefined security actions with the security profiles. For more information, see Configure Custom URL-Filtering Profiles.
To associate a security action with a URL-filtering profile:
- Go to Configure > Security Service Edge > Real-Time Protection > Profiles.
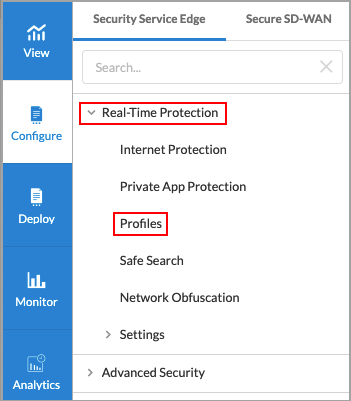
The following screen displays:

- To customize which columns display, click the Select Columns arrow, and then select or deselect the columns to display. Click Reset to return to the default columns settings. The options are:
- Logging
- Deny List
- Allow List
- URL Categories
- Reputations
- Action
- Click the Add icon to create a profile. The Create URL Filtering Profile screen displays.
- In Step 1, Deny and Allow List, enter information for the following fields.

Field Description Deny List (group of Fields) Choose which actions and URLs to deny (blacklist). - Action
Select a custom or predefined action to take. The predefined options are:
- Alert
- Allow
- Ask
- Block
- Drop Packet
- Drop Session
- Justify
- Reject
- Add New
Click the Add New icon to add a custom security action. For more information, see Step 2 in Configure Custom Security Actions, above.- Patterns
Enter a regular expression pattern, such as example-pattern. Click the Add icon to add additional patterns. Note that if you include special regex characters, you must precede them with a backslash.- Strings
Enter a comma-separated list of strings, such as example1,example2,example3. Allow List (Group of Fields) Choose which URLs to allow (whitelist). - Patterns
Enter a regular expression pattern, such as example-pattern. Click the Add icon to add additional patterns. Note that if you include special regex characters, you must precede them with a backslash.- Strings
Enter a comma-separated list of strings, such as example1,example2,example3. - Enable Logging
Click to enable logging to Versa Analytics. - Click Next to go to Step 2, Category and Reputations List, to specify an action, URL category, and reputation. If you specify both category and reputation lists, URLs must match both the category and the reputation. For category list, select a custom URL category or click the Add New icon to add a new URL category. For more information, see Configure Custom URL Categories, above.

- Click Next to go to Step 3, Action, and then select a default action to enforce if none of the criteria are matched. If you do not specify an action in the category and reputation lists, the default action is taken.

- Click Next to go to the Review and Submit screen.

- Enter a name for the URL filtering profile.
- Review the configuration. Click the
 Edit icon in any section to make changes as needed.
 - Click Save.
Supported Software Information
Releases 11.1.1 and later support all content described in this article, except:
- Release 11.4.1 adds support for custom security actions and custom URL categories.
- Release 12.1.1 adds support for uploading address group files and URL files.
- Release 12.2.1 adds support for configuring custom operating systems and application tags for user-defined applications, and for configuring application categories; the User Defined > Services screen allows you to choose which services to display (All Services, User Defined, Predefined); the Add Service screen is redesigned and contains additional fields; deprecated predefined applications are not displayed in the Concerto UI screens; and supports three new built-in security actions: GenAI_sanctioned, GenAI_tolerated, and GenAI_unsanctioned.
- Release 12.2.2 adds support for Digital Experience Monitoring (DEM) of client-native applications.