Configure a Secure SD-WAN Tenant
![]() For supported software information, click here.
For supported software information, click here.
The Tenants screen displays all configured tenants for a service provider. This screen displays when you first log in to the Concerto orchestrator as a Service Provider Administrator.
You can create a tenant that runs one or both of the following service types:
- Secure SD-WAN
- Security Service Edge (SASE)
- SASE for SIM
- Secure SD-Router
- NGFW-UTM
You can assign a non-SD-WAN solution tier to a tenant. For Release 12.2.2, the non-SD-WAN solution tier consists of the following:
- Essential NGFW
- Professional NGFW
- Elite NGFW
For Releases 12.1.1, 12.1.2, and 12.2.1, the non-SD-WAN solution tier consists of the following:
- Next-generation firewall (NGFW)
- ProNet
- Unified threat management (UTM)
You can choose options from the SD-WAN or the non-SD-WAN solution tier, but you cannot choose options from both tiers.
This article describes how to create a secure SD-WAN tenant. For information about creating a SASE tenant, see Configure SASE Tenants. For information about creating a tenant with the Secure SD-Router service type, see Configure a Secure SD-Router in Concerto.
Create a Secure SD-WAN Tenant
- Go to the Tenants home screen.

- On the Tenants screen, click + Tenant. The Create screen displays, and Step 1, General, is selected.
Note: Initially, the Create Tenant screen shows three workflow tabs: General, Roles (Tenant Active Roles), and Review & Submit. Once you select Secure SD-WAN under Select Services in the Create Tenant screen, the Secure SD-WAN step is added to the workflow.

Enter information for the following fields.
Field Description Tenant Name Enter a name for the tenant. Enabled Click the slider bar to enable the tenant.

Click the slider bar a second time to disable the tenant.

Global Tenant ID The global tenant ID is assigned automatically. Parent Tenant Select the parent tenant. Select Services Select Secure-SD-WAN. The Security SD-WAN step is added to the workflow:

In addition, the Authentication Type fields are displayed when you select Secure-SD-WAN:

Directors (Group of Fields) - Host
Select a host Director node. For information about configuring Director nodes, see Create a Director Cluster.
- Is Default
Click to designate the host as the default Director node for the tenant. If you configure only one Director node, that node is the default. If you configure two or more Director nodes, click the Is Default slide bar to select the default Director node.

Controllers
Select one or more Controller nodes. ZTP Type Choose the type of ZTP to use to initialize the tenant:
- Serial Number
- URL
Authentication Type (for Releases 12.1.1 and later) 
- Preshared Key
Use a preshared key for authentication. This is the default. - Certificate
Use a public key infrastructure (PKI) certificate for authentication. If you select the Certificate authentication type, the Certificate step is added to the tenant configuration workflow.

- CA in Data Center
Select if the certificate authority (CA) is located behind a Controller node. Otherwise, the workflow assumes that the CA is accessible over the WAN interfaces. License Year (For Releases 12.2.2 and later.) Select the Versa Director license year. By default, the License Year drop-down lists the Versa Director license year in which the license tier was published. The options are 2018, 2019, and 2025.
SD-WAN Solution Tiers Select one or more SD-WAN solution tiers. Click the
down arrow to display the available solution tiers, which are inherited from the parent tenant. Then, click the name of the tier to select it.
(For Releases 12.2.2 and later.) The options are:
- Essential SD-WAN
- Professional SD-WAN
- Elite SD-WAN
NGFW Solution Tiers Select a one or more NGFW solution tiers. Click the
down arrow to display the available solution tiers, which are inherited from the parent tenant. Then, click the name of the tier to select it.
(For Releases 12.2.2 and later.) The options are:
- Essential NGFW
- Professional NGFW
- Elite NGFW
Appliance Preferred Version Select the preferred Versa Operating System™ (VOS™) software version for the device. - Click Next. For Releases 12.1.1 and later:
— If you selected the Preshared Key authentication type for the tenant, go to Step 4.
— If you selected the Certificate authentication type for the tenant, the Step 2, Certificate screen displays.
- Enter information for the following fields.

Field Description Name (Required) Enter a name for the CA. URL (Required) Enter the URL of the CA server enrollment service. This is the URL to which CA certificate and enrollment requests are sent. CA Identity (Required) Enter the name of the CA server:
- For the CMP server type, enter CN=CA-name.
- For the GCP server type, enter GCP-CA.
- For the SCEP server type, enter CA-name.
Server Type (Required) Select a server type:
- ACME—Automatic Certificate Management Environment.
- CMP—Select if the CA server is using the Certificate Management Protocol for enrollment.
- SCEP—Select if the CA server is using the Simple Certificate Enrollment Protocol.
Retry Interval Enter the time interval, in seconds, at which to attempt to retrieve the certificate.
- Click Next to go to the Online Certificate Status Protocol (OCSP) section, and then enter information for the following fields.

Field Description OCSP Enabled Click the slider bar to enable OCSP. Responder URL (Required) Enter the URL of the OCSP responder that reports the status of a certificate. Hash Algorithm Select the hash algorithm to use when preparing the OCSP request. Responder Cached Period Enter how long, in hours, to cache OCSP responses.
Range: 1 through 168 hours
Default: None (no cache is created)
Monitor Interval Enter the time interval at which to verify the validity of the certificate status.
Range: 1 through 1440 minutes
Default: None (monitoring is disabled)
Action on Response Unknown Select the action to take on the IPsec tunnel when an unknown response is received from the OCSP responder:
- Tunnel Down—Bring down the IPsec tunnel.
- Tunnel Up—Bring up the IPsec tunnel.
Sign Request Click to have the OCSP responder verify the signature before responding to certificate requests. Verify Signature Click to have the VOS device verify the signature of OCSP responder. - Click Next to go to the CSR Options section.

- Select the certificate signing request (CSR) options to include in the certificate. These options define the attributes that the CA uses to authenticate the VOS device and configure the appropriate attributes in the certificate that is then sent back to the device. The CSR Options workflow configures these attributes on the device when it sends the CSR. Note that you configure he CSR options for each device; they are not associated with a master profile.
- Click Next to go to the Controllers section.

- Click the name of a controller node. In the Certificate Signing Request for Controller screen, enter information for the following fields.
Note that only the CSR options that you previously selected are displayed in the Certificate Signing Request screen, and you must provide information for each field.
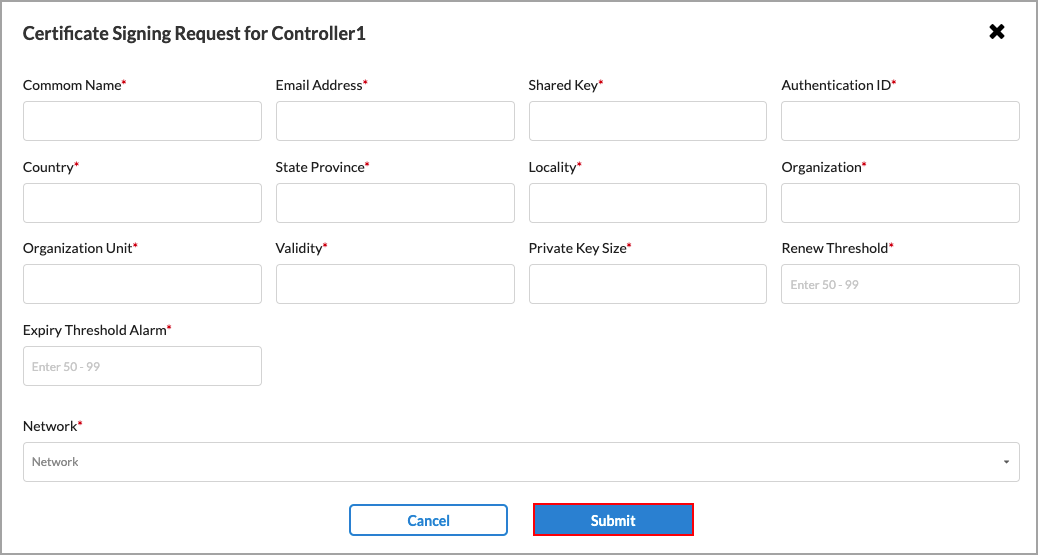
Field Description Common Name (Required) Enter the name of the certificate. The name is an identity that you also must configure on the CA server. Both names must match so that the CA server can issue the certificate. Because this attribute is mandatory, it does not appear in the CSR options section. Email Address (Required) Enter the email address for the device requesting the certificate. Shared Key (Required) Enter the shared key to authenticate the certificate request. The shared key is a password and must match the shared key on the server. Because this attribute is mandatory, it does not appear in the CSR options section. Authentication ID (Required) Enter the authentication identifier for the device requesting the certificate. Country (Required) Enter the country of the device requesting the certificate. State Province (Required) Enter the state or province of the device requesting the certificate. Locality (Required) Enter the locality, or city, of the device requesting the certificate. Organization (Required) Enter the organization of the device requesting the certificate. Organization Unit (Required) Enter the organizational unit of the device requesting the certificate, such as Sales or IT. Validity (Required) Enter the number of days that the certificate will be valid. Private Key Size (Required) Enter the size of the private key. Must be a valid unsigned integer (uint) 32.
Range: 0 through 4294967295
Default: None
Renew Threshold (Required) Enter a percentage value to modify when the certificate renews. For example, if the certificate renewal duration is configured to be 365 days in the Validity attribute, and you modify it to 50 percent, the certificate is renewed in 182.5 days.
Range: 50 through 99 percent
Default: None
Expiry Threshold Alarm (Required) Enter a percentage value to modify when a device sends an alarm that the certificate is about to expire. For example, if the expiration threshold alarm for the certificate is configured to be 365 days in the Validity attribute, and you modify it to 75 percent, an alarm is sent in 273.75 days.
Range: 50 through 99 percent
Default: None
Network (Required) Select the network to use to obtain the certificate. This attribute is mandatory, so it does not dieplay in the CSR options section. - Click Submit.
When you finish configuring a new device and publish it, the data that you entered above is converted into bind data. To view the bind data, go to the Deploy lifecycle. For more information see, Update CSR Bind Data for an Appliance before Publishing.
- Enter information for the following fields.
- Click Next, or select Step 2, Secure SD-WAN. The default VPN mapping for the new tenant displays. By default, the VPNs for parent tenants and tenants are inherited. To change the name of the tenant VPN, enter a new name in the field.

- The Parent Configurations section displays all the parent's reusable profiles and profile elements.
- Select either Display Latest Version Only or Display All Versions.
- Select a profile to assign to the tenant from the Profiles list and the profile elements to assign to the tenant from the Profile Elements.
- To display the available resources in each category, click the
 Plus icon.
 - For more information about profiles and profile elements, see Configure Profiles.
- Click Next, or select Step 3, Roles, to assign one or more roles to the tenant.

- Check the user roles for the new tenant. By default, all predefined roles are selected.
- Click Next, or select Step 4, Review & Submit.

- Review the configuration. Click the
 Edit icon to make changes.
 - Click Publish to publish the tenant to both the Director and Controller nodes. A progress bar shows displays during the publishing process.

- Click In Progress to view publish status messages.
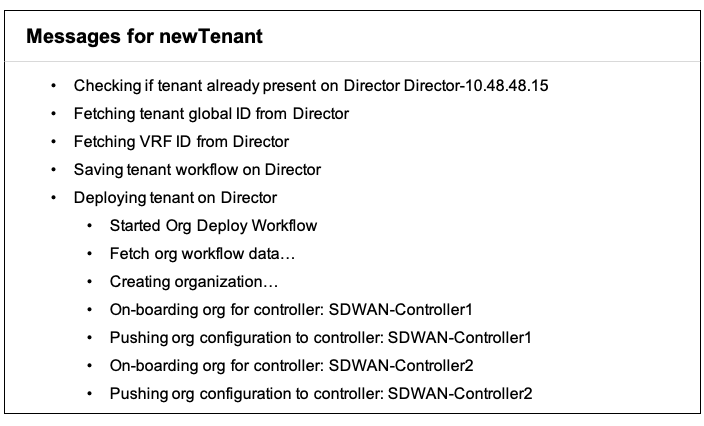
When the publishing process completes, the Publish Status column displays Published for the new tenant.

- To verify that the tenant has been published successfully, do one of the following:
- On the Concerto orchestrator home page, check the entries in the
 Tasks menu.
 - On the Director node, check the entries in the Director
 Task menu.
 - On the Director node, select the Workflows tab in the top menu bar and then select Infrastructure > Organizations in the left menu bar. The new tenant displays in the list of organizations.
Update CSR Bind Data for an Appliance before Publishing
After you configure the CSR options for a tenant appliance, you can view and revise the options:
- Select the Deploy lifecycle, select the Tenant on which the appliance is configured, and double-click the branch that contains the device (Branch1 in the example below).

- Select View Variables in the popup menu.

The Variables panel displays in the right portion of the screen, with the Password variable highlighted. The Name & Value field displays the Shared Key CSR bind variable. Note that the Shared Key bind variable is mandatory, so it is not listed in the configurable CSR Options screen.
The String, Email, and Integer variables also contain CSR bind data. You can change the bind data as needed before you publish the appliance.

- If the appliance is in an active–active configuration, click View Variables for the primary appliance. Note that for active–active configurations, you must define the bind variables for both the primary and secondary appliances in the Variables screen for the primary device.

The Variables screen displays. The example screen below shows two entries for the Shared Key variable, one for the primary device and one for the secondary device. You must specify two variables for all the CSR bind variables, except the Email variable.

- Before publishing the appliance, click each variable to review the entries. You can revise the entries as needed.

- Click Publish to publish the appliance.
Update Information about an Existing SD-WAN Tenant
- In the row for the tenant, click the
 Edit icon.

The Edit Tenant screen displays.


- Click the
 Edit icon in any of the sections to edit that section.
 - Click Save to publish the tenant information later, or click Publish to publish the tenant information immediately.
Delete a Tenant
- In the row for the tenant, click the
 Delete icon.

- Click Yes in the Delete Tenant popup window.

Publish a Tenant Configuration to Versa Director
To immediately publish the tenant's configuration to the Director node and its connected devices:
- In the row for the tenant, click the
 More icon.
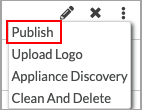
- Select Publish to publish the tenant configuration.
Upload a Tenant Logo
- In the row for the tenant, click the
 More icon.

- Select Upload Logo. For more information see Upload a Tenant Logo.
Discover VOS Devices for a Published Tenant
For Releases 10.2.1 and later.
To discover VOS devices for a published tenant on a Director node:
- In the row for the tenant, click the
 More icon.

- Select Appliance Discovery.
- Wait while Concerto performs the discovery operation. Note that Concerto does not discover Controller nodes.
- During discovery, click the tenant name in the main screen to display the Map or Honeycomb view for the tenant. Site icons in Map view change to blue and hexagons are added in Honeycomb view as appliances are discovered.
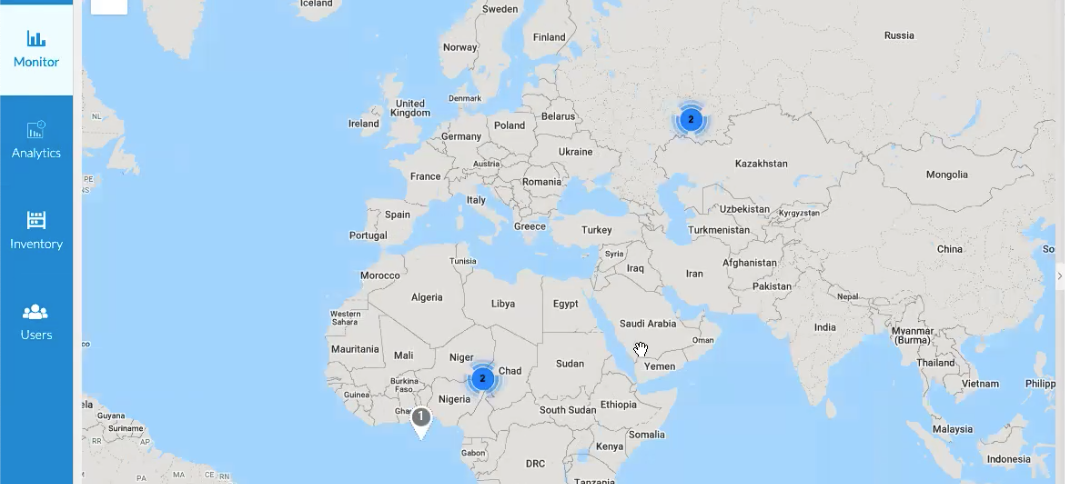
During discovery, click the ![]() Tasks icon to display discovery operation messages.
Tasks icon to display discovery operation messages.

When discovery completes, you can view the discovered VOS devices in the Monitor lifecycle, and the Concerto orchestrator begins populating the summary window with information from the discovered appliances. Updating the summary window may take a few minutes to complete. The Concerto orchestrator automatically maps discovered VOS devices to a site matching the location of the VOS device. If the Concerto orchestrator does not find a site matching the VOS device location, it creates a site for the location and maps the VOS device to the site.
Clean and Delete a Published Tenant
To clean and delete a published tenant:
- In the row for the tenant, click the
 More icon.

- Select Clean and Delete.
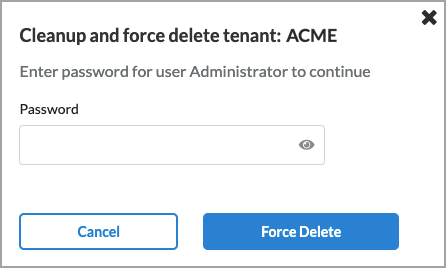
- Enter the Administrator password.
- Click Force Delete to delete the tenant.
Supported Software Information
Releases 10.1.1 and later support all content described in this article, except:
- Release 11.1.1 allows you to configure a Security Service Edge (SASE) tenant.
- Release 12.1.1 allows you to create a tenant with a non-SD-WAN solution tier and to use a PKI certificate for authentication.
- Release 12.2.1 adds the Description column to the Tenant home screen.
- Release 12.2.2 adds the Secure SD-Router and NGFW-UTM service types, and adds 2025 as the most recent license year.
