
Overview of Network Interfaces in Concerto
 For supported software information, click here.
This article lists the types of Secure SD-WAN network interfaces in Concerto Release 13.1.1 and later, provides a brief description, and includes links to the relevant articles.
In Releases 13.1.1 and later, you can configure interfaces in two ways:
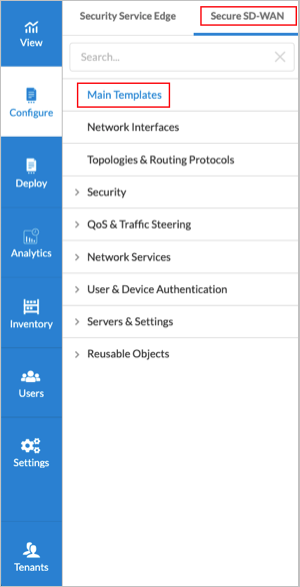
- Using the Main templates at Configure > Secure SD-WAN > Main Templates

- Using the Network Interfaces configuration workflow at Configure > Secure SD-WAN > Network Interfaces
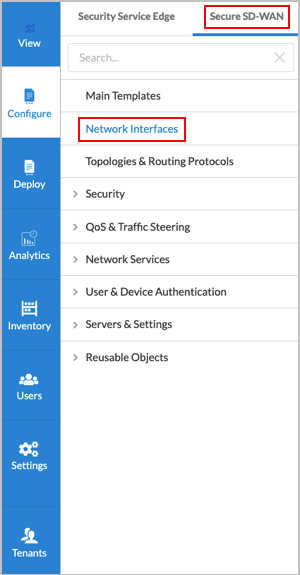
The following table shows the types of Secure SD-WAN network interfaces that you can configure and provides links the documentation for each type:
| Category | Sub Category | Documentation Links |
|---|---|---|
|
|
Configure WAN Interfaces in Concerto |
|
|
Configure LAN Interfaces in Concerto |
|
|
Configure Site-to-Site Tunnel Interfaces in Concerto |
|
None | Configure Loopback Interfaces in Concerto |
|
None | Configure Cross-Connect Interfaces in Concerto |
| Paired Virtual Tunnel | None | Configure Paired Virtual Tunnels in Concerto |
| WiFi Radios | None | Configure WiFi Radio Interfaces in Concerto |
Add a New Interface to a Main Template
To add a new interface to a main template:
- In Tenant view, select Configure > Secure SD-WAN > Main Templates.
- Click the
 Add icon to add a new main template, or click an existing main template to add a new interface to the template.
 - Select the Network Interfaces step from the horizontal workflow.
- Select a device in the Device Model field. If your device is not listed, select Other.

- Under the Primary Device Interfaces tab, click the Add icon. The Add Interface screen displays all available interface types. You can add a new interface, or you can select an existing interface.

- To add a new interface, click + Add New <interface-type>. The Add <interface-type> Interface screen displays. This example shows the Add WAN Interface screen.

For information about configuring each type of interface, see the links in the Additional Information section.
Add an Existing Interface to a Main Template
- To add an existing interface, click + Add Existing <interface-type> Interface in the Add Interface screen. The Add <interface-type> Interfaces screen displays. This example shows the Add Existing WAN Interfaces screen. The available WAN interfaces are listed in the left pane.

- Click the name of one or more interfaces to add. The interfaces move to the Selected Interfaces list in the right pane. Click the
 Arrow icon next to the interface name to display details about the interface.

- Go to the Review and Submit step to review and submit the interface configuration. Note that the screen displays Reuse Options. These fields only display when you add a new interface to a main template. You can choose the following:
- Reusable—Click to allow the interface to be used by other templates. The interface is added to Reusable Objects folder.
- Not reusable—Click the make the interface exclusive to this main template. The interface is not added to Reusable Objects folder.
For more information, see Configure Main Templates and Configure Reusable Objects.

- Click submit to add the existing interfaces to the main template.
Supported Software Information
Releases 13.1.1 and later support all the information in this article.
Additional Information
Configure Cross-Connect Interfaces in Concerto
Configure LAN Interfaces in Concerto
Configure Loopback Interfaces in Concerto
Configure Main Templates
Configure Paired Virtual Tunnel Interfaces in Concerto
Configure Reusable Objects
Configure Site-to-Site Tunnel Interfaces in Concerto
Configure WAN Interfaces in Concerto
Configure WiFi Radio Interfaces in Concerto