Service Provider Configuration of Cloud Applications for API-Based Data Protection
![]() For supported software information, click here.
For supported software information, click here.
Versa API-based data protection (API-DP) secures SaaS and IaaS applications using APIs provided by cloud services. This article is for cloud service providers and describes how to configure API-DP applications to make them available to their customers, and includes configuration procedures for the following SaaS and IaaS cloud applications:
- Asana
- Box
- Cisco Webex
- Citrix ShareFile
- Confluence
- Dropbox
- Egnyte
- Github
- Gmail
- Google Drive
- Jira
- Microsoft OneDrive
- Microsoft Outlook
- Microsoft SharePoint
- Microsoft Teams
- Microsoft Yammer
- Notion
- Salesforce
- ServiceNow
- Slack
- Trello
- Zendesk
- Zoom
- Amazon Web Services
- Google Cloud Platform
- Microsoft Azure
- Oracle Cloud Infrastructure
Asana for API-DP
- Navigate to the Asana developer console and log in.
- Click Create new app.

- Enter the details as shown in the following image, and then click Create app.

- From the left menu bar, navigate to the OAuth tab, and then click Add redirect URL.

- Add the redirect URL in the format shown below, and then click Add.
Redirect URL: https://<cluster-FQDN>/v1/asana/auth-callback

- In the left menu bar, click Manage distribution. The following screen displays.

- Select Any workspace as the distribution method, and then click Save changes.
- In the left menu bar, click Basic. The following screen displays.

- Store the Client ID and the Client Secret for later use.
Box API-DP
- Log in to box.com with an admin account.
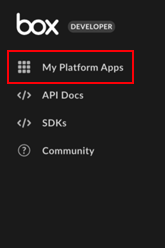
- Check for the Admin console and Dev Console buttons at the bottom of the left menu bar. If both are not present, as shown below, then the Box account type is not supported for creating applications.

- Click Dev Console.
- Create the OAuth application:
- On the My Platform Apps screen, click Create Platform App.

- In the Create Platform App screen, select Custom App.

- Enter the details in step 1 of the Create a Custom App window, and then click Next.
f
- In step 2, select User Authentication (OAuth 2.0) as the Authentication method, and then click Create App.

The app is created and is ready for use.
- On the My Platform Apps screen, click Create Platform App.
- Click the Configuration tab on the OAuth 2 App screen.
- Copy the Client ID and Client Secret and store them for later use.
- Enter the OAuth 2.0 Redirect URL below:
- Redirect URL—https://<cluster-FQDN>/v1/box/auth-callback

- Redirect URL—https://<cluster-FQDN>/v1/box/auth-callback
- Click Add.
- Add scopes and permissions to the application as shown in the following screenshot, and then click Save Changes at the top right corner of the screen.

OAuth 2.0 is now ready.
- Create the JWT app:
- Click My Platform Apps in the left menu bar.
- Select the Create Platform App option.
- Select Custom App, and then enter the details as shown in step 1 below.

- In step 2, select Server Authentication (with JWT), and then click Create App.

The JWT App is created.
- Click My Platform Apps in the left menu bar.
- Click the Configuration tab on the JWT App screen.

- Copy the client ID and store it for later use.
- Select the scope, and then select the access options as shown in following screenshots.


- To generate a JWT key JSON file, click Generate a Public/Private Keypair button in the Add and Manage Public Keys section. A file is then downloaded. Contact Versa Networks with this file.


- Click the Save changes button in the top right corner.
- Click My Platform Apps in the left menu bar.
- Create the Box Custom Skill app:
- Select the Create Platform App option.
- Select Box Custom Skill.

- Enter the required details, as shown below.

- Click Create App. The Box Skill is created.
- Click the Configuration tab, copy the client ID, and provide the Invocation URL:
- Invocation URL—https://<cluster-FQDN>/v1/box/webhook

- Invocation URL—https://<cluster-FQDN>/v1/box/webhook
- Click the Save Changes button in the top right corner.
- Authorize the OAuth and JWT applications, and set up Skill:
- Navigate to the Admin Console from the left menu bar in your account home screen (see Step 2).
- Click Integrations in the left menu bar.
- Select the Platform Apps Manager tab, click Server Authentication Apps, and then click Add Platform App in the upper right corner.
- Enter the JWT app client ID and the Box custom Skill app client ID, and then authorize.
- Select the User Authentication Apps tab, and then click Add Platform App.
- Enter the OAuth app client ID, and then authorize.

- Navigate from app.box.com/master/platform-apps/userauth to app.box.com/master/skills.
- Click the + Add Skill button.

- Enter the Box Skill client ID. Click Next.
- Select All content in your company, and then click Next.

- Click Enable in the the upper right corner.
Cisco Webex API-DP
- Sign into Webex Developer and navigate to https://developer.webex.com/my-apps/new/integration.

- Enter the Integration Name, upload or select an Icon, and enter an App Hub Description, Redirect URI(s), and scopes. Then click Create Integration. The following screen displays.

- Store the client ID and client secret for later use.
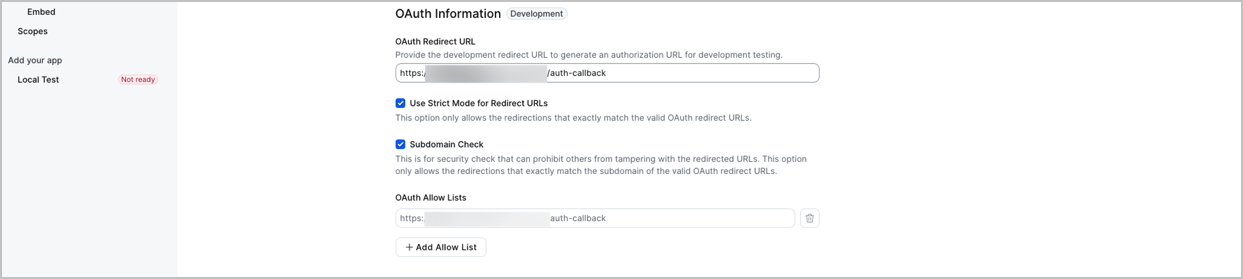
Citrix ShareFile API-DP
To configure a new instance for Citrix ShareFile:
- Navigate to https://api.sharefile.com/apikeys, and then click Create New.

- Enter the name and redirect URL shown below:
- Redirect URL—https://<cluster-FQDN>/v1/citrixfile/auth-callback
- Click Generate API Key.
- Store the client ID and client secret for later use.


Confluence for API-DP
- Navigate to https://developer.atlassian.com/console/myapps/ and log in.
- In the My Apps screen, click Create > OAuth 2.0 integration.

- In the new window, enter the App name, click the checkbox to agree to the terms, and then click Create.

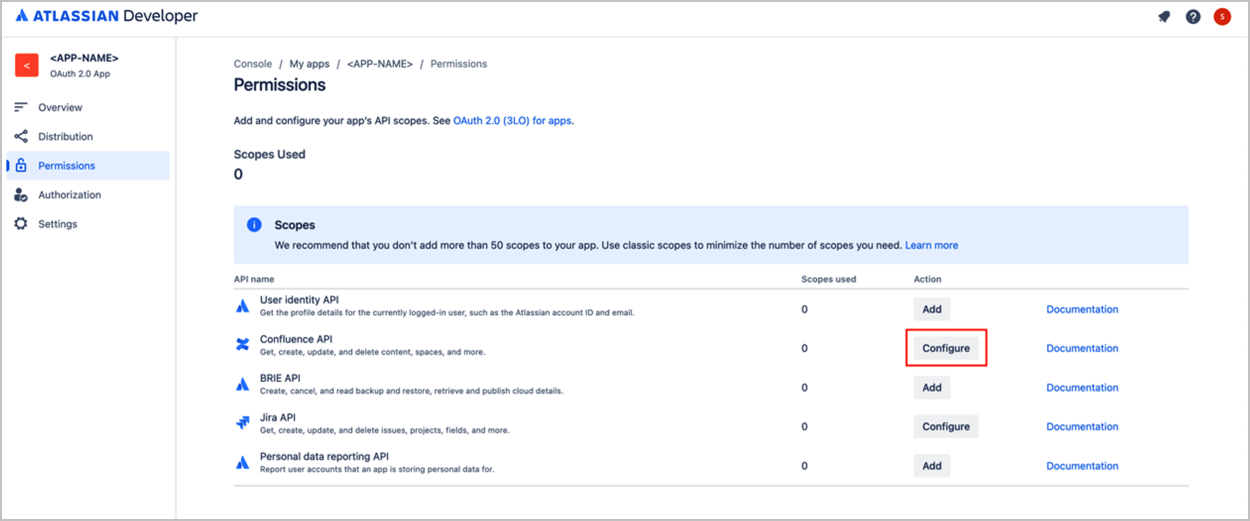
- In the Developer screen, click Permissions in the left menu bar, then click the Add button to the right of Confluence API.

- Click the Configure action for Confluence API.
- In the new window, click Edit Scopes, and then assign all permissions to the application you created.

- After assigning permissions, navigate to the Authorization tab, and then click the Add action for OAuth 2.0.

- Enter the Callback URL below, and then click Save changes.
- Callback URL—https://<cluster-FQDN>/v1/confluence/auth-callback

- Callback URL—https://<cluster-FQDN>/v1/confluence/auth-callback
- Navigate to Distribution and tab, and then click Edit.

- Enter all details, and select Yes for the Personal Data Declaration, as shown below.

- Click Save changes.
- Navigate to the Overview tab > App information or Settings.

- Store the Client ID and Client Secret for later use.
Dropbox API-DP
- Login to https://www.dropbox.com/developers (use the admin account), and then click App Console.


- Click Create app.

- Enter all details, select the scope and other details as shown below, and then click Create app.

- Once the app is created, select the Settings subtab, scroll down to the App key and App secret fields. Copy and store them for later use.
- Enter the URLs for OAuth redirect and Webhook shown below:
- OAuth redirect URL—https://<cluster-FQDN>/v1/dropbox/auth-callback
- Webhook URL—https://<cluster-FQDN>/v1/dropbox/webhook

- Select the Permissions subtab, and then select all Individual Scopes and Team Scopes.
Egnyte for API-DP
- Navigate to https://developers.egnyte.com/member/register, and then enter information for the fields shown below.


- Click Register.
- After you click register, an email is sent to the registered email address. When you receive this email, click the link in the email to complete the registration.
- Sign in at https://developers.egnyte.com/apps/mykeys.

- Store the key and secret from My API Keys -> KEYS for later use.
GitHub for API-DP
- Navigate to https://github.com and log in.
- Click your profile icon in the top-right corner of the GitHub interface.

- Select Settings from the drop-down menu.

- In the left menu, choose Developer Settings.

- Click GitHub Apps on the Developer Settings section, and then click New GitHub App.

- Enter the following application details:
Field Description GitHub App name
Enter a unique name for your GitHub App (for example, Versa Networks).
Homepage URL (Optional)
Add a URL that users can visit for more information (for example, https://versa-networks.com).
Callback URL
Enter https://<cluster-FQDN>/v1/github/auth-callback.
Webhook URL
Enter https://<cluster-FQDN>/v1/github/webhook.
Permissions
Repository permissions:
- Administration—Read and write
- Contents—Read and write
- Webhooks—Read and write
Organization permissions:
- Administration—Read only
- Events—Read only
- Members—Read and write
- Personal access tokens—Read and write
- Webhooks—Read and write
Account permissions:
- Email addresses—Read only
Subscribe to events
Member, Push, and Repository.
Where can this GitHub App be installed?
Enter Any account.
- Retain the default values for the remaining fields.
- Click Create GitHub App to create the app.
Gmail for API-DP
- Navigate to the Google Cloud Console at https://console.cloud.google.com and log in.
- Locate the project where you want to create the application, and then search for APIs & Services in the search bar and select the project from the results.

- Select Credentials in the left menu.

- Click + CREATE CREDENTIALS in the top menu bar, and then choose OAuth client ID from the drop-down list.

- Click the Application type field, and select Web Application from the drop-down list.

- In the Name field, enter a name to identify the application.
- In the Authorized redirect URIs section, click + ADD URI.

- Enter the URI using the following format, then click Create.
https://<cluster-FQDN>/v1/gmail/auth-callback

- After the credentials are created, a popup window appears with the Client ID and Client Secret. Store these for later use.

Google Drive for API-DP
- Create a Google Cloud project.
- Navigate to the Google Cloud Console: https://console.cloud.google.com/.
- Sign in with your Google Account.
- Click on the project drop-down (top left, next to Google Cloud).
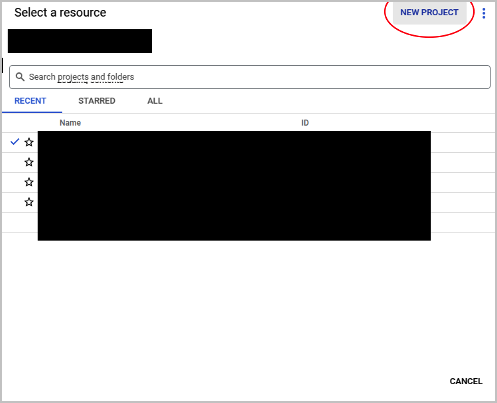
- Click New Project.
- In the Select a resource screen, enter your project details, and then click Create.
- To enable billing:
- Navigate to the Billing Section at https://console.cloud.google.com/billing.
- Select your newly-created project.
- If no billing account exists, click Create Account.
- Attach the Billing Account to your project.
- To enable Google Drive API:
- Navigate to the API Library at https://console.cloud.google.com/apis/library.
- Search for Google Drive API.
- Click on Google Drive API and enable it.

- To create a service account (this allows your application to authenticate without user intervention):
- Navigate to Service Accounts at:
https://console.cloud.google.com/iam-admin/serviceaccounts. - Select your project.
- Click + Create Service Account.
- Enter the details of the account.
- Click Create and Continue.
- Grant roles.
- Click Continue, and then click Done.

- Navigate to Service Accounts at:
- Generate a JSON Key for the service account.
- In the Service Accounts page, click on your newly-created service account.
- Navigate to the Keys tab.
- Click Add Key > Create new key.
- Select JSON as the key type.
- Click Create.

Note: Your credentials are downloaded automatically in a JSON file. Store this file securely. It contains sensitive information.
- Enable domain-wide delegation.
- Navigate to the Service Accounts page at https://console.cloud.google.com/iam...erviceaccounts.
- Select the service account.
- Click Edit.
- Click the checkbox for Create Google Workspace marketplace-compatible oauth client.
- Enter a name for the OAuth consent screen (if prompted).
- Save the changes.
- Copy the Client ID shown on the page and store it for later use.

- Create OAuth Client for Grant Access flow.
- Navigate to Google Cloud Console.
- Select your project or create a new one.
- Navigate to APIs & Services > Credentials.
- Click Create Credentials > OAuth Client ID.
- Set application type. For a web app, select Web application.
- Configure Authorized Redirect URIs, for example, https://<cluster-FQDN>/v1/gdrive/auth-callback.
- Click Create.
- Copy the Client ID and Client Secret and store them for later use.

- API Quotas
- Navigate to IAM & Admin > Quotas & System Limits > Google Drive API.
- The screen displays the default quotas.

- To request more quotas, enter a quota value and click SUBMIT REQUEST.

Pre Grant-Access Steps
- If you are using a Google Workspace domain, grant API scopes in the Google Admin Console (For Workspace Admins).
- Navigate to the Google Admin Console at https://admin.google.com/.
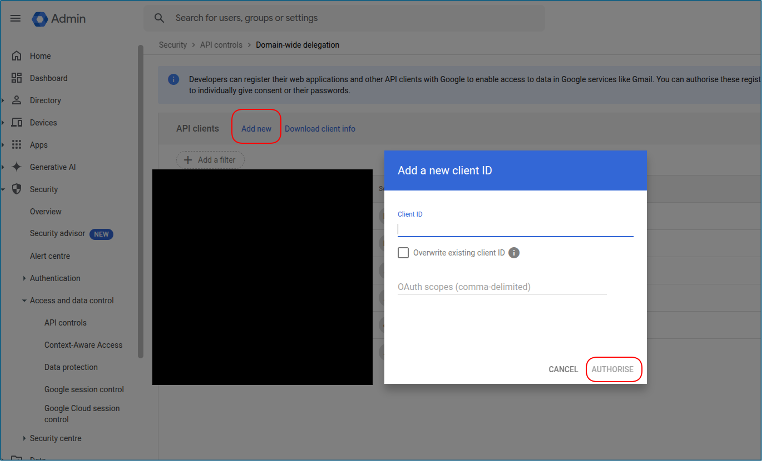
- Go to Security > Access and Data Control > API Controls > Domain-wide Delegation.
- Click Add new.
- Paste the Client ID (from the previous steps).
- Enter the OAuth Scopes required for the Google Drive API (comma-separated):
"openid",
"email",
"profile",
"https://www.googleapis.com/auth/drive"
"https://www.googleapis.com/auth/drive.file"
"https://www.googleapis.com/auth/drive.readonly"
"https://www.googleapis.com/auth/driv...adata.readonly"
"https://www.googleapis.com/auth/drive.appdata"
"https://www.googleapis.com/auth/drive.metadata"
"https://www.googleapis.com/auth/drive.photos.readonly"
"https://www.googleapis.com/auth/admi....user.readonly"
"https://www.googleapis.com/auth/admi...group.readonly"
"https://www.googleapis.com/auth/admi....user.security"
"https://www.googleapis.com/auth/admi...ember.readonly"
"https://www.googleapis.com/auth/admi...omain.readonly"
"https://www.googleapis.com/auth/admi...audit.readonly"
"https://www.googleapis.com/auth/admi...y.group.member"
"https://www.googleapis.com/auth/admin.directory.group"
"https://www.googleapis.com/auth/admin.directory.user"
"https://www.googleapis.com/auth/admin.datatransfer"
"https://www.googleapis.com/auth/admi...ctory.customer"
- Click Authorize.
Jira for API-DP
- Navigate to https://developer.atlassian.com/console/myapps/ and log in.
- Click Create in the My apps section, and then select OAuth 2.0 integration.

- Enter the application name in the new window, check the terms, and then click Create.

- Navigate to the Permissions tab, and then click the Add action for Jira API.

- Click the Configure action for Jira API.

- In the new window, click Edit Scopes, and then assign permissions to the application you created.

- After assigning permissions, navigate to the Authorization tab, and then click the Add action for OAuth 2.0.

- Enter the Callback URL below, and then click Save changes.
- Callback URL—https://<cluster-FQDN>/v1/jira/auth-callback

- Callback URL—https://<cluster-FQDN>/v1/jira/auth-callback
- Go to the Distribution tab, and then click Edit.

- Enter all details, and select Yes for the Personal Data Declaration, as shown below.
- Click Save Changes.

- Navigate to the Overview > App information or Settings.
- Copy the the Client ID and Client Secret, and store them for later use.

Microsoft OneDrive API-DP
- Navigate to https://portal.azure.com.
- Select App Registrations.
- Click New Registration.

- Enter details as shown below:
- Name—Enter a name for the application.
- Supported account types—Select Accounts in any organizational directory (Any Microsoft Entra ID tenant - Multitenant).
- Redirect URL—Select Web as the URL type, and enter the URL in the following format:
https://<cluster-FQDN>/v1/msonedrive/auth-callback

- Click Register to complete the registration.
- Record the application (client) ID and store it for later use.

- In the left menu bar, select Certificates & secrets.
- Click + New client secret.

- Enter a description and expiry time, and then click Add at the bottom of the page.
- Copy the Value (not the Secret ID) and store it for later use. Note that this value is not accessible once you leave the page.

- Assign API permissions in the created application:
- In the newly created application's left menu bar, click API Permissions, and then select the + Add a permission option.
- Assign all permissions shown in the following table.
Permission
Type
Description
Application.Read.All
Application
Read all applications
Application.ReadWrite.All
Application
Read and write all applications
Directory.Read.All
Application
Read directory data
Directory.ReadWrite.All
Application
Read and write directory data
Domain.ReadWrite.All
Application
Read and write domains
Files.Read.All
Application
Read files in all site collections
Files.ReadWrite.All
Application
Read and write files in all site collections
Mail.ReadWrite
Application
Read and write mail in all mailboxes
MailboxSettings.ReadWrite
Application
Read and write all user mailbox settings
offline_access
Delegated
Maintain access to data you have given it access to
Sites.FullControl.All
Application
Have full control of all site collections
Sites.Manage.All
Application
Create, edit, and delete items and lists in all site collections
Sites.Read.All
Application
Read items in all site collections
Sites.ReadWrite.All
Application
Read and write items in all site collections
User.Read
Delegated
Sign in and read user profile
User.Read.All
Application
Read all users' full profiles
-
After adding permissions, select Grant admin consent for <org_name>.
Microsoft Outlook API-DP
- Navigate to https://portal.azure.com.
- Select App Registrations.
- Click New Registration.
- Enter details as shown below.
- Name—Enter a name for the application.
- Supported account types—Select Accounts in any organizational directory (Any Microsoft Entra ID tenant - Multitenant).
- Redirect URL—Select Web as the URL type, and enter the URL in the following format:
https://<cluster-FQDN>/v1/msoutlook/auth-callback
- Click Register to complete the registration.
- Record the application (client) ID and store it for later use.
- In the left menu, select Certificates & secrets.
- Click + New client secret.
- Enter a description and expiry time, and then click on Add at the bottom of the page.
- Record the Value (not the Secret ID) and store it for later use. Note that this value is not accessible once you leave the page.
- Assign API permissions in the created application:
- In the newly created application's left menu bar, click API Permissions, then select the + Add a permission option.
- Assign all required Microsoft Graph permissions by selecting each permission type individually.
Permission
Type
Description
AuditLog.Read.All
Application
Application Read all audit log data
Directory.Read.All
Delegated
Read directory data
Directory.Read.All
Application
Read directory data
Domain.Read.All
Application
Application Read domains
Mail.ReadWrite
Application
Application Read and write mail in all mailboxes
MailboxSettings.Read
Application
Application Read all user mailbox settings
offline access
Delegated
Maintain access to data you have given it access to
Organization.Read.All
Application
Application Read organization information
User.Read.All
Application
Application Read all users' full profiles
-
After adding permissions, select Grant admin consent for <org_name>.
Microsoft SharePoint API-DP
- Navigate to https://portal.azure.com.
- Select App Registrations.
- Click New Registration.
- Enter the details shown below:
- Name—Enter a name for the application.
- Supported account types—Select Accounts in any organizational directory (Any Microsoft Entra ID tenant - Multitenant).
- Redirect URL—Select URL type as Web and enter the URL in the following format:
https://<cluster-FQDN>/v1/mssharepoint/auth-callback
- Click Register to complete the registration.
- Record the application (client) ID and store it for later use.
- In the left menu, select Certificates & secrets.
- Click + New client secret.
- Enter a description and expiry time, and then click on Add at the bottom of the page.
- Record the Value (not the Secret ID) and store it for later use. Note that this value is not accessible once you leave the page.
- Assign API permissions in the created application:
- In the newly created application's left menu bar, click API Permissions, then select the + Add a permission option.
- Assign all required Microsoft Graph permissions by selecting each permission type individually.
Permission
Type
Description
Application.Read.All
Application
Read all applications
Application.ReadWrite.All
Application
Read and write all applications
Directory.Read.All
Application
Read directory data
Directory.ReadWrite.All
Application
Read and write directory data
Domain.ReadWrite.All
Application
Read and write domains
Files.Read.All
Application
Read files in all site collections
Files.ReadWrite.All
Application
Read and write files in all site collections
Mail.ReadWrite
Application
Read and write mail in all mailboxes
MailboxSettings.ReadWrite
Application
Read and write all user mailbox settings
offline_access
Delegated
Maintain access to data you have given it access to
Sites.FullControl.All
Application
Have full control of all site collections
Sites.Manage.All
Application
Create, edit, and delete items and lists in all site collections
Sites.Read.All
Application
Read items in all site collections
Sites.ReadWrite.All
Application
Read and write items in all site collections
User.Read
Delegated
Sign in and read user profile
User.Read.All
Application
Read all users' full profiles
Microsoft Teams API-DP
- Navigate to https://portal.azure.com.
- Select App Registrations.
- Click New Registration.
- Enter the following details:
- Name—Enter a name for the application.
- Supported account types—Select Accounts in any organizational directory (Any Microsoft Entra ID tenant - Multitenant).
- Redirect URL—Select Web as the URL type, and then enter the URL in the following format:
https://<cluster-FQDN>/v1/msteams/auth-callback
- Click Register to complete the registration.
- Record the application (client) ID and store it for later use.
- In the left menu, select Certificates & secrets.
- Click + New client secret.
- Enter a description and expiry time, and then click Add at the bottom of the page.
- Record the Value (not the Secret ID) and store it for later use. Note that this value is not accessible once you leave the page.
- Assign API permissions in the created application:
- In the newly created application's left menu bar, click API Permissions, and then select the + Add a permission option.
- Assign all required Microsoft Graph permissions by selecting each permission type individually.
Permission
Permission Type
Description
offline_access
Delegated Permission
Maintain access to data you have given it access to
ChatMessage.Send
Delegated Permission
Send user chat messages
Directory.Read.All
Delegated Permission
Read directory data
ChannelMessage.Send
Delegated Permission
Send channel messages
Channel.ReadBasic.All
Application Permission
Read the names and descriptions of all channels
ChannelMessage.Read.All
Application Permission
Read all channel messages
ChannelMessage.UpdatePolicy
Application Permission
Flag channel messages for violating policy
Chat.Read.All|
Application Permission
Read all chat messages
Chat.ReadWrite.All
Application Permission
Read and write all chat messages
Chat.UpdatePolicyViolation
Application Permission
Flag chat messages for violating policy
ChatMessage.Read.All
Application Permission
Read all chat messages
Directory.Read.All
Application Permission
Read directory data
Organization.Read.All
Application Permission
Read organization information
Team.ReadBasic.Alll
Application Permission
Get a list of all teams
TeamMember.ReadWrite.All
Application Permission
Add and remove members from all teams
User.Read.All
Application Permission
Read all users' full profiles
- After adding permissions, select Grant admin consent for <org_name>.
Microsoft Yammer API-DP
- Navigate to https://portal.azure.com.
- Select App Registrations.
- Click New Registration.
- Enter the following details, then click Register.
- Name: Enter a name for the application.
- Supported account types: Select Accounts in any organizational directory (Any Microsoft Entra ID tenant - Multitenant).
- Redirect URL: Select URL type as Web and enter the URL in the following format:
https://<cluster-FQDN>/v1/msyammer/auth-callback
The application is registered.
- Record the application (client) ID.
- In the left menu bar, select Certificates & secrets.
- Click + New client secret.
- Enter a description and expiry time, and then click on Add at the bottom of the page.
- Immediately copy the Value (not the Secret ID) to somewhere safe.
Note: This value will be no longer accessible after you leave the page.
- Assign API permissions in the created application:
- In the newly created application's left menu bar, click API Permissions, then select the + Add a permission option.
- Select following permissions one by one and click Add Permission.
- Under Microsoft graph > Delegated permission >. User.Read.
- Under Yammer > Delegated permission > access_as_user.

Notion for API-DP
To create a new API-DP integration in Notion:
- Click the three dots in the upper right corner of the screen, and then select Add connections > Manage connections.

- Select My connections > Develop or manage integrations.

- In the Integrations screen, click + New Integration.

- In the APIDP-Notion screen, enter a name in the Company name field.

- Set the integration to public.
- Connect to one workspace and fill out the required information.
- Under OAuth Domain & URIs, enter the Redirect URI using the following format and then click Save:
https://<cluster-FQDN>/v1/notion/auth-callback

- The OAuth Client-ID and OAuth Client Secret are displayed under Secrets. Record and store them for later use.

Salesforce for API-DP
- Login to https://login.salesforce.com/ and navigate to Setup.
- In the left menu, click Platform Tools > Apps > App Manager.

- Click New Connected App in the upper right corner.

- Enter the required information for the app, including the name, API name, contact email, and description.

- In the API (Enable OAuth Settings) section, click the checkbox for Enable OAuth Settings.

- Enter the Callback URL for the app in the format shown below, and then select the full and refresh_token scopes, as shown below:
Callback URL: https://<cluster-FQDN>/v1/salesforce/auth-callback

- Retain the default settings for the remaining fields, and save the changes.
- Click Manage Consumer Details, which displays a Consumer Key and Consumer Secret, and then save these settings.

- Obtain the package URL from Versa Networks, which should be provided to customers for event monitoring.
ServiceNow for API-DP
No configuration is required for ServiceNow.
Slack for API-DP
- Navigate to https://api.slack.com/apps and log in.
- Click Create New App. and then select From an app manifest.

- Select the workspace to develop the app, and then click Next.

- Choose either YAML or JSON, erase the default content, and paste the app manifest provided below in Slack for Application Manifests (by replacing the placeholders for the app name, auth callback, and webhook URLs), then proceed to the next step.

- Confirm the details, and then click Create.

- Under Settings, select Manage Distribution.

- Click to expand the Remove Hard Coded Information section, and then click the checkbox to continue.

- Click on Activate Public Distribution at the bottom of the page.

- Under the Event Subscriptions tab, make sure you do not see "Your URL didn't respond". If you do see this message, as shown below, click Retry.

- Navigate to the Basic Information tab.
- Copy the Client ID, Client Secret, and Signing Secret, and store them for later use.

Slack for Application Manifests
Copy and paste the following application manifests for JSON and YAML as described in Step 4 above.
|
JSON |
|
{ "display_information": { "name": <APP NAME> }, "features": { "app_home": { "home_tab_enabled": false, "messages_tab_enabled": true, "messages_tab_read_only_enabled": true }, "bot_user": { "display_name": <APP NAME>, "always_online": true } }, "oauth_config": { "redirect_urls": [ https://<cluster-FQDN>/v1/slack/auth-callback ], "scopes": { "user": [ "channels:history", "channels:read", "groups:history", "groups:read", "im:history", "im:read", "mpim:history", "mpim:read" ], "bot": [ "channels:history", "channels:read", "groups:history", "groups:read", "im:history", "im:read", "mpim:history", "mpim:read" ] } }, "settings": { "event_subscriptions": { "request_url": https://<cluster-FQDN>/v1/slack/webhook, "user_events": [ "channel_archive", "channel_created", "channel_deleted", "channel_id_changed", "channel_rename", "channel_shared", "channel_unarchive", "channel_unshared", "group_archive", "group_deleted", "group_open", "group_rename", "group_unarchive", "im_created", "member_joined_channel", "member_left_channel", "message.channels", "message.groups", "message.im", "message.mpim" ] }, "org_deploy_enabled": false, "socket_mode_enabled": false, "token_rotation_enabled": true } } |
|
YAML |
|
display_information: name: <APP NAME> features: app_home: home_tab_enabled: false messages_tab_enabled: true messages_tab_read_only_enabled: true bot_user: display_name: <APP NAME> always_online: true oauth_config: redirect_urls: - https://<cluster-FQDN>/v1/slack/auth-callback scopes: user: - channels:history - channels:read - groups:history - groups:read - im:history - im:read - mpim:history - mpim:read bot: - channels:history - channels:read - groups:history - groups:read - im:history - im:read - mpim:history - mpim:read settings: event_subscriptions: request_url: https://<cluster-FQDN>/v1/slack/webhook user_events: - channel_archive - channel_created - channel_deleted - channel_id_changed - channel_rename - channel_shared - channel_unarchive - channel_unshared - group_archive - group_deleted - group_open - group_rename - group_unarchive - im_created - member_joined_channel - member_left_channel - message.channels - message.groups - message.im - message.mpim org_deploy_enabled: false socket_mode_enabled: false token_rotation_enabled: true |
Trello for API-DP
- Navigate to https://trello.com/power-ups/admin and log in.
- Click the Get Started button or navigate to the Apps section.
- Click the New button to start the application creation process.

- Fill in the required details for your application, including the name, Workspace, and any relevant URLs, then click Create.

- Navigate to API key tab, and then click Generate a new API key.

- In the Allowed origins field, enter the Callback URL in the format shown below, and then click Add:
Callback URL: https://<cluster-FQDN>/v1/trello/auth-callback

- Copy the API key and Secret and store them for later use.
Zendesk for API-DP
- Click the Settings icon in the left menu, and then click Go to Admin Center.

- Add the OAuth client by navigating to Admin Center > Apps and Integrations > APIs > Zendesk API > OAuth Client > Add OAuth Client.

- Set the Unique identifier and Type to be confidential, enter the Redirect URL in the format shown below, and then generate the secret:
Redirect URL: https://<cluster-FQDN>/v1/zendesk/auth-callback

- Click Save.
- Store the secret for later use. The unique identifier and secret is the client-id and client-secret used to grant access.
- To create the webhook, go to Apps and integrations > Webhooks > Create Webhook.

- In the Create webhook screen, select Trigger or automation.

- Enter the endpoint URL in the format shown below, the request method (POST), and the format (JSON):
Endpoint URL: https://<cluster-FQDN>/v1/zendesk/webhook

- To create a Trigger, go to Objects and rules > Triggers > Add Trigger.

- Add conditions when an event happens (in this case, when comment is created or updated).

- For Actions, choose the webhook created.

- Customize the JSON body:
{ "user": { "id": "{{current_user.id}}", "name": "{{current_user.name}}", "email": "{{ticket.requester.email}}" }, "obj_owner":{ "name": "{{ticket.requester.name}}", "email": "{{ticket.requester.email}}" }, "tenant": { "id" : "{{current_user.organization.id}}", "name" : "{{ticket.brand.name}}" }, "created_at": "{{ticket.updated_at_with_timestamp}}", "ticket_id" : "{{ticket.id}}", "obj_id": "{{ticket.latest_comment.id}}", "subject": "{{ticket.title}}", "content": "{{ticket.latest_comment.value}}", "attachments": [ {% for attachment in ticket.latest_comment.attachments %} { "name": "{{attachment.filename}}", "url": "{{attachment.url}}" }{% unless forloop.last %},{% endunless %} {% endfor %} ] }
Zoom for API-DP
Note: All steps should be performed from the Admin Account.
- Navigate to Account Settings.

- Navigate to Admin -> App Marketplace.
- In the App Marketplace, select Build App from the drop-down list in the top right corner.

- Click General App, and then click Create.

- Copy the Client ID and Secret and store them for later use.

- Add the OAuth Redirect URL in the format shown below, and then click Continue:
Redirect URL: https://<cluster-FQDN>/v1/zoom/auth-callback
- Get the token for event subscription.

- Enable and configure event subscription.
- Set Webhook for file-send/message-send and Webhook Event notification endpoint URL in the following format:
Event notification endpoint URL: https://<cluster-FQDN>/v1/zoom/webhook


- Team Chat DM Message Posted
- Team Chat DM Message Updated
- Team Chat DM Message Deleted
- Team Chat Channel Message Posted
- Team Chat Channel Message Updated
- Team Chat Channel Message Deleted
- Team chat file uploaded
- Team chat file changed
- Team chat file deleted
- Set Webhook for meeting-join/channel-join and Webhook Event notification endpoint URL.


- Meeting
- Participant/Host joined meeting
- Chat Channel
- Chat Channel Created
- Chat Channel Updated
- Chat Channel Deleted
- Member Invited
- Member Removed
- Member Joined
- Meeting
- Set Webhook for file-send/message-send and Webhook Event notification endpoint URL in the following format:
- Click Save and continue.
- Click Continue for Surface configuration.

- Click Continue for Embed configuration.

- On the next screen “Add Scopes”, search and add scopes as shown in the below screens.


Account- account:read:account_setting:master — View an account's settings
- account:read:settings:master — View an account's settings
- account:read:account_setting:admin — View an account's settings
- account:read:settings:admin — View an account's settings
- account:read:lock_settings:admin — View an account's lock settings
- account:read:managed_domains:admin — View an account's managed domains
- account:read:registration_settings:admin — View an account's registration settings
- account:read:vanity_url:admin — View an account's vanity URL
- account:read:entitlement:admin — View an account's entitlement
- account:read:trusted_domains:admin — View an account's trusted domains
- Meeting
- meeting:read:participant:admin — View a meeting's participant
- meeting:read:participant:master — View a meeting's participant
- Recording
- cloud_recording:read:list_user_recordings:admin — Lists all cloud recordings for a user
- Team Chat
- app:channel_content:write:admin — Enable Chatbot within Zoom Team Chat Channel
- imchat:bot — Enable Chatbot within Zoom Team Chat Client
- team_chat:update:chat_control:admin — Update a chat control
- team_chat:write:legal_hold_matter:admin — Add legal hold matter
- team_chat:delete:legal_hold_matter:admin — Delete legal hold matter
- team_chat:update:legal_hold_matter:admin — Update legal hold matter
- team_chat:delete:file:admin — Delete a chat file
- team_chat:write:migrate_dm_conversation_or_channel_operations:admin — Migrate DM conversation and channel operation
- team_chat:write:migrate_chat_messages:admin — Migrate chat messages
- team_chat:write:migrate_channel_members:admin — Migrate channel members
- team_chat:write:migrate_a_chat_channel:admin — Migrate a chat channel
- team_chat:write:migrate_chat_message_reactions:admin — Migrate chat message reactions
- team_chat:write:contact_information:admin — Send contact invitation
- team_chat:read:list_user_channels:admin — View a user's chat channels
- team_chat:read:list_channels:admin — View chat channels
- team_chat:read:channel:admin — View a chat channel
- team_chat:read:user_channel:admin — View a user's chat channel
- team_chat:read:list_members:admin — View a chat channel's members
- team_chat:read:list_invitations:admin — List a user's pending invitations
- team_chat:read:list_administrators:admin — View a chat channel's admins
- team_chat:read:mention_group:admin — List all the mention groups in a channel
- team_chat:read:list_channel_activity_logs:admin — Channel activity logs for specific channel
- team_chat:read:list_user_sessions:admin — View a user's chat sessions
- team_chat:read:list_user_messages:admin — View a user's chat messages
- team_chat:read:user_message:admin — View a user's chat message
- team_chat:read:thread_message:admin — Retrieve messages under a thread
- team_chat:read:list_bookmarks:admin — List user's bookmarks
- team_chat:delete:member:admin — Remove a chat channel's member
- team_chat:delete:user_channel:admin — Delete a user's chat channel
- team_chat:update:mention_group:admin — Update the mention group's information
- team_chat:delete:channels:admin — Delete channels
- team_chat:write:mention_group:admin — Create a mention group
- team_chat:update:retention:admin — Update retention policy of a channel
- team_chat:write:groups:admin — Add groups to a chat channel
- team_chat:read:retention:admin — Get retention policy of a channel
- team_chat:write:administrator:admin — Add administrators to a chat channel
- team_chat:write:user_channel:admin — Create a chat channel for a user
- team_chat:delete:channel:admin — Delete a chat channel
- team_chat:write:members:admin — Add members to a chat channel
- team_chat:delete:group:admin — Remove a chat channel's member group
- team_chat:write:search_channels:admin — Search account's channels
- team_chat:update:channel:admin — Update a chat channel
- team_chat:delete:mention_group:admin — Delete a mention group
- team_chat:update:user_channel:admin — Update a user's chat channel
- team_chat:update:archive_channels:admin — Archive or unarchive channels
- team_chat:read:list_groups:admin — View a chat channel's member groups
- team_chat:delete:batch_members:admin — Remove a chat channel's members
- team_chat:delete:batch_administrators:admin — Remove a chat channel's admins
- team_chat:delete:user_message:admin — Delete a user's chat message
- team_chat:write:user_message:admin — Create a chat message for a user
- team_chat:write:message_files:admin — Add files to chat messages
- team_chat:write:files:admin — Add files to chat
- team_chat:update:user_message:admin — Update a user's chat message
- team_chat:update:message_emoji:admin — Update a user's chat message emoji reaction
- team_chat:update:message_status:admin — Update a user's chat message read status
- team_chat:read:file:admin — Get chat file information
- team_chat:read:migrated_channels:admin — Get migrated chat channels
- team_chat:read:migrated_users:admin — Users can view migrated chat users
- User
- user:read:token:admin — View a user's token
- user:read:list_assistants:admin — View a user's assistants
- Users
- user:read:list_users:admin — View users
- user:read:user:admin — View a user
- user:read:user:master — View a user
- After selecting the scopes, click Continue. The app is configured.
Amazon Web Services for API-DP
- Login to the Amazon Web Services (AWS) console.
- Navigate to IAM services and create an IAM user with an access key ID and secret access key.
- (Optional) Download the access keys CSV file and store for later use.
- Attach an inline permission policy document to the IAM user.
{
    "Version": "2012-10-17",
    "Statement": [
        {
            "Sid": "VisualEditor0",
            "Effect": "Allow",
            "Action": "sts:AssumeRole",
            "Resource": "arn:aws:iam::*:role/<Provider_name>_Role"
        }
    ]
}
Note: The provider name, account number, IAM user, and access keys will be needed during services deployment and should be coordinated with the Versa Managed Service team.
Google Cloud Platform for API-DP
No configuration is required for Google Cloud Platform.
Microsoft Azure for API-DP
No configuration is required for Microsoft Azure.
Oracle Cloud Infrastructure for API-DP
No configuration is required for Oracle Cloud Infrastructure.
Supported Software Information
Release 12.2.2 and later support all content described in this article.