Configure SD-WAN Security Access Control Policies and Rules
![]() For supported software information, click here.
For supported software information, click here.
You can configure security access policies to filter traffic based on predefined and custom objects. A security access policy consists of an ordered set of one or more policy rules. Each policy rule consists of a set of match criteria and enforcement actions.
Configure an Access Control Policy
- In Tenant view, go to the Configure lifecycle in the left menu bar.

- Select Profiles > Profile Elements > Policies > Security > Access Control.
- If you have not yet configured an access policy, the following screen displays. Click Create Access Control Policy to display the Add Access Control Policy screen. Go to Step 4.

- If you have configured one or more access policies, the Access Control Policy screen displays the policies that are already configured.

- If you have not yet configured an access policy, the following screen displays. Click Create Access Control Policy to display the Add Access Control Policy screen. Go to Step 4.
- In the horizontal menu bar, you can perform the following operations.
Operation Description + Add Create a new access control policy. This button is active when no existing policy is selected. See Step 4 below. Clone Clone the selected access control policy. A popup window similar to the following displays:

Rename the default name of the cloned policy (here, Copy_of_ACP), if desired, and then click Submit.
Delete Delete the selected access control policy. A popup window similar to the following displays:
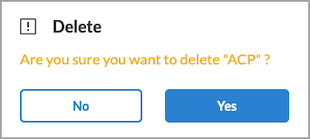
Click Yes to delete the policy, or click No to retain the policy.
Refresh Refresh the list of existing policies. More Actions Perform an action on the selected access control policy:
- Compare Versions—View the differences between two versions of a policy.
- Disable Auto Delete—Disable the automatic deletion of the policy (auto deletion is enabled by default). For more information, see Configure Automatic Deletion of SD-WAN Object Versions.
- Propagate—Propagate changes made to a policy to any entities that use the policy. For more information, see Propagate Object Configuration Changes.
- View References—View the objects that refer to the selected policy. For more information, see View References to Objects in the Configuration Hierarchies.
Select Columns To select the columns that you want to display, click the down arrow. To return to the default column selection, click Reset.

The column headings options are:- Version
- Rules
- Last Modified
- Click
 Add to create a new access control policy. A policy consists of one or more rules. The following screen displays, and Step 1, Rules is selected.

- Click Add Rule. The following list displays.

- To add existing rules to the access control policy, click Add Existing Rule. The Add Existing Access Control Rules screen displays.

- Select one or more rules in the Available Rules box to add them to the access control policy. The rules display in the Access Control Rule Selected box.

- To locate rules, you can filter them by clicking the
 Show Filter Bar icon. The screen changes to the following.

- Click
 Add Filter.
 - Select one or more filter types:
- Applications
- Data and Time Modified
- Destination Address
- Destination Zone
- Differentiated Services Code Point (DSCP)
- Name
- Reputations
- Schedule
- Security Enforcement
- Services
- Source Address
- Source Zone
- Status
- URL Categories
- Variable Name
- If you select multiple filters, choose the AND or OR Boolean operator for applying the filters. The following example shows that three filters have been applied and that the AND operator has been selected.

- To apply the filters, click Apply.
- To clear all filters, click Reset to Default Filter.
- Click Add Rules at the bottom of the screen.
- Select one or more rules in the Available Rules box to add them to the access control policy. The rules display in the Access Control Rule Selected box.
- If you select the Create Rule Only for this Policy option, the Access Control Rule configuration screen displays. For more information, see Configure Access Control Rules, below.
- Click Next to go to Step 2, Permissions.

- To change the permissions for a role, select Edit, Hide, or Read in the Permissions column.
- Click Next to go to the Step 3, Review and Submit.

- In the General box, enter a name for the access control policy, and optionally enter a text description for the policy and one or more tags. A tag is an alphanumeric text descriptor with no spaces or special characters. You can specify multiple tags added for the same object. The tags are used for searching the objects.
- Review the settings you have selected. Click the
 Edit icon to change a setting, as needed.
 - Click Save to create the access control policy.
Reorder the Rules in an Access Control Policy
An access control policy that has multiple rules processes the rules in the order that they appear on the screen. To process the rules in a different order, you reorder the list of rules.
To reorder the rules in an access control policy:
- In Tenant view, go to the Configure lifecycle in the left menu bar.
- Select Profile Elements > Policies > Security > Access Control. The Access Control Rules screen displays all the configured policies.
- Click the name of a policy. A screen similar to the following displays.

- Click Step 1, Rules. Select the rule that you want to move, and then click the
 Reorder icon. The following screen displays.

- Click the radio button to move the rule to the desired location.
- Click Move. The following screenshot shows that rule p1 has been moved to the bottom of the list.

- Click Next to to go Step 2, Permissions, and revise the permissions as needed.
- Click Next to go to Step 3, Review and Submit.
- Review the rule details and make any necessary changes.
- Click Save to save the changes to the rule.
Replace the Version of a Rule in a Policy
If you create two or more versions of a rule, you can replace one version of the rule with a different version of the same rule.
To replace the version of a rule in an access control policy:
- In Tenant view, go to the Configure lifecycle in the left menu bar.
- Select Profiles > Profile Elements > Policies > Security > Access Control. The Access Control Rules screen displays all the configured policies.
- Click the name of a policy. A screen similar to the following displays.

- Click Step 1, Rules. Select the rule that you want to replace with a different version, and then click the
 Replace Version icon. The Replace Version popup window displays.
 - Select the version of the rule to replace the current version.
- Click Save.
Configure an Access Control Rule
- In Tenant view, go to the Configure lifecycle in the left menu bar.
- Select Profile Elements > Rules > Security > Access Control.
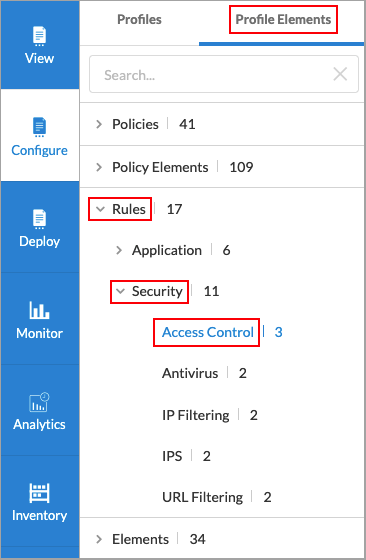
- The Access Control Rules screen displays the rules that are already configured.

- In the horizontal menu bar, you can perform the following operations.
Menu Selection Description + Add Add a new access control rule. Active when no existing rule is selected. See Step 4 below. Clone Clone the selected rule. A popup window similar to the following displays:

Rename the default name of the cloned rule (here, Copy_of_ACL2), if desired, and then click Submit.
Delete Delete the selected rule. A popup window similar to the following displays:

Click Yes to delete the rule, or click No to retain the rule.
Refresh Refresh the list of existing rules. More Actions Perform an action on the selected rule:
- Auto Delete or Disable Auto Delete—Enable or disable the automatic deletion of the rule. For more information, see Configure Automatic Deletion of SD-WAN Object Versions.
- Compare Versions—View the differences between two versions of a rule.
- Propagate—Propagate changes made to a rule to any entities that use the rule. For more information, see Propagate Object Configuration Changes.
- View References—View the objects that refer to the selected rule. For more information, see View References to Objects in the Configuration Hierarchies.
Select Columns To select the columns that you want to display, click the down arrow. To return to the default column selection, click Reset.
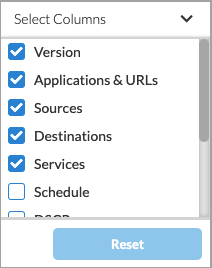
The column headings options are:
- Version
- Applications & URLs
- Sources
- Destinations
- Services
- Schedule
- DSCP
- Security Enforcement
- Variables
- Status
- Last Modified
- To locate rules, you can filter them by clicking the Show Filter Bar icon. For more information, see Step 6b in Configure Access Control Policies, above.
- To create a rule, click the Add icon. The Access Control Rule configuration wizard displays, and the Step 1, Applications & URLs, the Applications radio button, and the Application Group tab are selected. By default, all applications, URLs, and reputations match the rule.

- To select specific application groups to include or exclude in the rule, click User Defined Application Groups, Predefined Application Groups, or both. Then select the application groups for the rule to match. You can use the Search bar to find specific application groups.

- Select the Applications > Applications tab, and then select one or more user-defined and predefined applications for the rule to match. You can use the Search bar to find specific applications.

- Select the Applications > Application Category tab, and then select one or more predefined application categories for the rule to match. You can use the Search bar to find specific application categories.

- Select the URLs and Reputations tab. The following screen displays.

- In the URL Categories field, click the down arrow, and then select one or more URL categories for the rule to match.
- In the Reputations field, click the down arrow, and then select one or more reputations to include in the rule:
- High risk
- Low risk
- Moderate risk
- Suspicious
- Trustworthy
- Undefined
- Click Next or select Step 2, Users and Groups. The following screen displays. By default, access control rules are applied to all users. You can select known users, unknown users, or selected users to which to apply the rule.

If you choose Selected Users, the following screen displays.

- In the Enable Access Control Rule field, select the access control rule for matched users and groups.
- Click
 Add New User to add a new user. The Add User popup window displays.

- Enter the user's name and work email in the fields provided, then click Add. You can add multiple users.
- Select the User Groups tab to apply the access control rule to a user group.

- Click + Add New User Group to add a new user group. The Add User Group popup window displays.
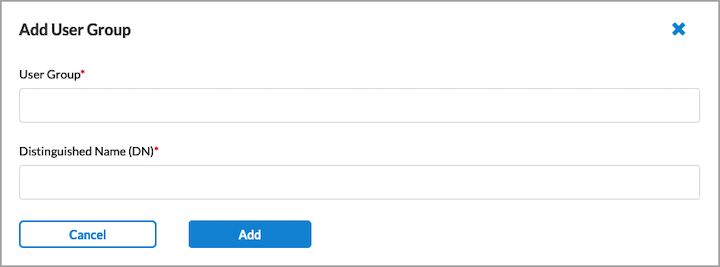
- Enter a user group name and Distinguished Name in the fields provided, and then click Add. You can add multiple user groups.
- Click Next or select Step 3, Source & Destination Traffic. The following screen displays with the Source Address tab selected by default. All source and destination traffic is included by default. You can customize which source and destination traffic for the rule to match.

- (For Releases 12.1.1 and later.) To customize the source traffic, on the Source Address tab, use one of the following methods:
- To specify source addresses to include in the match criteria, continue with Step 22.
- To specify source addresses to exclude from the match criteria, select Negate Source Address to match all source addresses except the source addresses that you specify, and then continue with Step 22.
- Select a source address group to include or exclude for the rule to match. You can click + Add Variable to create a variable for the source address. Enter a name for the variable, click the
 Plus icon, then click Add. You can add multiple variables before clicking the Add button.

- Enter values in any of the following fields for the rule to match: IP Address or IP Range, IP Subnet, or IP wildcard. You can click + Add Variable to create variables for these values, and you can add multiple variables for each one.
- To add a variable for the IP address or IP range, select IPv4 Address, IPv4 Range, or IPv6 Address, click the Plus icon, and then click Add.

- To add a variable for the IP subnet, select IP Subnet or IPv6 Subnet, click the Plus icon, and then click Add.

- To add a variable for the IP wildcard, enter a name for the variable, click the Plus icon, and then click Add.
- (For Releases 12.2.1 and later.) On the Source Address tab, in the VPN Name field, select the VPN through which the IP address is reachable.

- To add a variable for the IP address or IP range, select IPv4 Address, IPv4 Range, or IPv6 Address, click the
- Click the Destination Address tab, select a destination address group to include or exclude for the rule to match, then enter values in any of the following fields for the rule to match: IP Address or IP Range, IP Subnet, or IP wildcard. You can click + Add Variable to create variables for these values.

- (For Releases 12.1.1 and later.) To customize the destination traffic, on the Destination Address tab, use one of the following methods:
- To specify destination addresses to include in the match criteria, continue with Step 26.
- To specify destination addresses to exclude from the match criteria, select Negate Destination Address to match all destination addresses except the destination addresses that you specify, and then continue with Step 26.
- To specify a destination address to include or exclude in the match criteria, you can select a destination address from the list or use the search box to find a source address. To create a variable for the destination address, click + Add Variable to the right of the destination address list. As part of the match criteria, you can enter values for the fields IP address or IP range, IP subnet, and IP wildcard. To create variables for these values, click + Add Variable for that field. For more information on adding variables, see Steps 22 and 23.
- Select the Source Zone and Sites tab, and then enter information for the following fields.

Field Description Source Zones Click the down arrow, and then select one or more zones. To create a variable for the source zone, click
Add Variable.Source Sites Click the down arrow, and then select one or more sites. To create a variable for the source zone, click
Add Variable. - Select the Destination Zone and Sites tab, and then enter the information for the destination zone and destination site. The fields are the same as for the Source Zone and Sites shown above.
- (For Releases 12.2.1 and later.) Click Next or select Step 4, Source & Destination Geo Location. The following screen displays.

On the Source Geo Location tab:- To customize the geographic location by country, state, or city, click the down arrow in the Country box. The Selected section lists the country, state, or city with name and location type.
- Select Country, and then select one or more countries from the list. The map changes to highlight the countries that are selected.
- Select State, and then enter the name of the state and select the state from the list.
- Select City, and then enter the name of the city and select the city from the list.
- To remove a location from the selected list, click the X next to the location type name.
- To remove all locations from the selected list, click Clear All.
- Select the Destination Geo Location tab, and then repeat the substeps for Step 29. The fields are the same as for the Source Geo Location tab shown above.

- Click Next or select Step 5, Service & DSCP. The following screen displays with the Services tab selected by default, and all services, service groups, and DSCPs are included in the match criteria. You can customize the services, service groups, and DSCPs for the rule to match.

- To specify the services to include, do one or both of the following:
- In the search box under Services, enter the service name.
- Select one of the following services to filter:
- All Services
- Predefined
- User Defined
- Select the Service Groups tab, and then select the user-defined and predefined service groups to which to apply security access control rules. Click the
 Toggle Row Expanded icon next to the service group name to view the details for each service group.

- Select the DSCP tab. All DSCP decimal values are included by default. You can specify which DSCP decimal values to include or exclude.

- Select one or more DSCP decimal values, or use the search to locate one or more values.
- Click Next to go to Step 6, Enforcement. You use the security enforcement rules to define the actions to take on traffic that meets previously defined match conditions and to define the security enforcement actions to apply to matching traffic. The following screen shows the available security enforcement actions.

- You can apply either one security enforcement action or one security enforcement profile for a rule.
- To apply a security enforcement action, click one of the following:
- Allow—Allow all traffic that matches the rule to pass unfiltered.
- Deny—Drop all traffic that matches the rule.
- Reject—Drop the session and send a TCP reset (RST) message or a UDP ICMP port unreachable message.
- To apply a predefined security enforcement profile to allow or reject traffic, click one of the following:
- Intrusion protection system (IPS)—Identify malicious activity using signatures, which are rules for matching suspicious software or patterns in an application's traffic, and by monitoring for unusual events or trends in network traffic.
- IP filtering—Identify network traffic based on the source or destination IP address or fully qualified domain name (such as www.acme.com) and filters or blocks traffic based on its IP address or FQDN and based on the reputation associated with an IP address or FQDN and its geographic location.
- Malware protection—Scan web and email traffic for all types of malicious software (malware), which is a file or code that infects, explores, steals or otherwise damages servers and host devices.
- URL filtering—Prevent access to specific URLs, controlling access to secure (HTTPS) and unsecure (HTTP) websites, thus allowing you to limit web-browsing activity and reduce risks from uncontrolled access to internet websites, including threat propagation, loss of data, and lack of compliance.
- To change the default settings of a profile, click the down arrow for the profile and select one of the settings listed. For example, the following screen shot of the Malware Protection profile shows that Easy Malware Protection is selected by default. The types of malware that are blocked are listed under Blocked Malware.

- To customize the settings for the Malware Protection profile, click the down arrow, and then choose one of the options: Scan Email Traffic or Scan Web Traffic. (To retain the default settings, select Easy Malware Protection.)

- If you select Scan Email Traffic, the following screen displays and the types of malware that trigger alerts are listed under Alerted Malware.

- If you select Scan Web Traffic, the following screen displays and the types of denied malware affected are listed under Denied Malware.

Select Easy Malware Protection to return to the default settings. For more information about security enforcement profiles, see Configure Security Enforcement Actions for SASE Internet Protection Rules.
- To customize the settings for the Malware Protection profile, click the down arrow, and then choose one of the options: Scan Email Traffic or Scan Web Traffic. (To retain the default settings, select Easy Malware Protection.)
- To apply a security enforcement action, click one of the following:
- Click Next to go to Step 7, Permissions, and revise the permissions, if needed.

- Click Next to go to Step 8, Review and Submit, and then enter the following information.

Field Description Name Enter a name for the rule Description Enter a description of the rule. Tags Enter one or more tags. A tag is an alphanumeric text descriptor with no spaces or special characters. You can specify multiple tags added for the same object. The tags are used for searching the objects. Schedule Select a schedule to set the time and frequency at which the rule is in effect. Rule Enabled The rule is enabled by default. Click the slider bar to disable the rule. Logging Select an option for sending logs to Versa Analytics: - Never
- Start
- End
- Both
- Review the selected settings. Click the Edit icon in a section to change a setting, as needed.
- Click Save to create the access control rule.
Attach Access Control Policies to a Basic Master Profile
After you create an access control policy, you can attach it to a basic master profile.
To attach access control policies to a basic master profile:
- Go to Profiles > Master Profiles > Basic.

The screen displays the configured basic master profiles.

- Click the master profile to which you want add the access control policy. The Edit Master Profile screen displays.
- Click Profile > Security in the menu bar. The following screen displays.

- Select the Policies tab and then click + Policy. The following popup window displays.

- Click the down arrow, select Access Control, and then select Choose Existing. The Choose Policies screen displays.
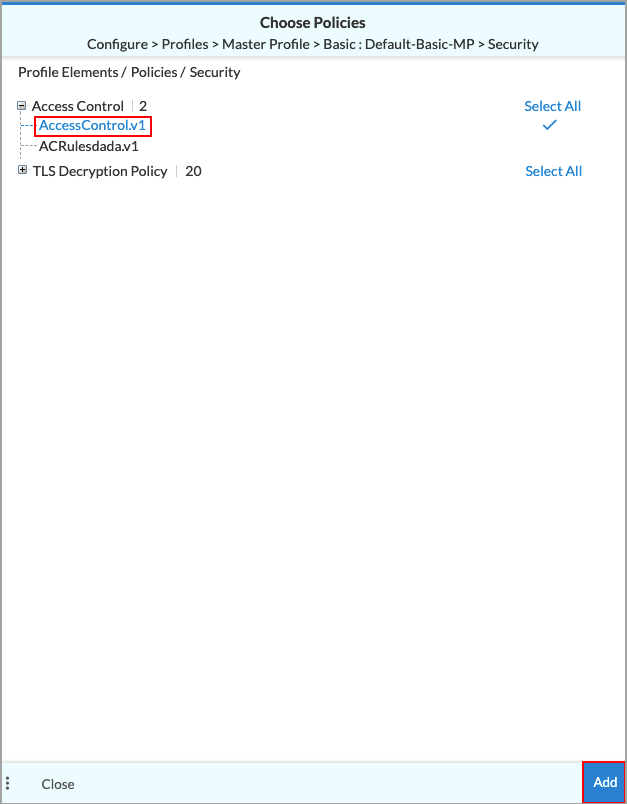
- Select the access control policy from the list (AccessControl.v1 in the screenshot above), and then click Add.
Attach Access Control Policies to a Standard Master Profile
After you create an access control policy, you can attach it to a standard master profile.
To attach access control policies to a standard master profile:
- Go to Profiles > Master Profiles > Standard.

The screen displays the configured standard master profiles. Note that you can have only one instance of each profile type for each standard master profile. If a standard master profile already has a security profile attached to it, you cannot add another security profile. You can, however, create a new standard master profile and attach an access control policy to it.

- Click the standard master profile to which you will add the security access control policy. The Edit Master Profile screen displays.
- Click Sub Profiles in the menu bar. The following screen displays.

- Click +Profile. The following popup window displays.

- Click the down arrow, select Security, and then click Choose Existing. The Choose Policies screen displays.

- Select the access control policy from the list (AccessControl.v1 in the screenshot above), and then click Add.
Supported Software Information
Releases 11.4.1 through 12.2.2 support all content described in this article, except:
- Release 12.1.1 adds support for the Negate Source Address and Negate Destination Address options when configuring an access control rule.
- Release 12.2.1 adds support to customize source and destination geographic locations by country, region, and city, and support for the VPN name option to include in the source address match list.