Configure File Filtering
![]() For supported software information, click here.
For supported software information, click here.
In Versa Operating SystemTM (VOSTM) SD-Security, you can use file filtering to reduce the risk of attacks from unwanted and malicious files, thus decreasing an attacker's ability to attack your organization by protecting against virus and vulnerabilities that are associated with various types of files. File filtering is performed based on the file type and the hash of the file.
You can configure file filtering to block the transfer of potentially dangerous files and types of files (that is, files associated with specific applications), files of specific sizes, files associated with specific protocols, and files traveling in a particular direction. You can configure SHA-based hash lists of files to mark potentially dangerous files for denying (sometimes called blacklisting) and to mark safe files for allowing (sometimes called whitelisting). You can configure file filtering to perform reputation-based file hash lookups on a cloud server.
Deny list, allow list, and cloud lookup file-filtering scans calculate the SHA-256 and SHA-384 sums of the file. You can configure a deny or a allow to match the SHA-256 and SHA-384 sums.
To configure file filtering, you create a file-filtering profile that defines rules for filtering files that enter and leave the network. The rules define match conditions and actions to take when a file does or does not meet the match conditions.
The file-filtering process is performed in the following sequence:
- Scan the early bytes of an incoming file and identify the file type.
- Calculate the SHA-256 or SHA-384 sum (or both) of the file and check whether it matches a deny list or an allow list entry.
- If a deny list entry matches, take the action configured in the deny list rule.
- If no deny list entry matches, check the allow list entries.
- If an allow list entry matches, take the action configured in the allow list rule.
- If no deny list or allow list entries match, check the configured rules.
- Search the configured rules to check whether the file type, file size, protocol, and direction match one of the rules.
- If a match occurs, take the appropriate rule action.
- If no match occurs, perform a cloud lookup.
- Perform a cloud lookup, sending the hash of the file, to check the file's reputation.
- If the hash of the file is found, take the configure action. A hash can indicate that the file is clean, malicious, or suspicious.
- (For Releases 22.1.2 and later.) Search for items to bypass cloud lookup based on FQDN, private IP addresses, file type and size, and application type.
- If the file matches none of these, take the default action defined in the file-filtering profile.
Note that the VOS software does not support decryption of the QUIC protocol. For the VOS security software modules to work, you must block QUIC traffic.
VOS also provides a predefined file-filtering profile called Versa Corporate profile (Versa recommended) that you can use in access policies.
View the Predefined File-Filtering Profile
Versa provides a predefined file-filtering profile called Versa Corporate Profile. In this profile, the default action is allow, the protocol is HTTP, and file decompression is disabled. The Versa Corporate profile includes two rules:
- Rule 1 sends alerts in both directions for PDF and EXE files that exceed 1 MB.
- Rule 2 sends alerts in both directions for all HTML files.
To view the predefined Versa Corporate Profile:
- In Director view:
- Select the Administration tab in the top menu bar.
- Select Appliances in the left menu bar.
- Select a device name in the main panel. The view changes to Appliance view.
- Select the Configuration tab in the top menu bar.
- Select Objects and Connectors > Objects > Predefined > File Filtering Profile in the left menu bar.

- Click the profile to view information about it.

Configure a File-Filtering Profile
You create file-filtering profiles to control how to handle the files in your network. A file-filtering profile inspects the file's payload, reading the early bytes in the file to identify the file type rather than by checking the file extension and determining the file transfer based on the IDP configuration. The file-filtering profile also checks the file for any viruses, and if it finds any, it notifies the VOS antivirus software.
To configure a file-filtering profile:
- In Director view:
- Select the Administration tab in the top menu bar.
- Select Appliances in the left menu bar.
- Select a device name in the main panel. The view changes to Appliance view.
- Select the Configuration tab in the top menu bar.
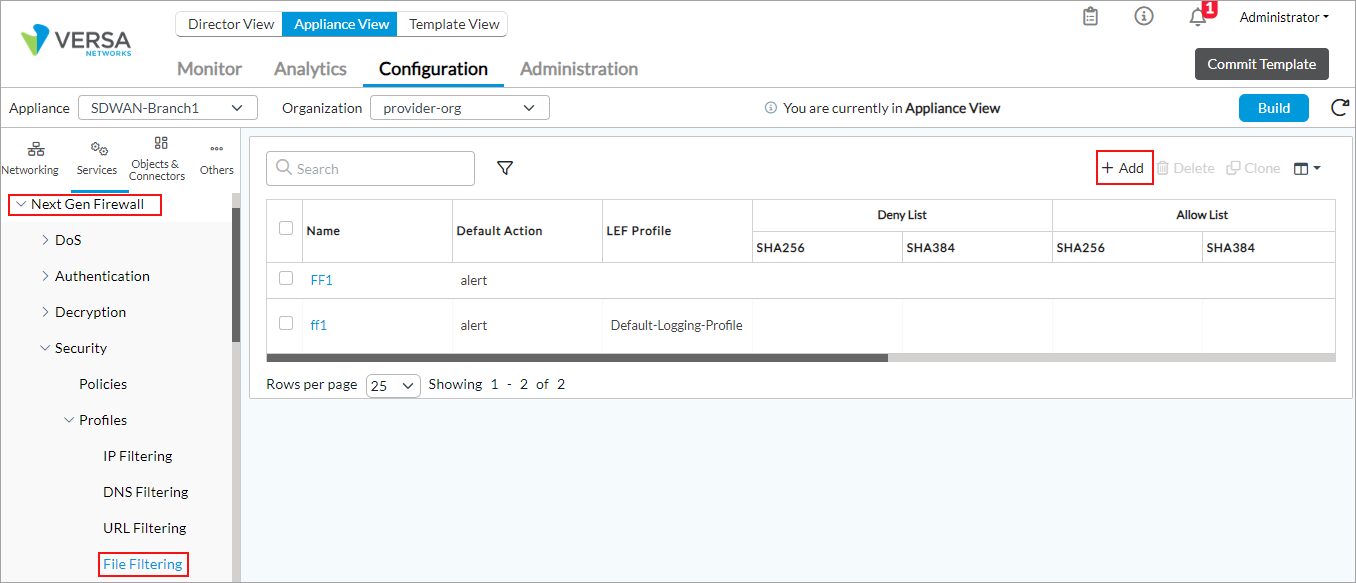
- Select Services > Next-Gen Firewall > Security > Profiles > File Filtering in the left menu bar. The main pane displays the configured file-filtering profiles.
-
In the Add File Filter popup window, click the
 Add icon, and then enter information for the following fields.

Field
Description Name (Required)
Enter a name for the file-filtering profile.
Description
Enter a text description for the file-filtering profile.
Tags
Enter a keyword or phrase that allows you to filter the file-filtering profile. This is useful when you have many policies and want to view those that are tagged with a particular keyword.
Default Action
Select the default action to take on a file that enters the network. The default action is taken when a file matches no entries in a deny list, an allow list, or a cloud lookup.
- Alert—Allow the file to pass and, if a LEF profile is configured, log the action.
- Allow—Allow the file to pass and log the action.
- Block—Do not allow the file to pass and, if a LEF profile is configured, log the action.
- Reject—Reset the connection to the server and client and, if a LEF profile is configured, log the action.
LEF Profile
Select a log export functionality (LEF) profile to use to record logs for the file-filtering profile. For information about configuring a LEF profile see Configure Log Export Functionality. For information about applying a LEF profile to a feature or service, see Apply Log Export Functionality.
Default Profile Click to use the default LEF profile instead of the LEF profile from the previous field. File Decompression (Group of Files)
Configure file decompression. Note that file filtering can decompress only .gzip files. - Decompression
Click to decompress the files being filtered and to place them into subdirectories. - Maximum Level
Enter the maximum number of subdirectories. Note that a .gzip file can be decompressed only into a single subdirectory.
Range: 1 through 10
Default: 1
- Limit Reach Action
Select the action to take when the maximum number of decompression subdirectories is reached:
-
Alert
-
Allow
-
Block
-
Reject
- Protocol
Click the
 Add icon, and then select one or more protocols to filter the files:
-
FTP
-
HTTP
-
IMAP
-
MAPI
-
POP3
-
SMTP
- Select the Deny List tab to configure a SHA-based list of files to mark as potentially dangerous. Enter information for the following fields.

Field
Description Action
Select the default action to take when a file is detected in the deny list.
- Alert—Allow the file to pass and, if a LEF profile is configured, log the action.
- Block—Do not allow the file to pass and, if a LEF profile is configured, log the action.
- Reject—Reset the connection to the server and client and, if a LEF profile is configured, log the action.
Enable Logging
Select to store logs about files in the deny list.
Enable Select to enable the deny list option. SHA256
Click the
Add icon to add the SHA-256 hash value of a file in the deny list. You can add more than one hash value to associate with a file in the deny list.SHA384
Click the
Add icon to add the SHA-384 hash value of a file in the deny list. You can add more than one hash value to associate with a file in the deny list. -
Select the Allow List tab to configure a list of files that the file filter marks as safe. Enter information for the following fields.

Field
Description Enable Logging
Select to store logs about files in the allow list.
Enable Select to enable the the allow list option. SHA256
Click the
Add icon to add the SHA-256 hash value of an allow-list file. You can add more than one hash value to associate with a file in the allow list.SHA384
Click the
Add icon to add the SHA-384 hash value of aa allow-list file. You can add more than one hash value to associate with a file in the allow list. -
Select the File-Based Actions tab to configure file-filtering rules for file properties, such as file type, file size, protocol, and direction.
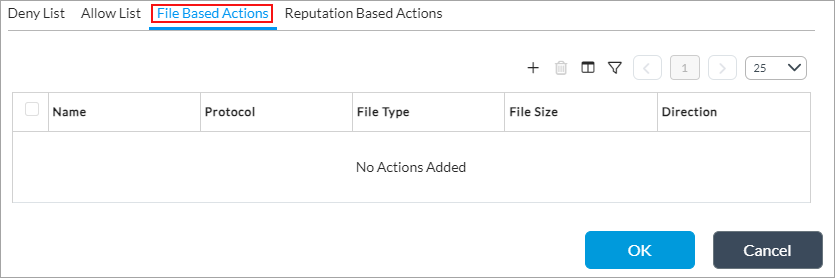
- Click the Add icon. In the Add File-Based Actions popup window, enter information for the following fields.

Field Description Name (Required)
Enter a name for the file action.
Description
Enter a text description for the file action.
Direction
Select the direction in which to apply the file filter:
- Download
- Upload
- Both
Action
Select the default action to take on a file:
- Alert—Allow the file to pass and, if a LEF profile is configured, log the action.
- Allow—Allow the file to pass without logging the action.
- Block—Do not allow the file to pass and, if a LEF profile is configured, log the action.
- Reject—Reset the connection to the server and client and, if a LEF profile is configured, log the action.
File Size
Enter a file size. Any file larger than this size is filtered.
Default: None
File Type (Required)
Click the
Add icon to add the file type for which to apply the file filter. You can select multiple file types.Protocol (Required)
Click the
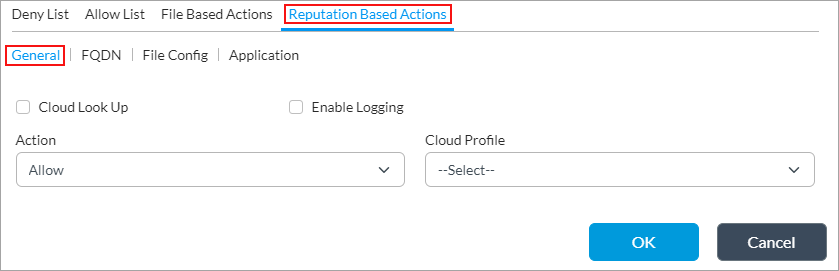
Add icon to add the protocols to associate with the file transfer. You can select multiple protocols. - Select the Reputation-Based Actions tab to configure file-filtering rules for cloud-based hash lookups. The General tab displays by default. For Releases 22.1.2 and later, the FQDN, File Configuration, and Application tabs allow you to configure cloud lookup bypass options that can reduce traffic to the cloud. Note that if you do not configure any cloud lookup options, the VOS device selects the default cloud lookup bypass settings in the security pack (SPack).
- In the General tab, enter information for the following fields.
Field
Description Cloud Lookup
Click to enable cloud lookup of a file for its reputation.
Enable Logging
Click to store logs.
Action
Select the default action to take on a file:
- Alert—Allow the file to pass and, if a LEF profile is configured, log the action.
- Allow—Allow the file to pass without logging the action.
- Block—Do not allow the file to pass and, if a LEF profile is configured, log the action.
- Reject—Reset the connection to the server and client and, if a LEF profile is configured, log the action.
Cloud Profile
Select the cloud profile to use for cloud lookup.
- (For Releases 22.1.2 and later) Select the FQDN tab, and then enter information for the following fields.

Field
Description Private IP Check Click to bypass verification of private IP addresses in cloud lookup. Bypass List Click the Add icon to add domains to bypass cloud lookup. You can add more than one domain.Lookup List Click the Add icon to add domains to include in the cloud lookup. You can add more than one domain. - (For Releases 22.1.2 and later) Select the File Configuration tab, and then enter information for the following fields.

Field
Description File Type Extension (Required) Select the file type and file size to bypass cloud lookup. The file types and file extensions that display are based on those configured in the security pack (SPack). For more information, see Use Security Packages. File Size Enter file size for the select file type. Cloud look bypasses the file types with this file size. - (For Releases 22.1.2 and later) Select the Application tab, and then enter information for the following fields.

Field
Description Predefined Applications Click the Add icon to add the predefined applications to bypass cloud lookup. You can add more than one application. For more information, see View Predefined Objects in Configure Next-Gen-Firewall.User Defined Applications Click the Add icon to add the user-defined applications to bypass cloud lookup. You can add more than one application. For more information, see Configure an Application Object in Configure Next-Gen-Firewall. - Click OK.
Apply a File-Filtering Profile to an Access Policy
To enable a predefined or custom file-filter profile, you associate it with a security access policy rule. To define and configure a security access policy, see Configure Security Access Policy Rules in Configure Next-Gen-Firewall.
To apply a file-filtering profile to an access policy:
- In Director view:
- Select the Administration tab in the top menu bar.
- Select Appliances in the left menu bar.
- Select a device name in the main panel. The view changes to Appliance view.
- Select the Configuration tab in the top menu bar.
- Select Services > Next-Gen Firewall > Security > Policies in the left menu bar, and select the Rules tab.

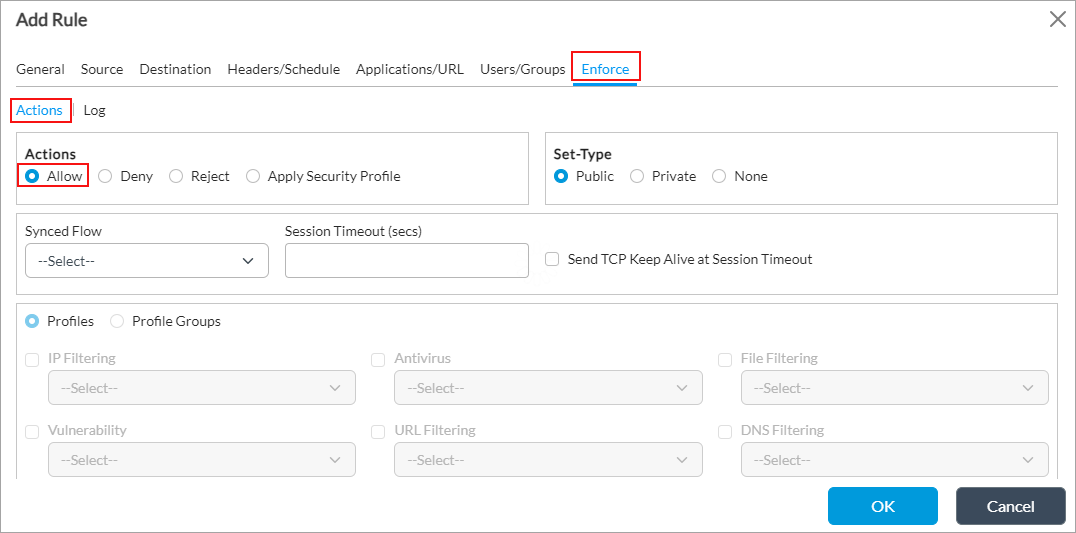
- Select a security access policy rule. In the Edit Rule popup window, click the Enforce tab and enter the following information.

- Select the Enforce tab.
- In the Actions group of fields, click Apply Security Profile.
- Click Profiles, and then click File Filtering and select the file-filtering profile to use for the access policy rule. The list displays the predefined and custom file-filtering profiles. For the Versa Corporate Profile predefined profile, the default action is Allow. For more information, see View Predefined File-Filtering Profile above.
- If you have created profile groups, click Profile Groups.
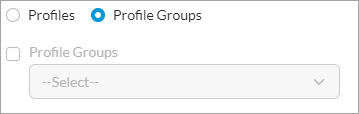
- Click File Filtering, and then select the file-filtering profile group to use for the access policy rule. The list displays the predefined and custom file-filtering profile groups. For more information, see Configure Security Profile Groups.
- Click OK.
Configure a Cloud Profile
If you enable cloud lookup on a VOS device, you can configure a cloud profile to look up information about the file on a cloud server. After completing the lookup, the profile marks the file for further action. If you configure a reputation-based action, you must create a cloud profile.
To configure a cloud profile:
- In Director view:
- Select the Administration tab in the top menu bar.
- Select Appliances in the left menu bar.
- Select a device name in the main panel. The view changes to Appliance view.
- Select the Configuration tab in the top menu bar.
- Select Objects & Connectors > Objects > Cloud Profiles in the left menu bar.
- Click the Add icon. In the Add Cloud Profile window, enter information for the following fields.

Field
Description Name (Required)
Enter a name for the cloud profile.
Description
Enter a text description for the cloud profile.
Connection Pool (Required)
Enter the number of simultaneous connections to the SSL cloud server.
Range: 1 to 100000
Default: None
Timeout
Enter the maximum timeout period to wait for a response from the SSL cloud server, in seconds.
Range: 1 through 4294967295 seconds
Default: 120 seconds
Activation
Click to activate the cloud lookup profile.
Source NAT Pool (Required)
Select the SNAT pool to configure cloud lookup for file filtering. The SNAT pool is linked to a routing instance that connects to the cloud server. For more information, see Configure SNAT Pools.
DNS Redirection Policy Select a DNS redirection policy to use for DNS lookup of either the local breakout domain or the FQDN of the cloud profile. For more information, see the Configure DNS Proxy Profiles section of the Configure a DNS Proxy article.
Note that if the next-generation firewall (NGFW) service is enabled, the redirection access policy must contain one rule with a source zone match condition that matches the host and with the action to allow self-generated DNS traffic. For more information, see Configuration Example: Access Policy Rule To Allow DNS Traffic for NGFW, below.
Type (Required)
Select the cloud profile type to use for cloud lookup:
- Custom Parameters—Enter the custom parameters in the Domain Name, Destination Port, SSL, and Default Profile fields.
- File Filter Cloud Profile—Use the predefined file filter cloud profile as the cloud profile.
- URLF Cloud Profile—URL cloud profile is not applicable to the file-filtering profile.
- Click OK.
Configuration Example: Access Policy Rule To Allow DNS Traffic for NGFW
The following example shows how to define an access policy rule to allow DNS traffic from a host when the NGFW service is configured. If cloud lookup uses DNS redirection policy, this access policy rule must be configured to allow self-generated DNS traffic. For more information, see Configure Access Policy Rules in Configure Next-Gen-Firewall.
To configure an access policy rule using DNS service:
- In Director view:
- Select the Administration tab in the top menu bar.
- Select Appliance in the left menu bar.
- Select the device from the main pane. The view changes to Appliance view.
- Select the Configuration tab in the top menu bar.
- Select Services > Next-Gen Firewall > Security > Policies in the left menu bar, and select the Rules tab.
- Click the + Add icon to define rules for the policy. The Add Rule popup window displays.
- In the General tab, enter the name of the rule.

- Select the Source tab, click the Add icon next in the Source Zone table, and select a host from the drop-down list.

- Select the Headers/Schedule tab, and in the Services table click the Add icon and select a DNS service if one is configured. Otherwise, add a new service.

- To configure a service object for DNS, select Click New Service. In the Add Service popup window, enter information for the following fields. For more information, see Configure Service Objects.

Field
Description Name (Required)
Enter a name for the service. In the example here, the name is DNS.
Protocol (Required)
Click, and in the Protocol field, select a protocol. In the example, the protocol is UDP, which is commonly used for DNS queries. Source/Destination Port Click, and in the Destination Port field, enter the destination port number. In the example, the port is 53, which is commonly used for DNS queries. - Click OK. In the Headers/Schedule tab, the new service is listed in the Services table (in this example, DNS as shown below) and is added to the list of user-defined services.

- Select the Enforce tab, and in the Actions field select Allow (selected by default).
- Click OK.
Monitor File Filtering
You monitor file filtering that you associate with access policy to view the statistics details when the policy is used. For more information, see Monitor VOS Device Services.
To monitor file-filtering profiles:
- In Director view:
- Select the Administration tab in the top menu bar.
- Select Appliances in the left menu bar.
- Select a device name in the main panel. The view changes to Appliance view.
- Select the Monitor tab in the top menu bar.
- Select a tenant in the left menu bar.
- Select the Services tab.
- Select NGFW > File Filtering. The NGFW file-filtering statistics display.

Display File-Filtering Threat Logs
To display the file-filtering threat logs:
- In Director view, select the Analytics tab in the top menu bar. The view changes to Analytics view.
- Select Logs > Threat Filtering in the left menu bar to view the threat filtering logs.
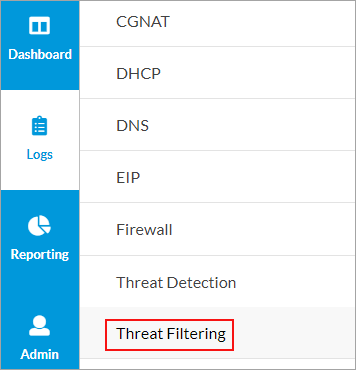
- Select the File Filtering tab to display information about the file-filtering threat logs.

Supported Software Information
Releases 20.2 and later support all content described in this article, except:
- Releases 22.1.2 adds support to bypass cloud lookup using the FQDN, File Configuration, and Application tabs under the Reputation Based Actions tab.