Configure Single Sign-On for Concerto
![]() For supported software information, click here.
For supported software information, click here.
Single sign-on (SSO) is a session and user authentication service that allows a user to use a single set of login credentials to access multiple applications. The service authenticates all the applications for which the user has the required rights and eliminates further prompts when you switch applications during the same session. On the backend, SSO logs user activities and monitors user accounts. In the context of Concerto, the service provider offers single sign-on as a login mechanism to different integrators and clients.
For SSO, Concerto supports:
- Security Assertion Markup Language (SAML)
- OpenID Connect SSO methods
Concerto enables identity provider (IDP)–based and local user authentication.
Concerto supports two types of SSO:
- IDP-initiated SSO—Allows you to access Concerto after authenticating on the customer's portal and redirects you directly to the Concerto node.
- Service provider (SP)–initiated SSO—Allows you to access Concerto when you click on the Login with Single Sign-On link on the Concerto login page. This redirects you to the IDP page for authentication and then redirects you to the Director node.
Concerto SSO has been tested with the ADFS, Azure, Okta, and Ping Identity IDPs.
To configure SSO on Concerto, you do the following:
- Configure Concerto service provider–initiated or Concerto IDP-initiated SSO.
- Access the Director node using SSO.
Configure SAML-Based SSO Using Okta
A service provider–initiated SSO flow operation is started from the service provider and is performed in the following sequence:
- The service provider server creates an authentication request and redirects you to the IDP.
- The IDP requests your credentials, validates you, and redirects you to the service provider with the login response.
- The service provider validates the login response and logs you in if the validation is successful.
Note: To create an IDP-initiated SSO using Okta, configure the IDP-related field-Default RelayState. The default relay state for enabling SSO in the system user is vd-ui::system, and for enabling SSO in any tenant users is vd-ui::organization-name. To configure IDP-Initiated SSO using Okta, follow the steps in Configure Service Provider–Initiated SSO, below. To log in with IDP-Initiated SSO, see Log In with IDP-Initiated SSO, below.
An IDP-initiated SSO flow operation is started from the IDP and is performed in the following sequence:
- Create an SSO response.
- Redirect you to the service provider with the login response.
- The service provider validates the login response and provides access to the requested resource if the validation is successful.
Configure Service Provider–Initiated SSO
To create service provider–initiated SSO using Okta, you do the following:
- Create an application on Okta.
- Define custom attributes.
- Add users to the application.
Create an Application
To create a SAML connection application:
- Create an account in www.okta.com
- Log in to Okta with your credentials.
- In the left menu bar, select Applications > Applications.
- Click Create App Integration to create a new SAML connect application.

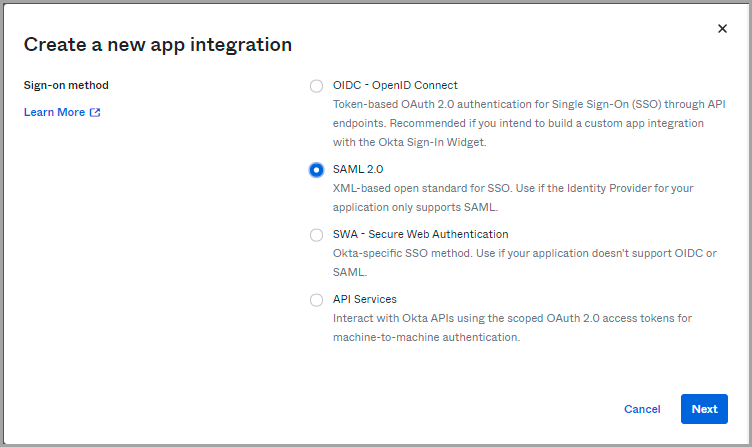
- In the Create a New App Integration window, click SAML 2.0, and then click Next.
- In the General Settings > App name field, enter an Application name, and then click Next.

- In the Configure SAML page, enter information for the indicated fields.

Field Description Single Sign-On URL Enter the URL to which Okta sends OAuth responses. The responses are sent in the format is https://versa-director-ip-address/versa/sso/loginConsumer. Audience URI (SP Entity ID) Enter the service provider entity ID, which is http://versa-networks.com/sp. Show Advanced Settings Click to display the advanced settings. Delay Relay State To create an IDP-initiated SSO using Okta, configure the IDP-related field-Default RelayState. The default relay state for enabling SSO in the system user is vd-ui::system, and for enabling SSO in any tenant users is vd-ui::organization-name. Enable Single Logout Click to enable SAML single logout. Single Logout URL Enter the location to which to send the logout response. SP Issuer Enter the URL http://versa-networks.com/sp. Attribute Statements Enter the role, organization, and idle timeout attributes. The attribute strings are case sensitive. Preview the SAML Assertion Click to preview the SAML assertion. Copy the metadata, and save it as an XML file. The following is an example of the SAML assertion:

- Click Next.
- In the Feedback page, select Customer or Partner, and then click Finish.

Define Custom Attributes
- In the Profile Editor page, select Directory > Profile Editor > Newly Created SAML Connect > Profile in the left menu bar.

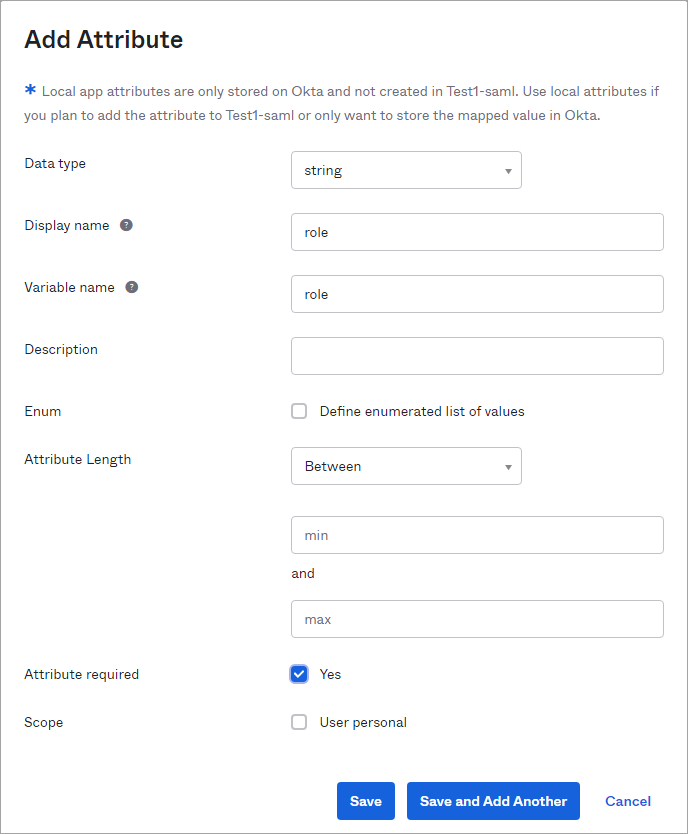
- On the next page that opens, select Add Attribute.

- In the Add Attribute window, add roles, organizations, and idle timeout as attributes. The attribute values are case sensitive.
- These attributes display in the Attributes dashboard.

Add Users to an Application
- To assign users to the Versa Director, select Applications > Applications in the left menu bar, and then click the newly created SAML connect.

- In the Assignments tab, click the Assign field, and then click Assign to People.

- Select a person and then click Assign.

- Enter the role, organization, and idle timeout attribute information.

- Click Save and Go Back.
Configure an SSO Connector in Versa Director
- In Director view, select the Administration tab in the top menu bar.
- Select System > SSO in the left menu bar. The main pane displays SSO information.

- Click
 Add icon to configure SSO, and enter information for the following fields.

Field Description Connector Name (Required) Name for the connector. IDP Name (Required) Name for the IDP service. Organization Enter the name of the organization. SSO Initiated Type Select the SSO initiator:
- All
- IDP Initiated
- SP Initiated
SSO Type Select the SSO type markup language.
- OpenID—OpenID is an open-standard data format for exchanging authentication data and authorization data between an identity provider and a service provider.
- SAML—SAML is an XML-based, open-standard data format for exchanging authentication data and authorization data between an identity provider and a service provider.
SSO Signout Type Select the SSO signout type:
- IDP—Both the service provider and the IDP sessions are cleared.
- Local—Only the service provider session is cleared.
Username Format Select the format for the username:
- String
Versa Director FQDN/IP Address (Required) Enter the FQDN or IP address of Versa Director to which to connect. SP Entity ID Enter the entity ID of the service provider (that is, the VOS device). Auth Context Required Click to enable authentication context details such as authentication type and comparison method in the SAML authentication request.
Authentication Type Enter the method to verify the identity of the user in a SAML authentication request—through a password, certificate, or multi-factor authentication. If the authentication type is not specified, the default value PasswordProtectedTransport is used. Auth Context Comparison Enter the method to compare the authentication context between identity provider (IdP) and the service provider in a SAML assertion. Authentication context comparison is required to enforce the security level during the authentication process.
- Exactly (This is the default method)
- Minimum
- Maximum
- Better
Logout Success Redirect URL Enter the URL to which to be redirected after successful IDP logout. IDP Metadata XML Click Browse and then select the IDP (Okta, in this case) metadata. The metadata is generated from the IDP server.
SSO Enabled Click to enable SSO. SSO User Attribute Tab The following attribute fields must be the same as the user configured in the IDP:
- Concerto Role
- Email (Required)
- Idle Timeout (Required)
- Organization (Required)
- Roles (Required)
- To configure Concerto client, click the Concerto Client tab, and enter information for the following fields.

Field Description Concerto IP/FQDN (Required) Enter the FQDN or IP address of Concerto to connect. Concerto APP ID (Required) Enter the application ID of Concerto to connect. Click  Add icon.
- Click OK.
- In the main pane, click View More to view the service provider certificate.

- Copy and save the certificate to a notepad file with the filename extension .crt.

- Log in to Okta, and then click Applications > Applications.
- Select the General tab. In the SAML Settings section, click Edit and then click Next.
- In the Configure SAML page, click Show Advanced Settings.
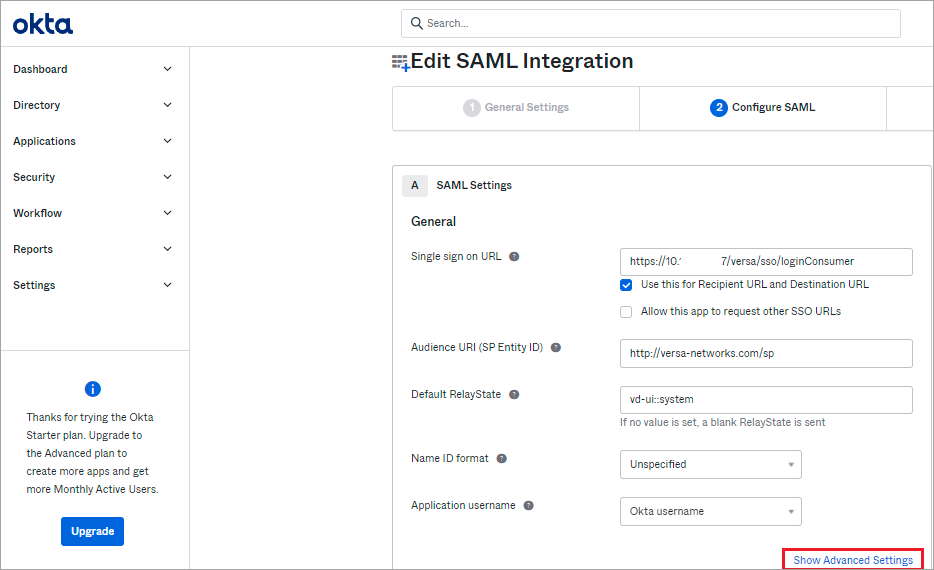
- Select Enable Single Logout. Click Browse, select the Signature Certificate file (a .crt file), and then click Upload Certificate.

- Click Next.
Log In with IDP-Initiated SSO
- Log in to www.okta.com using your credentials.
- In the left menu bar, select Dashboard > Dashboard.
- Click the Okta Apps icon, and then click My End-User Dashboard.
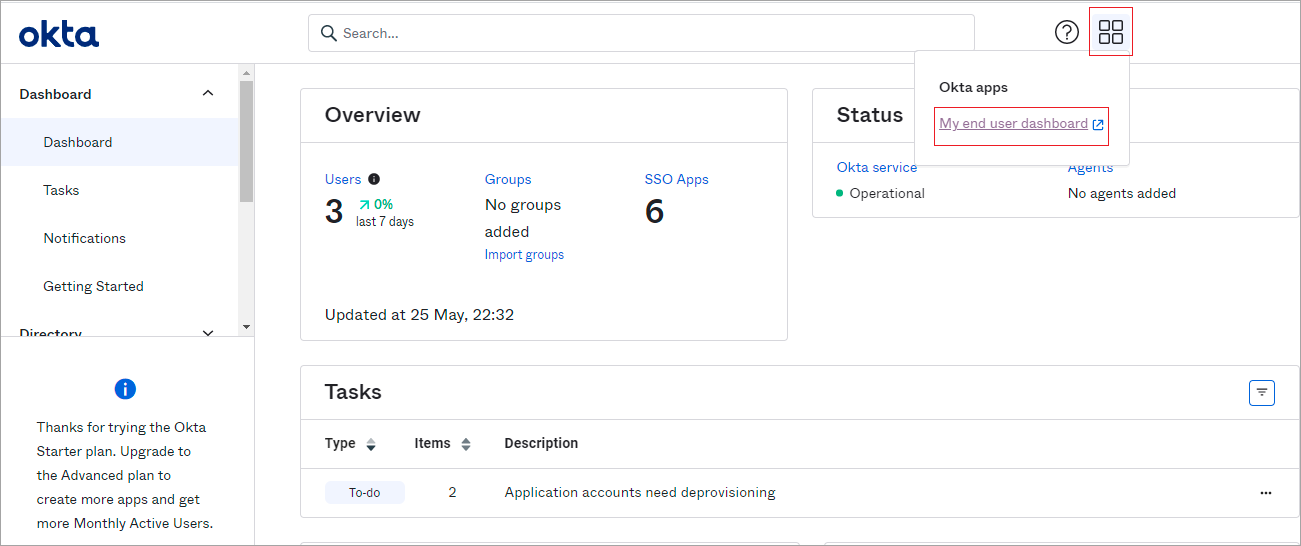
- Click the SAML connector.

The Concerto SSO login page displays.

Configure OpenID Connect SSO Using Okta
Create an Application
To create an OpenID-based single sign-on using Okta:
- Create an account in www.okta.com
- Log in to Okta using your credentials.
- Select Applications in the left menu bar, and then click Add Application to create a new OpenID Connect application.

- Click Create New App to create an OpenID application. The Create a New Application Integration screen displays.

- Click OIDC-OpenID Connect and Web Application, and then click Next.

- Enter information for the indicated fields.

Field Description General Setting (Group of Fields) - Application integration name
Enter a name for the OpenID connect application. - Logo
Browse and select a logo to represent the OpenID Connect. Configure OpenID Connect (Group of Fields) - Sign-in redirect URIs
Enter the URI to which Okta sends OAuth responses. The login redirect URI format is https://versa-director-ip/versa/sso/openid/loginConsumer. - Sign-out redirect URIs
Enter the URI to which Okta sends relying party-initiated logouts. The logout redirect URI format is https://versa-director-ip/versa/sso/openid/logoutConsumer. - Click Save.
-
Select the General tab in the new OpenID Connect preview page, and copy the Client ID and Client Secret key from the Client Credentials section.

Create Custom Attributes
-
To add custom attributes, select Directory > Profile Editor in the left menu bar and then select the newly created OpenID Connect.
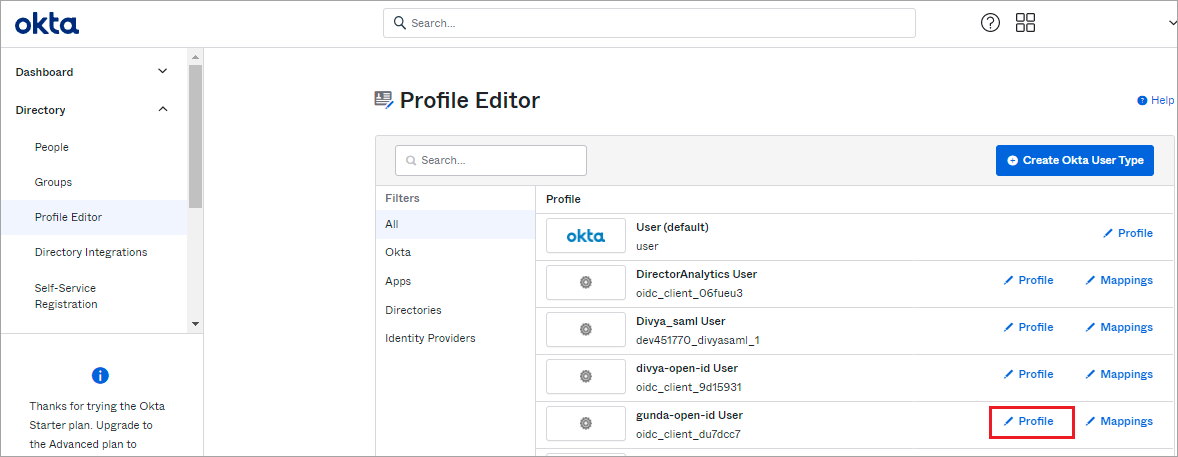
- On the next page that opens, select Add Attribute.
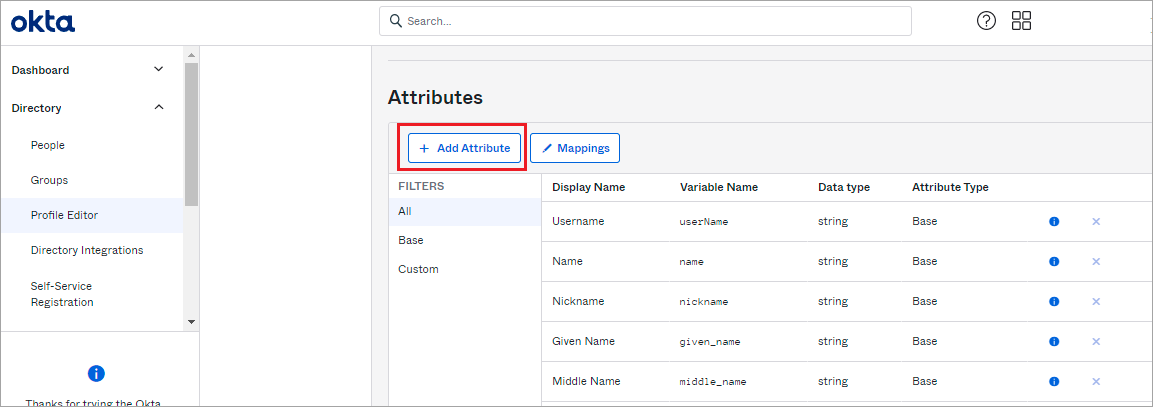
- In the Add Attribute window, add roles, organization, and idle timeout as attributes. The attribute values are case sensitive.

These attributes display in the attribute dashboard.

Add Users to an Application
- To assign users to the Versa Director, in the left menu bar, select Applications > Applications and click the newly created OpenID connect.
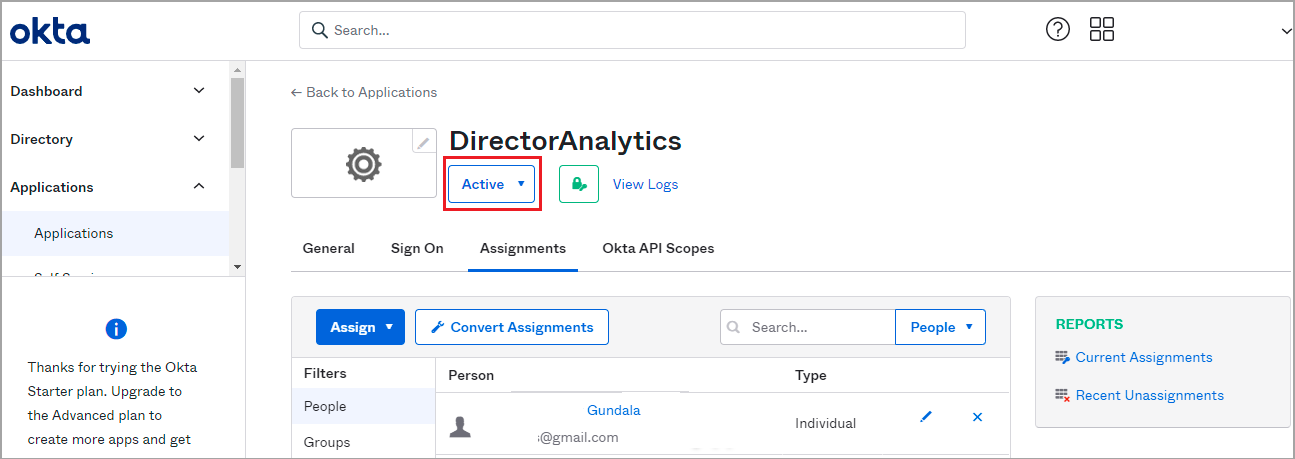
- Select the Assignments tab. Click the Assign field, and then click Assign to People.

- Select a person and then click Assign.
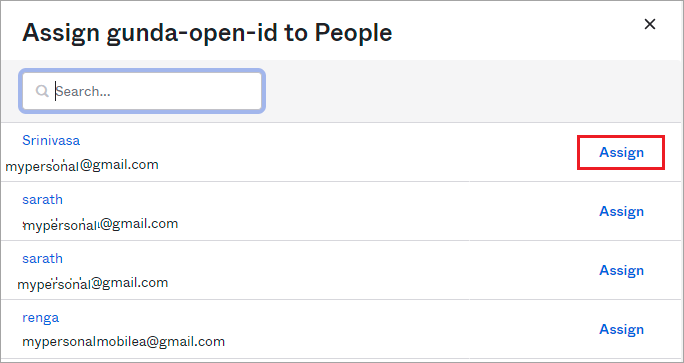
- In the preview page that opens, enter the roles, organization, and idle timeout for the user and then click Save and Go Back to complete the process.
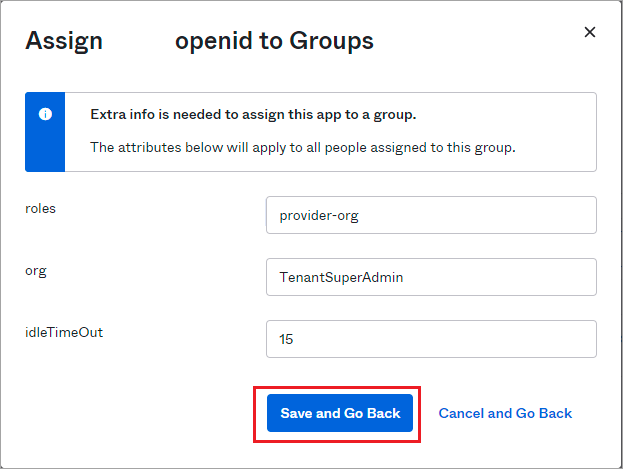
- In your app, go to Application > Open, click Sign On, and the copy the Issuer to configure the connector on the Director node.

Configure an SSO Connector in Versa Director
- In Director view, select the Administration tab in the top menu bar.
- Select System > SSO in the left menu bar.

- Click the
 Add icon, and in the Add SSO popup window, enter information for the following fields.

Fields Description Connector Name (Required) Enter the name of the connector. IDP Name (Required) Enter the IDP name. Organization Select the name of the organization. SSO Initiated Type Select the type of SSO initiation:
- All
- IDP Initiated
- SP Initiated
SSO Type Select the SSO type:
- OpenID—OpenID is an open-standard data format for exchanging authentication data and authorization data between an identity provider and a service provider.
- SAML—SAML is an XML-based, open-standard data format for exchanging authentication data and authorization data between an identity provider and a service provider.
SSO Signout Type Select the SSO signout type:
- IDP—Both the Director and the IDP sessions are cleared.
- Local—Only the Director session is cleared.
Username Format Select the format for the username:
- String
Versa Director FQDN/IP Address (Required) Enter the IP address of the Director node. Logout Success Redirect URL Enter the URL to which to be redirected after a successful IDP logout. SSO Enabled Click to enable SSO. Logout Endpoint (Required) Enter the logout redirect URIs received from the Okta page, for example, issuer/oauth2/v1/logout. Authorize Endpoint (Required) Enter the URL that interacts with the IDP and obtains an authorization grant, for example, issuer/oauth2/v1/authorize. Token Endpoint (Required) Enter the IDP endpoint to get the access token, for example, issuer/oauth2/v1/token. UserInfo Endpoint (Required) Enter the IDP endpoint to get the user details; for example, issuer/oauth2/v1/userinfo. Revoke Endpoint (Required) Enter the IDP endpoint to revoke the access token; for example, issuer/oauth2/v1/revoke. Client ID (Required) Enter the client ID information received from the Okta page. Client Secret (Required) Enter the client secret information received from the Okta page. - Click OK.
Log In with IDP-Initiated SSO
To log in with OpenID IDP-initiated SSO, update the Okta URL to one in the following format:
https://authorize_end_point?client_id=app_client_id&state=client_name::org_name&nonce=null&response_type=code&redirect_uri=https://director_ip_address/versa/sso/openid/loginConsumer&scope=openid+profile+email
| Field | Description |
|---|---|
| authorize_end_point | Enter the URL that interacts with the IDP and obtain an authorization grant. |
| app_client_id | Enter the client ID information received from the Okta page. |
| client_name |
Enter the name of the client:
|
| org_name |
Enter the name of the organization:
|
| director_ip_address | Enter the Director IP address. |
For example:
https://dev-754693.oktapreview.com/o...+profile+email
Copy the link and paste it in a browser URI field. The Okta log in page displays.
Enter the Okta username and password.
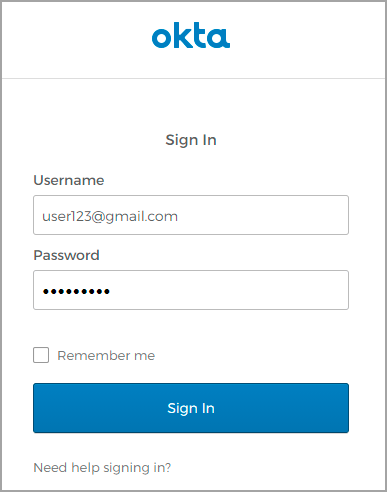
The Director home page displays.
Configure SSO for Tenant Users
To configure SSO for tenant users in an organization, you must update the IDP connector for the tenant's organization, and you must add supported user roles.
To configure SSO for tenant users:
- In Director view, select the Administration tab in the top menu bar.
- Select System > SSO in the left menu bar.
- Click a connector, and then click
 Connector Mode.

- In the Connector Mode popup window, select the connector mode.

Field Description None Click if provider users do not require connector mode. System users cannot use this connector mode to log in.
Default IDP Connector Click for system users. Tenant users do not need to configure the IDP connector on the organization page. Single IDP Connector Click for all provider and tenant users. Tenant users do not need to configure the IDP connector on the organization page.
- Click OK.
- Select the Administration tab in the top menu bar, and then select Organizations in the left menu bar.

- Click an existing organization name, or click the
 Add icon to add a new tenant. The Add/Edit Organization popup window displays.
 - In the IDP Connector field, select the name of IDP connector to use for Versa Director SSO.

- Select the Supported User Roles tab, and select the roles for the tenant.

- For information about configuring the other fields on the Add Organization popup window, see the Configure Tenants section in Configure Multitenancy.
- Click OK.
- Log out of Versa Director.
- In Concerto, click Login with SSO.

- Click Tenant User, and enter the tenant name.

- Click Submit.
Log In with SSO for Service Providers
To log in with SSO for service providers:
-
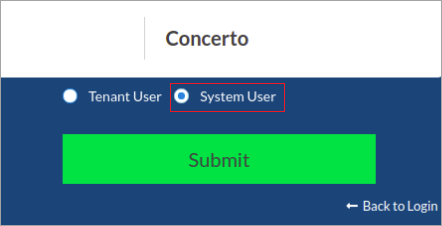
In Concerto, click Login with SSO.

-
Click System User.
-
Click Submit.
Supported Software Information
Releases 10.2.1 and later support all content described in this article.
