Install on Nutanix
![]() For supported software information, click here.
For supported software information, click here.
To install the Versa headend components (Versa Director and Versa Analytics) on Nutanix Prism Central, you need to upload the Versa software images to the Nutanix portal, and then create virtual machines (VMs) for the Versa headened components.
Before You Begin
Before you install Versa Director and Versa Analytics, ensure that you have the following:
- Administrator access to Nutanix Prism Central.
- Versa Director and Versa Analytics QCOW2 images.
- Sufficient resources (compute, storage, networking).
Upload Versa Images to Nutanix Prism Central
- Log in to Nutanix Prism Central.
- From the Application Switcher Function, select the Infrastructure application.
- From the Navigation Bar, select Compute & Storage > Images. The following screen displays.

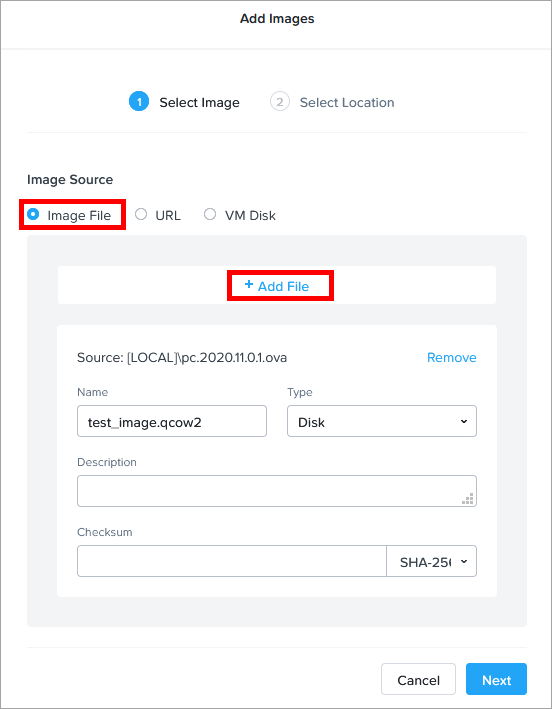
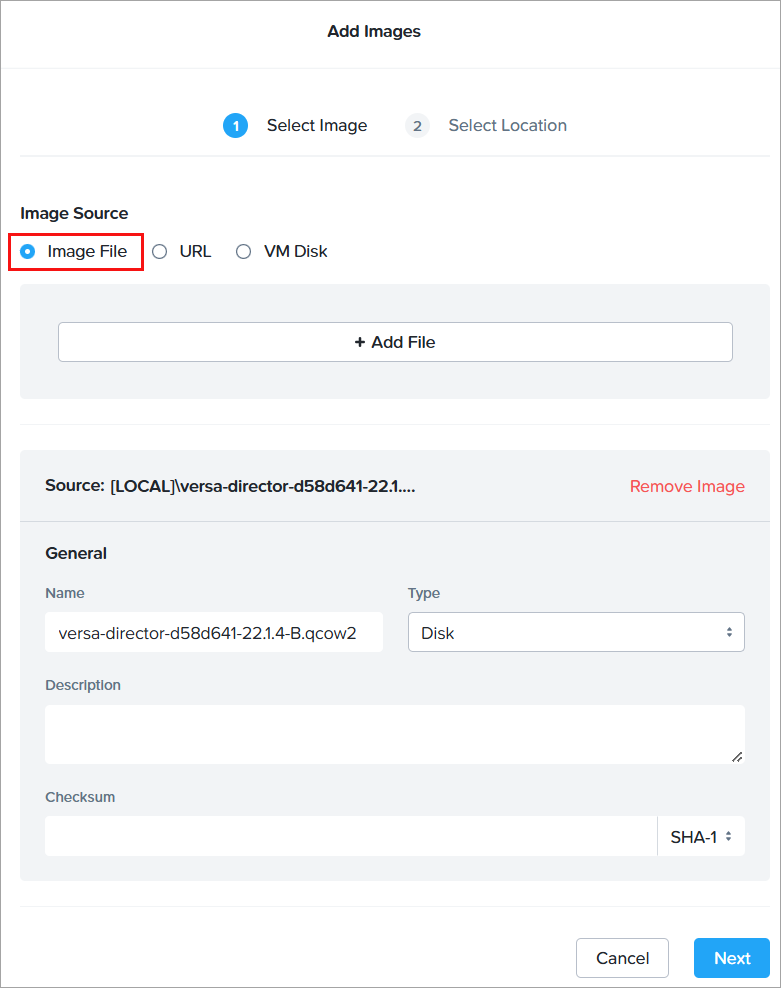
- Select Image File as the image source, and then click Add File to browse to the location of the image file to upload. Note that the image should be a QCOW2 image. Sample screenshot for Director:

- Enter image file attributes such as name and type.
- Repeat Steps 4 through 6 to add another image file.
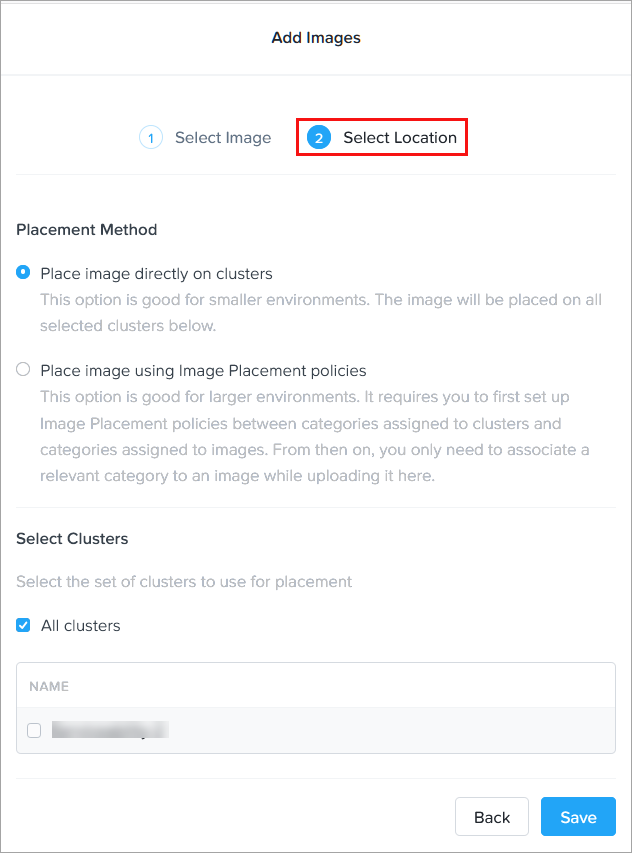
- Click Next after you add the image file. The following screen displays.

- Select a placement method:
- Place image directly on clusters—Places images directly on selected clusters.
- Place image using Image Placement policies—Delegates image placement decisions to configured policies and assign categories to the images
- Select one or more clusters to place the image, or select All clusters.
- Click Save. For more information, see Adding Images from a Workstation on the Nutanix website.
Create VMs for Director and Analytics
To create a virtual machine (VM) for Director and Analytics in a Nutanix Acropolis Hypervisor (AHV) cluster:
- Log in to Nutanix Prism Central.
- From the Applicatoin Switcher Function, select the Infrastructure application.
- From the Navigation Bar, go to Compute & Storage > VMs.
- Click Create VM. The Create VM screen displays step 1, Configuration. For detailed information about each of the following steps, see Creating a VM through Prism Central (AHV) on the Nutanix website. Sample screenshot for Director:

- Enter the VM name, select the cluster, and specify the VM properties. Specify the CPU and Memory based on the VM requirements. For more information, see Hardware and Software Requirements for Headend.
- Click Next to go to step 2, Resources. Sample screenshot for Director:

- Configure the following for the VM:
- Attach a disk.
- Create a network interface.
- Perform boot configuration. Note that you must select Legacy BIOS Mode for Director and Analytics.
- Add a GPU.
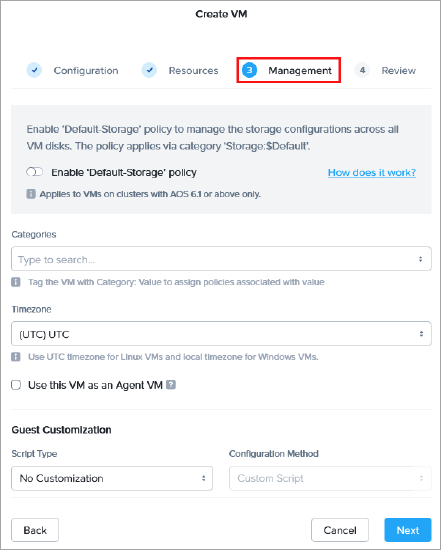
- Click Next to go to step 3, Management.

- Configure the following:
- Categories
- Timezone
- Guest Customization—Select the script type and configuration method.
- Click Next to go to step 4, Review.
- Verify your entries, and then click Create VM.
Supported Software Information
Releases 22.1.4 and later support all content described in this article.
