Configure Single Sign-On for Titan Portal
![]() For supported software information, click here.
For supported software information, click here.
Single sign-on (SSO) is a session and user authentication service that allows a user to use a single set of login credentials to access multiple applications. The service authenticates all the applications for which the user has the required rights and eliminates further authentication prompts when the user switches applications during the same session. On the backend, SSO logs user activities and monitors user accounts. Titan Portal allows a service provider (SP) to offer single sign-on as a login mechanism to different integrators and clients.
You can enable SSO authentication when you create a new customer by selecting the external SSO authentication option. Note that you can enable only one authentication method at a time, either external SSO authentication or two-factor authentication. After you enable SSO authentication, you must create an SSO profile for the user.
When you configure a Titan SSO profile, you choose to allow users with one of the following options:
- All IdP user—An external identity provider (IdP) authenticates and authorizes the user, and then Titan Portal proceeds with access for the user. You do not need to create a local user in Titan database, but the user must exist in the IdP database.
- Titan-known user only—An external IdP authenticates the user, and Titan authorizes the same user in the Titan database and proceeds with access. An administrator adds local users to Titan database before creating an SSO profile. When you create Titan-known users only, even if the user exists in the IdP database, Titan does not provide access to the user if the user is not a local user. Then, you need to add a local user using the external option in the Add User window to provide access to the Titan dashboard.
For SSO, Titan Portal supports Security Assertion Markup Language (SAML), an XML-based, open standard data format for exchanging authentication data and authorization data between an IdP and a service provider.
Titan Portal enables IdP-based and local user authentication.
Titan Portal supports two types of SSO:
- SP-initiated SSO—Allows you to access the Titan Portal when you click the Login with Single Sign-On link on the Titan Portal login page. This page redirects you to the IdP page for authentication and then redirects you to the Titan Portal.
- IdP-initiated SSO— Allows you to access Titan Portal after authenticating on the customer's portal and redirects you directly to the Titan Portal.
Titan Portal SSO has been tested with the ADFS, Azure AD, G-Suite, Okta, and OneLogin IdPs.
To configure SSO on Titan Portal, you do the following:
- Configure Titan Portal SP-initiated or Titan Portal IdP-initiated SSO.
- Configure an IdP.
- Access the Titan Portal using SSO.
SAML-Based Authentication
Security Assertion Markup Language (SAML) is a common standard for authenticating and authorizing users so that they can access multiple services and applications. SAML is a common standard for exchanging authentication between a service provider (SP) and an IdP, and it is most commonly used for web browser–based SSO. SSO authenticates a user once and then communicates that authentication to multiple applications. Using SAML-based SSO in Titan Portal improves the user experience, because users do not have to enter their credentials frequently.
Configure SAML-Based SSO using Okta
An SP-initiated SSO flow operation is started from the SP and is performed in the following sequence:
- The SP server creates an authentication request and redirects you to the IdP.
- The IdP requests your credentials, validates you, and redirects you to the SP with the login response.
- The SP validates the login response and logs you in if the validation is successful.
An IdP-initiated SSO flow operation is started from the IdP and is performed in the following sequence:
- Create an SSO response.
- Redirect you to the SP with the login response.
- The SP validates the login response and provides access to the requested resource if the validation is successful.
Configure SP-Initiated SSO
To create SP-initiated SSO using Okta, you do the following:
- Create an application on Okta.
- Add users to the application.
Create an Application
To create a SAML connection application:
- Create an account in www.okta.com
- Log in to Okta with your credentials.
- In the left menu bar, select Applications > Applications.
- Click Create App Integration to create a new SAML connect application.

- In the Create a New App Integration window, click SAML 2.0, and then click Next.

- In the General Settings > App name field, enter an Application name, and then click Next.

- In the Configure SAML page, enter information for the indicated fields.

Field Description Single Sign-On URL Enter the URL to which Okta sends OAuth responses. Audience URI (SP Entity ID) Enter the SP entity ID. Name ID Format Select the name identifier format supported by the IdP. Attribute Statements Enter the following attributes and their values:
- Director role
- External ID
- First name
- Last name
- Idle timeout
- Name ID
- Role
- Two-factor status
- Click Next.
- In the Feedback page, select Customer or Partner, and then click Finish.

- In the left navigation bar, select Applications > Applications and click the newly created SAML application.

- Select the Sign On tab, and then click View SAML Setup Instructions.

Make a note of the single sign-on URL and IdP issuer information, and download the certificate file. You use this information while configuring the SSO profile in Titan Portal.

Add Users to an Application
- In the left navigation bar, select Applications > Applications and then click the newly created SAML application.
- Select the Assignments tab, click the Assign drop-down list, and then click Assign to People.

- Select a person and then click Assign.
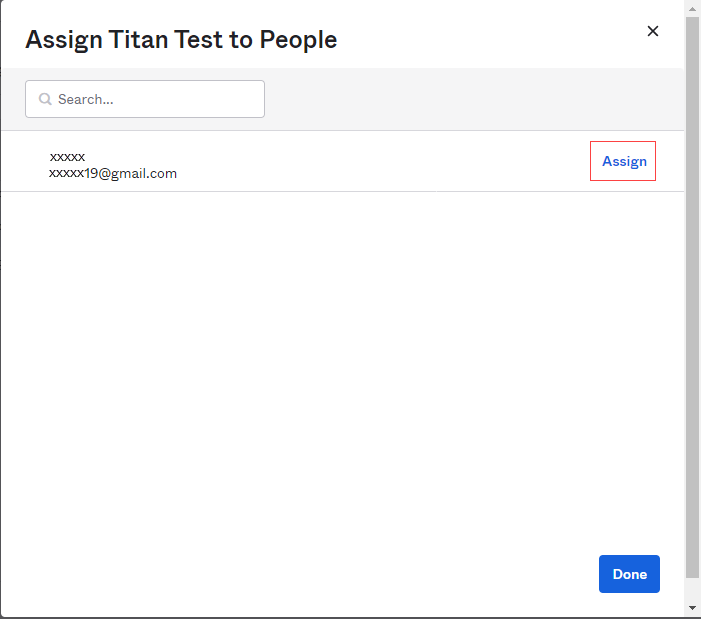
- In the Assign to People popup window, click Save and Go Back.

- Click Done.
Configure an SSO Profile in Titan Portal
You can enable SSO authentication while creating a new customer by selecting the external SSO authentication option. After you enable SSO authentication, you must create an SSO profile for the user.
To create an SSO profile in Titan Portal:
- Log in to Titan Portal.
- In the Settings menu, click Single Sign-On.

- In the Single Sign-On popup window, enter information for the following fields.

Field Description SAML Name Enter a name for the SSO profile. Display Name Enter a display name for the SSO. This is displayed when you login with SSO. Name ID Select a name identifier for the IdP:
- Email Address
- Persistent
- Transient
- Unspecified
IdP Certificate Click Browse File icon, and then upload the certificate generated by the IdP while creating the SAML application in Okta. Single Sign-on URL Enter the SAML SSO URL generated by the IdP while creating the SAML application in Okta. Issuer Enter the URL of the issuer of the certificate. Allow Users Choose the type of user:
- All IdP user—An external IdP authenticates and authorizes the user, and then Titan Portal proceeds with access for the user.
- Titan-known user only—An external IdP authenticates the user, and then Titan authorizes the same user in Titan database and proceeds with access.
Enabled Click to enable or disable the SSO authentication profile. - Click Save.
To edit, view, or delete a SSO profile from the SSO profile list:

- Click the
 Edit icon to update a SSO profile.
 - Click the
 Eye icon to view a SSO profile.

- Click the
 Delete icon to delete a SSO profile.
Access Titan Portal Using SP-Initiated SSO
If you have enabled the SSO Enabled option in the Edit SSO window, the Titan Portal login page displays the Login with Single Sign-On link.
To access Titan Portal using SSO:
- On the Titan Portal login page, click Continue with Single Sign-On (SSO).
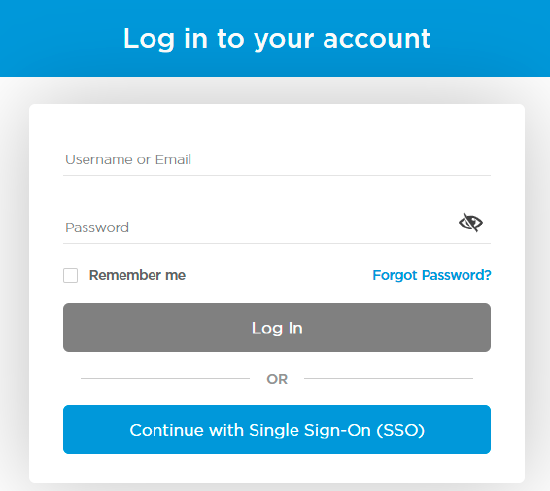
- In the popup window, enter the organization name, and then click Next.

- In the IdP (Okta) login page, enter your credentials and click Sign In.
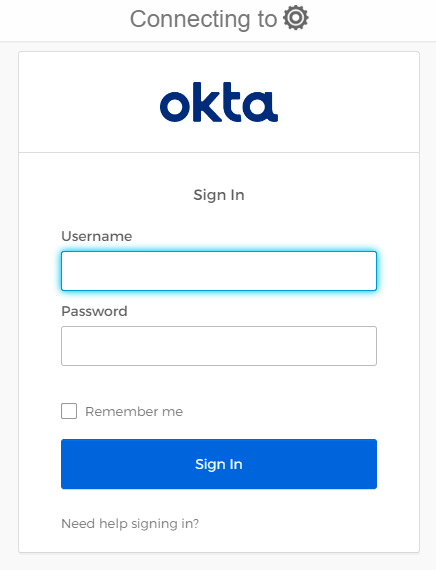
- IdP validates your credentials and then displays the Titan Portal home page.
Supported Software Information
Releases 11.3 and later support all content described in this article.