Configure a DNS Proxy
![]() For supported software information, click here.
For supported software information, click here.
A DNS proxy intercepts incoming DNS requests from a client and redirects them to a DNS server. The DNS server then resolves the DNS queries either using information in its DNS cache or by forwarding requests to other DNS servers.
You can configure a Titan device to act as a DNS proxy. To do this, you create a DNS proxy profile that defines the DNS resolvers to use to resolve the domain names received in DNS requests, and you define which interfaces and source NAT (SNAT) pools to use to reach the DNS resolvers. You then create DNS profiles that define the domain name patterns and types to be resolved by a DNS proxy profile, and DNS then associates these profiles with DNS policies.
You can configure multiple DNS servers to ensure that incoming DNS requests are sent to the appropriate DNS server or servers. For example, the DNS path selection mechanism can send corporate DNS queries to a corporate DNS server while sending other queries to the ISP's DNS servers. To direct incoming DNS requests to other DNS servers, you create a redirection rule in a DNS policy, and you then associate a DNS proxy profile with the rule. You can configure multiple redirection rules. You can also configure a redirection rule that responds to a domain name with a static IP address.
Note: You must be using the Secure Application Optimization license to use DNS proxy configuration. For information about adding licenses, see Add Devices Using Titan Portal.
Configure DNS Proxy Profiles
To create a DNS proxy profile:
- Click Configure in the left menu bar to open the Configure dashboard.
- Hover over the device in the honeycomb, and then click Configure to open the site information window.

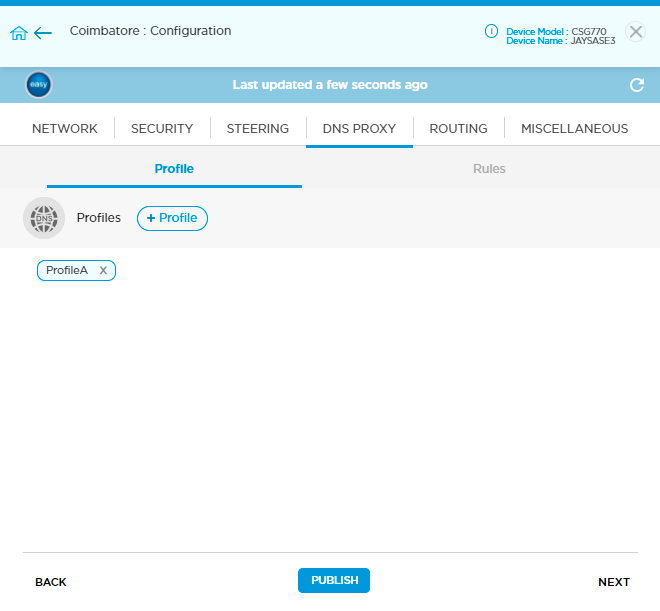
- Select the DNS Proxy tab.

- In the Profile tab, click
 to display the DNS Proxy > Profile > Add screen. Enter information for the following fields.

Field Description Profile Name (Required) Enter a name for the DNS profile. Mode Select the mode to use to check the availability of the resolver:
- Failover—Click to redirect the traffic through another resolver if the resolver fails or is not reachable. This is the default
- Round-Robin—Click to use a round-robin method to send traffic among the resolvers.
Default: Failover
Resolver (Group of Fields) - Resolver Name (Required)
Enter a name for the resolver profile. - Device Name
Click and select a device to which to send traffic for DNS resolution. - Network
Click and select which local WAN or LAN networks to use to proxy a DNS request. - Mode
Select the mode to use to check the availability of the DNS server:
- Failover—Click to redirect the traffic through another resolver server if the server configured in resolver fails or not reachable. This is the default.
- Round-robin—Click to use a round-robin method to send traffic among the resolvers.
Default: Failover
- SNAT Pool
Select an SNAT pool to associate with the DNS profile. The address in this pool can be used to create a new proxy session.
Click
 to add an SNAT pool, and enter information for the following fields.

- Name (Required)—Enter a name for the SNAT pool.
- Egress Network (Required)—Select an egress network to associate with the SNAT pool.
Click Add, and then click Continue.
- Servers
Select a DNS server to associate with the DNS profile.
Click
 to add a new server, and enter information for the following fields.
- Name (Required)—Enter a name for the DNS server.
- IP Address (Required)—Enter the IP address of the DNS server. The address can be an IPv4 or an IPv6 address.
- Port (Required)—Enter the port number to use to connect to the DNS server.
- Monitor (Required)—Select the monitor object to use. Monitor object evaluates the state of the IP addresses configured in the resolver. The DNS proxy responds to DNS query with IPv4 or IPv6 addresses whose monitor status is up.
-
Click
 to add a new monitor, and enter information for the following fields.

-
Name (Required)—Enter a name for the monitor object.
-
Monitor Type (Required)—Select the type of packets to send to the IP address:
-
DNS
-
ICMP
-
TCP
-
-
IP Address (Required)—Enter the IP address to monitor.
-
Next Hop—Select the device to use as the next hop.
-
Networks—Select the source network interface.
-
Source Interface—Select the source interface on which to send the probe packets. This interface determines the routing instance through which to send the probe packets.
-
-
Click Add and then click Continue.
-
-
Click Add.
Add Resolver Click  .
. - Click Add, and then click Publish.
Configure DNS Proxy Rules
To create a new DNS proxy rule:
- Click Configure in the left menu bar to open the Configure dashboard.
- Hover over the device in the honeycomb, and then click Configure to open the site information window.
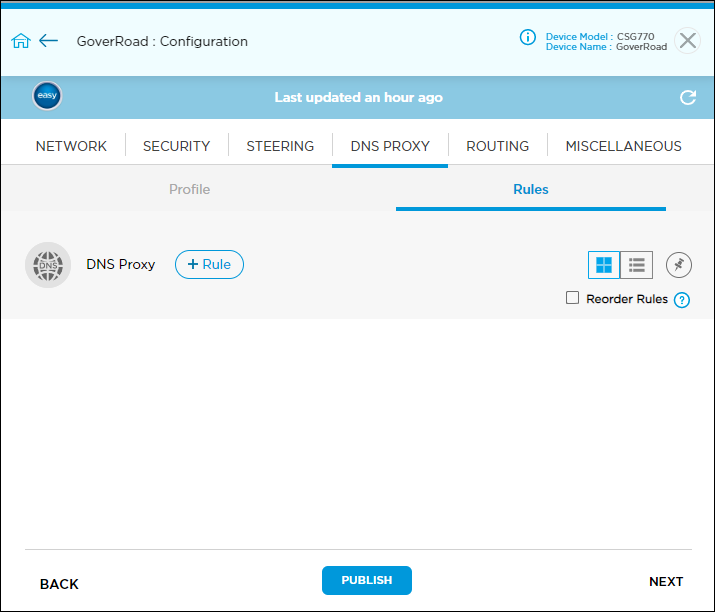
- Click DNS Proxy tab, and then click Rules tab .

- If necessary, click Reorder Rules to enter rule reorder mode.
- To change a rule order, click the rule name and drag it to a different location in the rule set.
- Click Publish Reordered Rules to save the changes to the Titan cloud.
- By default, the rules are displayed in grid view. To change the view to list, click the list view icon.
- To pin the view to grid or list for the login session, use the pin icon.
- In the Rules tab, click
 to display the DNS Proxy > Rules > Add screen. Enter information for the following fields.

Field Description Rule Name (Required) Enter a name for the DNS proxy rule. Description Enter a text description for the rule. The description can be a maximum of 63 characters. Match Criteria Click Address, Hostname, DNS Header, or User and Group tab to add details for that criteria type. Match criteria details are listed in the Apply Match Criteria for DNS Proxy Rules section.
Scope (Group of Fields) - Source Zone
In the Please Select field, click the down arrow. A popup window displays the configured interfaces and tunnels. Select the type:
- SD-WAN
- Untrusted
- Wired LAN
- Wireless LAN

- Arrow
Choose a connection type:
 One-way
 Two-way
- Destination Zone
In the Please Select field, click the down arrow. A popup window displays the configured interfaces and tunnels. Select the type:
- SD-WAN
- Untrusted
- Wired LAN

Action (Group of Fields) Configure the action to take when a rule matches. - Proxy Setting
Click to use proxy settings, and then enter information for the following fields to configure the proxy settings:

- Select Profile—Select the name of the DNS proxy profile.
- Apply Policy-Based Forwarding—Click to look up steering policy rules to determine the path on which to send the DNS query.
- Server Setting
Click to use server settings, and then enter information for the following fields to configure the server settings.

- IP Address—For A/AAAA DNS queries, enter the static IPv4 or IPv6 address to send in the response to a DNS query.
- Monitor—Select the monitor object to use. Monitoring object evaluates the state of the IP addresses configured in the resolver. The DNS proxy responds to DNS query with IPv4 or IPv6 addresses whose monitor status is up.
-
Click
 to add a new monitor, and enter information for the following fields.

-
Name (Required)—Enter a name for the monitor object.
-
Monitor Type (Required)—Select the type of packets to send to the IP address:
-
DNS
-
ICMP
-
TCP
-
-
IP Address (Required)—Enter the IP address to monitor.
-
Next Hop—Select the device to use as the next hop.
-
Networks—Select the source network interface.
-
Source Interface—Select the source interface on which to send the probe packets. This interface determines the routing instance through which to send the probe packets.
-
Click Add and then click Continue.
-
-
-
Click Add.
- None
Click to take no action.

Logging (Group of Fields) Configure log settings. - None
Click to perform no logging. - Default
Click to use default logging. - Custom
Click to configure logging to a customer log server. Based on the rule match, the device may send a large number of log messages.

- Click the down arrow in the Please Select field to select a log profile. To create a new custom flow logs profile, click
 . For more information, see Add Custom Logs Profile.
- Click Add, and then click Publish.
Apply Match Criteria for DNS Proxy Rules
You can apply the following match criteria types in a DNS proxy rule:
- Address
- DNS header
- Hostname
- User and Group

To specify the match criteria for a DNS proxy rule:
- Select the Address tab to display the address window.

- Click the toggle switch to enter the source or destination IP address, and then click Source.

- Enter a source IP address in CIDR format, and then click the
 icon. Click the
  icon to remove an IP address from the list.

- Enter a destination IP address in CIDR format, and then click the
 Add icon. Click the
  Delete icon to remove an IP address from the list.

To specify hostname match criteria for a DNS proxy rule:
- Select the Hostname tab to display the Hostname window.

- Click the toggle switch to enter the source or destination hostname, and then click Source.

- Enter a source hostname, and then click the
 Add icon. Click the
  Delete icon to remove a hostname from the list.

- Enter a destination hostname, and then click the
 Add icon. Click the
  Delete icon to remove a hostname from the list.

- Click Continue.
To specify DNS header match criteria for a DNS proxy rule:
- Select the DNS Header tab to display the DNS header window.

- Select the type of query to associate with the rule:
- A—Click to select an IPv4 query.
- AAAA—Click to select an IPv6 query.
- MX—Click to select a mail server query.
- Query Record—Enter the domain name to match with the query and then click

To specify user and group match criteria for a DNS proxy rule:
- Select the User and Group tab to display the user and group window.

- Select a user to bind with the security policy:
- Any
- Known
- Selected
- Unknown
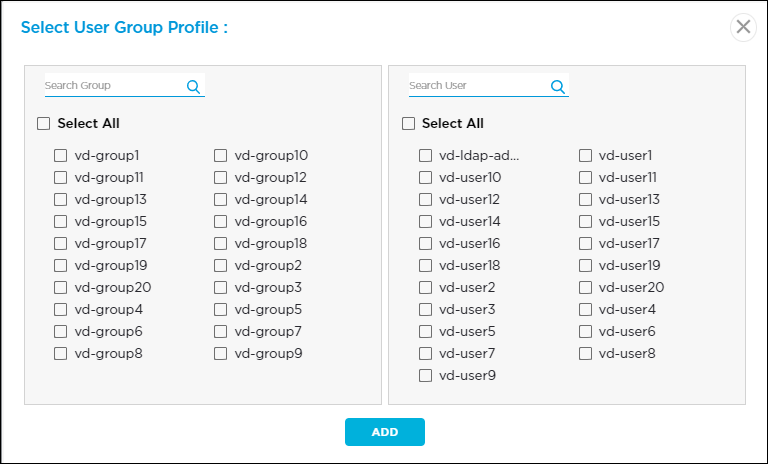
- To select a specific user and group, click Selected and then do the following:
- In the LDAP drop-down list, select an LDAP user group profile.
- Use the search box to search for the user and group, or click the check box next to the user and group name.

- Click Add.
- To edit a rule, in the DNS Proxy > Rules tab, click a rule name. Then click Save to save the changes to the Titan cloud.
- To delete a rule, in the DNS Proxy > Rules tab, click the X. Then click Save to save the changes to the Titan cloud.
Supported Software Information
Releases 11.2 and later support all content described in this article.
