Manage Device Inventory
Use the Inventory dashboard to view device licenses and the devices with which they are associated. On the Inventory dashboard, you can turn a service and security on or off, and you can perform the inventory-related actions depending your user privileges.
The Inventory dashboard is available to the Enterprise Administrator. The Enterprise User does not have access to the Inventory dashboard.
You can download and export inventory data in CSV format.
View Device Licenses
You can view a list of licenses used by activated devices or a list of all licenses. For Cloud Account/vCSG license information, see Configure a Branch in AWS.
To manage licenses and devices in the Versa Portal Inventory:
- Click the Inventory icon in the left menu bar to open the Inventory dashboard.
- Select a device type in the Device Type field to view device licenses:
- Click Active Licenses to view active device licenses.
- Click Total Licenses to view all device licenses.
- Click SASE Gateway to view all SASE device licenses.

- Click the
 Select Display Fields icon to choose the columns to display in the Inventory section.

Field Description Action Click to select an inventory action. Activation Date Click to display the date of device activation. Appliance Proxy Click to use appliance proxy. If a Versa Director node is directly connected to an LDAP server, the Director node can fetch the user and group profile. If it is not connected to an LDAP server, you can configure appliance proxy, which allows a Versa Operating SystemTM (VOSTM) device to act as an LDAP proxy. To use appliance proxy, you must also create an LDAP authentication profile and associate it with the device. AWS Region Display the AWS region of the device and the organizational hierarchy. Cores Display the subscribed cores and actual cores. Available only on virtual appliances (vCSG). Device Name Display the device name. License Expiration Date Display the date when the device license expires. License Number Display the device's license number. OS Security Package Display the version of the OS security package installed on the device. PO License Start Date Display the license start date as stated in the purchase order. SASE/MT Usage Display the total provisioned users and bandwidth for the SASE or multitenant device. Click on the value in blue to open details for the tenants and usage. Security Click the Security toggle to turn all device security components on or off. Serial Number Display the device serial number. Service Type Display the CSG series classification (CSG300, CSG700, CSG1000, CSG2000, or vCSG) and license type (such as CSG350-2LA). Service State Display whether the device is temporarily disabled from the enterprise VPN network. If the service to the device is disabled, direct internet access (DIA) continues to function. When the service is again enabled, the device is immediately back in service and does not have to perform the zero-touch provisioning (ZTP) process. Site Display the site location. Hover over the site name to view the site address. SPACK Version
Display the version of the installed security package (SPack). Store Display the store. Subscription Display the device subscription, including add-ons, other license-related information, and, for CSG devices, whether the device has same business day replacement (SBDR) or next business day replacement (NBDR). S/W Version Display the VOS software version running on the device. Hover over S/W Version to view software information. This also shows whether a customer has OS version Bionic or Trusty. Customers should upgrade devices to 22.1.3 Bionic. Contact Versa NOC to migrate from Trusty to Bionic before upgrading to 22.1.3. VD Region Display the Versa Director region of the device and the organizational hierarchy.
Perform Inventory-Related Actions
On the Inventory dashboard, you can perform the following actions:
- Deactivate a device and its configuration from the Versa Portal dashboard.
- Upgrade a device. If you are upgrading a branch, SASE gateway, or HA device from a previous release and the remote access VPN option is not enabled, you can enable it from the device upgrade option.
- Upload CA certificates, including the key file, CA certificate file, and CA chain file.
- Manage device users.
- Undeploy
To perform inventory-related actions:
- Locate the device in the grid, and then click the 3-dot icon in the Action column to display available actions.

- Click an action:
- Undeploy Device
- Upgrade
- Upload/Download CA Certificates
- User Management
- Deactivate
Note: You must wait for 5 minutes after you undeploy a configuration before you redeploy and activate a device so that Versa Portal has time to synchronize internal data structures. If the synchronization process is not complete, an error message displays when you try to activate the device.
Upgrade a Device
Note that if you are upgrading a branch, SASE/multitenant gateway, or HA device from a previous release, and the remote access VPN option is not already enabled on the device, you can enable it when you are upgrading the device.
To upgrade a device:
- Locate the device in the grid, and then click the 3-dot icon in the Action column to display available actions.

- Click Upgrade. In the Upgrade Option popup window, enter information for the following fields.

Field Description Current Security License Click to select a license to upgrade. Add-on Feature Click the Remote Access VPN toggle to enable remote access VPN for the device. - Click Upgrade.
Upload a Certificate
You must upload the public certificates on an activated license. Before you upload a certificate, you must upload a key file with the extension .key.
The key file, certificate file, and CA chain file that you upload to the license must have the same name as the remote access VPN device FQDN. For example, if the remote access VPN FQDN is blrgw1.versa-networks.com, the filenames must be as follows:
- Key filename—blrgw1.versa-networks.com.key
- Certificate filename—blrgw1.versa-networks.com.crt
- CA chain filename—ca.blrgw1.versa-networks.com.crt (The CA chain filename is a combination of root CA and intermediate CA)
To upload a key file:
- Locate the license in the grid, and then click the 3-dot icon in the Action column to display available actions.

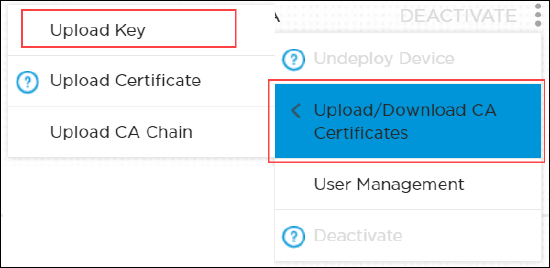
- Click Upload/Download CA Certificates and then click Upload Key.

- In the Add Key popup window, enter the following information.

- Enter a key name and password.
- Click Browse file to select the key file to upload. The file must be in .key format.
- Click System Key to store the key file at system level for remote access VPN. Selecting this option is mandatory. Note that you must select System Key after you upload the key file.
- Click Add.
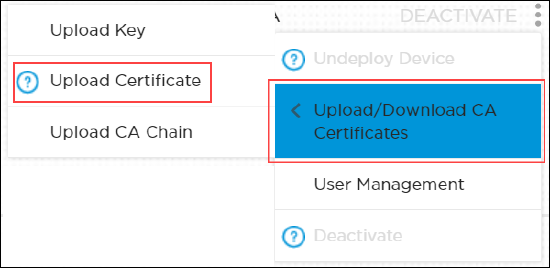
- Click Upload/Download CA Certificates, and then click Upload Certificate.

- In the Add CA Certificate popup window, enter the following information.

- Enter a certificate name.
- Select the key file name.
- Click Browse file to select the CA certificate file to upload. The file must be in .crt, .cer, or .pem format.
- Click System Certificate store the certificate file at system level for remote access VPN. Selecting this option is mandatory. Note that you must select System Certificate after you upload the certificate file.
- Click Add. The certificate file name displays.
- Click the
 icon to download the file. You need to install this certificate on your system to configure TLS decryption.
- Click Upload/Download CA Certificates and then click Upload CA Chain.

- In the Add CA Chain popup window, enter the following information.

- Enter a CA chain name.
- Click Browse file to select the CA chain file to upload. The file must be in .crt format.
- Click System CA Chain to store the CA chain file at system level for remote access VPN. Selecting this option is mandatory. Note that you must select System CA Chain after you upload the CA chain file.
- Click Add.
Manage VOS Device Users
An enterprise administrator can add, edit, and delete custom VOS device users from Versa Portal. Custom users have access only to the CLI on VOS devices. An enterprise administrator can delete a custom user, but they cannot delete the default VOS users (Admin and Versa). An enterprise administrator can change the password for a custom user but cannot change the username. When you deactivate or undeploy a device, the password for the default users is reset to the factory default and all custom users are removed.
Default users can log in to the shell of a VOS device, which is a Bash shell, and they can access the CLI from the shell. When logging in to the CLI, the default user is placed at the CLI prompt.
An MSP or a reseller with manage service privilege can read or write user management for custom VOS devices.
To create a user on a device:
- Locate the device in the grid, click the 3-dot icon in the Action column to display available actions, and then click User Management.

- In the Device User Management popup window, enter information for the following fields.

Field Description Username Enter a name for the VOS device user.
Range: 2 through 31 characters
Role Select the user role:
- Admin—Superuser with sudo privileges who can connect via SSH or to the CLI to the device on port 22 and port 2024. An admin user can modify any part of configuration. This is the default.
- Operator—Console user who can log in to only to the CLI and only using the physical or virtual console.
Default: Admin
Login Select the login method:
- CLI
- Shell
Custom users with Admin and Operator roles have only CLI access.
Password Enter a password for the user. The password must be a minimum of 8 characters long. Confirm Password Confirm the password. - Click Add.
Deactivate a Device
You can deactivate a device and its configuration from the Inventory dashboard. Before you deactivate a device, you must delete all the tenants associated with the SASE device. The Deactivate window lists the tenants configured on the SASE device.
To deactivate a device:
- Locate the device in the grid, and then click the 3-dot icon in the Action column to display available actions, and then click Deactivate.

- Click Yes.

