Install on Bare Metal
![]() For supported software information, click here.
For supported software information, click here.
This article describes how to install the Versa headend components on a bare-metal platform.
Install Versa Analytics Software on a Bare-Metal Platform
This section describes how to install the Versa Analytics software on a bare-metal platform.
The figures in this procedure are created using a Supermicro server. The actual screens you see may differ, depending on your server.
To access the bare-metal platform remotely, configure the Intelligent Platform Management Interface (IPMI) on the bare-metal server.
To install Versa Analytics software on a bare-metal platform:
- Log in to the remote console.

- Click anywhere in the Remote Console Preview window to launch the remote console. If the Java SE Development Kit is installed on the server, you can launch the remote console from the development kit.

- In the Virtual Media tab, select Virtual Storage.
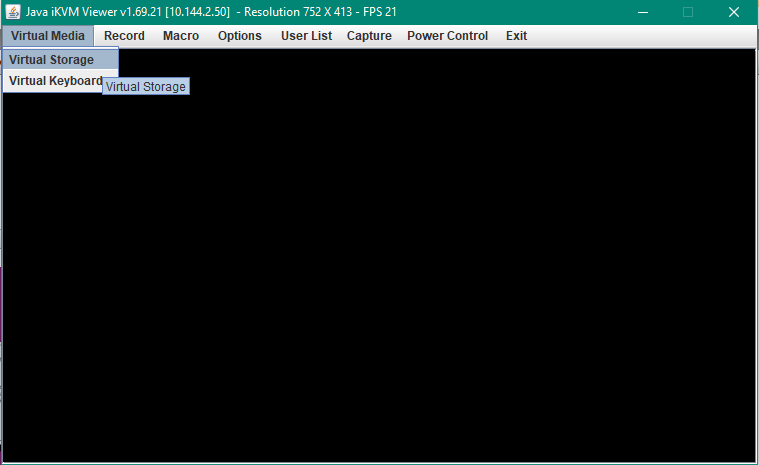
- In the Virtual Storage window, click the CDROM & ISO tab. The Settings for Device2 window displays.
- In the Logical Drive Type drop-down, select ISO File.
- Click Open Image and type the full path name of the software image.
- Click Plug In.
- Click OK.

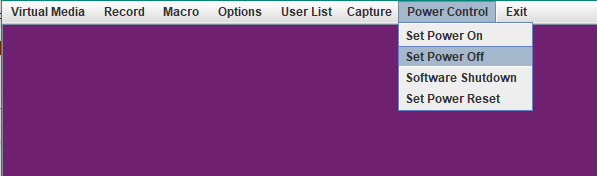
- Click the Power Control tab.
- Click Set Power Off to power down the device.
- Click Set Power On to restart the device.
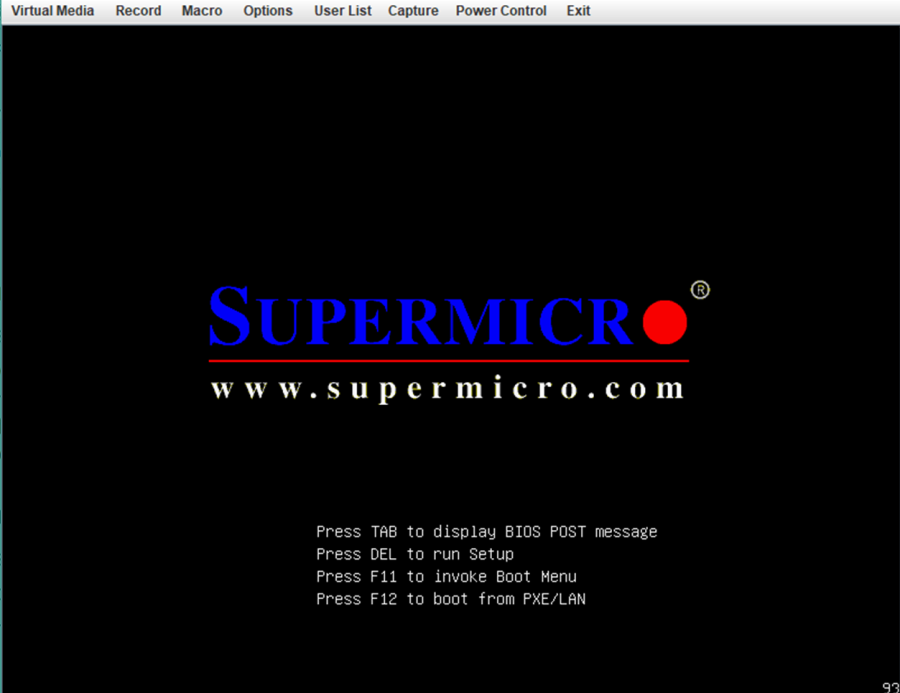
- After the device restarts, the remote console window displays the server banner. To perform device setup, press the Delete key.
- In the System BIOS > System BIOS Settings > Boot Settings page, set boot mode to BIOS.
- In the Setup Utility window:
- Click the Save & Exit tab.
- Click IPMI Virtual CDROM 3000 to run the ISO file from a local partition.
- Press Enter.

- In response to the boot prompt, type versa-serial and then press Enter.
- In the Ubuntu screen, press Enter to install Versa Analytics.

- After the Versa Analytics software installation completes, log in to Versa Analytics using the default username and password (contact Versa Technical Support for the default username and password). The Versa Analytics banner displays.

Install Versa Director Software on a Bare-Metal Platform
This section describes how to install the Versa Director software on a bare-metal platform.
The figures in this procedure are created using a Supermicro server. The actual screens you see may differ, depending on your server.
To access the bare-metal platform remotely, configure the Intelligent Platform Management Interface (IPMI) on the bare-metal server. If you load the ISO image directly from a bootable USB flash drive, start at Step 8 of the installation procedure.
To install the Versa Director software on a bare-metal platform:
- Log in to the remote console.

- Click anywhere in the Remote Console Preview window to launch the remote console. If the Java SE Development Kit is installed on the server, you can launch the remote console from the development kit.
- In the Virtual Media tab, select Virtual Storage.
- In the Virtual Storage window, click the CDROM & ISO tab. The Settings for Device2 window displays.
- In the Logical Drive Type drop-down, select ISO File.
- Click Open Image and type the full path name of the software image.
- Click Plug In.
- Click OK.
- Click the Power Control tab.
- Click Set Power Off to power down the device.
- Click Set Power On to restart the device.
- After the device restarts, the remote console window displays the server banner. To perform device setup, press the Delete key.
- In the Setup Utility window:
- Click the Save & Exit tab.
- Click IPMI Virtual CDROM 3000 to run the ISO file from a local partition.
- Press Enter.
- In response to the boot prompt, type versa-serial and then press Enter.
- In the Ubuntu window, press Enter to install Versa Director.

- After the Versa Director software installation completes, log in to Versa Director using default username and password (contact Versa Technical Support for the default username and password). The Versa Director banner displays.

Install Versa Controller Software on a Bare-Metal Platform
This section describes how to install the Versa Operating SystemTM (VOSTM) software on a bare-metal platform to create a Versa Controller.
Before you install the VOS software, ensure that you have the following:
- Console cable
- USB drive on which you have loaded the desired VOS software image
To install the VOS software on a bare-metal platform:
- Connect your laptop to the Versa branch appliance using a console cable.
- Insert the USB drive into one of the USB ports on the Versa branch appliance. The appliance boots.
- Press the Esc/Del key to interrupt the boot process and enter BIOS mode.
- In the Boot tab, under Boot Option Priorities, select Boot Option #1, which is your USB drive, and make sure that you select Legacy boot mode and not UEFI mode. Then press Esc. If your USB drive is not shown as Boot Option #1, select Boot Option #1 and press F4 to save the changes and exit the setup process.

- The following error displays, followed by the boot: prompt, and the installation stops:

- In response to the error "Error setting up gfxboot", type versa-branch-usb and press Enter. Then press the spacebar to continue.

- In response to the Partition Disks prompt "unmount the partitions that are in use?", select or type Yes. The Versa branch appliance installs the software and then reboots.

- While the Versa branch appliance is rebooting, remove your USB drive from the appliance.
- Log in to the Versa branch appliance. The VOS banner displays:

- To verify the version of software that was installed, issue the show package-info command:

Supported Software Information
Releases 20.2 and later support all content described in this article.