Install on Hyper-V
![]() For supported software information, click here.
For supported software information, click here.
This article describes how to install a Versa Operating SystemTM (VOSTM) device on Hyper-V. For the installation, you create a virtual switch where you want to locate your network interfaces and then you create an instance for the VOS device on Hyper-V.
For information about downloading the VOS software image files, see the Versa Networks Customer Support website.
To install a VOS device on Hyper-V:
- On your Windows server, access the Hyper-V Manager:
- Search for Server Manager.
- From the Dashboard, select Hyper-V.

- Right-click the name of the Windows server, and then select Hyper-V Manager.

- In the Hyper-V Manager window, select the server name and then right-click Virtual Switch Manager.

- In the Virtual Switches lists, select a virtual switch.
- In the Create Virtual Switch box, select a type of virtual switch. A virtual switch can be external, internal, or private. For example, if you want your host to communicate with the outside, you create an external switch. Similarly, for VM-to-VM communication, you create an internal switch.
- Click Create Virtual Switch to create a switch based on the topology you use.

- In the Virtual Switch Properties box, enter a name for the virtual switch.

- In Connection Type, select the type of network to connect the virtual switch to. For example, if you want your host to communicate with the outside, select External Network. Similarly, for VM-to-VM communication, select Internal Network.
- Click OK.
- In the Actions list, select New > Virtual Machine.

- Read the instructions in the Before You Begin window, and then click Next.

- In the Specify Name and Location window, enter a name for the VM and click Next, to use the default VM location. To use a different VM location, click Store the virtual machine in a different location, browse to and select the location, and then click Next.

- In the Specify Generation window, select the hardware and firmware generation that the VM supports, and then click Next.

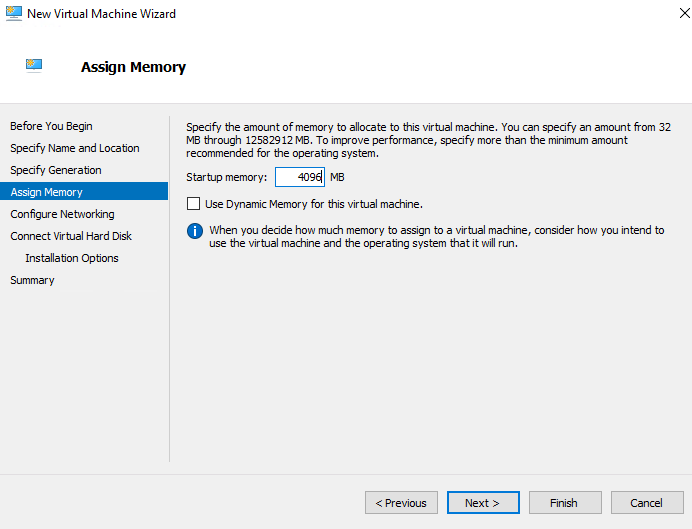
- In the Assign Memory window, allocate an amount of memory to the VM, in megabytes (MB), and then click Next.

- In the Configuring Networking window, select the network adapter (connection) to use for the virtual switch, and then click Next. If you want to access the VOS instance from an outside (external) network, the virtual switch connection must have an interface that has connectivity with the public network.

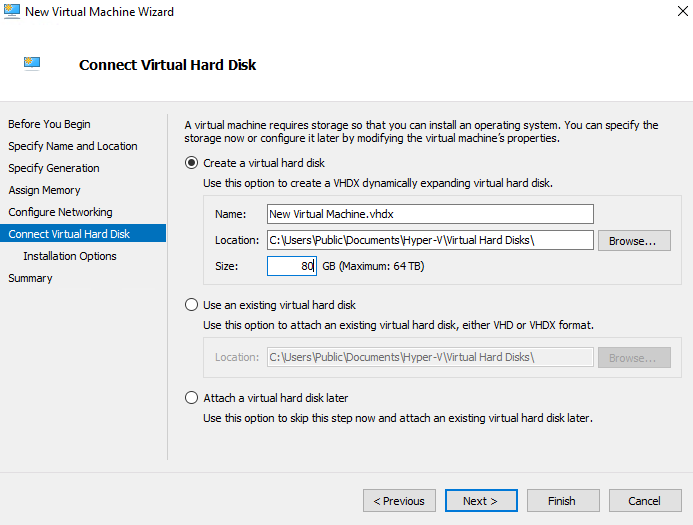
- In the Configuration Virtual Hard Disk window, select the hard disk to use with the VM. You can either create a new virtual hard disk, use an existing one, or attach a hard disk to the VM at a later point. If you create a new hard disk, specify the name, location, and size of the hard disk. The recommended size is 80 GB. If you use an existing hard disk, specify the location. Then click Next.

- In the Installation Options window, select Install an Operating System from a Bootable CD/DVD-ROM, browse to select the .iso file, and then click Next.

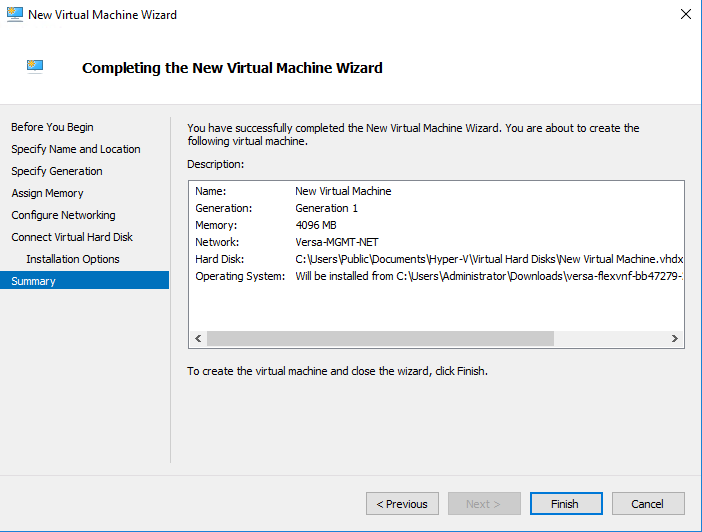
- In the Completing the New Virtual Machine Wizard window, review the configuration summary and then click Finish.

The system displays the new VM in the Virtual Machines list in the Hyper-V Manager Dashboard.

- Select the new VM from the Dashboard, and in the Actions list, select Settings.

- In the left navigation bar, select Add hardware, and in Add Hardware, select Network Adapter. Then click Add.

- In the left navigation bar, select Processor in the left navigation bar, and in Processor, select the number of virtual processors. It is recommended that you configure four virtual processors.

- In the Actions lists, click Start to start the VM.

Supported Software Information
Releases 20.2 and later support all content described in this article.
