Deploy a VOS Branch Using an AWS Marketplace Image through AWS Portal
![]() For supported software information, click here.
For supported software information, click here.
This article describes how to deploy and configure a Versa Operating SystemTM (VOSTM) branch device through AWS portal using an AWS marketplace image. To perform this deployment, you bring up a VOS EC2 instance in AWS.
Create AWS Resources for a VOS EC2 Instance
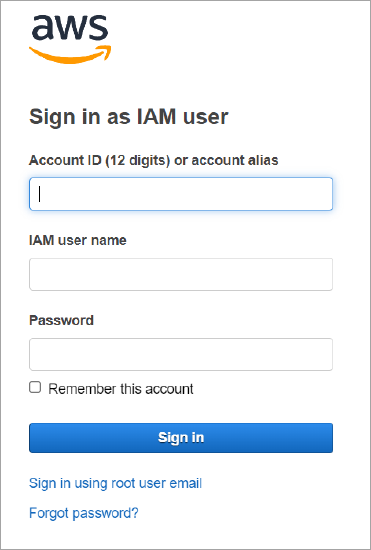
- Log in to AWS account https://us-east-1.signin.aws.amazon.com/
- Click Sign In to the Console.

- Enter your AWS login credentials, and then click Sign In.
- To change the default region, on the Console Home page, click the top banner and then select the region in which to create the EC2 instance. The screenshot below shows that we have selected the US East (N. Virginia) us-east-1 region.

- Check whether an Amazon virtual private cloud (VPC) is available in the selected region. An Amazon VPC allows you to provision a logically isolated section of the AWS cloud in which you can launch AWS resources in a virtual network that you define. For the virtual network, you can select the IP address range, create subnets, and configure route tables and network gateways. You can use both IPv4 and IPv6 addresses in the VPC for secure access to resources and applications. Also, you can customize the network configuration of your VPC. For example, you can create a public-facing subnet for web servers that have access to the internet, you can place databases and application servers in a private-facing subnet with no internet access, and you can use multiple layers of security, including security groups and network access control lists, to control access to the EC2 instances in each subnet.
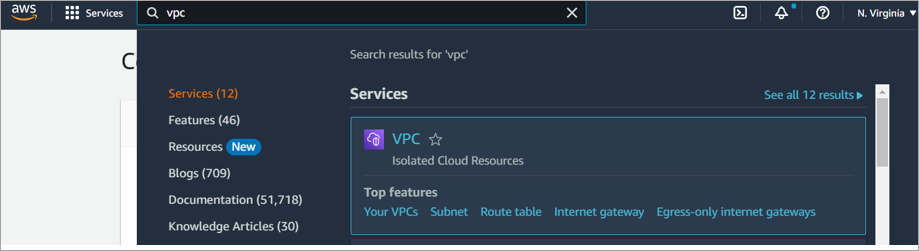
To determine whether a VPC is available, in the Find Services box, search in the region for the string "vpc".
- If the VPC is available, select it.
- If no VPC is available in the region, click Create VPC to create one.

- In the Create VPC window, enter a name for the VPC, enter a CIDR IPv4 address, and configure the other fields as required.

- To create subnets in the VPC, click VPC > Subnets > Create Subnet. You must create the following three subnets for the VOS branch, and you can create additional subnets as needed:
- Subnet-1—For management interfaces
- Subnet-2—For WAN transport interfaces
- Subnet-3—For LAN (client-side) interfaces
- In the VPC ID field, select the VPC.

- In the Subnet Settings window, for each subnet, enter a name and select the availability zone and CIDR IPv4 address block.


- Click Create Subnet.
- Create an internet gateway to provide internet access from the subnets attached to the VOS EC2 instance. To do this, select Internet Gateways in the left navigation bar. Then, click Create Internet Gateway and enter the following information.

- In the Name Tag—Enter a name for the tag to identify the internet gateway.
- Tags—Optionally, enter values in the Key and Value fields.
- Click Create Internet Gateway.
- To associate an internet gateway to VPC, select Attach to VPC in the Actions drop-down list.

- In the Available VPCs field, select the VPC name. Note that the VPC displays only if it is not attached to an internet gateway.

- Click Attach Internet Gateway.
- By default, subnets in AWS are not associated with an internet gateway, so you must manually add a default route table to the internet gateway. To do this, select Route Tables in the left navigation bar. Then, click Create Route Table and enter the following information.

- Name—Enter a name for the route table.
- VPC field—Select the VPC that you created earlier.
- Click Create Route Table.
- Select VPC > Route Tables > Actions > Edit subnet associations.
- Select the management and WAN subnets to associate with the route table.

- Click Save Associations.
- Select Route Tables in the left navigation bar, and then click Edit Routes to add a default route for the internet gateway.

- In the Edit Routes screen, click Add Route and enter information about the route.

- Click Save Changes.
Create a VOS EC2 Instance
- Navigate to the AWS Management Console page, search for Marketplace, and click AWS Marketplace Subscriptions.

- Click AWS Marketplace > Discover Products. Search for Versa Operating System (or simply "versa"), and then click Versa Operating System.

- Click Continue to Subscribe, to initiate the subscribe operation.

- Click Continue to Launch.

- In the Choose Action field, select Launch through EC2 to launch the configuration through the Amazon EC2 console.

- Click Launch.
- In the Launch an Instance page, enter information for the following fields.


- Name—Enter EC2 instance name.
- AMI—By default, Amazon Marketplace chooses the Amazon Machine Image (AMI) from the subscription service.
- Select one of the following instance types depending on your configuration and the Versa recommended instance types. For more information, see Qualified AWS Instances:
- c5.xlarge
- c5.2xlarge
- c5.4xlarge
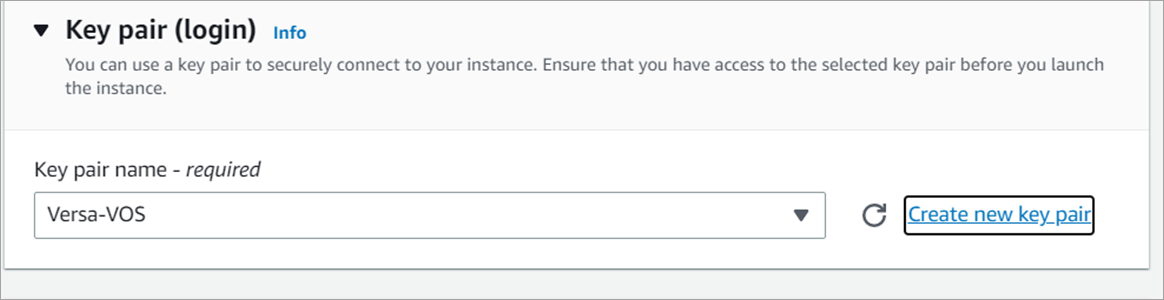
- Select an existing key pair. If you do not have a key pair, click Create New Key Pair. The key pair is used to log in to the VOS EC2 instance.
- In the Network Settings section, select a VPC.
- Create a firewall rule for VOS deployments. For more information, see VOS Device Firewall Requirements.
- Click Advanced Network configuration. For the first network interface, select the management subnet that you created earlier, and then click Add Network Interface.


- For the second network interface, select the WAN subnet that you created earlier. This subnet connects to the Versa Controller node.
- For the third network interface, select the LAN subnet that you created earlier. This subnet connects VOS LAN-side networks.
- In the Configure Storage section, the 80-GiB root volume is selected by default.
- Click Launch Instance.
Associate an Elastic IP Address with an Interface
After the VOS EC2 instance is up and running, you associate an elastic IP address with an interface. To do this, you must determine the interface ID from the EC2 instance that you created. If the controller is reachable from the branch using a public IP address, you associate the elastic IP address on the WAN and management interfaces.
To associate an elastic IP address with an interface:
- Navigate to EC2 > Instances, and then select the VOS EC2 instance that you created.

- Select the Networking tab.

- Scroll down until you see the network interface IDs for the NICs attached to the management and WAN subnets, and make a note of these IDs.

- Click EC2 > Elastic IP Addresses > Allocate Elastic IP Addresses, and then click Allocate.

- Click Actions > Associate Elastic IP Address.

- In the Associate Elastic IP Address window, enter the following information.

- Resource Type—Select Network Interface.
- Network Interface—Select the management interface ID of the VOS instance.
- Click Associate.
- Repeat Steps 6 and 7, selecting the WAN network interface ID of the VOS instance.
Disable the Source and Destination Check on the Southbound Interface
By default, each EC2 instance performs a source and destination check to verify that the instance is either the source or destination of any traffic it sends or receives. It is recommended that you disable the source and destination check for the VOS southbound interfaces, that is for the LAN and WAN interfaces. You can disable this either globally or for individual interfaces.
In the example here, we disable the source and destination check for the VOS WAN and LAN interfaces vni-0/0 and vni-0/1.
To disable the source and destination check for the two southbound interfaces:
- Navigate to EC2 > Instances, and then select the VOS EC2 instance that you created.
- Select the Networking tab.

- Scroll down until you see the network interface IDs for the NICs attached to the WAN and LAN subnets, and make a note of these IDs.

- Select any WAN network interface ID.
- Click Interface > Actions > Change Source/Destination Check.

- In the Change Source/Destination Check window, uncheck the Enable option in the Source/Destination Check field.

- Repeat Steps 4 through 6 for for the LAN interface.
Create a Password for the Administrative User
To create a password for the administrative (admin) user:
- Navigate to EC2 > Instances, and then select the VOS EC2 instance that you created.
- Select the Details tab, and make a note of the public (Elastic) IP address of management network interface.

- Log in to the VOS EC2 instance shell using the key pair that you associated during the EC2 instance creation. The default user is admin.
ssh -i key admin@ec2-elastic-ip-address
- Set the password the default password that is used during the ZTP process. Please consult Versa technical support for the default password.

- Start the ZTP process. For more information, see Use the CLI To Activate VOS Devices.
Supported Software Information
Releases 22.1.1 and later support all content described in this article.
Additional Information
Activate VOS Devices
Firewall Requirements
Qualified AWS, Azure, and Google Cloud Instances