Configure Schedule Objects
![]() For supported software information, click here.
For supported software information, click here.
Security policy rules work at all dates and times. You can define a schedule to limit a security policy to specific times and then apply it to a policy. Versa Operating SystemTM (VOSTM) schedule objects can match criteria based on time of day. For example, you can define a policy rule that is effective only during certain times of the day such as lunch hours or after standard working hours. You can specify schedule objects for a fixed date and time range or a recurring daily or weekly schedule.
Schedule objects that you configure for a tenant are applicable for that tenant only, and they are not visible to other tenant in the system.
Configure Schedule Objects
- In Director view:
- Select the Administration tab in the top menu bar.
- Select Appliances in the left menu bar.
- Select a device name in the main panel. The view changes to Appliance view.
- Select the Configuration tab in the top menu bar.
- Select Objects & Connectors > Objects > Schedules in the left menu bar.

- Click the
 Add icon in the dashboard to add a new schedule. In the Add Schedule window, enter information for the following fields:

Field Description Name Enter a name for the custom schedule object. Description Enter a text description for the custom schedule object. Tags Enter a keyword or phrase that allows you to filter the custom schedule object. This is useful when you have many objects and want to view those that are tagged with a particular keyword. Recurrence Select the type of schedule:
- Non-Recurring—Specify a start and end date and time. Click the
 Add icon to add another row.
 - Daily—Specify a start and end time in 24-hour format (HH:MM). Click the
 Add icon to add another row.
 - Weekly—Select a day of the week, and specify the start and end time in 24-hour format (HH:MM). Click the
 Add icon to add another row.
- Non-Recurring—Specify a start and end date and time. Click the
- Click OK.
Apply a Schedule Object to an Access Policy
You can apply a schedule object to a security access policy to define a security policy. To define and configure a security access policy, see Configure Security Access Policy Rules.
- In Director view:
- Select the Administration tab in the top menu bar.
- Select Appliances in the left menu bar.
- Select a device name in the main panel. The view changes to Appliance view.
- Select the Configuration tab in the top menu bar.
- Select Services > Next-Gen Firewall > Security > Policies in the left menu bar, and then select the Rules tab.

- Select a security access policy rule. The Add Rule popup window displays.

- Select the Headers/Schedule tab:
- In the Others group of fields, in the Schedules field, select a schedule object to apply to the rule.
- To add a schedule object, click +Schedule. The Add Service popup window displays. For more information about a service object, see Configure Custom Service Objects.
- Click OK.
Configuration Example
The following example shows how to deny traffic based on a schedule object and how to monitor the effects of the object.
To configure the schedule object:
- In the Add Schedule popup window, add a schedule object. For more information, see Configure Schedule Objects, above.
- Enter a name for the schedule object. In the example here, the name is Schedule_Object_Daily.
- Select the time frequency (recurrence) for running the schedule object. In this example, the recurrence is Daily .
- Enter the start and end times during which to apply the schedule object.
- Click OK.

- Create an access policy rule that includes the scheduled object. For more information, see Apply a Schedule Object to an Access Policy.
- In the General tab, enter a name for access policy rule. In our example, the name is Deny_Based_Schedule_Object.

- In the Headers/Schedule tab, select the schedule you created in Step 1, here, Schedule_Object_Daily.

- In the Application/URL tab, select an application (for example, Facebook) from the Application List.

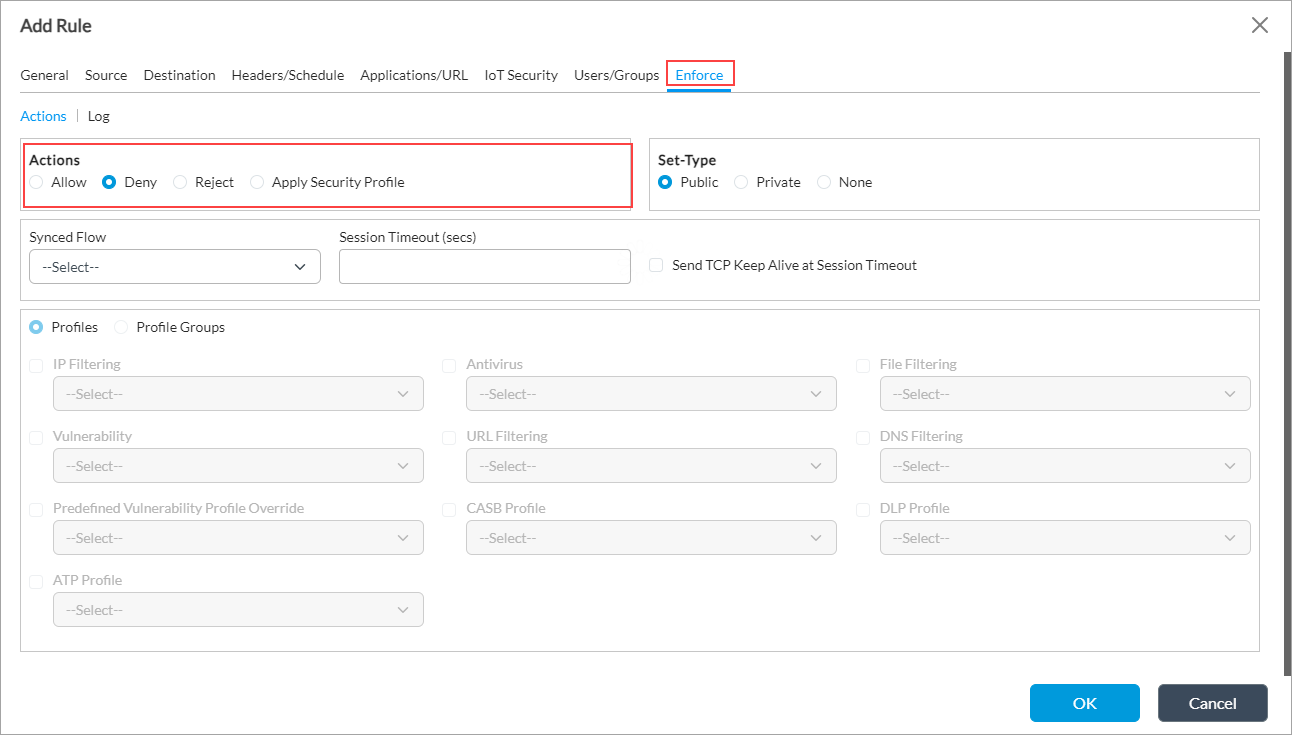
- In the Enforce tab, select Deny under Actions and click OK. This action creates a rule that denies users from accessing Facebook during the time specified in the scheduled object.

To see how the schedule object associated with a policy affects the traffic flow, you monitor the policy. For more information, see Monitor VOS Device Services.
To monitor the policy:
- In Director view:
- Select the Administration tab in the top menu bar.
- Select Appliances in the left menu bar.
- Select a device name in the main panel. The view changes to Appliance view.
- Select the Monitor tab in the top menu bar.
- Select a provider organization in the left menu bar.
- Select the Services tab in the horizontal menu bar.
- Select NGFW > Policies. The NGFW policy statistics display, and you can view the access policy rule you created under Rule Name.

Supported Software Information
Releases 20.2 and later support all content described in this article.
