Access Versa Director REST APIs Using Swagger UI
![]() For supported software information, click here.
For supported software information, click here.
Versa Director is integrated with Swagger, which provides a webpage to display the Director REST APIs. You can use Swagger UI to run real-time REST API commands and to export the APIs as YAML or JSON files that you can use to generate client code.
Versa Director provides REST APIs so that you can integrate upstream (northbound) applications. A number of integration options allow you to customize the integration of applications. For more information, see Versa Director REST API Overview.
This article describes how to access the Swagger webpage, navigate to different APIs by section, export and download APIs, and generate client code for the API file.
Access the Swagger Webpage
To access the Swagger webpage, you need the management IP address or domain name of the Versa Director on which you want to execute the REST APIs. No additional permissions are required to run the REST API client.
Access the Swagger Webpage for Releases 23.1.1 and Later
In Releases 23.1.1 and later, you access the Swagger web page after you log in to the Director UI.
- After you log into Versa Director, click the username in the top right corner and select Swagger Documentation.

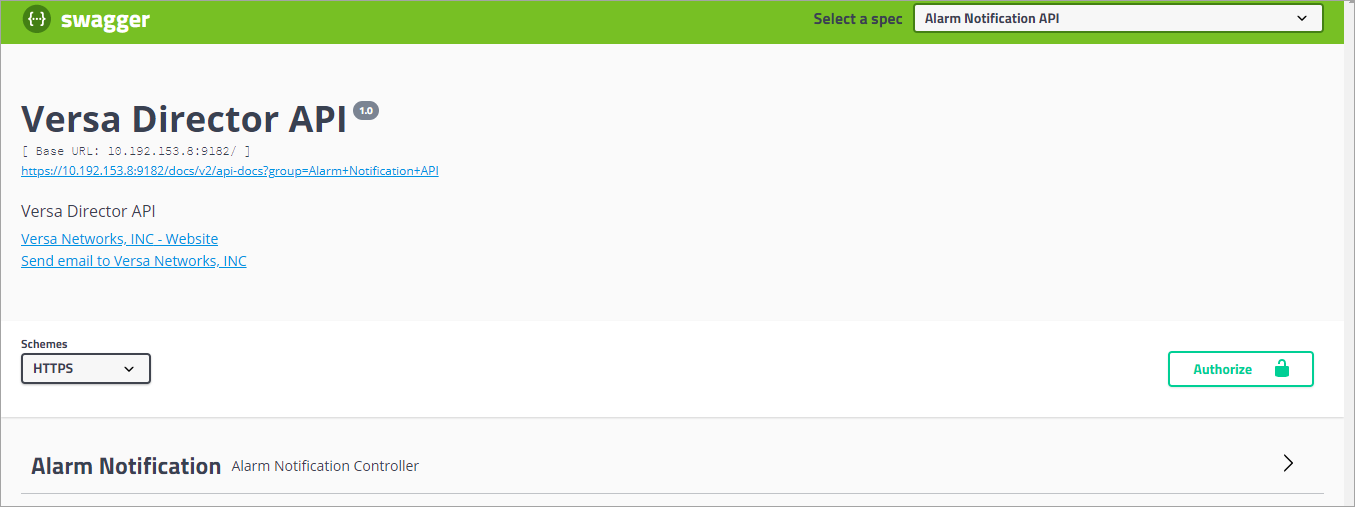
- The Swagger webpage for the Director REST APIs displays.

- To grant different levels of access to API data for different users, click Authorize. The Available Authorizations window displays, and you can set authorization scopes.
- Enter the login credentials to log in to Versa Director. Note that Releases 23.1.1 and later support only basicAuth.
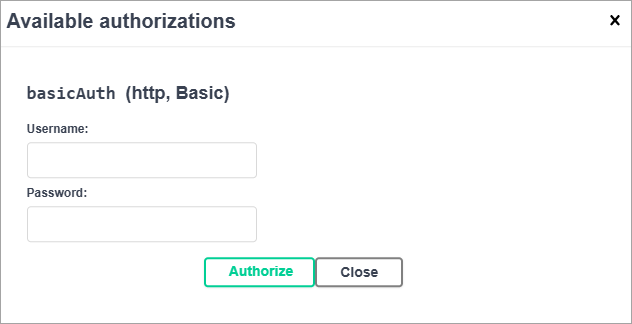
- Click Authorize to save the changes.
Access the Swagger Webpage For Releases 22.1.4 and Earlier
- Open a browser and enter a URL in one of the following formats to open the Swagger web page:
https://director_ip_address:9182/docs/swagger-ui.html
https://director_hostname:9182/docs/swagger-ui.html
Note that in Chrome, when you are on the NET::ERR_CERT_INVALID tab, you may have to accept a certificate or accept the "This is unsafe" option to proceed.

- The Swagger webpage for the Director REST APIs displays.
- To grant different levels of access to API data for different users, click Authorize. The Available Authorizations window displays, and you can set authorization scopes.
- Enter the login credentials to log in to Versa Director.

- Click Authorize to save the changes.
Director REST API Categories
Versa Director supports the following categories of REST APIs:
- VMNS APIs
- NextGen APIs
- Appliance APIs
VNMS APIs
Includes APIs related to SD-WAN workflows management, connectors management, fault management, package management, devices status management, tasks information, users and management.
NextGen APIs
This category is similar to VNMS APIs and includes APIs related to user operations.
Appliance APIs
For Releases 23.1.1 and later.
Each appliance API module is categorized into three groups:
- Appliance Configuration APIs

- Appliance Operational APIs


- VNMS Dashboard APIs


Navigate to the Director REST APIs
Note that the Swagger UI has been updated for Release 23.1.1.
- On the Swagger webpage:
- For Releases 23.1.1 and later, select an API module or group in the Select a definition field in the top menu bar.

- For Releases 22.1.4 and earlier, select an API module or group in the Select a Spec field in the top menu bar.

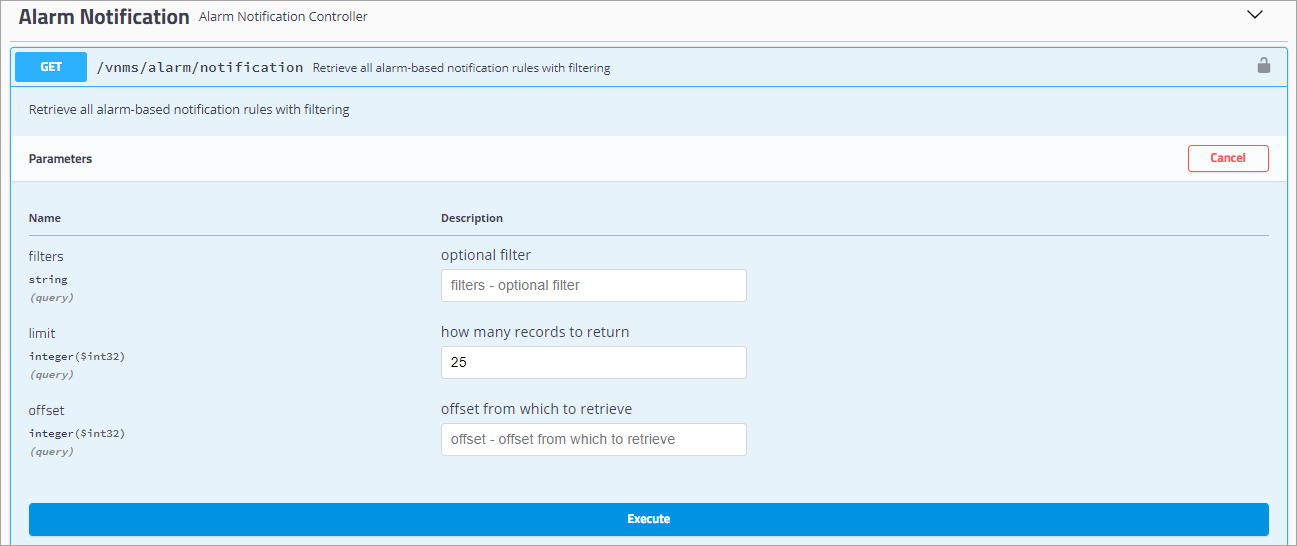
The selected API details are displayed in the main window. The following screen displays the Alarms API group.

- For Releases 23.1.1 and later, select an API module or group in the Select a definition field in the top menu bar.
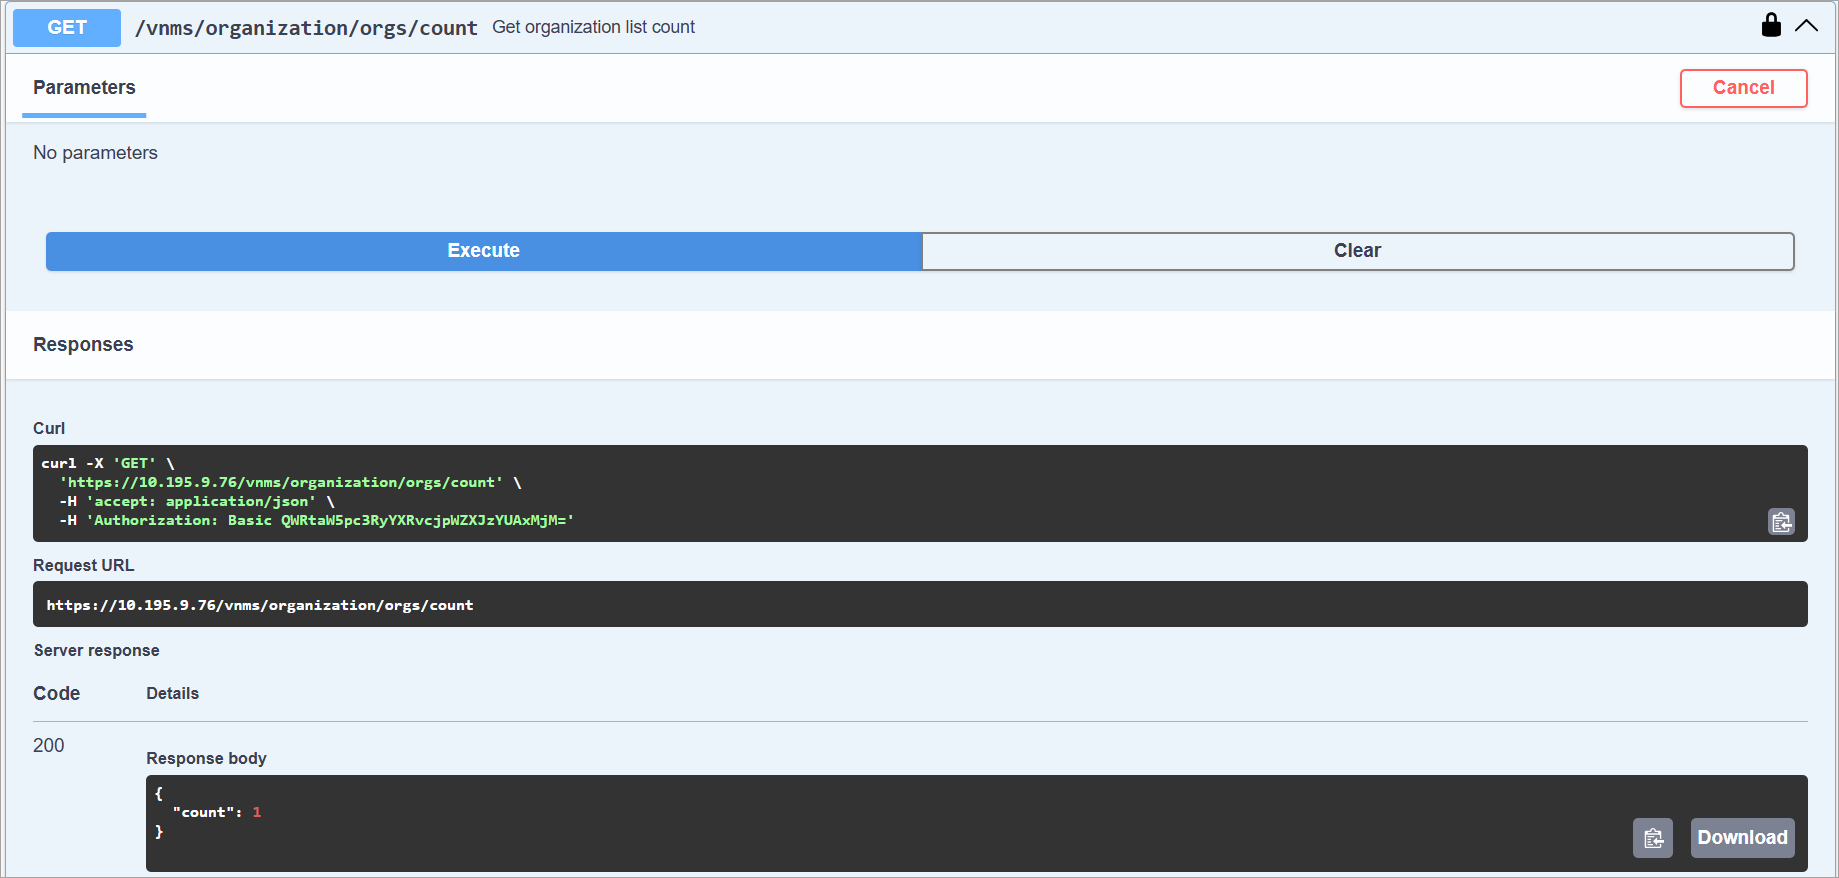
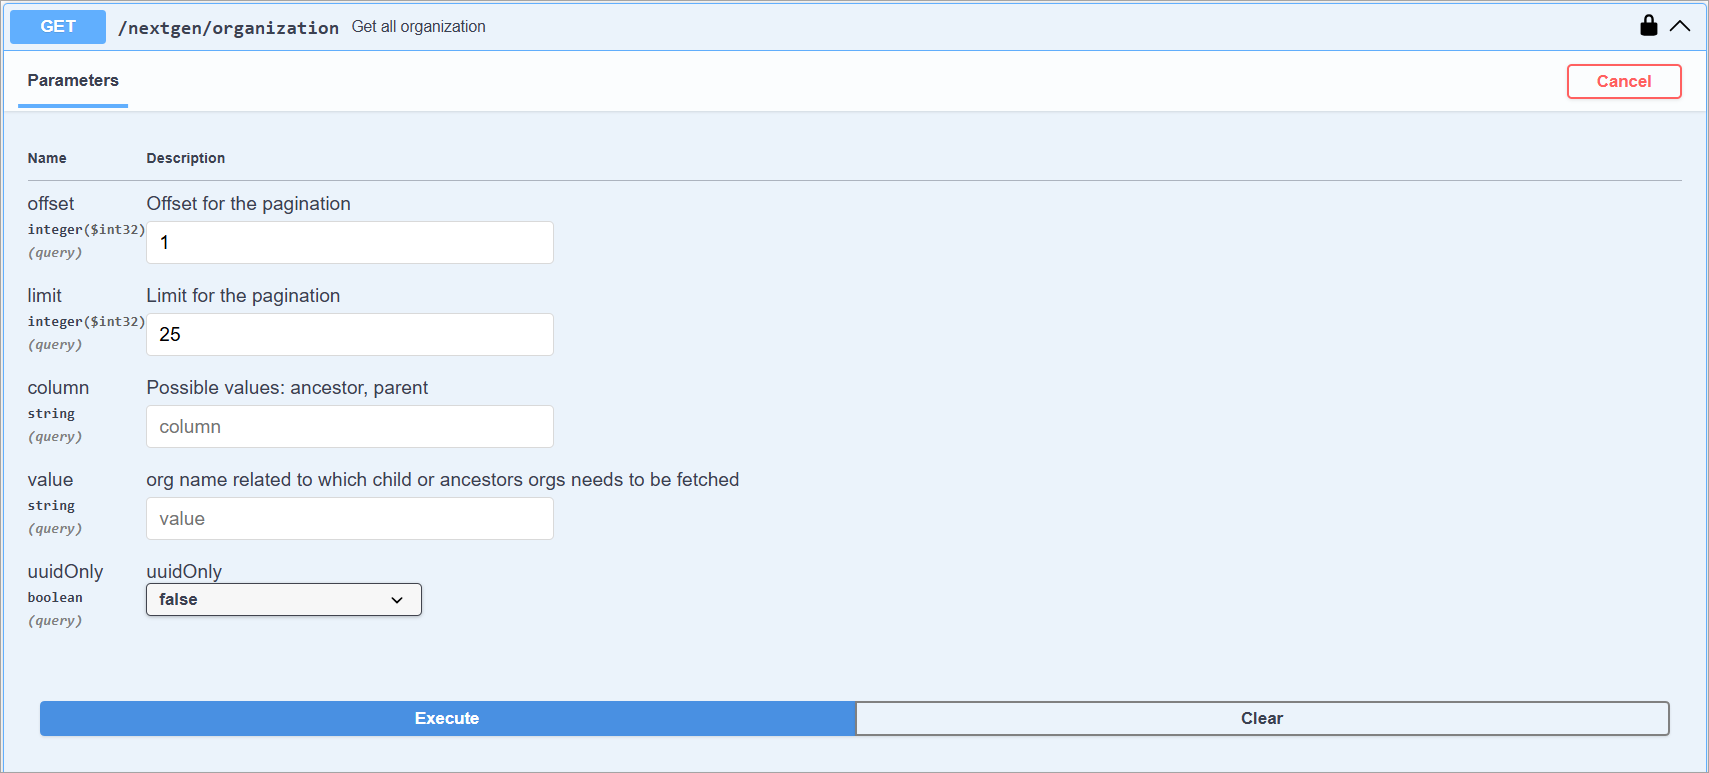
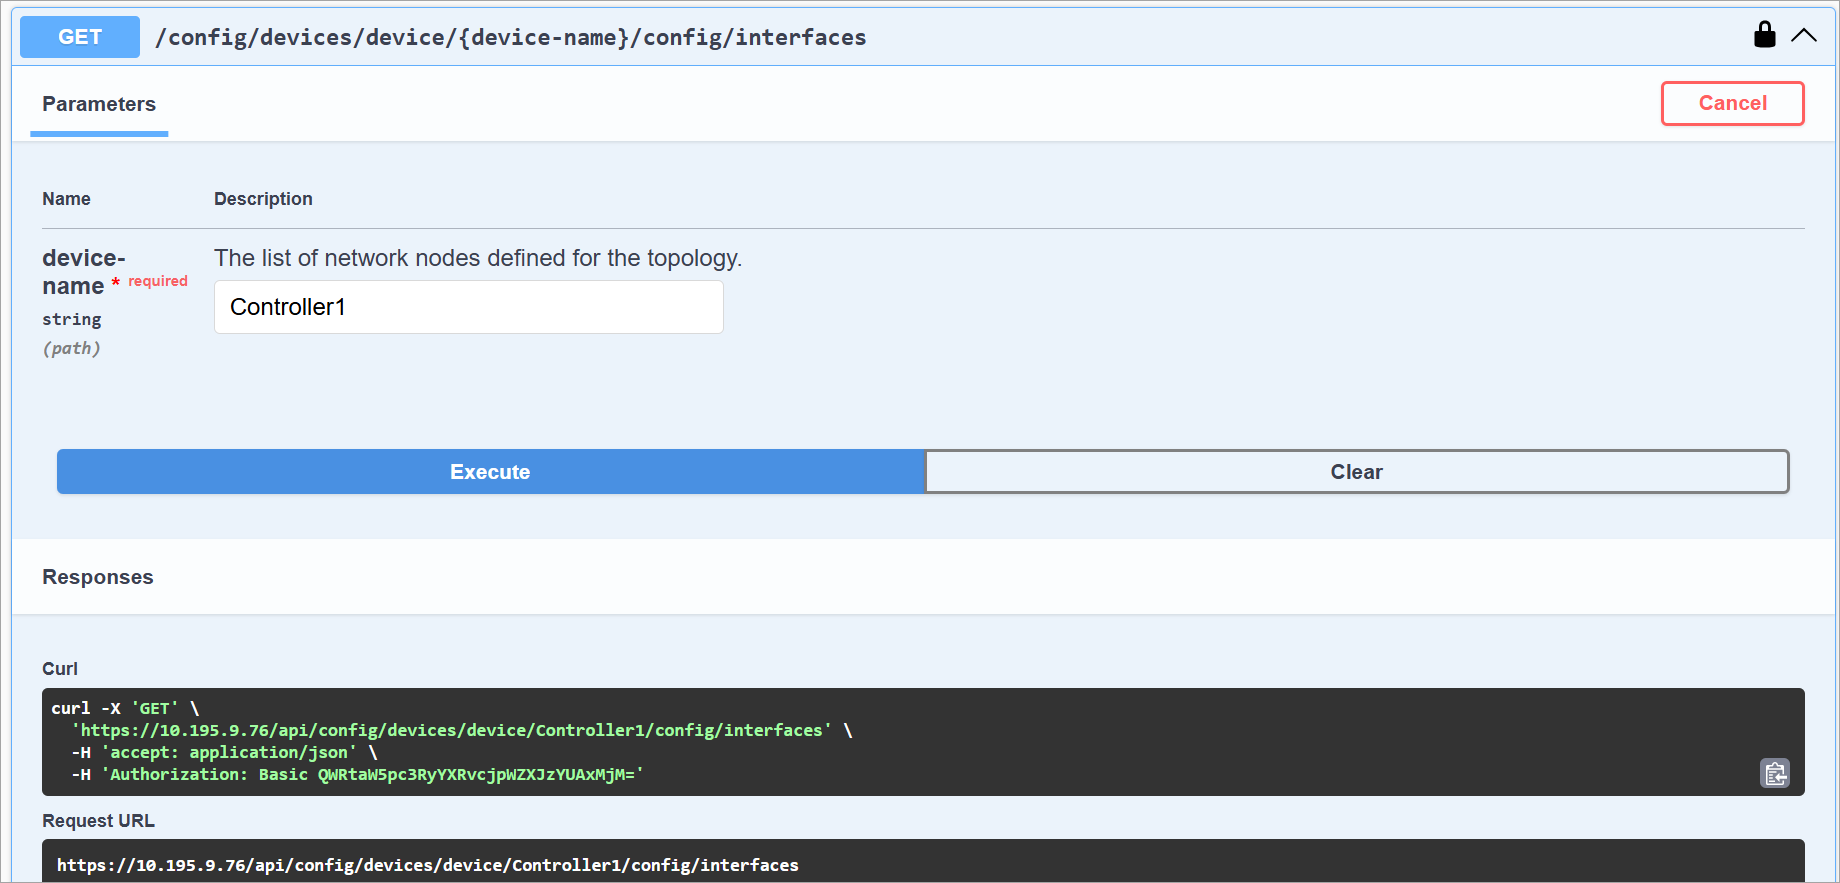
- To change the values of an API, click Try It Out and update the required fields.
- Click Execute.
Export APIs To Generate Client Code
Swagger UI allows you to export a selected API group or all API groups in the following formats:
- For releases 23.1.1 and later, you can download .json or .yml files.
- For releases 22.1.4 and earlier, you can download .zip files.
Export APIs in Releases 23.1.1 and Later
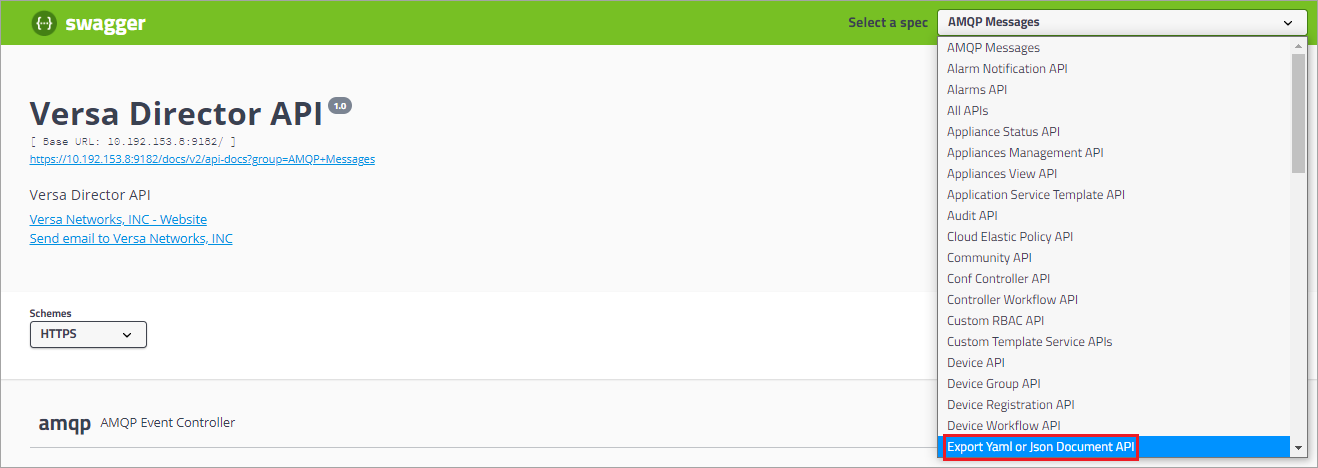
- In the Swagger webpage, click the Select a definition field in the top menu bar.
- Select Export YAML or JSON Document API.

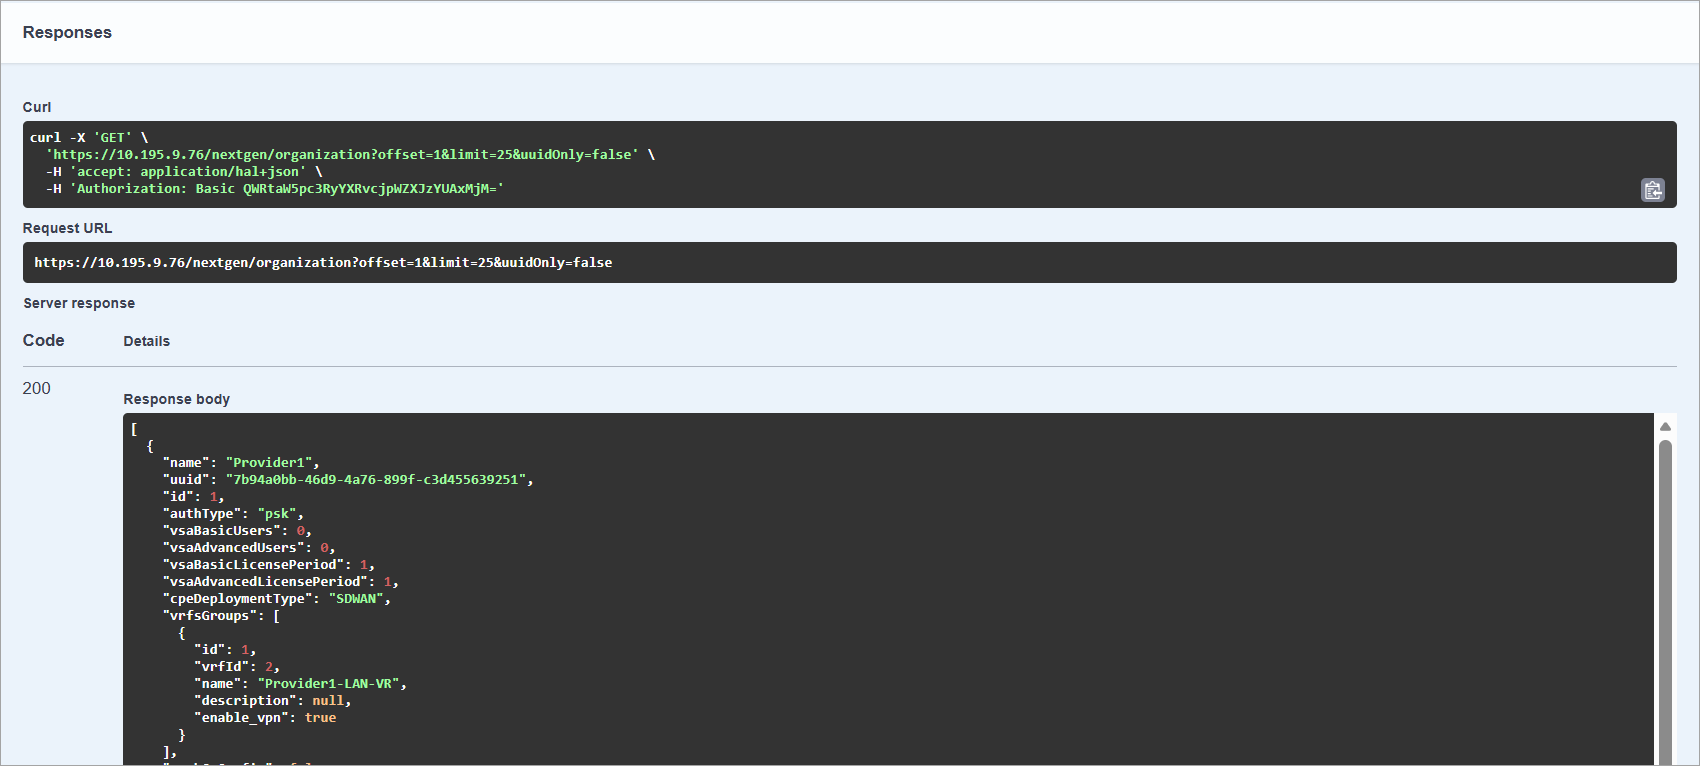
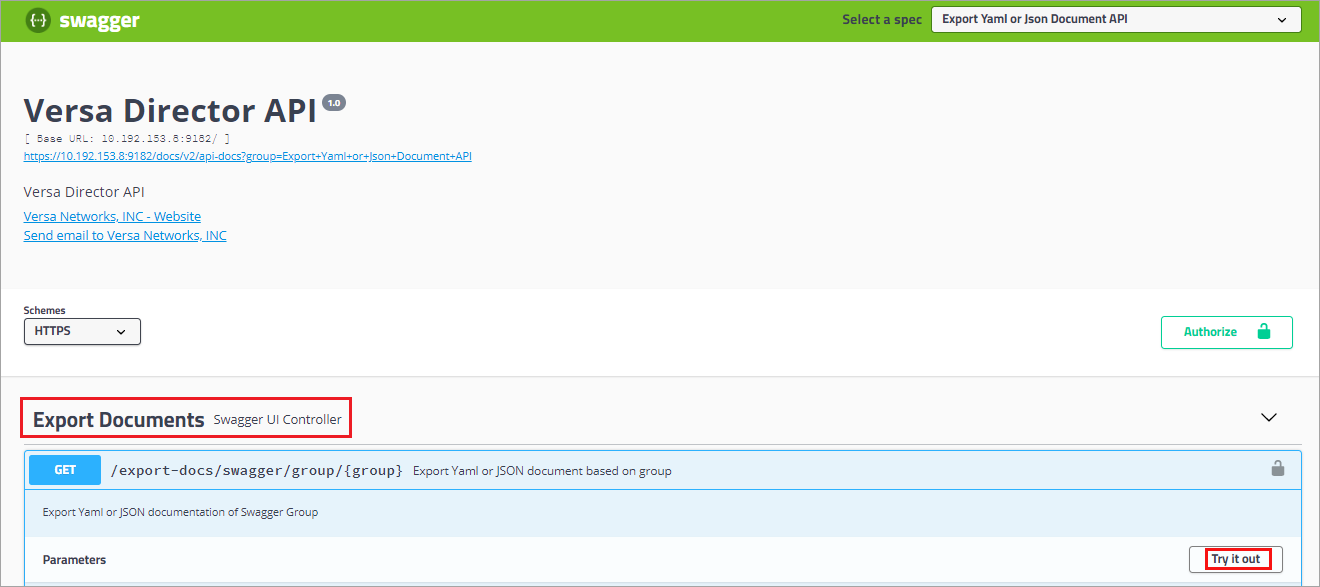
- Click Export Yaml or Json Document API in the main screen.

- In the Parameters section, click Try it Out, and then enter the following information:
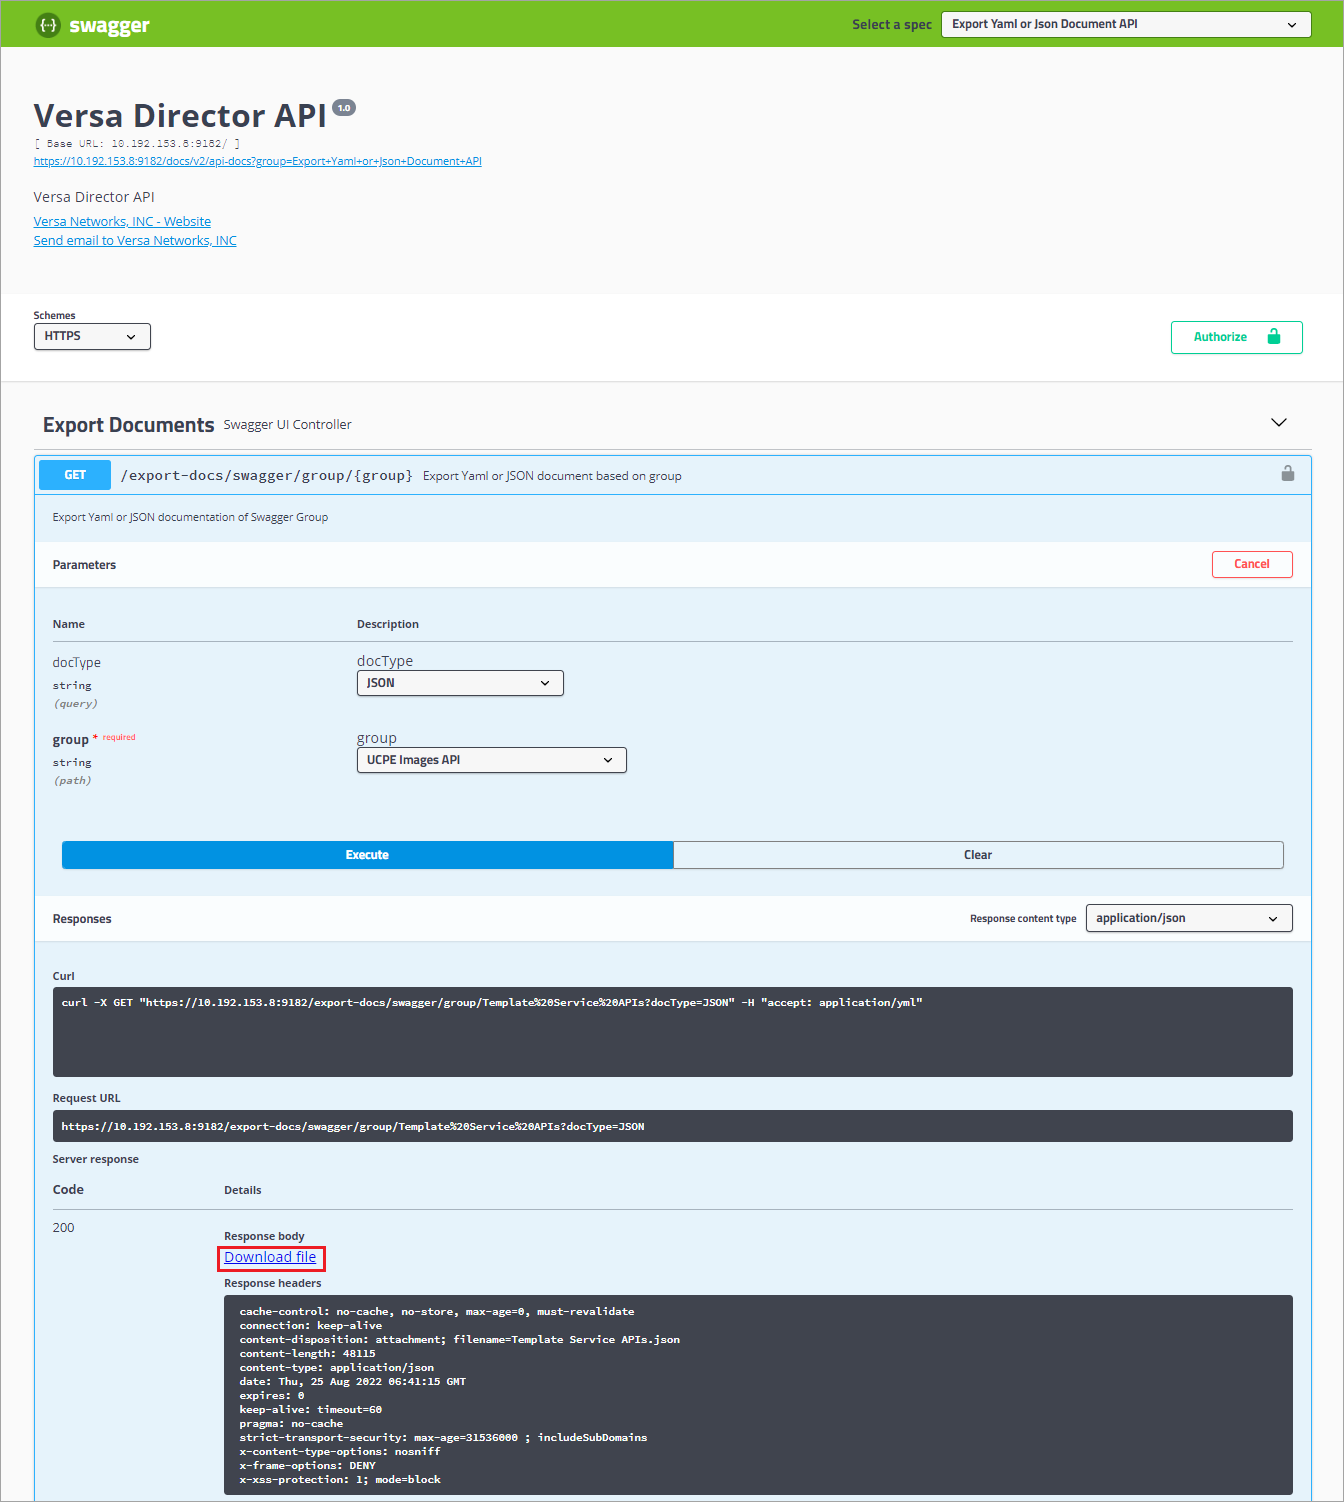
- In the group field, enter the name of the group that you want to export.
- In the docType field, select either YAML or JSON as the export file format.

- Click Execute.
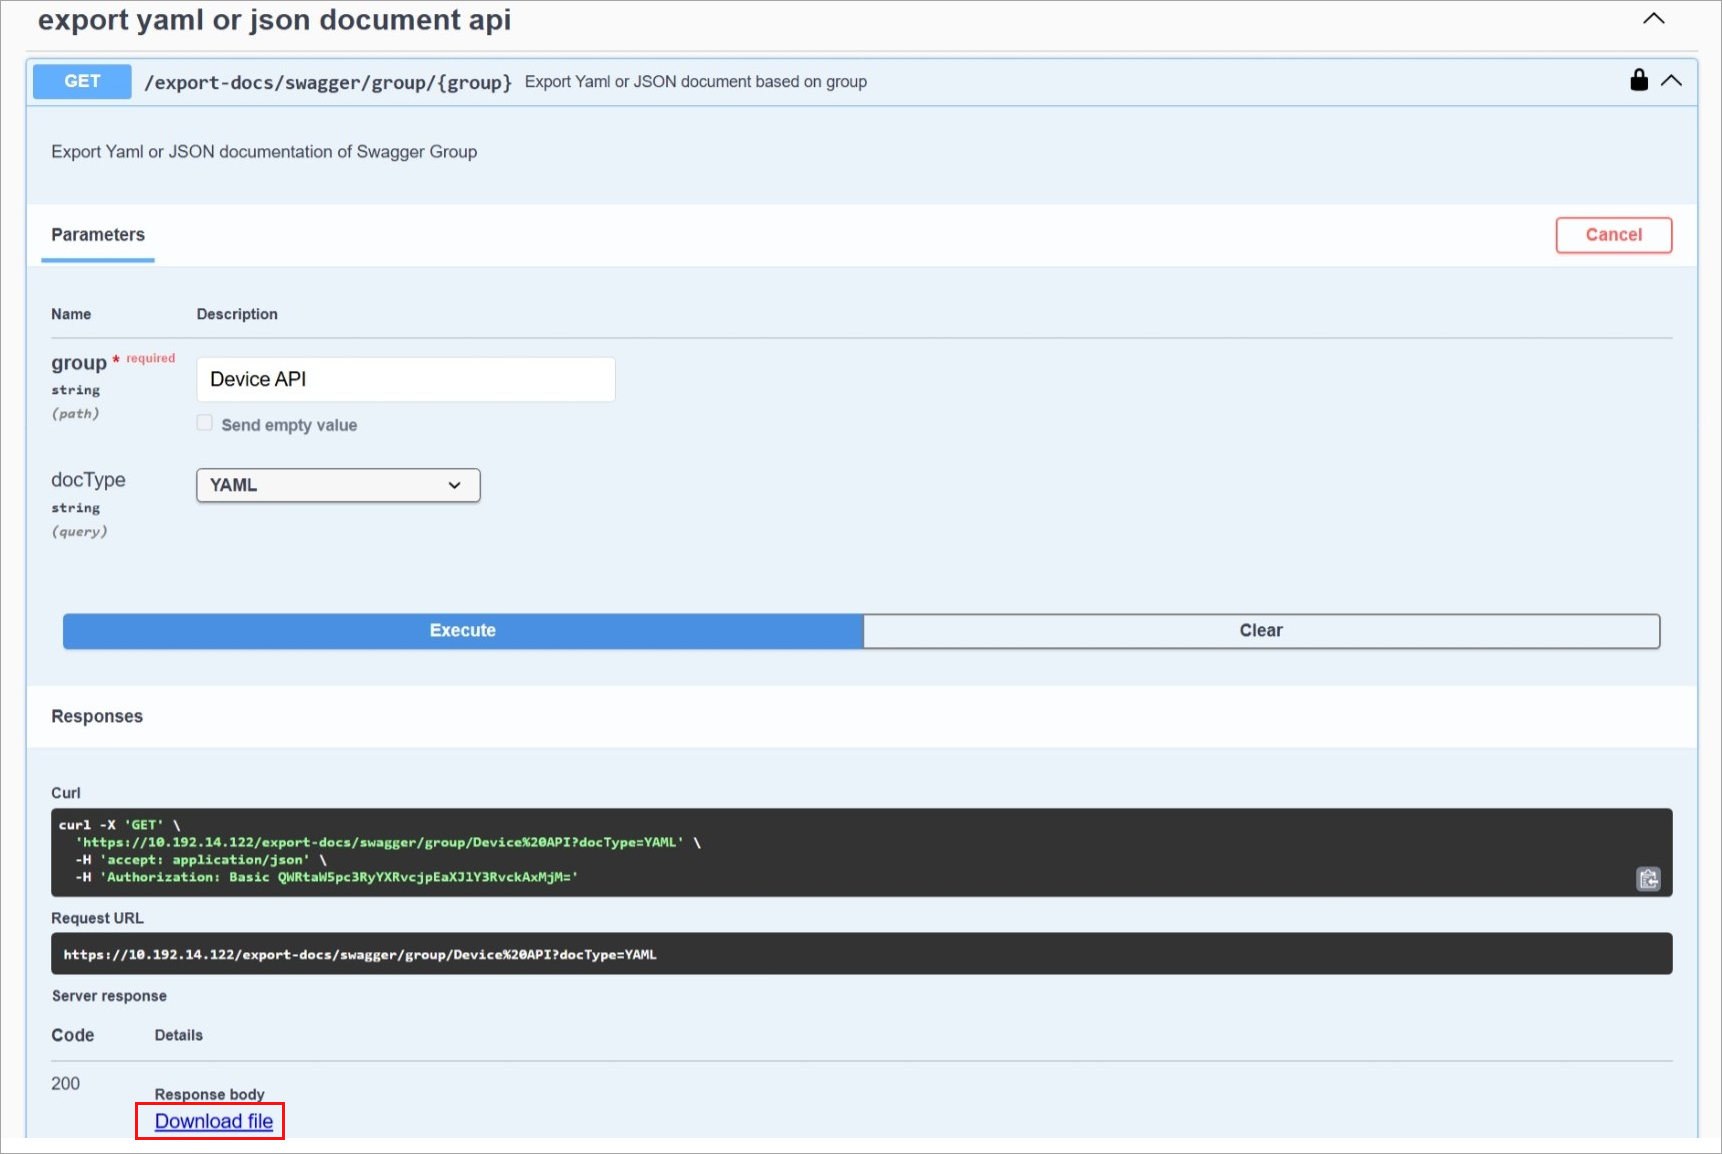
- To download and save the API group file (JSON or YAML) to the local device, click Download file.
Export APIs in Releases 22.1.4 and Earlier
- In the Swagger webpage, click the Select a spec field in the top menu bar.
- Select Export YAML or JSON Document API.
- Click Export Documents in the main screen.
- In the Parameters section, click Try it Out, and then enter the following information:
- In the docType field, select JSON or YAML as the file type.
- In the Group field, select the API group you want to export or select All APIs to export all Director REST API groups.

- Click Execute.
- To download the API group file (JSON or YAML) as a .zip file to the local device, click Download File, and then save the file.
Generate Client Code
To generate client code for the downloaded API file (JSON or YAML):
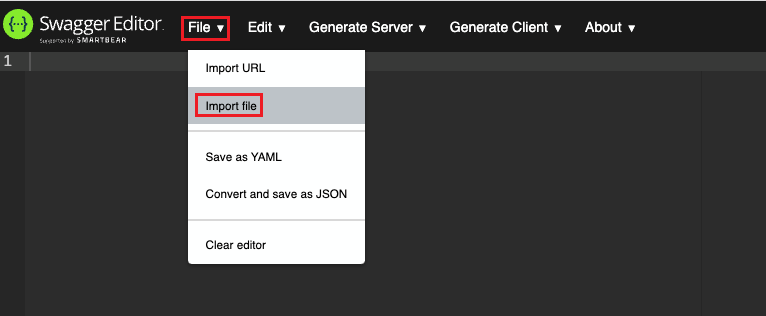
- Navigate to https://editor.swagger.io/. The SwaggerEditor webpage displays.

- Click File > Import file, and then select the API file you saved in Export APIs To Generate Client Code, above.
- Click Generate Client, and select a client and the language of the code to generate.

- Save the file at the desired location.
Execute Template-Level APIs
You can execute template-level APIs using Postman or cURL requests.
To execute template-level APIs:
- Copy the device-level APIs.
- Replace /devices/device/<device-name> with /devices/template/<template-name>.
- For example, change this:
- https://<Director-IP-address>/api/config/devices/device/<device-name>/config/interfaces/vni
- To this:
- https://<Director-IP-address>/api/config/devices/template/<template-name>/config/interfaces/vni
- For example, change this:
- Add port number 9182 after the IP address to execute the request for both Postman and cURL.
- For example, the request format using Postman:
- https://<Director-IP-address>:9182/api/config/devices/template/PostStaging/config/interfaces/vni
- Sample response:
"vni": [ { "name": "vni-0/0", "unit": [ { "name": 0, "family": { "inet": { "address": [ { "addr": "{$v_WAN1_IPv4__staticaddress}" } ] } }, "enable": true, "vlan-id": 0, "description": "WAN interface: WAN1" } ], "enable": true } ] - For example, the request format using cURL:
- curl -k 'https://<Director-IP-address>:9182/api/config/devices/template/PostStaging/config/interfaces/vni' -u 'Administrator:Versa@123'
- Sample response:
{
"vni": [
    {
     "name": "vni-0/0",
     "unit": [
          {
           "name": 0,
           "family": {
                  "inet": {
                       "address": [
                               {
                                "addr": "{$v_WAN1_IPv4__staticaddress}"
                               }
                       ]
                  }
           },
           "enable": true,
           "vlan-id": 0,
           "description": "WAN interface: WAN1"
         }
       ],
       "enable": true
     }
   ]
}
- For example, the request format using Postman:
Supported Software Information
Releases 21.2 and later support all content described in this article, except:
- Release 23.1.1 adds support to access the Swagger web page from the Director UI.