Manage Users
![]() For supported software information, click here.
For supported software information, click here.
You configure user accounts to give users access to the Concerto portal. Each user account has a role, which determines what the user can see and do in Concerto. This article describes how to configure and manage user accounts, roles, and permissions.
This article also describes how to view audit logs. Concerto creates audit logs for all actions taken in Concerto.
Account Components
Concerto uses the following components to implement user accounts:

- Concerto views—A view is the specific set of menus that a user can see in Concerto. There are two Concerto views:
- Service Provider view—This view allows the user to perform actions on the Concerto infrastructure and manage tenants.
- Tenant view—This view allows the user to perform actions for a single tenant.
- Account types—The account type determines which views a user can access and whether the user has full or read-only access to the views.
There are four types of user accounts:- Service Provider Administrator—Provides full access to Service Provider view and Tenant views for all tenants.
- Service Provider Operator—Provides read-only access to Service Provider view and Tenant views for all tenants.
- Enterprise Administrator—Provides full access to Tenant view for a single tenant.
- Enterprise Operator—Provides read-only access to Tenant view for a single tenant.
- Permissions—Permissions identify which operations you can perform on objects. Objects include lifecycle menus, tables shown on lifecycle screens, and SD-WAN configuration objects such as CGNAT profiles.
There are 3 categories of permissions:- General permissions for lifecycle menus and screens—You set these permissions from the Add Role or Edit Role screen when you add or edit a role.
- Individual region, site, or device permissions—(Releases 13.1.1 and later.) You set these permissions from the configuration screen for the region, site, or device. See Set Permissions for Individual Regions, Sites, and Devices, below.
- Individual SD-WAN configuration object permissions—You set these permissions from the Permissions step in the workflow for the object. See Object Permissions in Versa Concerto for SD-WAN.
- Concerto roles—You assign a role to each user account, and the role determines the account type and permissions for the account.
The role of the current account displays in the upper-right corner of the Concerto UI. In the following example, the user is logged into account dev1, which has role Service Provider Administrator.

Concerto comes pre-configured with a default role for each account type. You can create additional roles, which are referred to as custom roles.
Concerto Lifecycles
The top-level menu in Concerto displays a navigation panel on the left side of the screen. This panel lists the lifecycles that are available in the current Concerto view.
The following table lists the two Concerto views with their corresponding navigation panels and lifecycles.
| View | Navigation Panel | Lifecycles |
|---|---|---|
| Service Provider view |  |
|
| Tenant view |  |
|
Create User Accounts
This section describes how to create service provider and enterprise accounts.
Create a Service Provider Account
Only service provider administrators can create service provider accounts.
To create a service provider administrator or service provider operator account:
- In Service Provider view, select Users > Users.
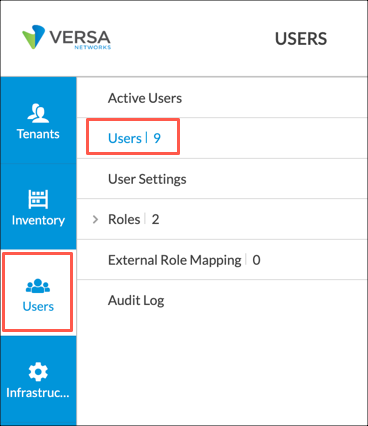
The following screen displays.

- Click +User. The following screen displays.
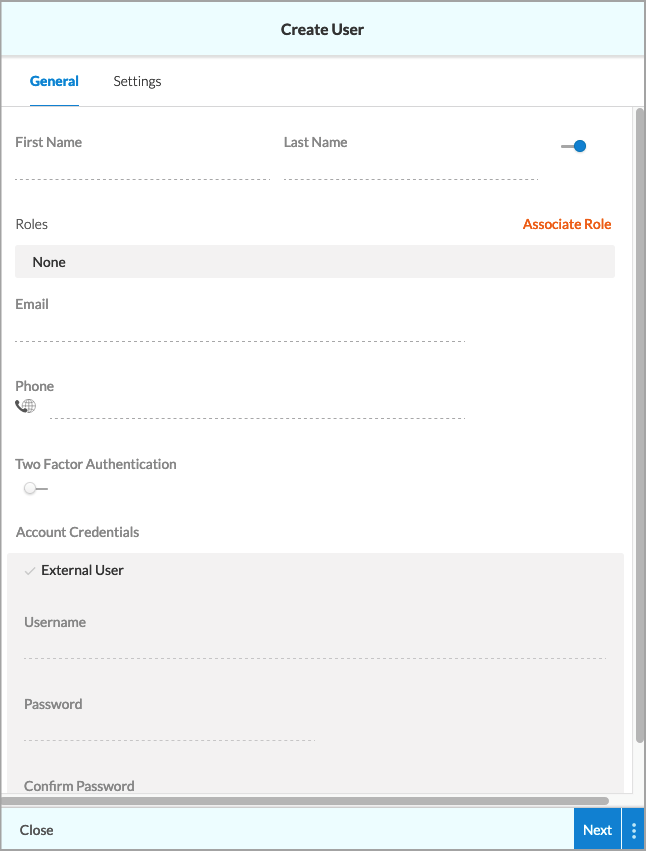
- Enter information for the following fields.
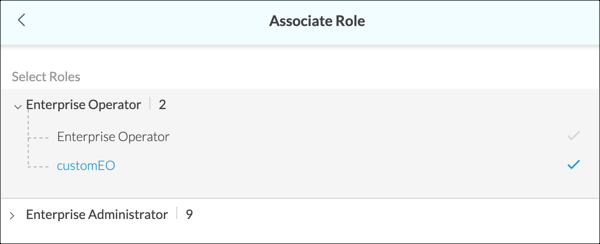
Field Description First name (Required) Enter the first name of the account user. Last name (Required) Enter the last name of the account user. Click the toggle next to the last name to enable or disable the account. The toggle is blue in the enabled position. Role (Required) Click Associate Role. The Associate Role screen displays. This field determines both the role and the account type for the new account.
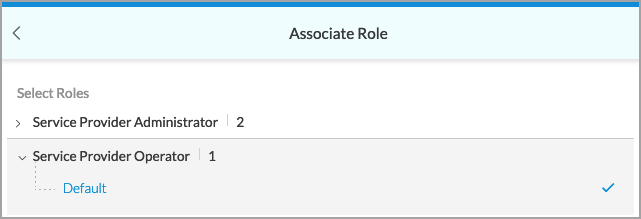
- Click the arrow to the left of an account type to display the available roles.
- Select a role under the account type for the account.
- Click Save.
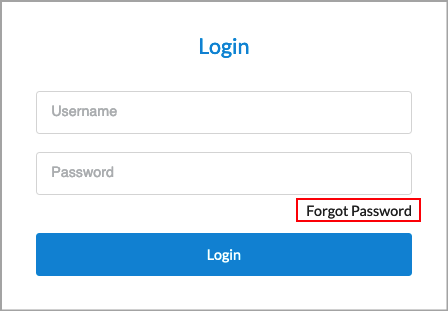
Email (Required) Enter an email address for the account. This email is used for the Forgot Password option on the Concerto login screen. When this option is selected, Concerto sends a temporary password to the associated email address, allowing the user to reset their password.
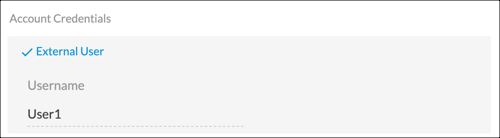
Phone Enter a phone number. This is required when you enable two-factor authorization. Two-Factor Authentication Click the toggle to enable two-factor authentication. The toggle is blue in the enabled position. Account Credentials (Group of Fields) - External User
Click if the account information is on an external server. The screen refreshes and a check symbol displays to indicate this is an external account.
Note that you can map the external account's role to a Concerto role. See Map External Roles to Concerto Roles, below.
- Username (Required)
Enter the username for the account. - Password
Enter a password for the account. - Confirm password
Enter the password again. - Select the Settings tab, or click Next, and then enter information for the following fields.

Field Description Idle Timeout Enter how long, in minutes, the user can be idle before being logged out. Landing Lifecycle Choose the lifecycle screen to display when the user enters Tenant view. - Click Save.
Create an Enterprise Account
Enterprise administrators and service provider administrators can create enterprise accounts.
Note: While it is possible to grant a service provider operator or enterprise operator permission to create enterprise accounts, this is not recommended. Operator roles are intended to remain read-only.
To create an enterprise administrator or enterprise operator account:
- In Tenant view, select the Users lifecycle in the left navigation bar. The Users screen for the tenant displays all currently configured user accounts.

- Click +User. The Create User screen displays.
- Enter information for the following fields.
Field Description First name (Required) Enter the first name of the account user. Last name (Required) Enter the last name of the account user. Click the toggle next to the last name to enable/disable the account. The toggle is blue in the enabled position. Role (Required) Click Associate Role. The Associate Role screen displays. This field determines both the role and the account type for the new account.
- Click the arrow to the left of an account type to display the available roles.
- Select a role under the account type for the account.
- Click Save.
Email (Required) Enter an email address for the account. This email is used for the Forgot Password option on the Concerto login screen. When the Forgot Password option is selected, Concerto sends a temporary password to the associated email address, allowing the user to reset their password.
Phone Enter a phone number for the account. This is required when you enable two-factor authorization. Two-Factor Authentication Click the toggle to enable two-factor authentication. The toggle is blue in the enabled position. Account Credentials (Group of Fields) - External User
Click if the account information is on an external server. The screen refreshes and a check symbol displays to indicate this is an external account.
Note that you can map the external account's role to a Concerto role. See Map External Roles to Concerto Roles, below.
- Username (Required)
Enter a username for the account. - Password
For internal accounts only, enter a password for the account. - Confirm password
For internal accounts only, enter the password again. - Select the Settings tab, or click Next, and then enter information for the following fields.

Field Description Idle Timeout Enter how long, in minutes, the user can be idle before being logged out. Landing Lifecycle Choose the lifecycle screen to display when the user logs into the account. - Click Save.
Manage Concerto Roles
Roles determine the account type and permissions for an account.
View and Edit Permissions for Service Provider Roles
- In Service Provider view, select Users > Roles.
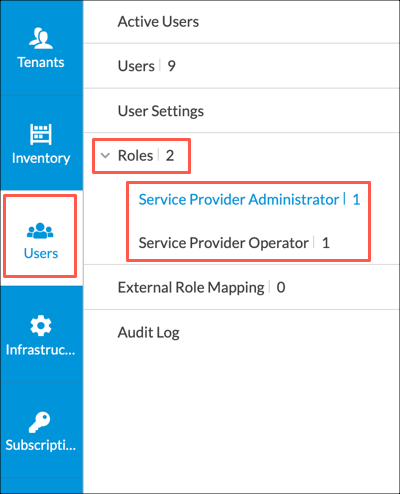
- Select the account type for the role, either Service Provider Administrator or Service Provider Operator. The screen displays a high-level overview of permissions for each role for the account type.
The following example displays two roles:- Service Provider Administrator—This is the default service provider administrator role.
- HideViewLC—This is a custom role.

- To view and edit permission details, click the role name in the Name column. The following example displays the result of clicking HideViewLC in the previous screen.

All tabs correspond to lifecycles in provider view except the Tenant Level Permissions tab. The Tenant Level Permissions tab includes lifecycles for all Tenant views. For a description of service provider permissions, see Configure Custom Service Provider Roles. For a description of tenant level permissions, see Configure Custom Enterprise Roles.
Permissions are indicated as follows: Empty box—Permission is disabled for this object and all subobjects.
 Checked box—Permission is enabled for this object and all subobjects.
 Lined box—Permission is enabled for some subobjects and disabled for others.
- Select a tab to view and edit permissions for the corresponding lifecycle or lifecycles.
- (Optional) Click Save to save your changes.
Configure Custom Service Provider Roles
To configure a custom role for the service provider administrator or service provider operator account types:
- In Service Provider view, select Users > Roles.
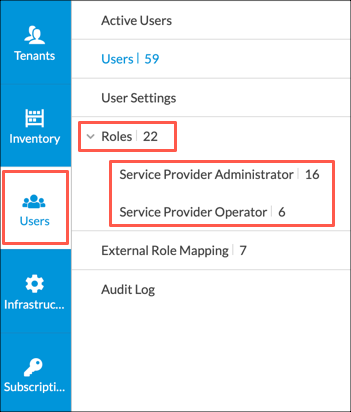
- Select the account type for the role: Service Provider Administrator or Service Provider Operator. The role table for the account type displays.
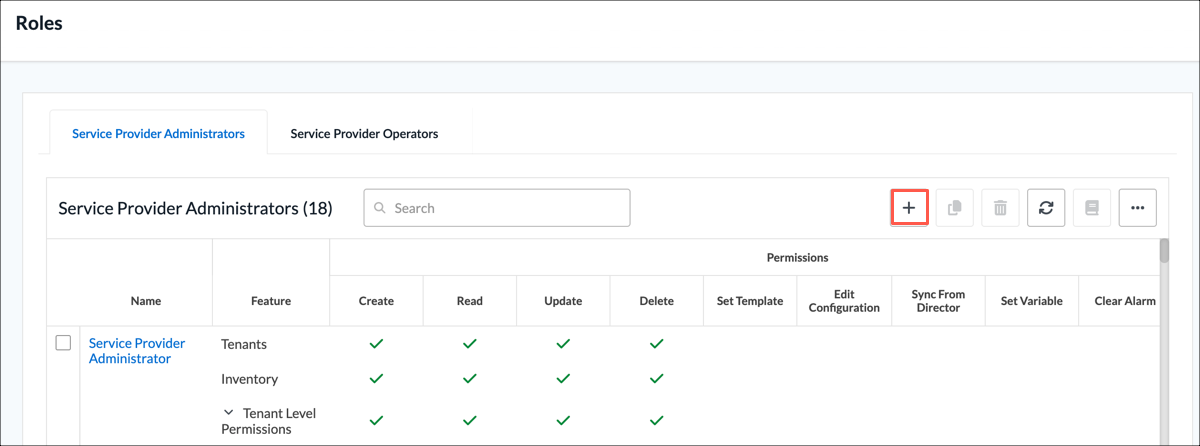
- Click the + Add icon. The Add Service Provider Administrator Role or Add Service Provider Operator Role window displays. Both screens display identical tabs.
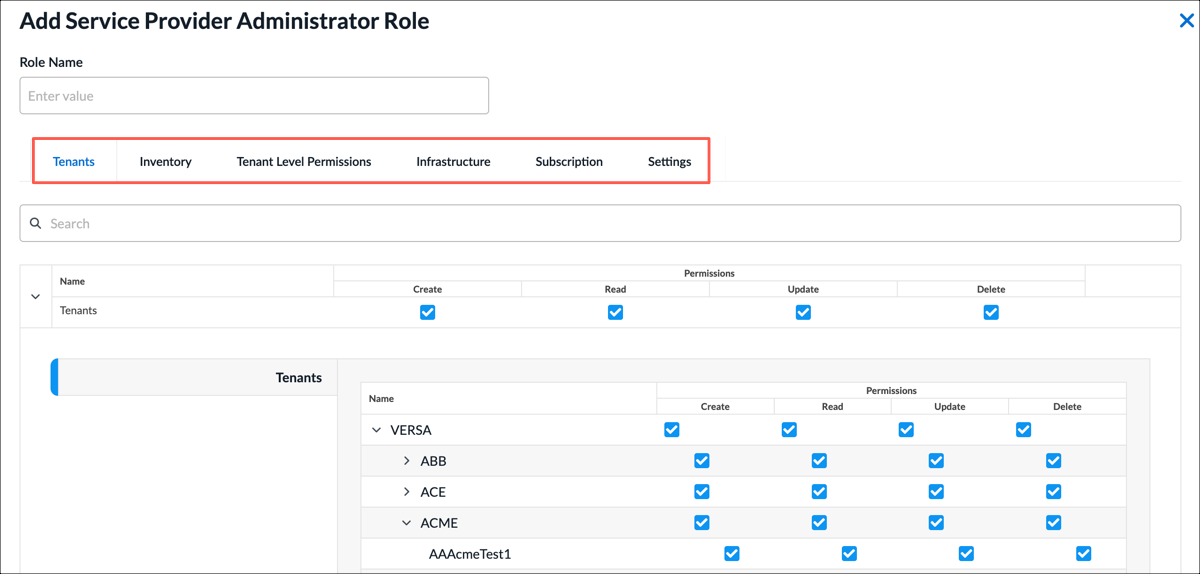
All tabs except Tenant Level Permissions corresponds to a lifecycle in Service Provider view. The Tenant Level Permissions tab allows you to set permissions for lifecycles in Tenant view for each tenant. - Select a tab and then select and deselect permissions for elements (objects) in lifecycle screens. Permissions are described in the following table. For a description of tenant- level permissions, see Configure Custom Enterprise Roles, below.
Permission Description Create
Grants create permission for the lifecycle object.
Read Grants read permission for the lifecycle object. Update Grants edit permission for the lifecycle object. Delete Grants delete permission for the lifecycle object. Clear Alarms (For the Inventory lifecycle) Allows the user to clear alarms for the device. Upgrade Security Package (For the Inventory lifecycle) Allows the user to upgrade security packages. Upgrade OS Security Package (For the Inventory lifecycle) Allows the user to upgrade operating system security packages. Upgrade Software Package (For the Inventory lifecycle) Allows the user to upgrade software. - Click Add Service Provider Administrator Role or Add Service Provider Operator Role to add the role.
View and Edit Permissions for Enterprise Roles
To view and/or edit existing enterprise roles:
- In Tenant view, select Users > Roles.
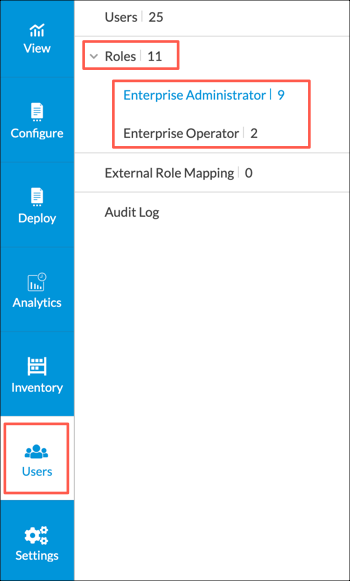
- Select the account type for the role, either Enterprise Administrator or Enterprise Operator. The screen displays a high-level overview of permissions for each role for the account type. Note that Enterprise Administrator and Enterprise Operator are the default roles for account types enterprise administrator and enterprise operator, respectively.

- To view and edit permission details, click the role name in the Name column. The following screen displays.

Tabs correspond to lifec ycles in Tenant view, except Configure-SASE corresponds to Configure > Security Service Edge and Configure SDWAN corresponds to Configure > Secure SD-WAN. Permissions are indicated as follows. For a description of these permissions, see Configure Custom Enterprise Roles.
- Empty box—Permission is disabled for this object and all subobjects.
- Checked box—Permission is enabled for this object and all subobjects.
- Lined box—Permission is enabled for some subobjects and disabled for others.
- Select a tab to view and edit permissions.
- (Optional) Click Save to save your changes.
Configure Custom Enterprise Roles
To configure a custom role for account type enterprise administrator or enterprise operator:
- In Tenant view, select Users > Roles.

- Select the account type for the role: Enterprise Administrator or Enterprise Operator. The Add Enterprise Administrator Role or Add Enterprise Operator Role popup window displays. Both screens display identical tabs and options.

Each tab corresponds to a lifecycle in Tenant view, except as noted below:- Tenants
- View
- Configure SASE—Corresponds to Configure > Security Service Edge
- Configure SD-WAN—Corresponds to Configure > Secure SD-WAN
- Deploy
- Analytics
- Inventory
- Users
- Select tabs and then select and deselect permissions. The following table describes the permissions.
Note: For the Deploy lifecycle, these settings apply to all devices and all sites. You can reduce these permissions for individual devices and sites. For more information, see Set Permissions for Individual Sites and Devices, below.
Permission Description Create
Allows the user to create a subobject of the object.
Read Grants read permission for the lifecycle element. Update Grants update permission for the llifecycle element. Delete Grants delete permission for the lifecycle element. Set Template (For the Deploy lifecycle) Allows the user to use the Set Template action in the hover menu for devices and sites. Edit Configuration (For the Deploy lifecycle) Allows the user to edit the configuration for devices and sites. Sync from Director (For the Deploy lifecycle) For devices, allows the user to sync (commit) the VOS device configuration from Director to the device. For sites, allows the user to commit any of the devices contained in the site from the hover menu in the site hexagon. Set Variable (For the Deploy lifecycle) Allows the user to use the Set Variable feature in the hover menu for a device. Publish (For the Deploy lifecycle) Allows the user to publish the device configuration to Director. Clear Alarms (For the Deploy and Inventory lifecycles) Allows the user to clear alarms for the device. Upgrade Security Package (For the Inventory lifecycle) Allows the user to upgrade security packages. Upgrade OS Security Package (For the Inventory lifecycle) Allows the user to upgrade operating system security packages. Upgrade Software Package (For the Inventory lifecycle) Allows the user to upgrade software. - Click Add Enterprise Operator Role or Add Enterprise Administrator Role to add the role.
Map External Roles to Concerto Roles
For Releases 11.3.1 and later.
You can use an external server to define user accounts and you can map an external role to a local Concerto role so that the external user can log in to Concerto successfully.
Role mapping is required in the following scenarios:
- If a single sign-on (SSO) user role configured in an identity provider (IdP), such as Okta or Ping Identity, is a custom role (that is, a role that is not present in Concerto). For information about configuring single sign-on, see Configure Single Sign-On for Concerto.
- If a user is created in Versa Director with a custom role.
- If a user role configured in an external server (such as Active Directory, RADIUS, and TACACS+ servers) is a custom role (that is, a role that is not present in Concerto)
For example, a custom user role, AcmeOperator, has been configured in an IdP. For the AcmeOperator user to log in to Concerto successfully, you must map this role to a local default Concerto role, such as Enterprise Administrator or Enterprise Operator. Then, when AcmeOperator attempts to log in to Concerto, Concerto maps the AcmeOperator role to its Enterprise Administrator or Enterprise Operator role and allows AcmeOperator to log in to Concerto.
In Releases 11.4.1 and later, you can map the external custom role created in Versa Director, an IdP, or an external server to a local custom Concerto role and to a local default Concerto role.
To map an external user with a custom role to a local Concerto role:
- For service provider accounts, go to Service Provider view. For enterprise accounts, go to Tenant view.
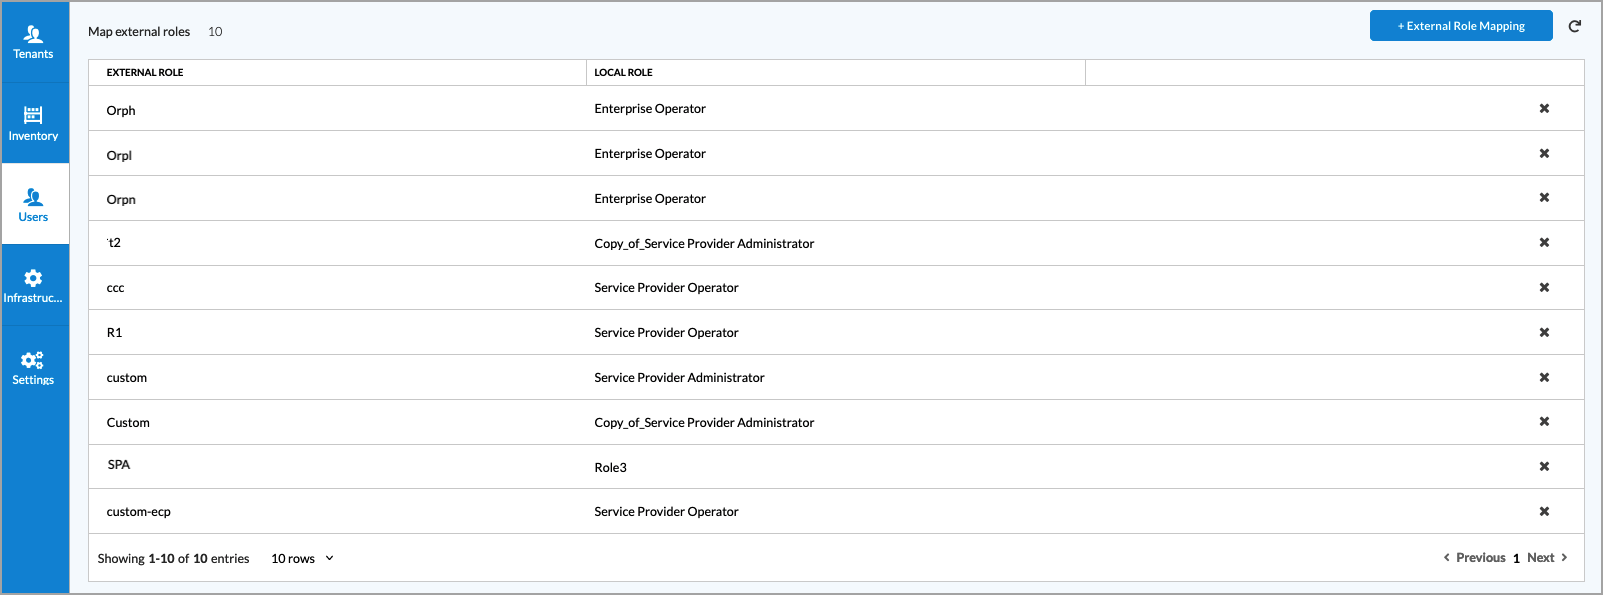
- Select Users > External Role Mapping.

- Click + External Role Mapping.

- In the New Role Mapping window, enter information for the following fields.

Field Description External Role Enter the name of the external role. Local Role Select the local Concerto role to map to the external role. - Click Save.
The following screen shows a list of external user roles and the local Concerto roles to which they are mapped.
Set Permissions for Individual Regions, Sites, and Devices
For Releases 13.1.1 and later.
You can set permissions for individual regions, sites, and devices through the Permissions tab on the configuration window for the region, site, or device.
The following image displays the Permissions tab on the Edit Site window for a site.

The following table describes the permissions for regions, sites, and devices.
| Permission | Description |
|---|---|
| Create |
For a site, can create devices for the site. |
| Read | Can view the device or site details. |
| Update | Can modify the device or site details. |
| Delete | For devices, can delete the device. For sites, can delete the site and can delete site devices that have Delete permission enabled. |
| Set Template | Can use the Set Template action for the device or site. |
| Edit Configuration |
A combination of Create, Read, Update, and Delete permissions. You can also set these permissions independently. |
| Sync from Director | Can sync the device state from Director back to Concerto. |
| Set Variable | Can use the Set Variable action. For sites, can use the Set Variable action for devices in the site. |
| Publish | For a device, can publish and commit the device configuration. For a site, can publish and commit device configurations for all devices in the site that have the Publish permission enabled. |
| Clear Alarm | Clear alarms for the device or site. |
Configure Default Account Settings
For Releases 11.4.1 and later.
You can configure settings for user accounts such as settings for password policy and login attempts. Account settings apply to both service provider and enterprise accounts.
To configure account settings:
- In Service Provider view, select Users > User Settings.

The following screen displays.

- Enter information for the following fields.
Setting Description Maximum Number of Login Attempts Allowed Before Account is Locked
Enter the number of user login attempts that are allowed before the user's account access is locked. Configuring a maximum number of login attempts protects against brute force login attacks. Default Time for Locked Account to Unlock
Enter the default time before a locked account is unlocked, in seconds. If a user enters the wrong password too many times and is locked out, the user's account is unlocked after this amount of time has passed. Number of Days of Inactivity Before Account is Deactivated
Enter the number of days that an account can be inactive before the account is deactivated. Number of Days Before Account Expires
Enter the number of days before an account expires. Time Interval Before User Can Reset Password Again (secs)
If a user resets their password, enter the amount of time, in seconds, that must pass before the user can reset their password again. Concurrent Login Policy
Select a concurrent login policy. A concurrent login allows a user to log in to a system using the same credentials but using different devices. Note that this field is supported in Versa Director Releases 22.1 and later.
- Allow—Allow concurrent logins.
- Deny—Do not allow concurrent logins.
- Force Logout—The active user is logged out before another user can log in with the same credentials.
Minimum Password Length Enter the minimum length of the password. Note that this field is supported in Versa Director Releases 22.1 and later. Require at Least One Uppercase Letter in Password
Click the toggle to require at least one uppercase letter in a password. Require at Least One Lowercase Letter in Password
Click the toggle to require at least one lowercase letter in a password. Require at Least One Number in Password
Click the toggle to require at least one number in a password. Require at Least One Special Character in Password
Click the toggle to require at least one special character in a password. Require User to Reset Password on First Login
Click the toggle to require a user to reset their password when logging in for the first time. Prohibit Dictionary Words in Password
Click the toggle to prohibit users from using dictionary words in their password. A password dictionary contains a list of words or characters that users may not use in their passwords. Note that this field is supported in Versa Director Releases 22.1 and later. Enable Password History
Click the toggle to enable password history.
- Number of Passwords to Keep in Password History—Enter a number of passwords to keep in the password history (or use the up and down arrows) that the user is not allowed to reuse.
Expire Password
Click the toggle to expire passwords.
- Number of Days Before Password Expires—Enter the number days before a password expires (or use the up and down arrows).
- Click Submit.
Manage User Accounts
This section describes how to perform actions for existing user accounts. Only service provider administrators can manage service provider accounts. Both service provider and enterprise administrators can manage enterprise accounts. You can perform the following actions:
- Delete
- Edit
- Force Logout
- Reset Password
- Unlock Account
To manage user accounts:
- Navigate to the Users table for the account type.
- For service provider accounts, go to Service Provider view and select Users > Users.
- For enterprise accounts, go to Tenant view and select Users > Users.
The Users table displays.
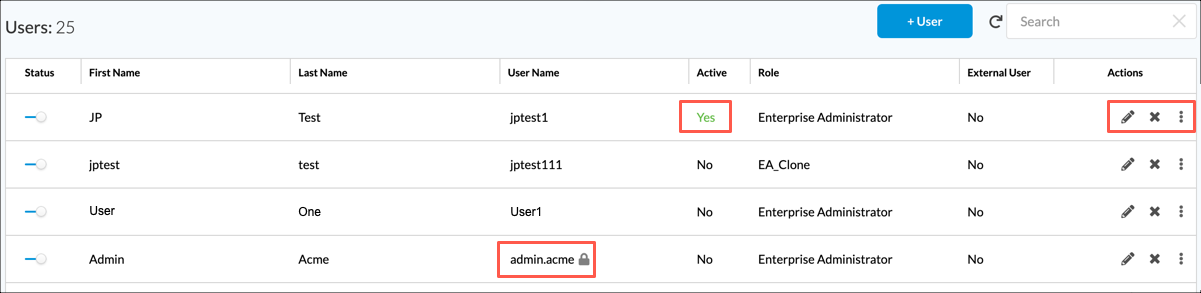
- To delete an account, hover over the row for an account and select the
 Delete icon.
 - To unlock, reset a password, or force a logout for an account, hover over the row for an account and then click the
 3-dot icon. Note that some actions are only available when the requirements described below display.
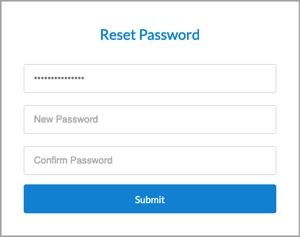
Action Requirement Description Unlock User Name field displays a lock icon Unlock the password for the account. Reset Password Reset the account password. When you reset the password, the next time the user logs into the account, they are presented with the following screen to reset their password.
Force Logout Active field is Yes Force the user to be logged out of the account. - To edit an account:
-
 Edit icon. The Edit User window displays.

- Select the General tab, and make your changes.
- Click Next or select the Settings tab.

- Make your changes and then click Save.
-
View and Export Audit Logs
For Releases 11.4.1 and later.
Internal audit logs capture information about all activity on Concerto, including all internal URLs that were visited, the payloads for each request, the actions that occur as a result of the request, and all errors that were encountered. The logs are placed in the Concerto audit tables, and they are also sent to Versa Director.
There are separate log tables for actions performed in service provider and Tenant views.
To view and export audit logs:
- To view audit logs for actions taken in Service Provider view:
- In Service Provider view select Users > Audit Logs.
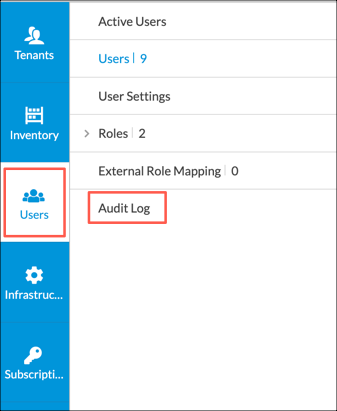
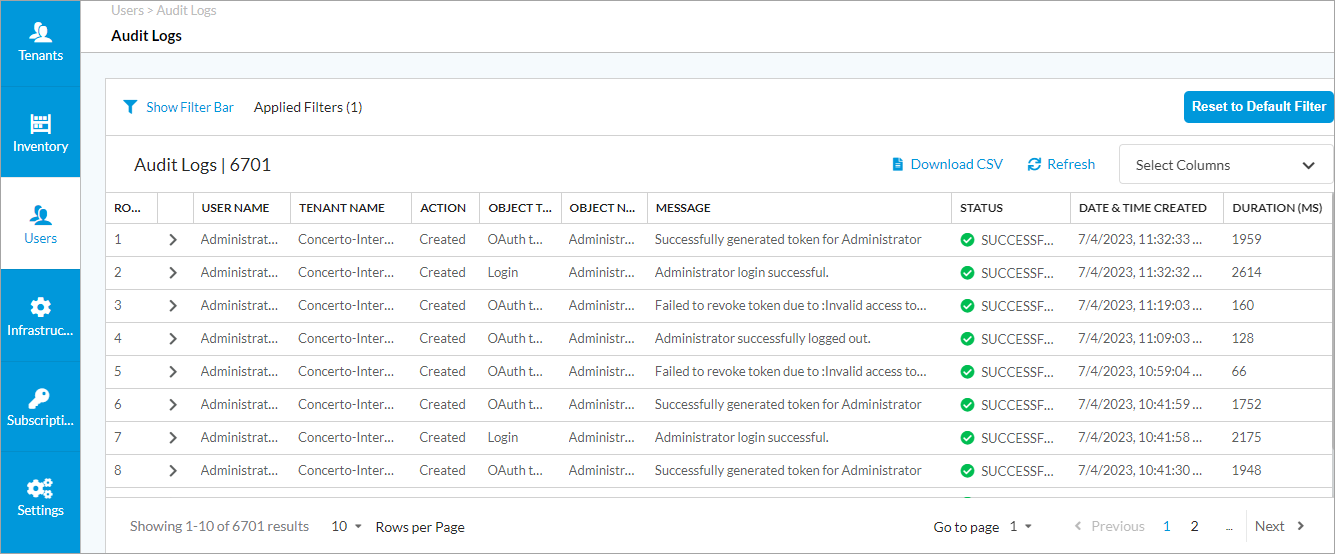
The Audit Log table for Service Provider view displays.
- Continue to Step 3.
- In Service Provider view select Users > Audit Logs.
- To view audit logs for actions taken in Tenant view:
- In Tenant view select Users > Audit Logs.

The Audit Log table for the current tenant displays.

- Continue to Step 3.
- In Tenant view select Users > Audit Logs.
- To view details for a log entry, click the
 Arrow icon to the left of the username. The log entry details display.

Field Description Change Set (For audit logs with the Modified action) Displays a comparison of the previous and updated versions of the object. This option displays in the audit log any time after you modify an object, including before you publish the object to the SD-WAN branch.

Payload Displays the content of the request. To maintain user privacy, sensitive user information is replaced with asterisks (****). Trace ID Displays the trace ID associated with the request. When a user clicks a link in Concerto, Concerto generates a trace ID for the request.
Operation Displays audit logs for the listed operation.
Session ID Displays audit logs for the login session in which the action in this row was performed.
Resource Group Displays audit logs for the listed resource group. Resource Displays audit logs for the listed resource.
HTTP Method Displays the HTTP method:
- DELETE
- GET
- HEAD
- PATCH
- POST
- PUT
Task Displays all the task details. This option displays in the audit log only after you publish the SD-WAN branch. View Diffs (For audit logs with the Modified action) Click View to display the differences between last published configuration and the current published configuration. This option displays in the audit log only after you publish the SD-WAN branch. - To filter the Audit Logs table display:
- Click
 Show Filter Bar icon. The Action filter displays by default. Note that you can delete this filter by clicking the
  Delete icon in the field.

- To define an Action filter, select one of the following values from the Action drop-down list:
- Created—Select to view audit logs with value Created in the Action column.
- Deleted—Select to view audit logs with value Deleted in the Action column.
- Modified—Select to view audit logs with value Modified in the Action column.
- Read—Select to view audit logs with value Read in the Action column.
- None—Select to view audit logs where no action is listed in the Action column. For example, at the service provider level for CLI operations, such as upgrade and show commands.
- To add a filter, click the
 Add Filter icon, and then select one of the following query types for filtering the log information.

Query Description Change Set Search on a string of characters in an error message. Select the string search type:
- Contains—Results contain the search string that you enter. This is the default.
- RegEx—Results match a regular expression that you enter.
Duration Search on the duration of the requests: - Seconds—Click to enter a search duration in seconds. This is the default.
- Milliseconds—Click to enter a search duration in milliseconds.
Object Name Search on an object name such as master profile, appliance, rule, element, profile, or subprofile name. Select the string search type:
- Contains—Results contain the search string that you enter. This is the default.
- Exact—Results contain the exact search string that you enter.
- RegEx—Results match a regular expression that you enter.
Object Type Search on an object type. Object Subtype Search on an object subtype. Object Subtype Category Search on an object subtype category. Operation Select the type of operation to query. Select the string search type:
- Contains—Results contain the search string that you enter. This is the default.
- Exact—Results contain the exact search string that you enter.
- RegEx—Results match a regular expression that you enter.
Payload Search on a string of characters in the payload. Select the string search type:
- Contains—Results contain the search string that you enter. This is the default.
- RegEx—Results match a regular expression that you enter.
Resource Search on the type of resource. Select the string search type:
- Contains—Returns results that contains search string. This is the default keyword.
- Regex—Returns results that matches regular expression search string.
Resource Group Search on the type of resource group. Select the string search type:
- Contains—Returns results that contains search string. This is the default keyword.
- Exact—Returns results that matched the exact search string.
- RegEx—Returns results that matches regular expression search string.
Date and Time Created Search on the date and time:
- Preset—Returns results within the 7 days or a week.
- Custom—Returns results within a custom start date and end date.
Status Select the status on which to query:
- Client Error
- Redirection
- Server Error
- Successful
Status Code - CLI Status Codes:
- 0—CLI exit code of 0 means that the CLI operation was successful.
- 1—CLI exit code of other than 0 means that the CLI operation was not successful.
- 126—CLI exit code of 126 means that a command was found but it is not executable.
- 127—CLI exit code of 127 means that a command was not found.
- HTTP Status Codes:
- 200—OK. The request succeeded.
- 201—Created. The request succeeded, and a new resource was created as a result.
- 204—No content. There is no content to send for this request, but the headers may be useful.
- 302—Found. The URI of requested resource was changed temporarily. Further changes in the URI may be made in the future.
- 400—Bad request. The server could not understand the request because of invalid syntax.
- 401—Unauthorized. The client must authenticate itself to receive the requested response.
- 403—Forbidden. The client does not have access rights to the content.
- 404—Not found. The server cannot find the requested resource.
- 405—Not acceptable. The web server, after performing server-driven content negotiation, found no content that conforms to the criteria given by the user agent.
- 500—Internal server error. The server encountered a situation that it does not know how to handle.
Tenant Name Select the tenant name. Trace ID Enter an exact trace ID on which to query.
Session ID Enter an exact session ID on which to query. Username Select the username on which to query. Select the string search type:
- Contains—Returns results that contains search string. This is the default keyword.
- Exact—Returns results that matched the exact search string.
- RegEx—Returns results that matches regular expression search string.
- Click Apply to apply the filter.
- Click
- To export the logs in the audit logs table, after applying any filters, to a CSV file:

- Click Download CSV. The Download Audit List window displays.
- Enter values for the starting and ending rows. You can download a maximum of 5000 logs at a time.

- Click Download.
Supported Software Information
Releases 10.1.1 and later support all content described in this article, except:
- Release 10.2.1 adds the Active column in the Users screen; adds support for the unlocking users from Concerto, changing passwords, resetting forgotten passwords, forcing user logout, and discovering appliances created in Versa Director; adds support for two-factor authentication.
- Release 11.3.1 adds support for mapping an external user role to a local Concerto role.
- Release 11.4.1 adds support for audit logs; adds the User Settings screen; adds support for mapping external custom roles to local Concerto custom roles.
- Release 13.1.1 adds support for permissions for individual sites and devices; adds support for encrypted sensitive information.