Integrate Versa Secure SD-WAN with Microsoft Entra Internet Access
This article describes how to integrate Versa Secure SD-WAN with Microsoft Entra Internet Access. The integration uses two IPsec tunnels to Microsoft Entra Internet Access, and both tunnels peer using BGP to two different zones for redundancy within Microsoft Entra.
Versa Director provides workflows to automate the configuration and provisioning of the IPsec tunnels to Microsoft Entra Internet Access. Equal Cost Multipath (ECMP) load balancing is enabled by default.
The Versa API-based integration with Microsoft Entra Internet Access focuses on simplicity and time to deployment. With this method, you can ensure a consistent and reliable connection to critical resources, while ensuring the highest level of security across both solutions.

Prerequisites
The following prerequisites are required to integrate Versa Secure SD-WAN and Microsoft Entra Internet Access.
Versa Secure SD-WAN:
- Versa Director and Versa Operating SystemTM (VOSTM) Release 22.1.4 or later.
- The physical interface where the IPsec tunnels terminate must have a public IP address.
Microsoft Entra Internet Access:
- Enable permissions on Microsoft Entra Admin Center.
- Create an application and service principal. Refer to the documentation for Microsoft Entra Identity Platform.
- Add application permissions. Refer to the documentation for Microsoft Entra Identity Platform.
Gather Information from the Microsoft Entra Application
In this procedure, you gather the Microsoft Entra client ID, tenant ID, and client secret, which you need to create the CMS cloud connector in Versa Director.
To gather information from the Microsoft Entra application:
- Log in to Microsoft Entra Admin Center.
- Navigate to Entra ID > App registrations, and then select your application.
- Select Overview in the left menu.

- Copy the Directory (tenant) ID and Application (client) ID and store them for later use.
- To create a client secret, refer to the Microsoft Entra Identity Platform documentation. After you save the client secret, the value of the client secret is displayed. This is only displayed once, so copy this value and store it where you can retrieve it. You provide the secret value along with the application's client ID to sign in to the application.
Enable a Microsoft Traffic Profile
To enable a traffic profile in Microsoft Entra:
- Log in to Microsoft Entra Admin Center.
- Navigate to Global Secure Access > Connect > Traffic Forwarding.
- Click the toggle to enable the Microsoft traffic profile, as shown below.

Configure a CMS Cloud Connector in Versa Director
To establish a connection between a VOS device and Microsoft Entra, and manage that connection through Versa Director, you must first configure a CMS cloud connector on Versa Director. Note that you can create only one CMS connector per tenant for Microsoft Entra API-based integration.
Before you create the CMS cloud connector on Versa Director, make sure that you have the Microsoft Entra application client ID, client secret, and tenant ID. To obtain these items, see Gather Information from Microsoft Entra Application, above.
Create a CMS Cloud Connector
- Log in to Versa Director.
- In Director view, select the Administration tab in the top menu bar.
- Select Connectors > CMS in the left menu bar, and then click the + Add icon.

- In the Add CMS Connector window, enter information for the following fields.

Field Description CMS Name (Required) Enter the name of the CMS connector. The name is a text string. Organization (Required) Select the tenant organization, which should be present in the provider Versa Director. CMS Flavor Select Microsoft GSA for the type of cloud service. Client ID (Required) Enter the client ID obtained from Microsoft Entra. Client Secret (Required) Enter the client secret ID obtained from Microsoft Entra. Tenant ID (Required) Enter the tenant ID value obtained from Microsoft Entra. - Click OK.
Verify the CMS Cloud Connector
To verify that the CMS connector is working:
- In Director view, select the Administration tab in the top menu bar.
- Select Connectors > CMS in the left menu bar. The main pane displays the CMS connectors.
- Select the CMS connector to verify, and then click
 Validate Connector in the horizontal menu bar. This triggers an API call to the CMS connector to verify its Microsoft Intra user rights. If the validation is successful, the Valid Credentials popup message displays.

Associate the CMS Cloud Connector with an Organization
After you add a CMS cloud connector, you associate it with an organization that is already configured on the Director node.
To associate a CMS connector with an organization:
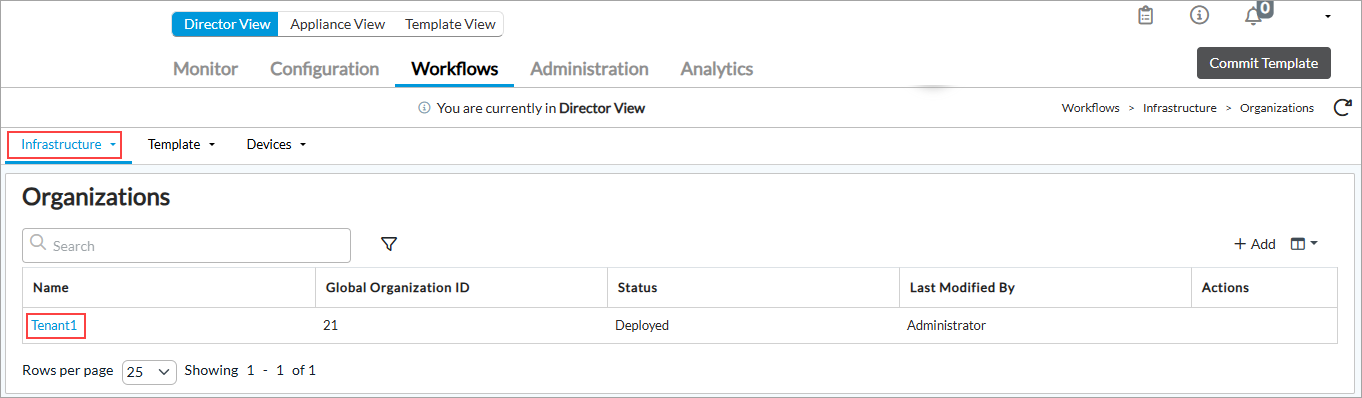
- In Director view, select the Workflows tab in the top menu bar.
- Select Infrastructure > Organizations in the horizontal menu bar. The main pane displays a list of organizations.
- Select the organization with which you want to associate the CMS connector. In this example, the organization is Tenant1.
- Select step 4, CMS Connector. The Configure CMS Connector screen displays with the CMS Connectors tab selected.
- In the Available pane, click Select for the connector (here, Microsoft-Tenant1-cms) to add it to the Selected pane.

- Select step 7, Review, to review the configuration and make any needed changes.
- Click Deploy.
Configure a Site-to-Site Tunnel in a Workflow Template for Microsoft Entra
- In Director view, select the Workflows tab in the top menu bar.
- Select Template > Templates in the horizontal menu bar.
- Select an SD-WAN post-staging template in the main pane. To create a new workflow template, see Create and Manage Staging and Post-Staging Templates.

- Select step 3, Tunnels, in the top menu bar. The Configure Tunnels screen displays.

- In the Partner Site to Site Tunnels section, click the + Add icon.
- In the Partner Site to Site Tunnels popup window, enter the following information.

Field Description Name (Required) Enter a name for the site-to-site tunnel. Peer Type Select the Microsoft GSA peer type. Tunnel Protocol Select the IPsec tunnel protocol to use to reach the peer. WAN Network Select one or more WAN networks to use. This network is the originating endpoint of the tunnel. The highest priority is 1. Organization Select the organization for which the site-to-site tunnel is created. LAN VRF Select one or more virtual routing instances to use to reach the LAN. - Click OK, and then click Save.
- If modifying an existing device:
- Click step 7, Review, and then click Re-Deploy.
- Commit the template.
Versa Director shows a diff with newly-added changes for the tunnel to validate changes.

- Click Deploy.
For more information on template workflows, see Overview of Configuration Templates.
Configure a Site-to-Site Tunnel in a Device Workflow for Microsoft Entra
Versa Network’s device workflow automates configuration or provisioning, attaching the device groups and bind data for each VOS instance. To configure the device workflow, you must attach the template workflow to the device group within the device workflow. In this scenario, this is the template workflow that you configured in Configure a Site-to-Site Tunnel in a Workflow Template for Microsoft Entra, above. For more information on device workflows, see Overview of Configuration Templates.
In the following example configuration, there are two Microsoft Entra BGP peers and one Versa BGP peer. Versa uses a local tunnel interface that can be viewed as a loopback. The Versa BGP local IP peer exchanges information with the primary BGP peer (BGP peer IP) and the secondary BGP peer (BGP zone peer IP) through the IPsec tunnels. In this example, APIPA (RFC 3927) address space is used. You can also verify Microsoft Entra supported address space and ASNs here.
To configure a Versa Director–Microsoft Entra IPsec site-to-site tunnel for a device:
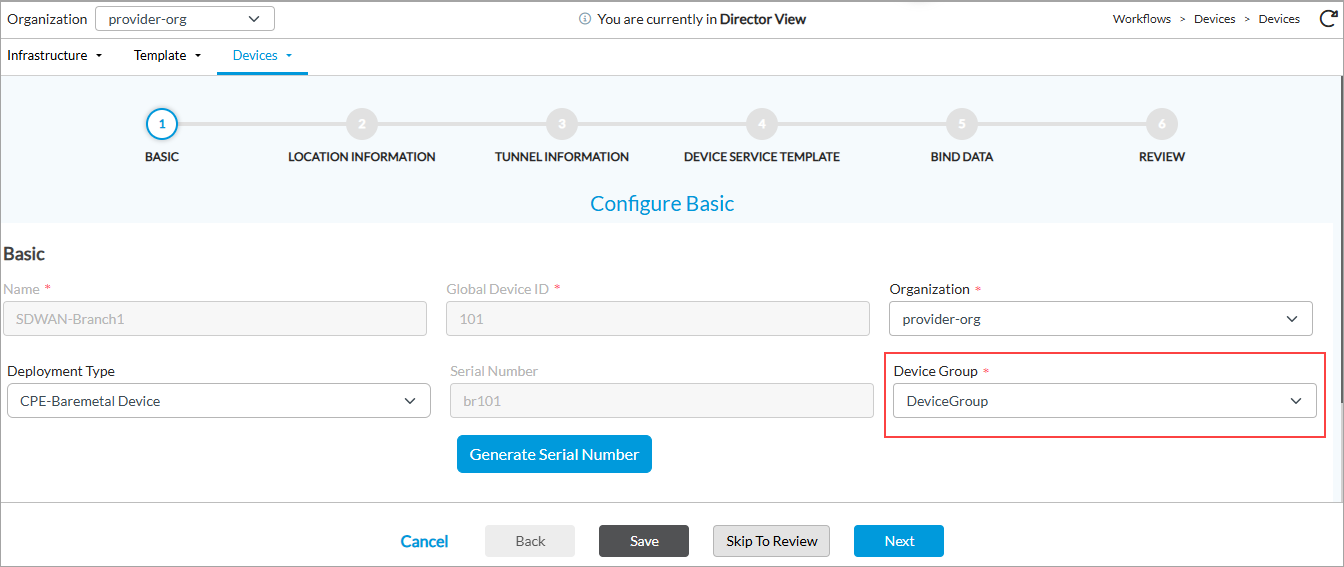
- In Director view, select the Workflows tab in the top menu bar.
- Select Devices > Devices in the left menu bar.
- Select a device in the main pane.

- In workflow step 1, Basic, select a device group that has a template associated with it.
- Select step 3, Tunnel Information. The Tunnel Information screen displays.
- Click the Names field, select the partner site-to-site tunnel created in the workflow template, and then click the
 Add icon.

- In the Configure Site-To-Site Tunnel popup window, enter information for the following fields.

Field Description Bandwidth (Mbps) Select the tunnel bandwidth, in Mbps, for Microsoft Entra. BGP Peer IP Enter the IP address of primary BGP speaker on Microsoft Entra. BGP Zone Peer IP Enter the IP address of secondary BGP speaker on Microsoft Entra. BGP Local ASN Enter the Versa BGP local autonomous system number (ASN). Versa BGP Local IP Enter the VOS local ASN. Region Select the Microsoft Entra region. - Click OK. The tunnel information page displays the tunnel information for the device workflow.

- Click Save.
- If modifying an existing device:
- Click step 6, Review, and then click Re-Deploy.
- Commit the template.
Commit Template Modifications
When you change the configuration in an existing configuration or service template, you must commit the changes so that the new configuration is deployed on the associated devices. You can commit all changes, and you can merge the changes into the existing configuration.
To commit a modified template:
- In Director view, select the Administration tab in the top menu bar.
- Select Appliances in the left menu bar.
- In the Status column in the main pane, check whether Reachability is green and Service is Up, and then click Commit Template. If the device is not reachable or if the service is not up, the commit may not succeed.

- In the Commit Template To Select Devices window, select which templates to commit to which devices. You can select either All the Associated Templates or Only Selected Templates. The All the Associated Templates option is selected by default.
- Select the organization.
- Select a post-staging template
- Click Fetch Devices.
- Select the device and click Review.

- The Commit Template to Devices Review window displays.

- Click Commit to commit the template changes.
- To schedule the commit for a later date or time, click Schedule & Commit. In the Schedule Your Commit popup window, set the schedule.
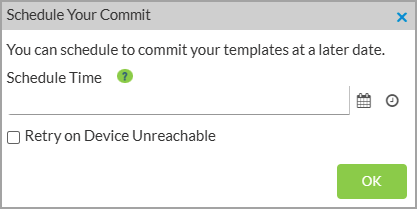
- Click OK.
To view the details and progress of the commit template, click the ![]() Task icon. Expand an activity to view more information, which you can use to analyze and troubleshoot any issues.
Task icon. Expand an activity to view more information, which you can use to analyze and troubleshoot any issues.

Verify IPsec Tunnel Services
To verify IPsec tunnel services for a site-to-site tunnel:
- In Director view:
- Select the Monitor tab in the top menu bar.
- Select Devices in the horizontal menu bar.
- Select a device in the main pane. The view changes to Appliance view.
- Select Services > IPsec in the horizontal menu bar.
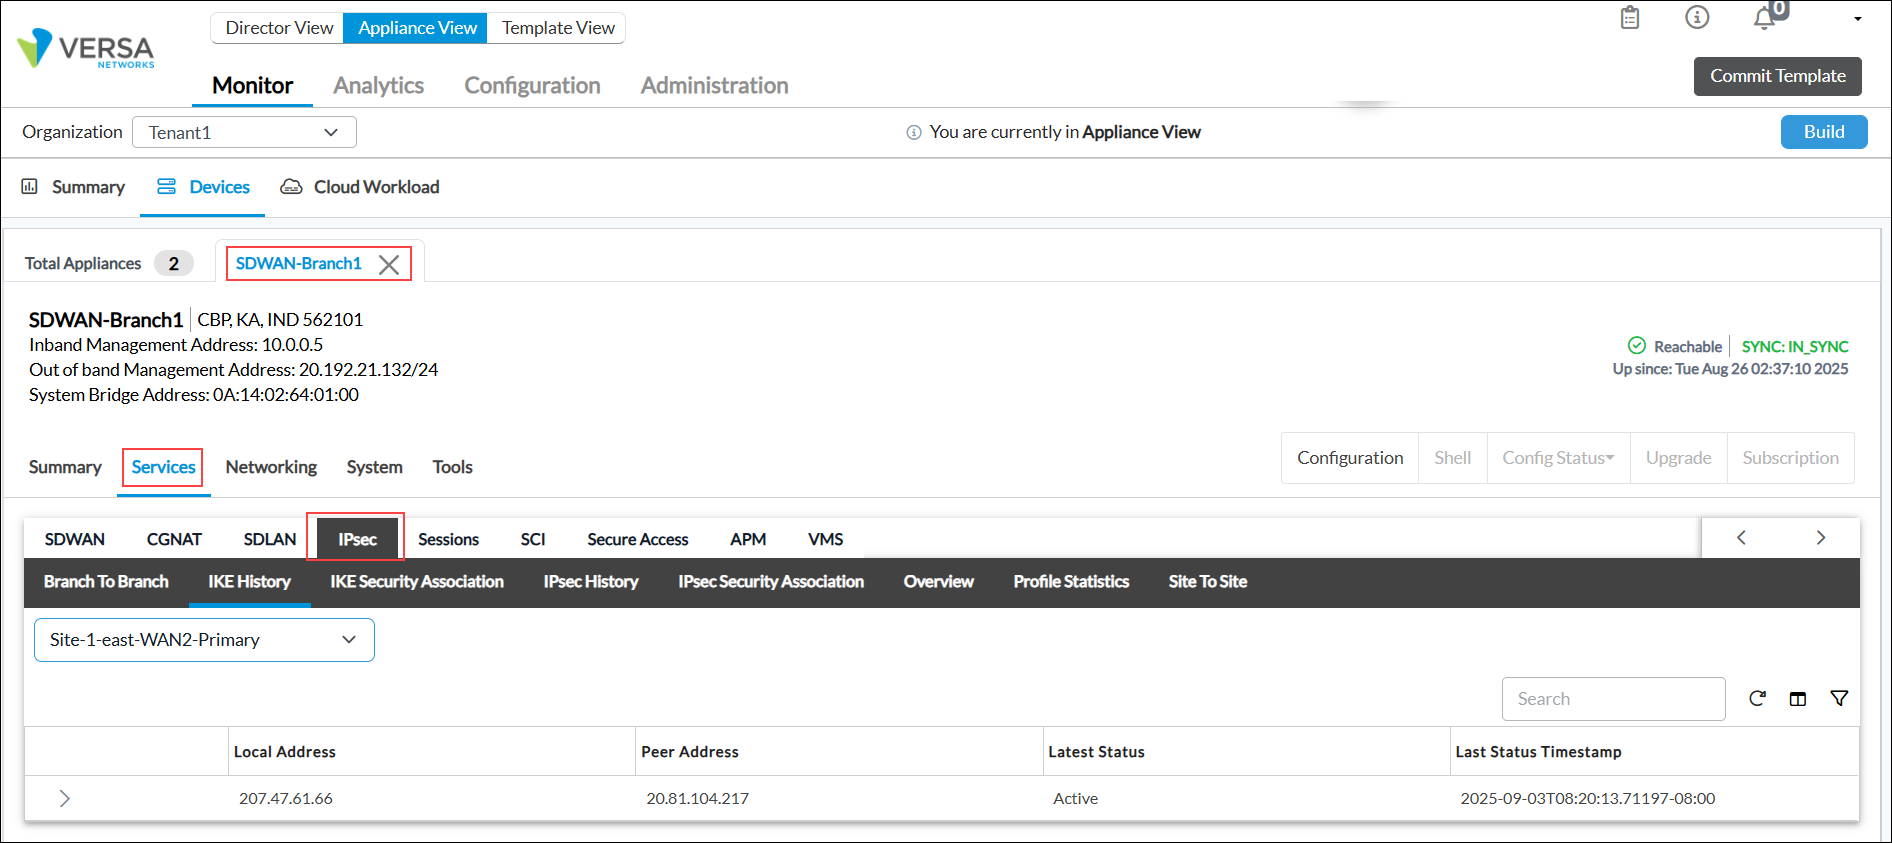
- On the IPsec tab, select IKE History, and then select the IPsec tunnel. Click an entity to view the IKE history.

- Select IPsec Security Association, and then select the IPsec tunnel. Click an entity to view the IPsec security details.

Verify Microsoft Entra BGP Peers in Versa Director
- In Director view:
- Select the Monitor tab in the top menu bar.
- Select Devices in the horizontal menu bar.
- Select a device in the main pane. The view changes to Appliance view.
- Select Networking > BGP in the horizontal device menu bar.
- On the BGP tab, select Neighbors, and then select Tenant1-microsoftGSA-Transport-VR to check neighbors for Microsoft Entra BGP Peers.

- Select Received Prefixes to view the prefixes received from Microsoft Entra Intra Access.

Verify Traffic Through VOS to Microsoft Entra
- In Director view:
- Select the Monitor tab in the top menu bar.
- Select Devices in the horizontal menu bar.
- Select a device in the main pane. The view changes to Appliance view.
- Select Services > Session in the horizontal device menu bar to display the session information.

Verify Versa Director Device Information from Microsoft Entra
To verify the device information from Microsoft Entra:
- Log in to Microsoft Entra Admin Center.
- Navigate to Global Secure Access > Connect > Remote Networks.
- Click the remote network created by Versa Director.

- In the remote network details page, select Links. The view link details pane displays the device information.
- Select the General tab to view the device information.

- Select the Details tab to view the IKE and IPsec information. For Versa supported IKE encryption algorithms, see Supported Encryption Algorithms.

- Select the Security tab to view the randomly generated pre-shared keys.

- Select the General tab to view the device information.
View Versa Director Traffic Logs from Microsoft Entra
To view Versa Director traffic logs from Microsoft Entra:
- Log in to Microsoft Entra Admin Center.
- Navigate to Global Secure Access > Monitor > Traffic Logs.
- Select the Connections tab.

Supported Encryption Algorithms
Versa Networks supports the following IKE encryption algorithms in phase 1 and phase 2. The default values for phase 1 is MIX 8 and phase 2 is MIX 6.
Table 1: IKE Phase 1 Encryption Algorithms
| IKEV2 | MIX 1 | MIX 2 | MIX 3 | MIX 4 | MIX 5 | MIX 6 | MIX 7 | MIX 8 |
|---|---|---|---|---|---|---|---|---|
| Encryption | AES128 | AES128 | AES128 | AES128 | AES256 | AES256 | AES256 | AES256 |
| Integrity | SHA256 | SHA256 | SHA384 | SHA384 | SHA256 | SHA256 | SHA384 | SHA384 |
| DH Group | ECP256 | ECP384 | ECP256 | ECP384 | ECP256 | ECP384 | ECP256 | ECP384 |
Table 2: IKE Phase 2 Encryption Algorithms
| IPsec | MIX 1 | MIX 2 | MIX 3 | MIX 4 | MIX 5 | MIX 6 |
|---|---|---|---|---|---|---|
| Encryption | GCMAES128 | GCMAES128 | GCMAES128 | GCMAES256 | GCMAES256 | GCMAES256 |
| Integrity | GCMAES128 | GCMAES128 | GCMAES128 | GCMAES256 | GCMAES256 | GCMAES256 |
| PFS Group | PFS14 | ECP256 | ECP384 | PFS14 | ECP256 | ECP384 |
Supported Software Information
Releases 22.1.4 and later support all content described in this article.