
Configure SD-WAN Security Settings
 For supported software information, click here.
Versa Networks periodically provides security packages (SPacks) and operating system security packages (OS SPacks) to update the Concerto and Versa Operating SystemTM (VOSTM) software, protecting devices against newly-identified security vulnerabilities. To maintain security across deployed devices, install SPacks and OS SPacks when they become available.
The VOS software supports both automatic and manual updates. Each update contains the latest signatures to protect against newly-discovered threats.
On a VOS device, you can configure automatic updates for SPack, OS SPack, and Cloud Lookup Settings from the Security Settings page, either at a scheduled time or in real time, and attach these settings to a main template.
View Security Settings
To view the Security Settings page, in Tenant view, select Configure > Secure SD-WAN > Security > Security Settings.
The Security Settings page displays a table that lists all configured security settings.

| Field | Description |
|---|---|
| Name | Displays the name of the security setting. Click the name to view or edit the configuration. |
| Version | Displays the version number of the security setting. If more than one version exists, the number of additional versions displays in parentheses — for example, 3 (2 more). |
| SPack — Status | Displays the status of the SPack update configuration: Enabled, Disabled, or a variable value. |
| SPack — Details | Click View to display the SPack update configuration details. |
| OS SPack — Status | Displays the status of the OS SPack update configuration: Enabled, Disabled, or a variable value. |
| OS SPack — Details | Click View to display the OS SPack update configuration details. |
| Cloud Lookup — Reachability Via | Displays the network interface used for reachability between the controller and the download server. |
| Last Modified | Displays the date, time, and username of the last modification made to the security setting. |
In the horizontal menu bar, you can perform the following actions:
| Action | Description |
|---|---|
| Add | Click to create a new security setting. |
| Clone | Click the checkbox to the left of a security setting name to select it, and then click Clone to create a copy of the selected security setting. |
| Delete | Click to delete the selected security setting. |
| Refresh | Click to refresh the Security Settings table. |
| Propagate | Click to propagate the selected security setting to the assigned devices. |
| More | Select a Security Setting, and then click to access additional actions for the selected security setting, including View References, Copy to Sub Tenant, View Audit Log, and Enable Auto Delete. |
| Column Selector | Click to show or hide columns in the Security Settings table. Select Name, Version, or Last Modified to display the column, or deselect to hide it. Click Reset to default to restore the default column selection. |
You can manually download and upgrade SPack and OS SPacks. For more information, see:
Configure Automatic Updates for SPacks and OS SPacks
- In Tenant view, select the tenant for which you want to configure the automatic SPack and OS SPack updates.
- Select Configure > Secure SD-WAN > Security > Security Settings.

- Click + (Add). The Add Security Settings window displays.
To edit a setting, click the setting name. - In workflow step 1, SPack Update, select one of the following options for Enable Automatic Security Update Setting:
- Enabled—Turns on automatic SPack updates. When you select this option, the configuration fields display.
- Disabled—Turns off automatic SPack updates. This is the default.
- Variable — You can also define this field as a variable and set the value in the Main Template (under Boolean in workflow step 10, Variables) or during device publishing.

- Enter information for the following fields.
Note: You can define any free-text field in this section as a variable and set the value in the Main Template (under Boolean in workflow step 10, Variables) or during device publishing. Fields that require you to select a predefined value cannot be defined as a variable.
For more information on configuring variables in Main Template, see Configure Main Templates.
For more information on variables, see Parameterized Variables.
Field Description SPack Server URL (Required) Enter the URL of the server from which to download the SPack.
Use: https://spack.versanetworks.com/versa-updatesCommon Settings (Group of Fields) - Download Type (Required)
Select the type of package to download:
- Full—Download the full database repository. A full download overwrites the SPack installed on the device.
- Incremental—Download only an update to the currently installed SPack. To determine whether an incremental update is available, check the release notes for the SPack version.
- Download Timeout (Required)
Enter the time, in minutes, after which the download times out.
Range: 5 through 3600 minutes (5 minutes through 60 hours)
- Defer Interval (Days) (Required)
Enter the number of days to defer the update after it becomes available.
- Reachability Via (Required)
Select the network to use for reachability between the controller and the download server. - Flavor Type (Required)
Select the type of SPack database to download:
- Premium—Download a full antivirus, IPS, and URL filtering database. This option requires a minimum of 8 GB of RAM. If memory is insufficient, an error appears during installation. You cannot install a premium SPack on two-core 4-GB VOS devices.
- Sample—Download a basic antivirus, IPS, and URL filtering database with fewer signatures. This option is not recommended for unified threat management (UTM) deployments.
Scheduled Updates (Group of Fields) A scheduled download retrieves the SPack and installs it on the VOS device at the selected time. To view the download or update status, click the Tasks icon in the horizontal menu bar. - Start Time
Enter the time at which to perform the SPack update. - Interval
Enter a time interval after which the device attempts the next SPack download. This interval defines the time between consecutive downloads.
Realtime Update (Group of Fields) Realtime updates ensure that critical updates are downloaded and installed on the VOS device before the next SPack upgrade is available for download. - Start Time
Enter the time at which to perform the real-time SPack update. - Interval
Enter a time interval, in seconds, after which the VOS device again attempts to download the SPack if an earlier download attempt fails.
Range: 900 through 86390 seconds (15 minutes through just under 24 hours)
- Click Next.
- In workflow step 2, OS SPack Update, select one of the following options for Enable Automatic OS SPack Update:
- Enabled—Turns on automatic OS SPack updates. When you select this option, the configuration fields display.
- Disabled—Turns off automatic OS SPack updates. This is the default.
- Variable — You can also define this field as a variable and set the value in the Main Template (under Boolean in workflow step 10, Variables) or during device publishing.
- Enter information for the following fields.
Note: You can define any free-text field in this section as a variable and set the value in the Main Template (under Boolean in workflow step 10, Variables) or during device publishing. Fields that require you to select a predefined value cannot be defined as a variable.
For more information on configuring variables in Main Template, see Configure Main Templates.
For more information on variables, see Parameterized Variables.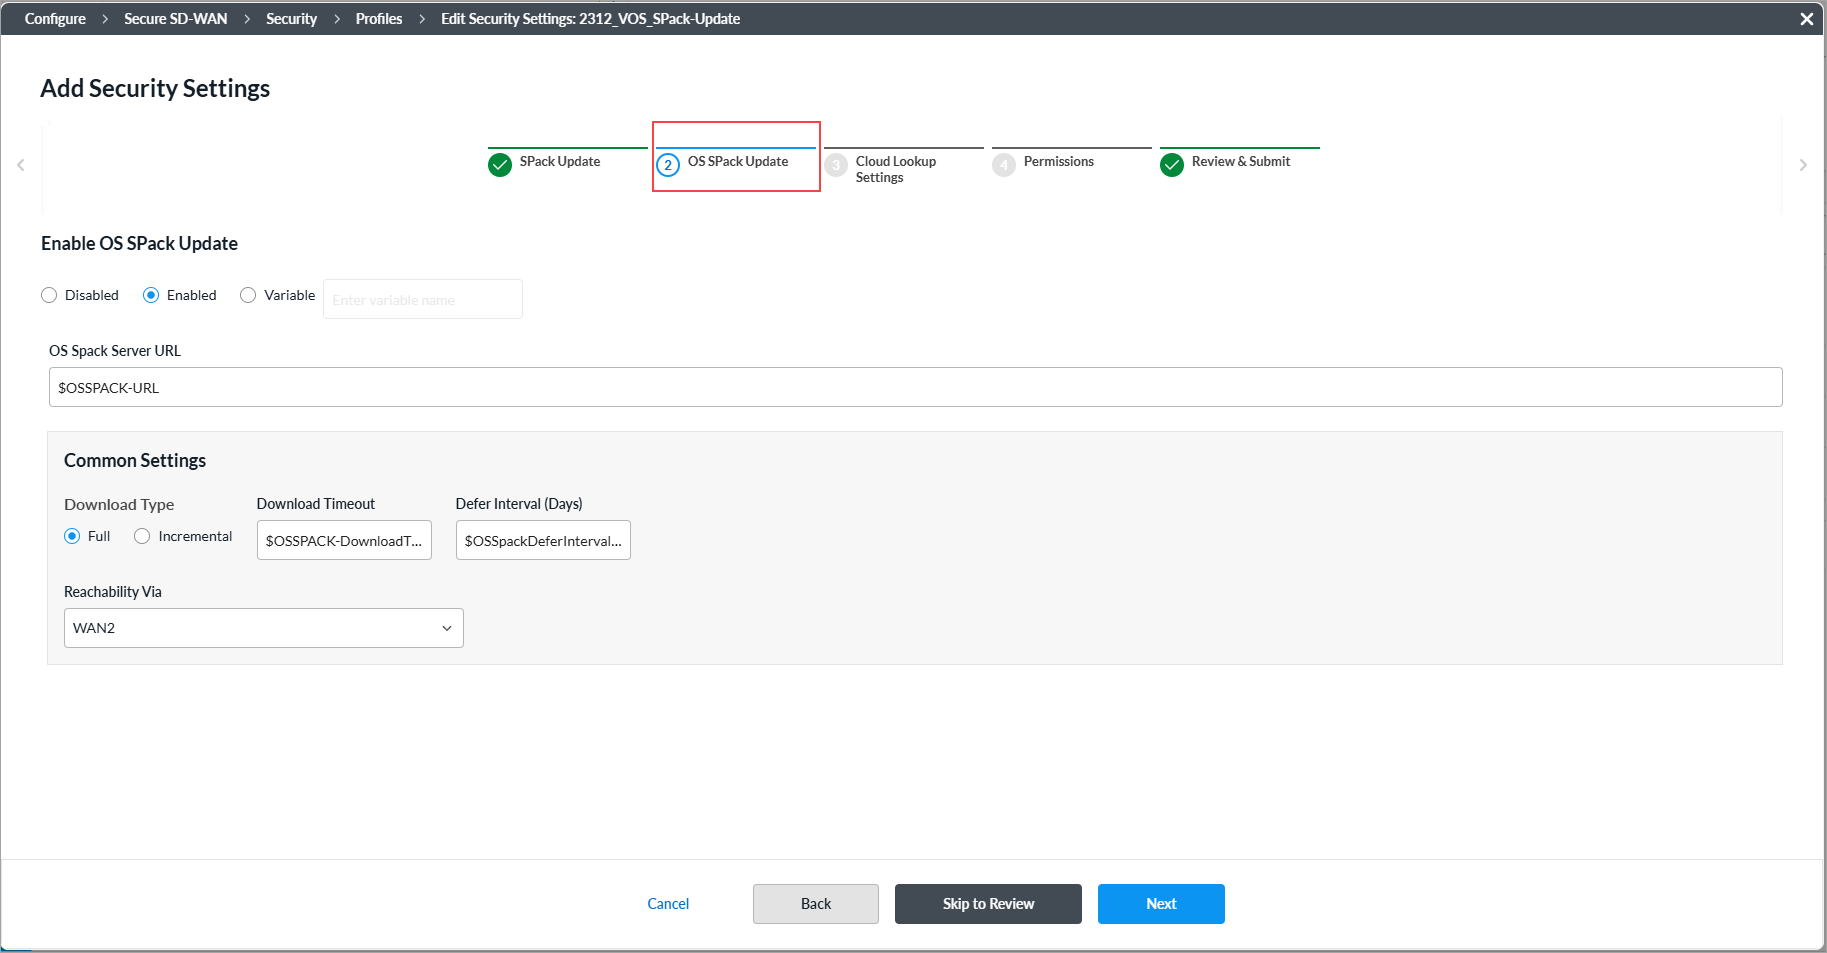
Field Description SPack Server URL (Required) Enter the URL of the server from which to download the OS SPack.
Use: https://spack.versanetworks.com/versa-os-updates.Common Settings (Group of Fields) Download Type (Required) Select the type of package to download:
- Full—Download the full database repository. A full download overwrites the OS SPack installed on the device.
- Incremental—Download only an update to the currently installed OS SPack. To determine whether an incremental update is available, check the release notes for the OS SPack version.
Download Timeout (Required) Enter the time, in minutes, after which the download times out.
Range: 5 through 3600 minutes (5 minutes through 60 hours)
Defer Interval (Days) (Required) Enter the number of days to defer the update after it becomes available.
Reachability Via (Required) Select the network to use for reachability between the controller and the download server. - Click Next.
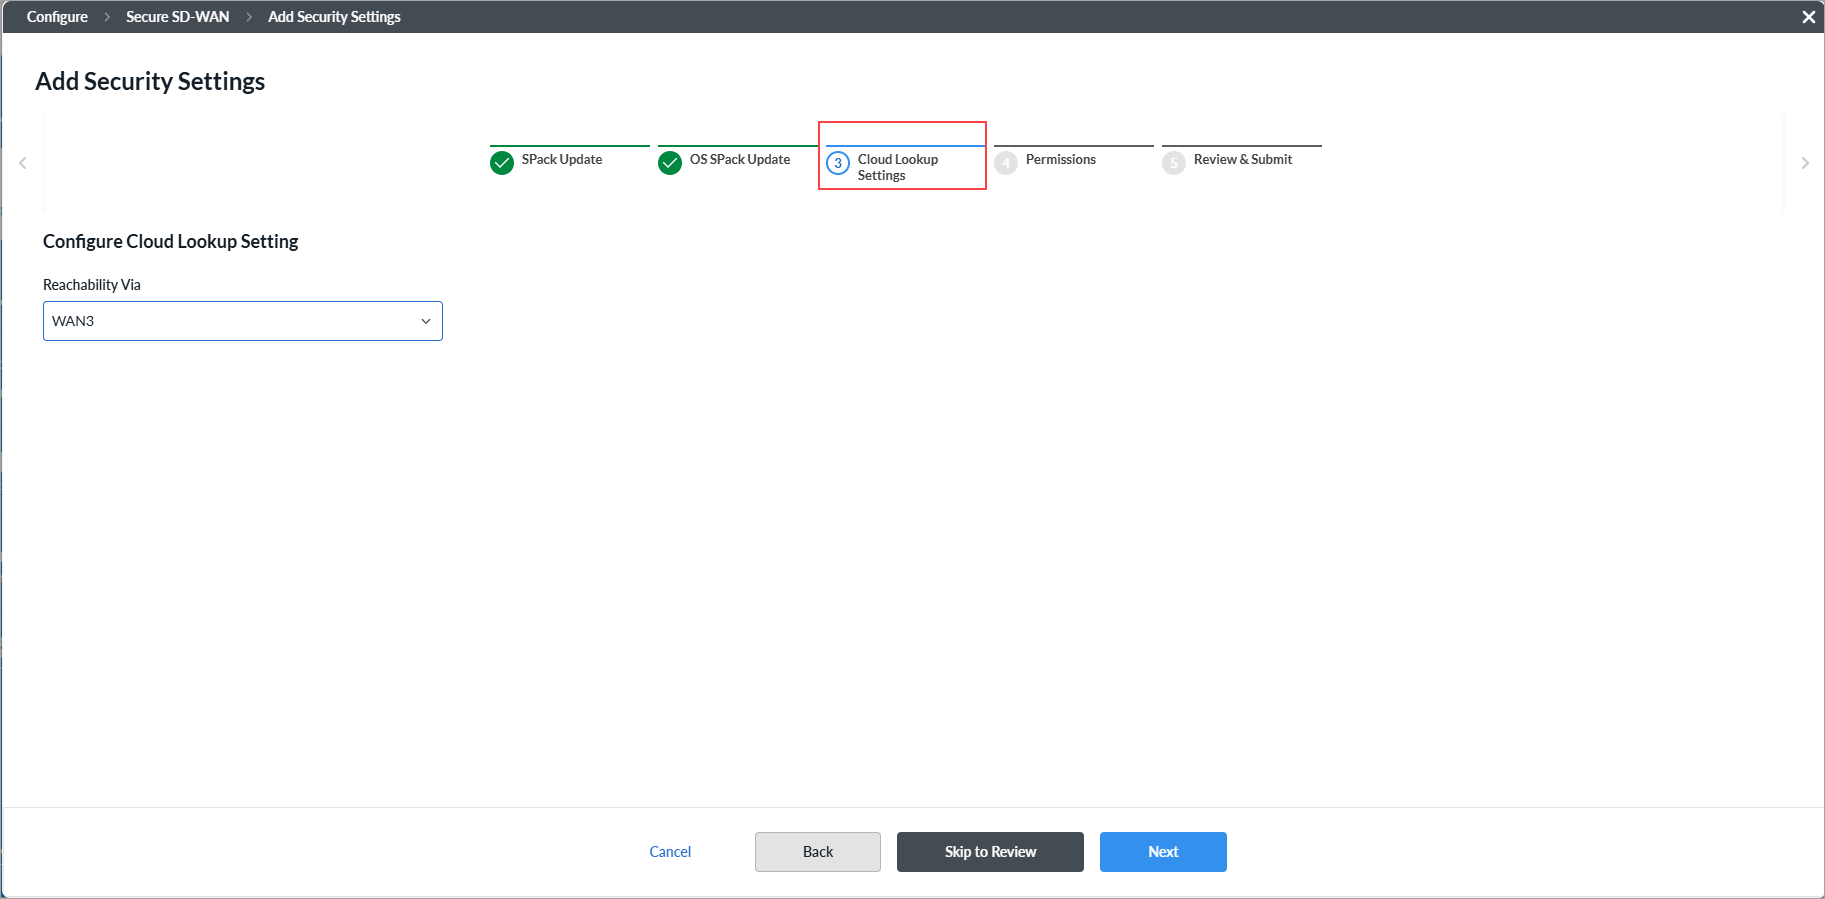
- In step 3, Configure Cloud Lookup Settings, select the network to use for reachability between the controller and the download server in the Reachability Via field.
- Click Next.
- In step 4, Permissions,the permission for each role is selected by default, and you can update it. To change permissions for a role, select or deselect the Create, Read, Update, and Delete fields for the role.

- Click Next.
- In step 5, Review & Submit, enter information for the following fields.

Field Description Name (Required) Enter a name for the settings. Description (Optional) Enter a description for the settings. Tags (Optional) Enter one or more tags to associate with the settings. A tag is an alphanumeric text descriptor with no spaces or special characters that you can use to search for objects. - Review your entries. To change an entry, click the
Edit icon and make the change.
- Click Submit.
Attach Settings to a Main Template
- In Tenants view, select Configure > Secure SD-WAN > Main Templates. The Main Templates screen displays.

- Click the main template name to attach the settings.
- Select workflow step 7, Security.
- Select the Security Settings tab in the horizontal menu bar.

- Click Add, and then click Add Existing Security Setting. The Add Existing Security Settings screen opens.

Note: You can click Add New Security Setting to create a new security setting and attach it to the template. - Click the checkbox next to the required security settings, and then click Submit.
- Click Skip to Review, and then click Submit.
- Associate the Main Template with a VOS Device and publish. For more information, see Configure Main Templates.

Supported Software Information
Releases 13.1.1 and later support all content described in this article.
Additional Information
Configure Main Templates
Use SPacks with Concerto
Use OS SPacks with Concerto