Manage Files and Folders
![]() For supported software information, click here.
For supported software information, click here.
You can upload files from your local system to the Director node and then push those files to multiple Versa Operating SystemTM (VOSTM) devices. Before you upload the files, you select the organization that contains the VOS devices that need to access the uploaded files. To push the uploaded files to the organization's appliances, you need to commit the revised template to the VOS devices.
This article describes how to upload various types of files to a Director node, and and how to create and manage folders for these files.
Enable File Transfer
Before you can upload and manage files, you must enable file transfer on the VOS device. To do this, go to the shell on the Director node, and then issue the following commands to check whether the SECURITY_FILE_TRANSFERS parameter is set to true in the vnms.proprties files, as shown in the example below.
admin@Director$ grep SECURITY_FILE_TRANSFERS /opt/versa/vnms/etc/conf/vnms.properties
SECURITY_FILE_TRANSFERS=true

admin@Director$ grep SECURITY_FILE_TRANSFERS /var/versa/vnms/data/conf/vnms.properties
SECURITY_FILE_TRANSFERS=true
If the output shows that SECURITY_FILE_TRANSFERS=false in either of the files, edit the file and set SECURITY_FILE_TRANSFERS=true.
For information on how to access the shell on the Director node, see Access the Versa CLI.
Manage Files and Folders
To manage files and folders:
- In Director view, select the Administration tab in the top menu bar.
- Select Files and Folders in the left menu bar.
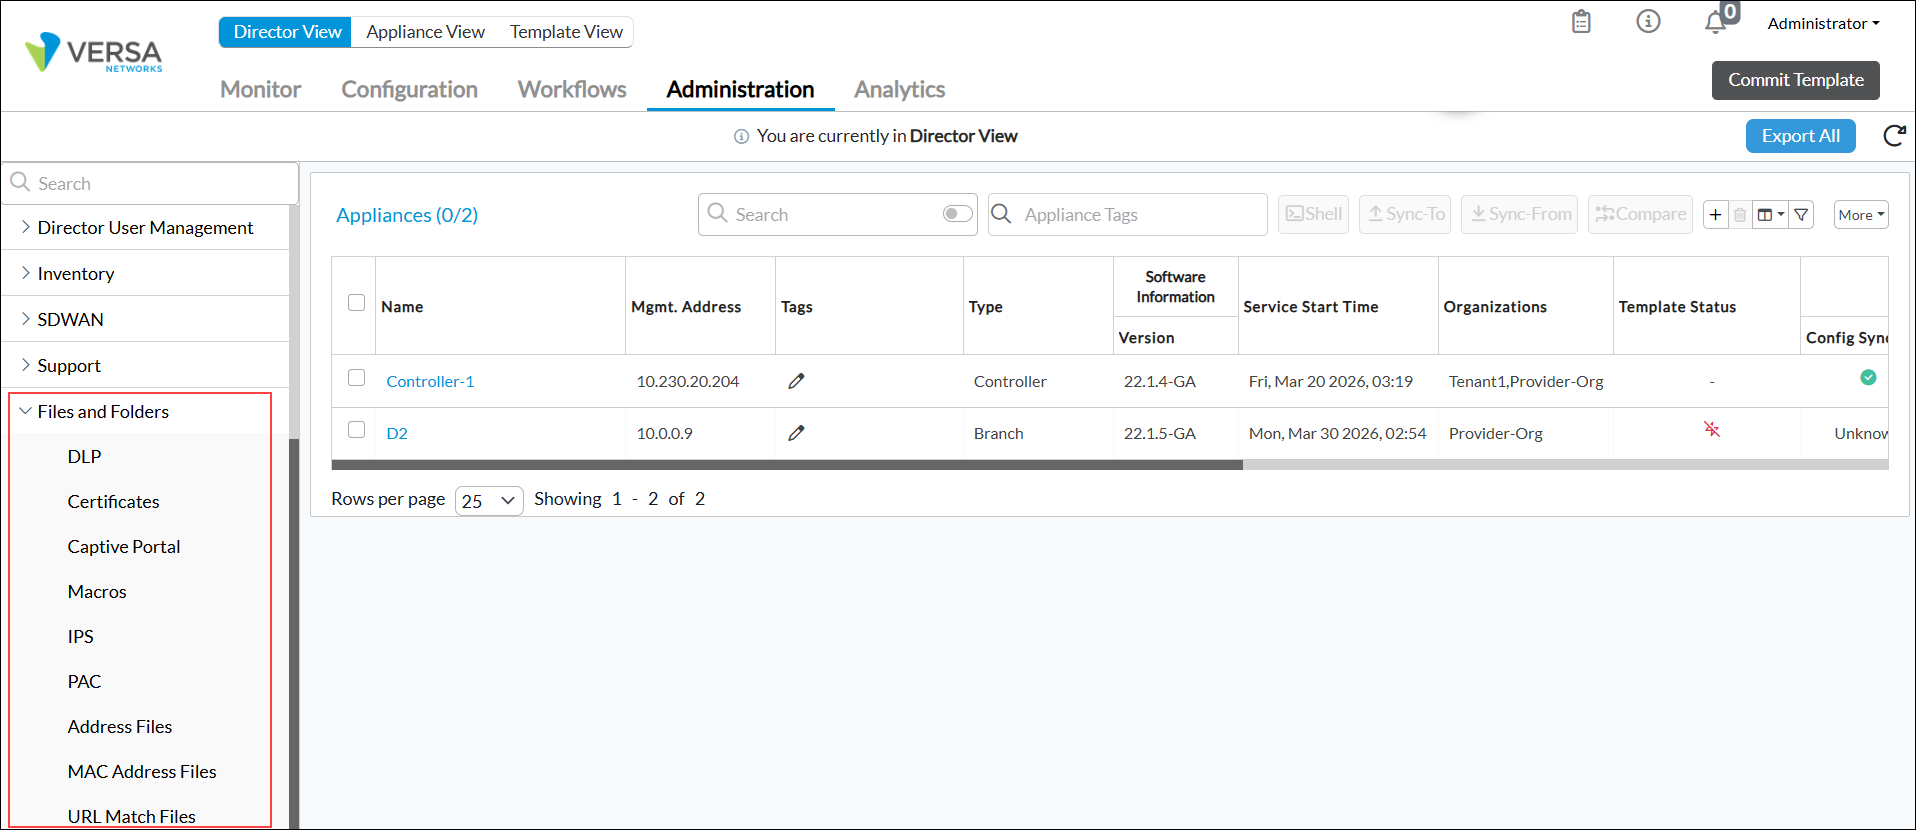
- From here, you can upload the following types of files: DLP, Certificates, Captive Portal, IPS, PAC, IP Address, MAC Address, and URL Match. See the sections below for each category.
DLP Files for EDM and Document Fingerprinting
Exact data match (EDM) and document fingerprinting are part of data loss prevention (DLP). When you configure rules for EDM and document fingerprinting, you can upload files that contain the custom data patterns to be matched.
You upload files that are used by EDM and document fingerprinting into a folder named DLP. The DLP folder contains two folders:
- EDM folder—You upload files directly into this folder. You cannot create new subfolders in it.
- Fingerprint folder—You must first create a subfolders to contain the files to be fingerprinted, and then you upload files to the subfolder.
To manage the files and folders for EDM and document fingerprinting:
- In Director view, select the Administration tab in the top menu bar.
- In the Organization field, select the organization that contains the VOS devices that need to access the uploaded files.
- Select Files and Folders > DLP in the left menu bar. The following screen displays.

- Click the
 Expand icon to the left of the DLP folder to display the folders in the DLP folder.
 - To upload files for EDM processing:
- Highlight the EDM row, and then click the
Add Files icon in the Action column.

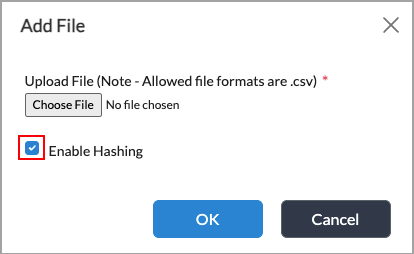
- In the Add File popup window, enter information for the following fields.

Field Description Choose File Click to upload from your local system. The file must be in CSV format. Enable Hashing Click to hash the file that is being uploading using the SHA-256 algorithm. Hashing is the default. If you disable hashing, you can hash the file using any one-way hash utility tool before uploading it. See Use the Versa Hash Utility.
Note: If you use the Versa hash utility to hash the file, do not enable hashing when uploading the file.
Default: Enabled
- Highlight the EDM row, and then click the
- To upload files for document fingerprinting:
- Highlight the Fingerprints row, and then click the
Add Folders icon in the Action column.

- In the Add Folders popup window, enter a name for the new folder, and then click OK to create the new folder.

- Highlight the new folder, and then click the
Add Files icon in the Action column.
- In the Add File popup window, enter information for the following fields.
Field Description Choose File Click to upload from your local system. The file must be in CSV format. Enable Hashing Click to hash the file that is being uploading using the SHA-256 algorithm. Hashing is the default. If you disable hashing, you can hash the file using any one-way hash utility tool before uploading it. See Use the Versa Hash Utility.
Note: If you use the Versa hash utility to hash the file, do not enable hashing when uploading the file.
Default: Enabled
- Highlight the Fingerprints row, and then click the
- After you have uploaded the files, click Commit Template to push the template configuration to the devices.

Certificate Files
A certificate authority is a trusted entity that issues a CA certificate, which verifies a digital entity’s identity on the internet. A private key is required to access secured traffic using a certificate. To secure the traffic on a VOS device, you can use either a self-signed CA certificate or a trusted CA certificate. A certificate chain is an ordered list of certificates, containing an SSL/TLS certificate and CA certificates, that allow the receiver to verify that the sender and all CA's are trustworthy.
You upload the files containing the CA certificate, the CA chain, and the private key into three folders:
- CA Certificate
- CA Chain
- Private Key
To upload certificate files and and to manage the certificate folders:
- In Director view, select the Administration tab in the top menu bar.
- In the Organization field, select the organization that contains the VOS devices that need to access the uploaded files.
- Select Files and Folders > Certificates in the left menu bar. The following screen displays.

- Click the Expand icon to the left of Certificates to display the default subfolder in the Certificates folder.
- To upload a CA certificate, select the CA Certificate row, and then click the
 Add Files icon in the Actions column.
 - In the Add File popup window, enter information for the following fields.
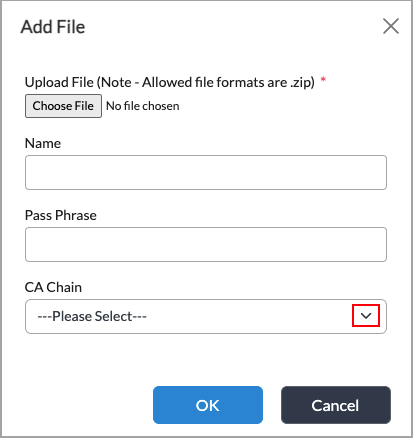
Field Description Choose File Click to upload a CA certificate file from your local system. The CA certificate file must be in .zip format. Name Enter a name for the CA certificate file.
Pass Phrase Enter a password. It can be up to 63 characters. CA Chain Select a CA chain. - Click OK.
- To upload a CA chain, select the CA Chain row, and then click the Add Files icon in the Actions column.
- In the Add Files popup window, enter information for the following fields.
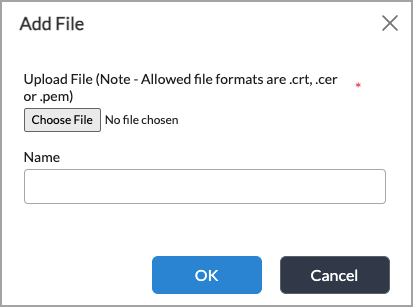
Field Description Choose File Click to upload a CA chain file from your local system. The file must be in .cer, .crt, or .pem format. Name Enter a name for the CA chain file.
- Click OK.
- To upload a private key, select the Private Key row, and then click the Add Files icon in the Actions column. In the Add Files popup window, enter information for the following fields. Note that private key files must be in .key or .pem format.

Field Description Choose File Click to upload a private key file from the local system. The file must be in .key or .pem format. Name (Required) Enter a name for the private key file.
Pass Phrase Enter a password. It can be up to 63 characters. - After you have uploaded the certificate files, click Commit Template to push the template configuration to the devices.

Captive Portal Files
For captive portal, you can upload files that contain the text for a custom captive portal page and associate them with the Ask, Block, and Justify actions. You can upload different files for each action.
You must compress the files for the captive portal webpage into a .zip file. The main index file in the .zip file must be named index.htm, and it must contain the custom captive portal page HTML files, CSS files, and image files. You can use the following variables in the index.htm file:
- $category—Display the URL category to which the URL belongs.
- $host—Display the IP address of the client machine.
- $message—Display a message to the user.
- $reputation—Display the reputation of the URL.
- $url—Display the URL that the user is attempting to access.
- $user—Display the name of the user.
For more information, see Configure Captive Portal.
To manage files and folders for captive portal:
- In Director view, select the Administration tab in the top menu bar.
- In the Organization field, select the organization that contains the VOS devices that need to access the uploaded files.
- Select Files and Folders > Captive Portal in the left menu bar. The following screen displays.

- To configure a captive portal category for the Ask, Block, or Justify action, click the
 Edit icon in the Ask, Block, or Justify box. In the Add Captive Portal popup window, select Ask, Block, or Justify in the Category field.

- In the Category field, select a category:
- If you select Default, click OK.
- If you select Custom, the following screen displays. Enter a custom message, and then click OK.

- If you select File, the following screen displays. Click Choose File to upload a captive portal file in .zip format from your local system, and then click OK.

- After you have uploaded the captive portal files, click Commit Template to push the template configuration to the devices.

IPS Signature Files
An intrusion prevention system (IPS) signature file contains vulnerability rules. You can import and use your own custom IPS signatures to use in vulnerability profiles. For more information, see Configure Custom Vulnerability IPS Signatures.
To upload an IPS signature file:
- In Director view, select the Administration tab in the top menu bar.
- In the Organization field, select the organization that contains the VOS devices that need to access the uploaded files.
- Select Files and Folders > IPS in the left menu bar. The following screen displays.

- Highlight the IPS row, and then click the Add Files icon in the Action column.

- In the Add File popup window, click Choose File and select a file to upload from your local system. The file must be in .zip or .rules format.
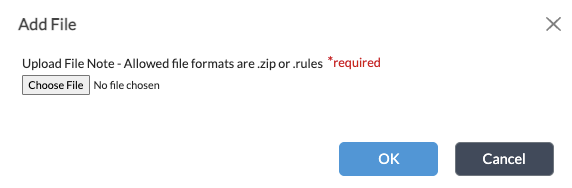
- Click OK.
- After you have uploaded the files, click Commit Template to push the template configuration to the devices.

PAC Files
A proxy autoconfiguration (PAC) file defines how web browsers and other user agents can automatically choose the appropriate proxy server to fetch a given URL.
To upload PAC files:
- In Director view, select the Administration tab in the top menu bar.
- In the Organization field, select the organization that contains the VOS devices that need to access the uploaded files.
- Select Files and Folders > PAC in the left menu bar. The following screen displays.

- Highlight the PAC row, and then click the Add Files icon in the Action column.

- In the Add File popup window, click Choose File and select a file to upload from your local system. The file must be in .pac format.

- Click OK.
- After you have uploaded the files, click Commit Template to push the template configuration to the devices.

Address Files
When you want to configure policy for groups of IP address, you can upload files that contain the addresses so that you do not have to configure these objects individually. You can use the address files to block (deny list) or allow (accept list) an IP address or a group of IP addresses.
The IP addresses in the file must be in CSV format, with each entry formatted as follows: name, type, value, where name is the name of the address list. type is the type of address and can be one of the following strings: IPv4-prefix, IPv4-range, IPv6-prefix, or IPv6-range. value is the IP address, subnet mask, or range. For more information, see Configure Address Objects.
To upload address files:
- In Director view, select the Administration tab in the top menu bar.
- In the Organization field, select the organization that contains the VOS devices that need to access the uploaded files.
- Select Files and Folders > Address Files in the left menu bar. The following screen displays.

- Highlight the Address Files row, and then click the Add Files icon in the Action column.

- In the Add File popup window, click Choose File and select a file to upload from your local system. The file must be in .csv format.
- Click OK.
- After you have uploaded the files, click Commit Template to push the template configuration to the devices.

MAC Address Files
For Releases 23.1.2 and later.
When you configure policies for groups of MAC addresses, you can upload files that contain the MAC addresses so that you do not have to configure these objects individually. You can use the MAC address files to block (deny) or allow (accept) a MAC address or a group of MAC addresses.
The MAC addresses in the file must be in CSV format, with each entry formatted with two class IDs: one to allow the MAC address, and the other to deny the MAC address. To configure the ingress MAC address, or to select a file that lists the MAC addresses that you want to allow access to the network, see Configure Layer 2 Forwarding.
To upload MAC address files:
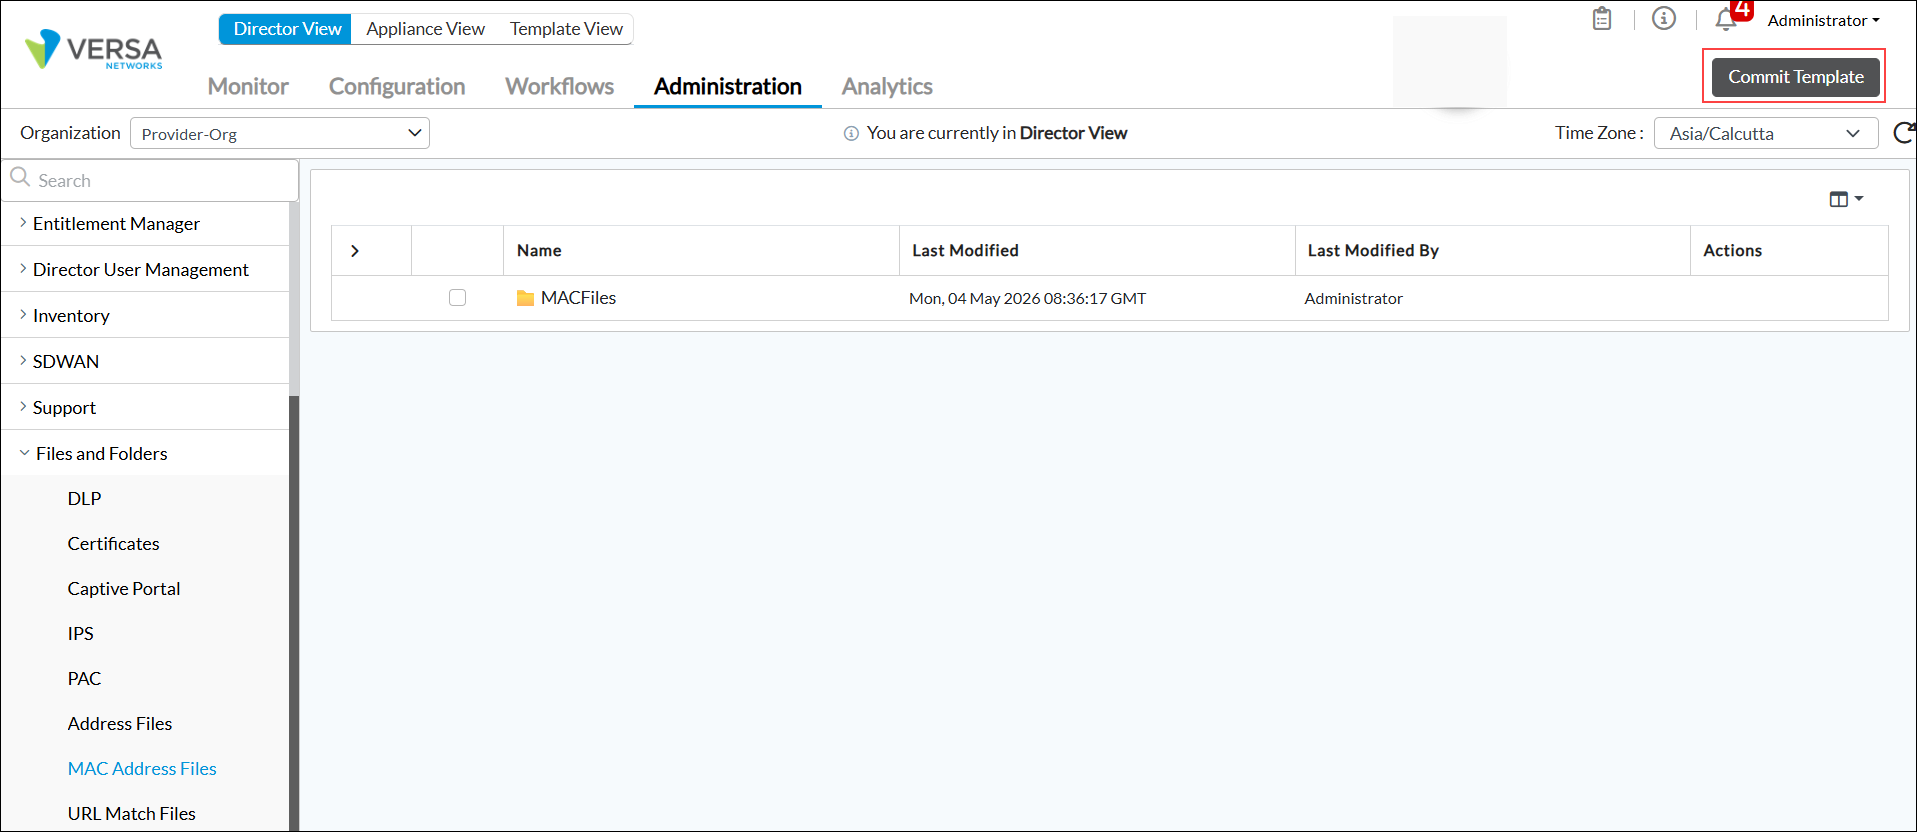
- In Director view, select the Administration tab in the top menu bar.
- In the Organization field, select the organization that contains the VOS devices that need to access the uploaded files.
- Select Files and Folders > MAC Address Files in the left menu bar.

- Highlight the MAC Address Files row, and then click the Add Files icon in the Actions column.

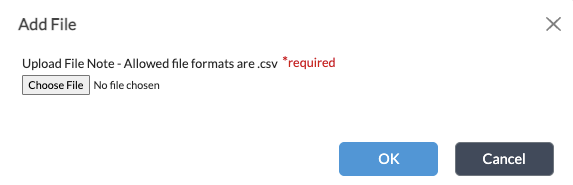
- In the Add File window, click Choose File and select a file to upload from your local system. The file must be in .csv format.

- Click OK.
- After you have uploaded the file, click Commit Template to push the template configuration to the devices.
URL Match Files
You can upload a file of URLs and URL reputations to reference when you configure a URL category object so that you do not have to enter them individually. To use a file when you are configuring URL category objects, you create a CSV file and then upload it.
When you want to configure policy for URL categories and reputations objects, you can upload files that contain the URL information so that you do not have to configure these objects individually.
To upload URL match files:
- In Director view, select the Administration tab in the top menu bar.
- In the Organization field, select the organization that contains the VOS devices that need to access the uploaded files.
- Select Files and Folders > URL Match Files in the left menu bar. The following screen displays.

- Highlight the URL Match Files row, and then click the Add Files icon in the Action column.

- In the Add File popup window, click Choose File and select a file to upload from your local system. The file must be in .csv format.
- Click OK.
- After you have uploaded the files, click Commit Template to push the template configuration to the devices.

Supported Software Information
Releases 22.1.3 and later support all content described in this article, except:
- Release 22.1.4 adds support for uploading IPS files, PAC files, address files, and URL match files.
- Release 23.1.2 adds support for uploading MAC address files.
Additional Information
Configure CA Certificates and CA Chains
Configure URL Filtering
Use the Versa Hash Utility